Home

Contact Me!

Hi! I'm Anna Chiarin, a Junior 3D Artist.
My ultimate goal is to turn my passion for computer graphics into a professional career. With determination, curiosity, and vision, I explore new techniques every day, transforming creativity into technical expertise.


Theme: “Here We Go Again”
Genre: Psychological Horror Puzzle
Engine: Unreal Engine 5.5 Short game developed for the Epic MegaJam 2025.
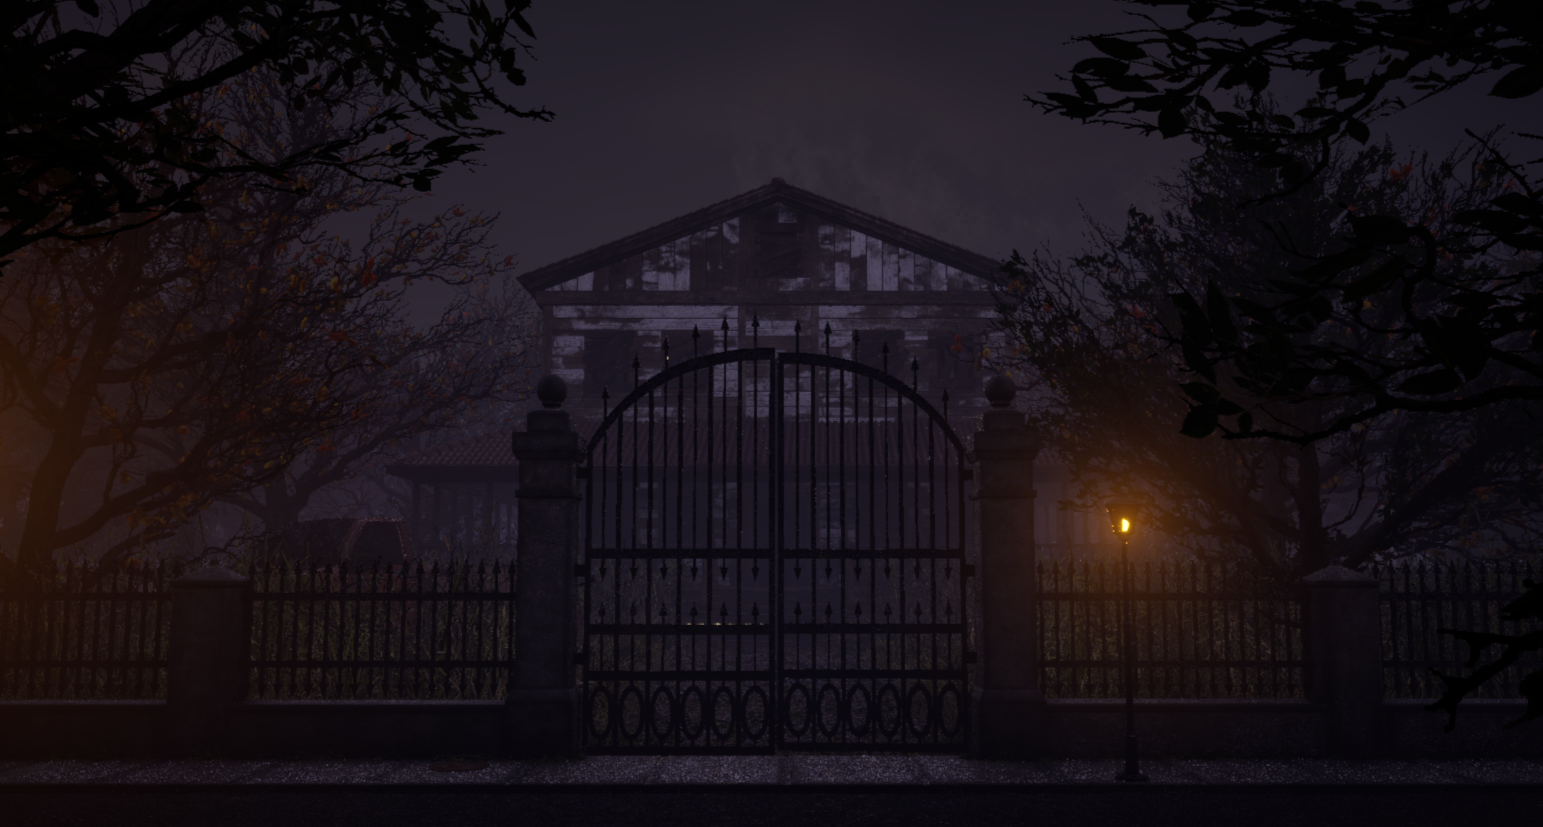
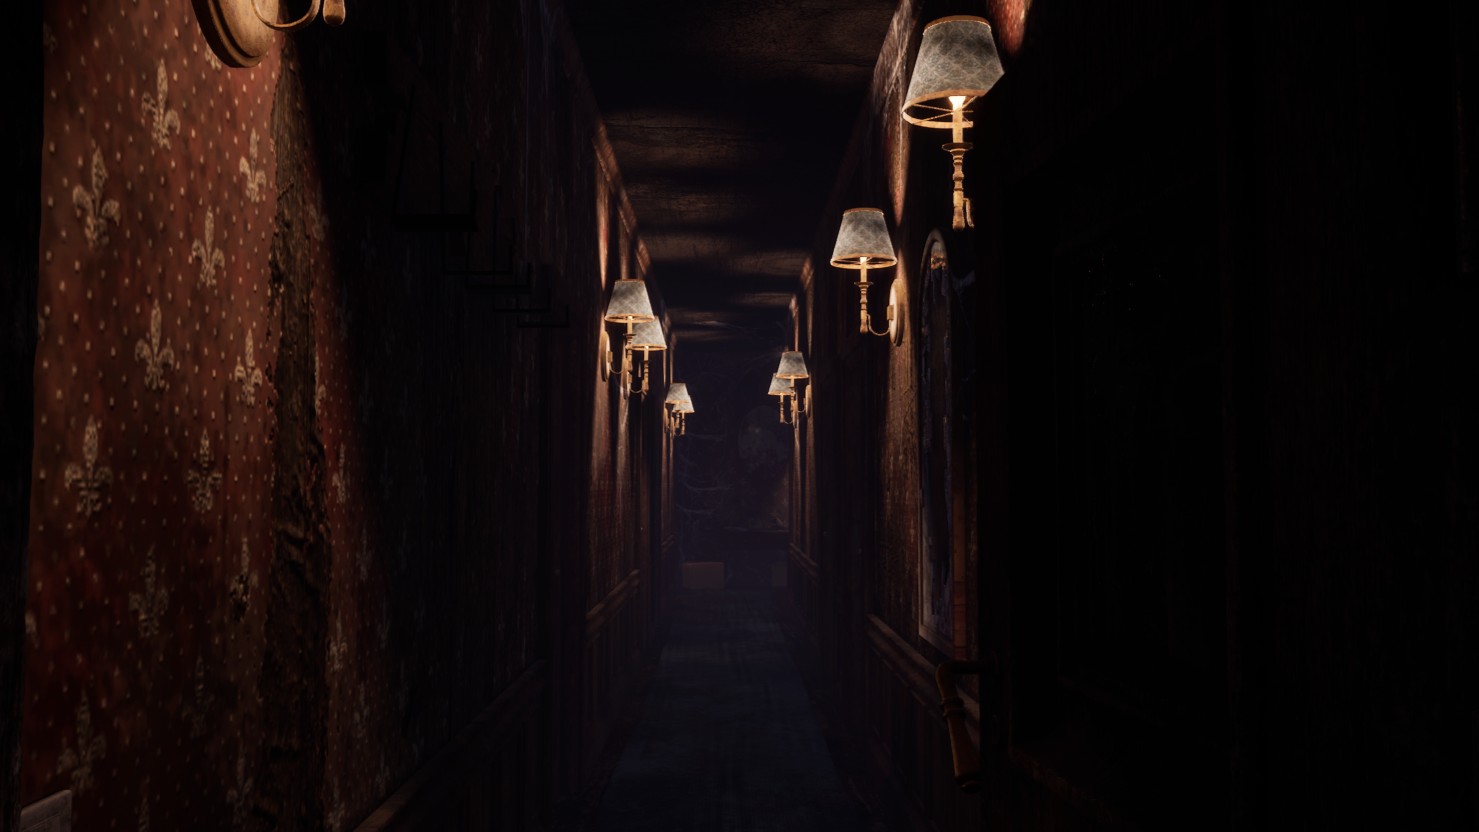
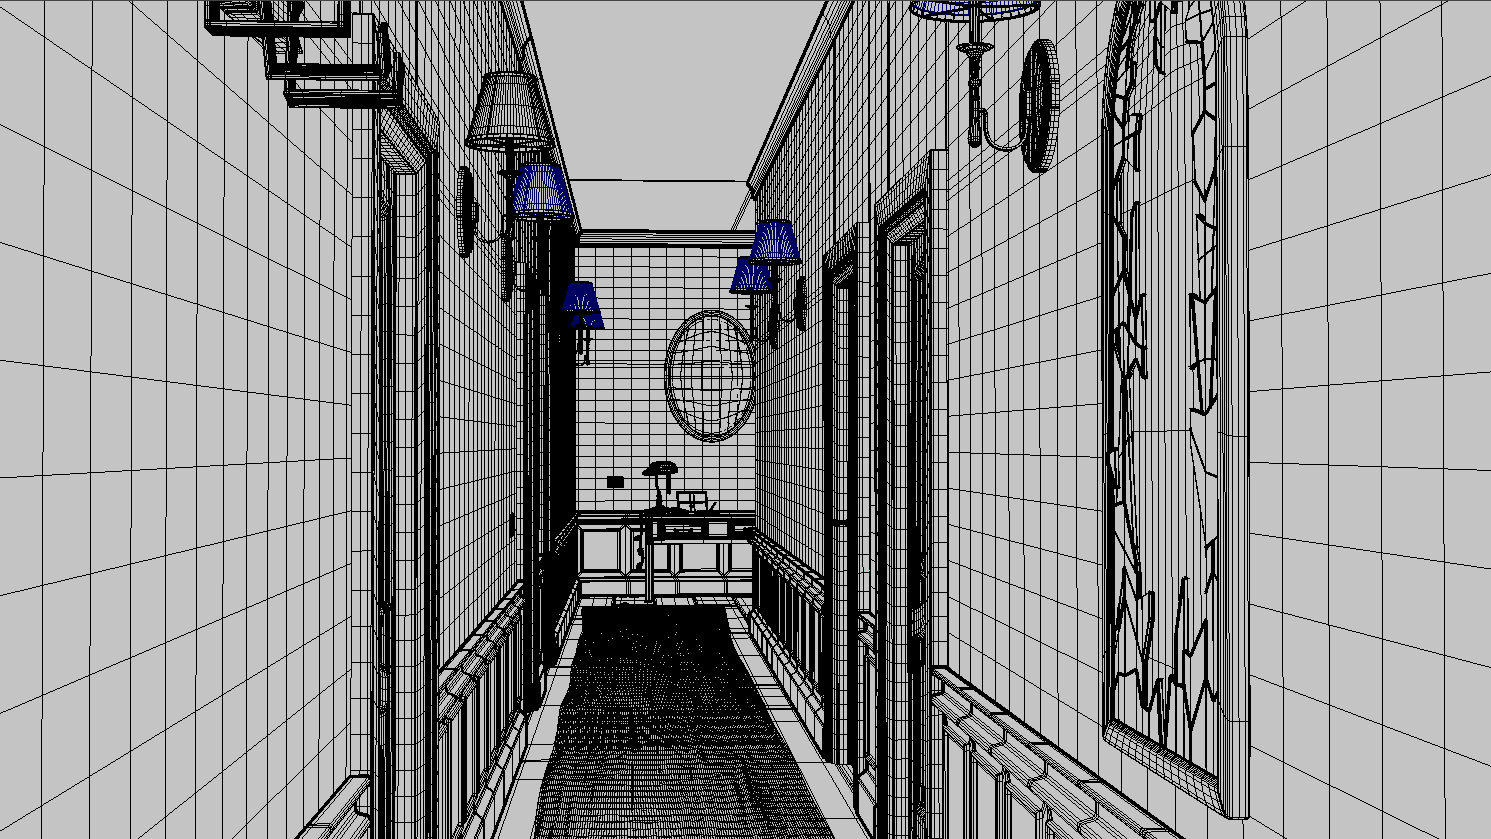
The player is trapped inside a repeating corridor where each loop changes subtly — objects move, lights flicker, and new rooms appear.
The goal: find the key to escape. But every time you open the door… you start again.
The experience is designed around the feeling of repetition and unease. The corridor represents a mental loop — a subconscious space where the player relives the same path, noticing small changes that build psychological tension.
Solo-developed in 7 days using Unreal Engine 5, Maya, and Substance Painter.
Play it on: https://beylix-99.itch.io/trapped
Individual project developed during the Unreal Engine course at Tecna Evolution.
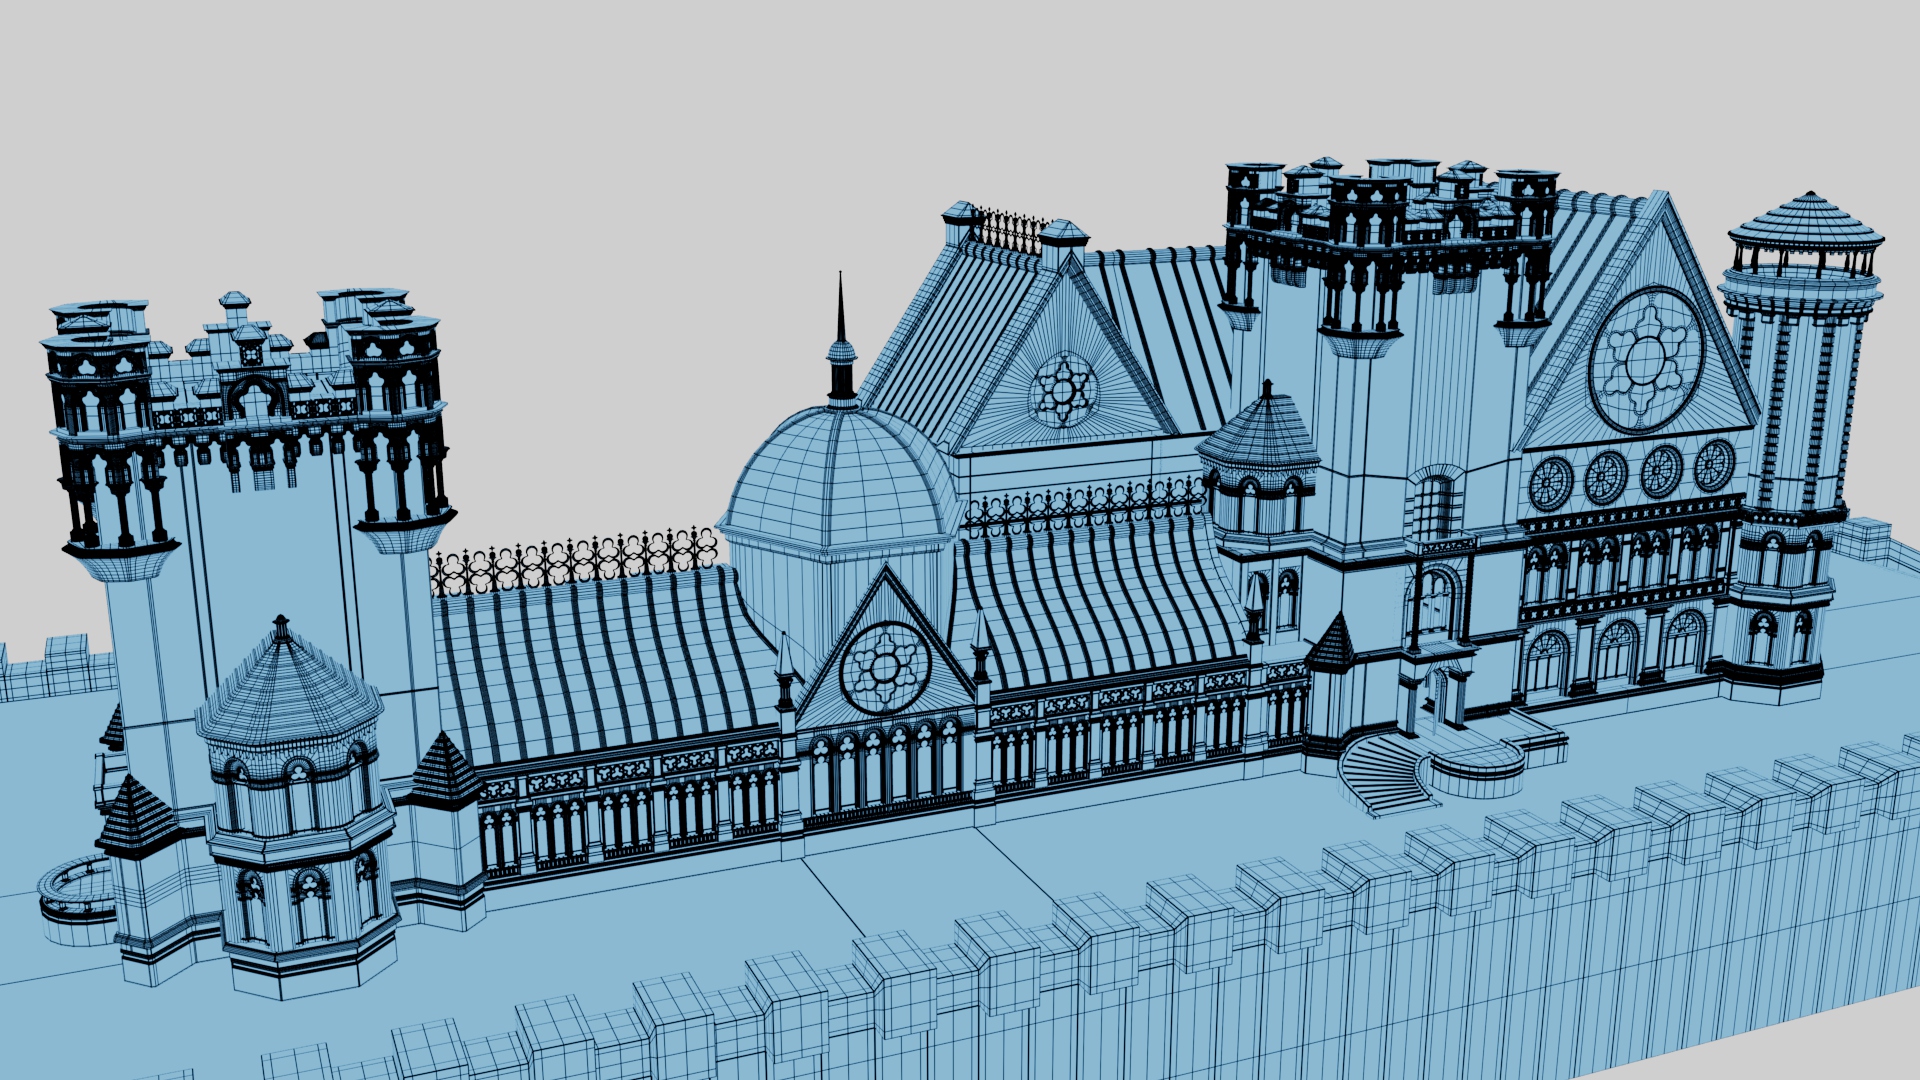
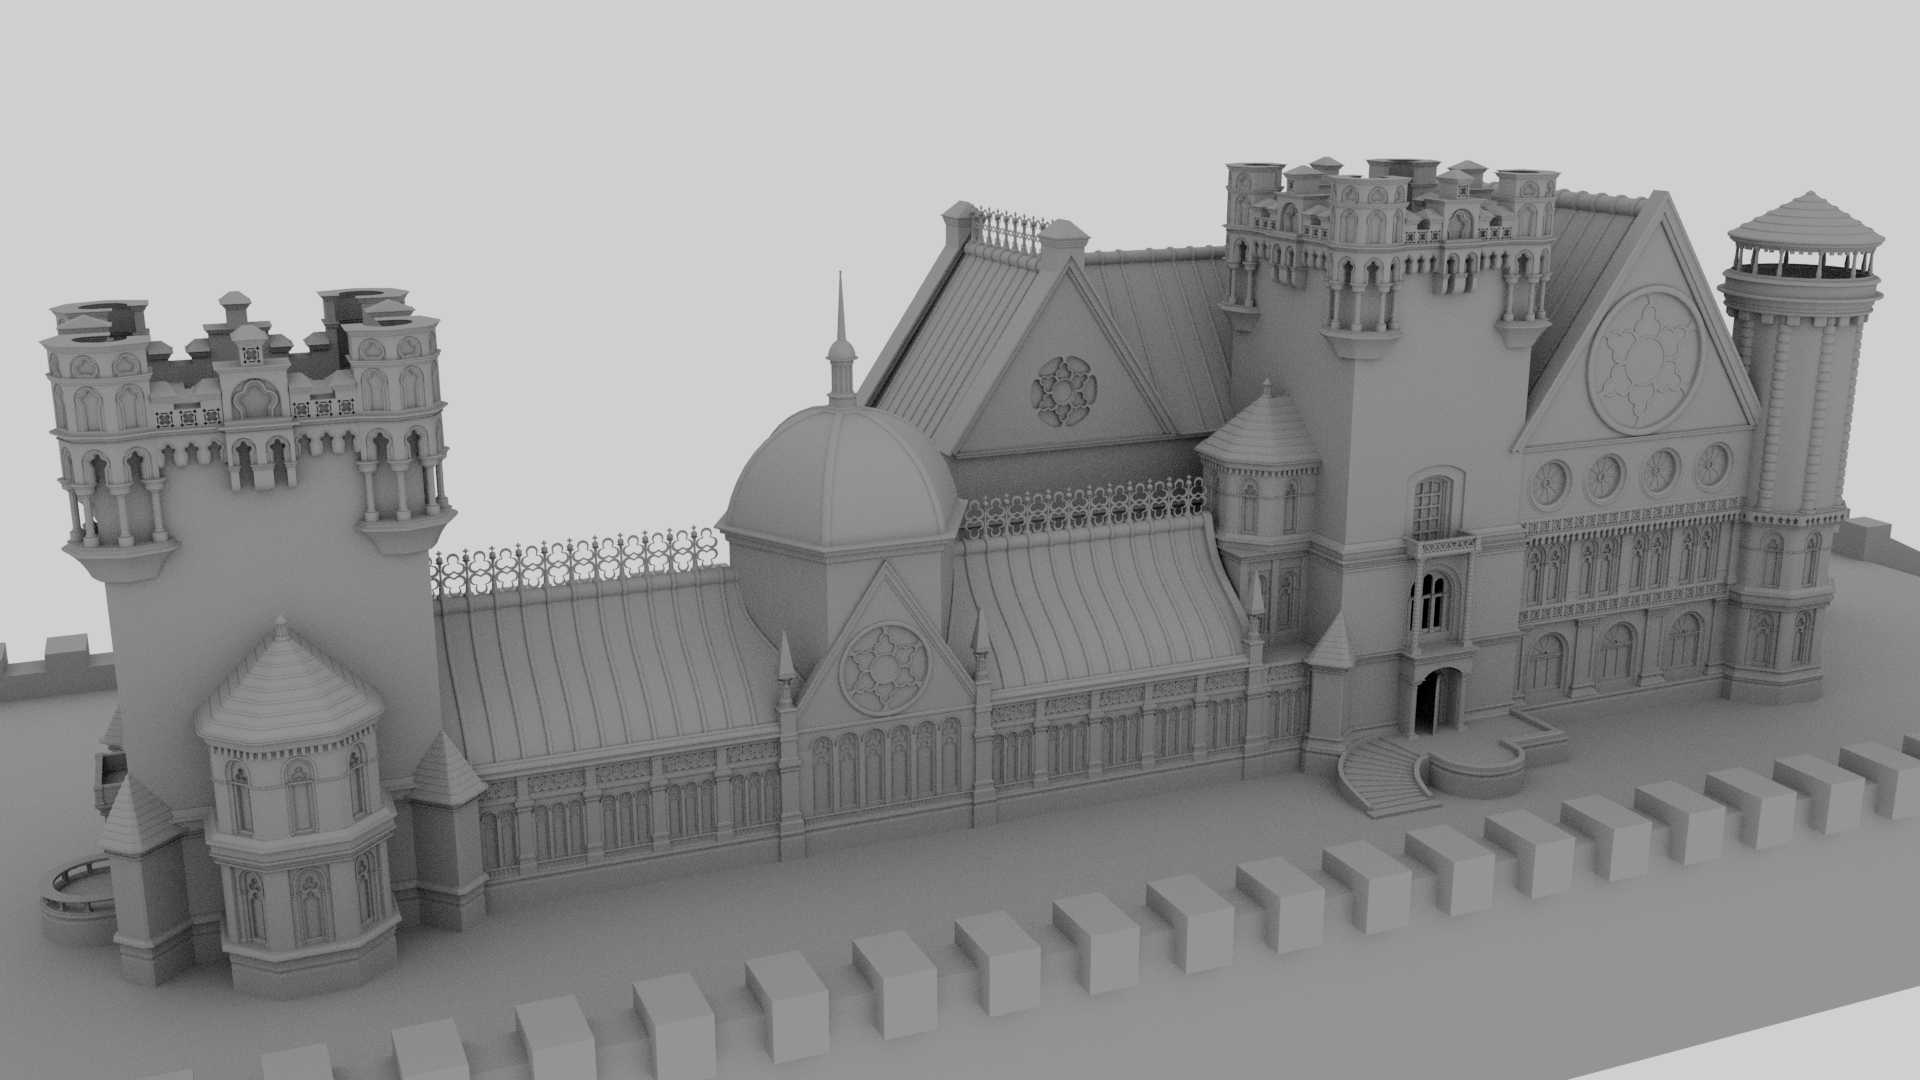
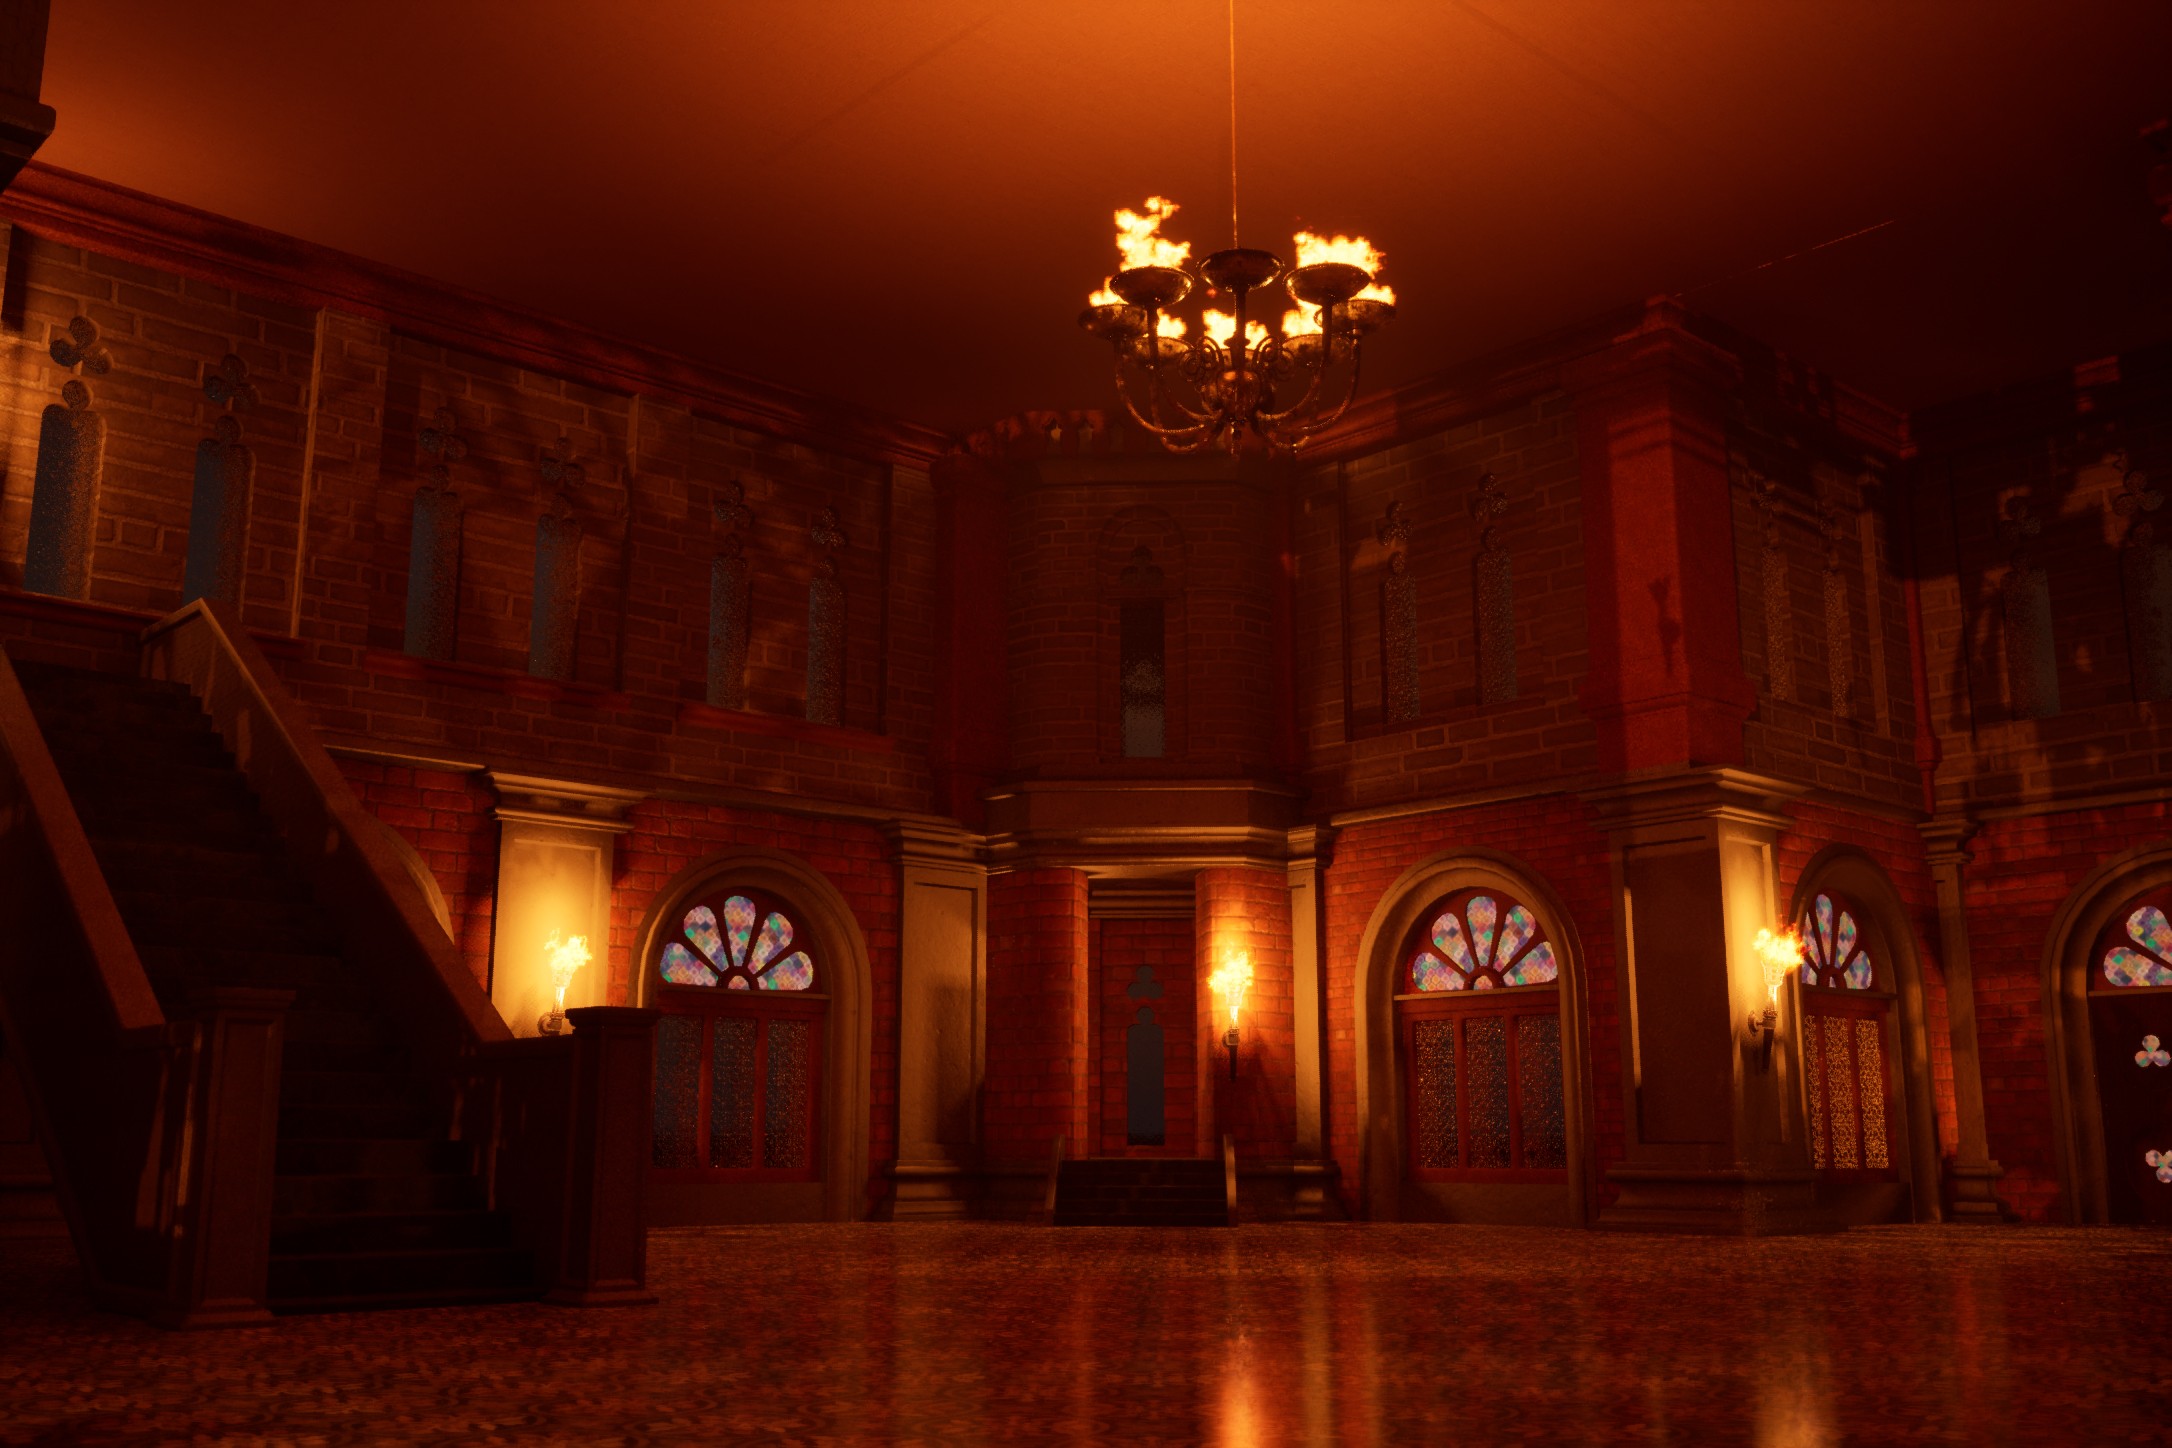
The assigned task was to create a game-ready environment suitable for integration into an interactive experience. I chose to design a castle, developing a modular architectural structure to optimize both production time and real-time performance.
The entire scene was modeled in Maya, with dedicated UV mapping and the export of individual modules into Unreal Engine 5.4, where they were organized into Prefab Actors (PLA) for efficient and scalable management.
The materials, created in Substance 3D Designer, follow a PBR workflow aimed at achieving a realistic materiality for stone, plaster, and other architectural surfaces. The environment, currently unfurnished, serves as a solid structural foundation for future gameplay elements, maintaining clean composition, spatial consistency, and optimized performance for real-time rendering.


.png)
Designed as a functional extension of the castle, this maze represents an independent environmental level, created to introduce explorative challenges and interactive gameplay mechanics. The modular structure was modeled directly in Unreal Engine, a choice driven by the geometric simplicity of the forms and the need for fast iteration during layout composition.
Inside the maze, players must navigate and solve environmental puzzles by activating buttons that open or close walls, crossing moving platforms, and collecting key items, including a real-time interactive map. These mechanics were implemented using Blueprints, with particular focus on functional clarity and smooth gameplay progression.
The entire scene is immersed in dense dynamic fog, generated via the Niagara system, designed to enhance disorientation and strengthen the atmosphere of tension and suspense. The maze is conceived as an optional challenge tied to the completion of the castle and is fully optimized for real-time rendering.

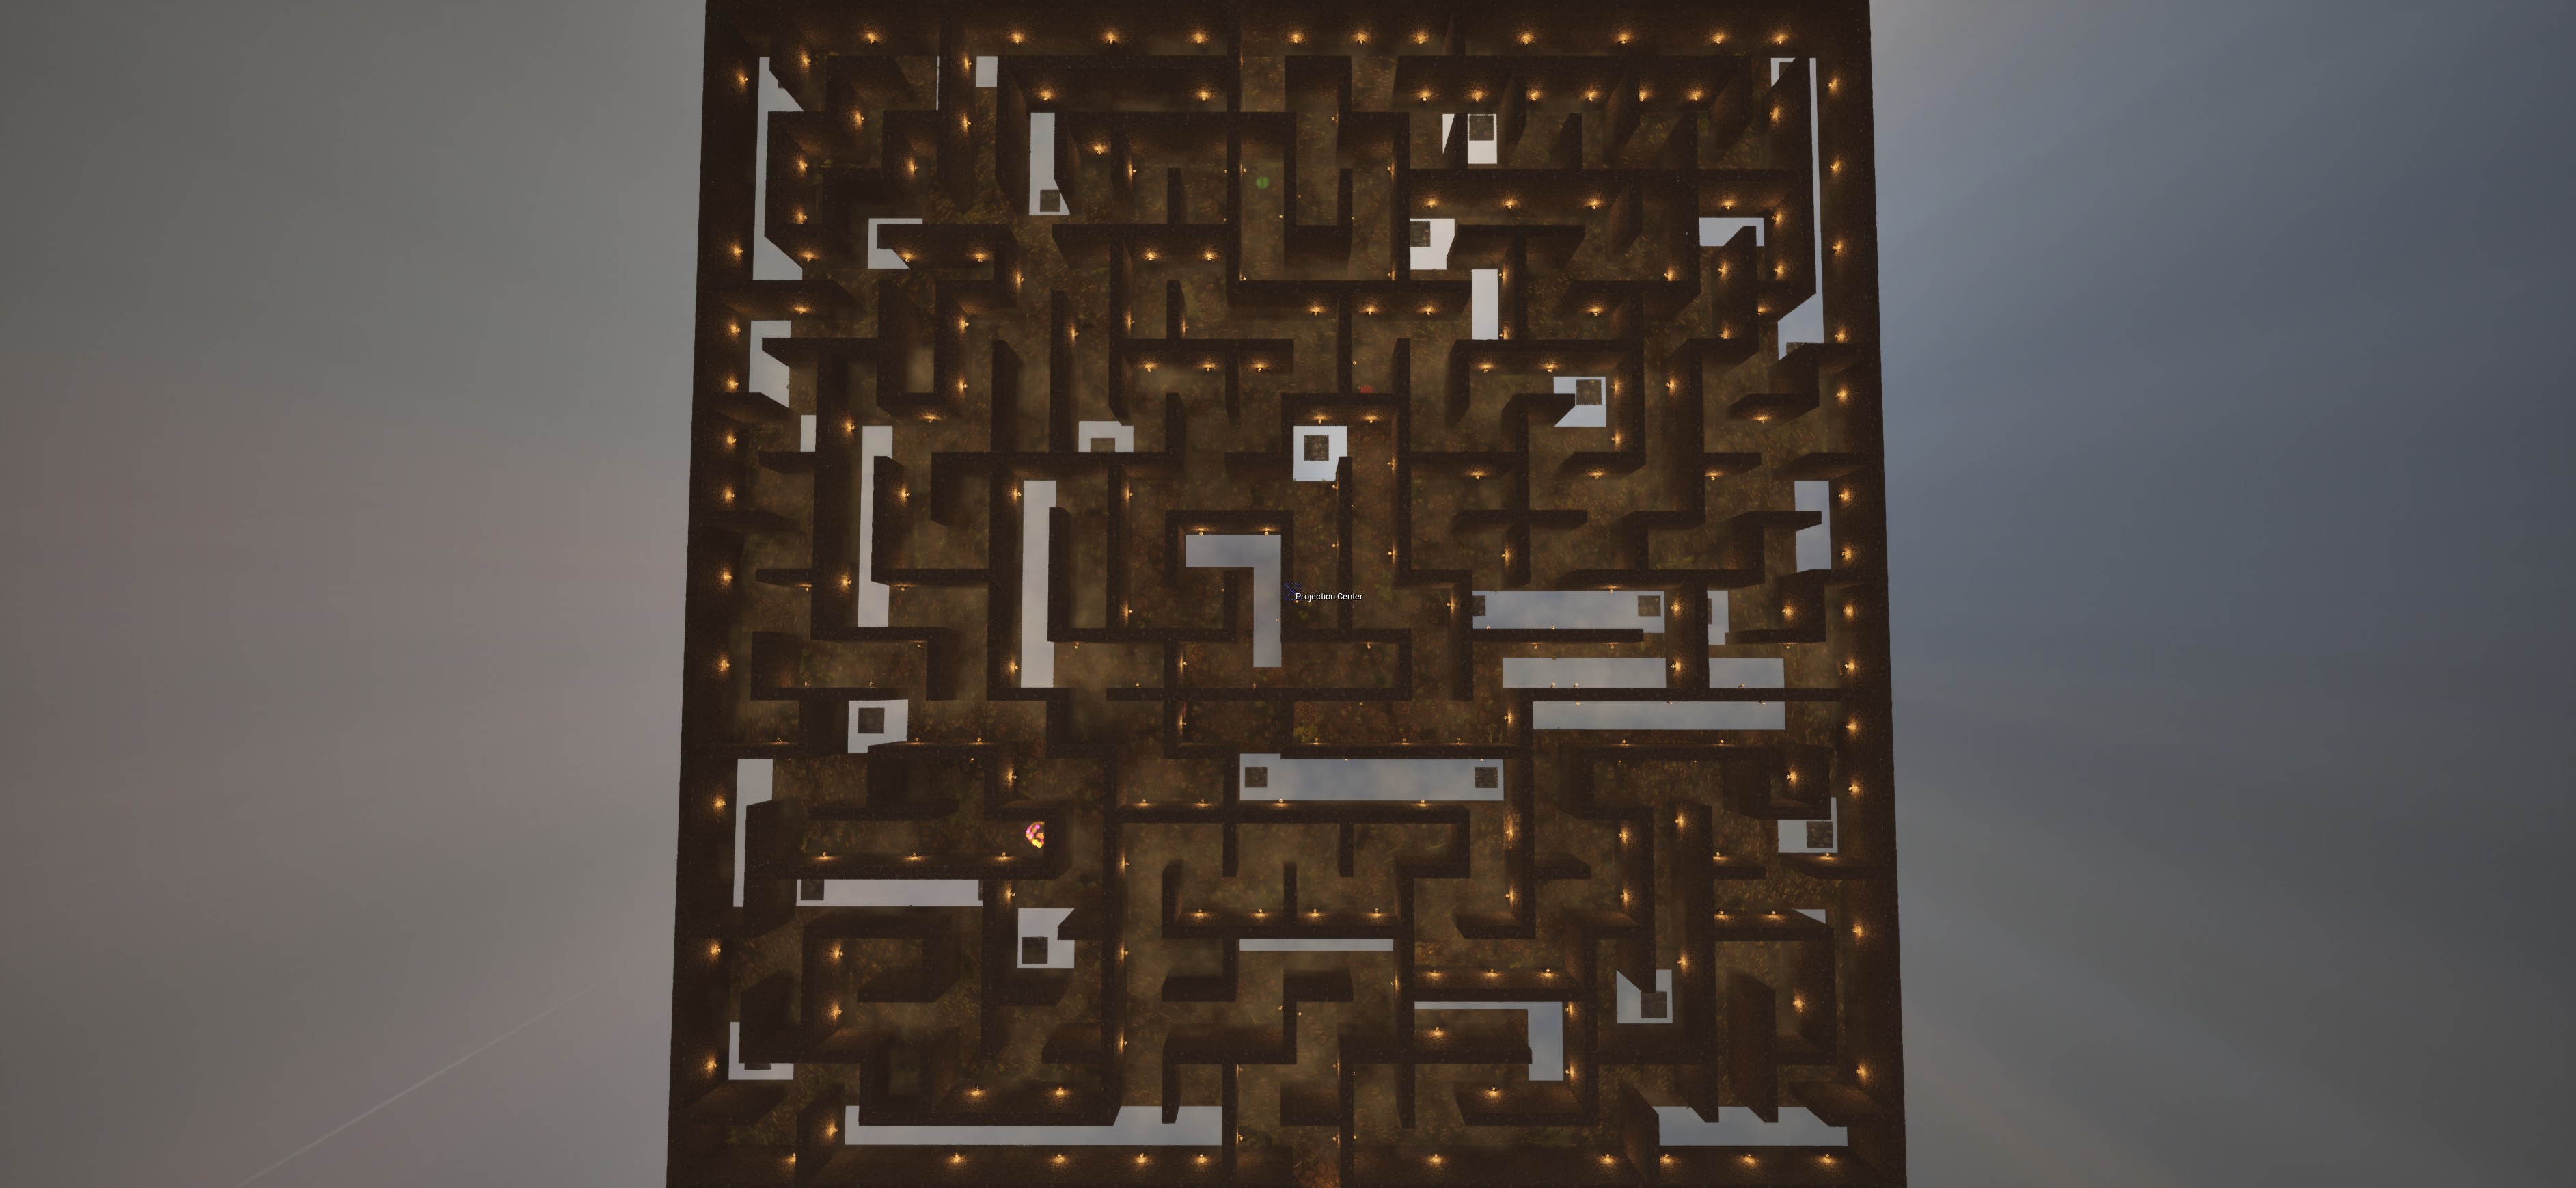

Activation system using a collision volume at the maze entrance, which simultaneously enables ambient music, sequential lighting, and a Niagara VFX for dynamic fog simulation, creating an immersive atmosphere. At the bottom left, a custom widget displays the player’s real-time position within the maze via a mini-map designed in the style of an ancient clock, consistent with the project’s fantasy-medieval aesthetic.
The platforms within the maze are activated sequentially and time-synchronized through a Blueprint Timeline. Their smooth motion introduces dynamic obstacles, increasing the level of challenge and interactivity. The system is fully integrated into the gameplay flow and designed to be expandable, maintaining both architectural consistency and coherence with the overall mechanics of the project.
Inside the maze, the player can collect a map through a contextual interaction(key E). Once acquired, the map can be shown or hidden with a simple keyboard command (key M). The system is managed using Blueprints and UI Widgets, displaying the player’s real-time position through a fluorescent yellow directional arrow. The map, highlighted by a glowing Niagara VFX, integrates seamlessly into the HUD and aligns with the project’s fantasy-medieval aesthetic.
Interaction is triggered via a collision volume: when the button is pressed (input via trigger), a movable wall opens or closes through a Blueprint event. To provide immediate visual feedback to the player, a secondary camera is activated using Cast to Viewport, showing real-time changes in the scene. The system is fully replicable and allows for modular management of multiple walls and connected cameras.
Developed by following a series of dedicated tutorials and gradually implemented using Blueprints in Unreal Engine. The system allows players to collect, view, and manage items within a UI slot-based interface and is easily scalable for future projects. The focus was on understanding the logic behind data structures, user interface design, and real-time interactions with the game environment.
A system connecting two game levels using the Open Level node, while maintaining the player’s position and state parameters through a custom Game Instance class. This setup enables a consistent respawn at the initial access point, ensuring narrative continuity and smooth gameplay flow.
.png)
Individual project developed as the final work for the Multimedia Design 3 course.
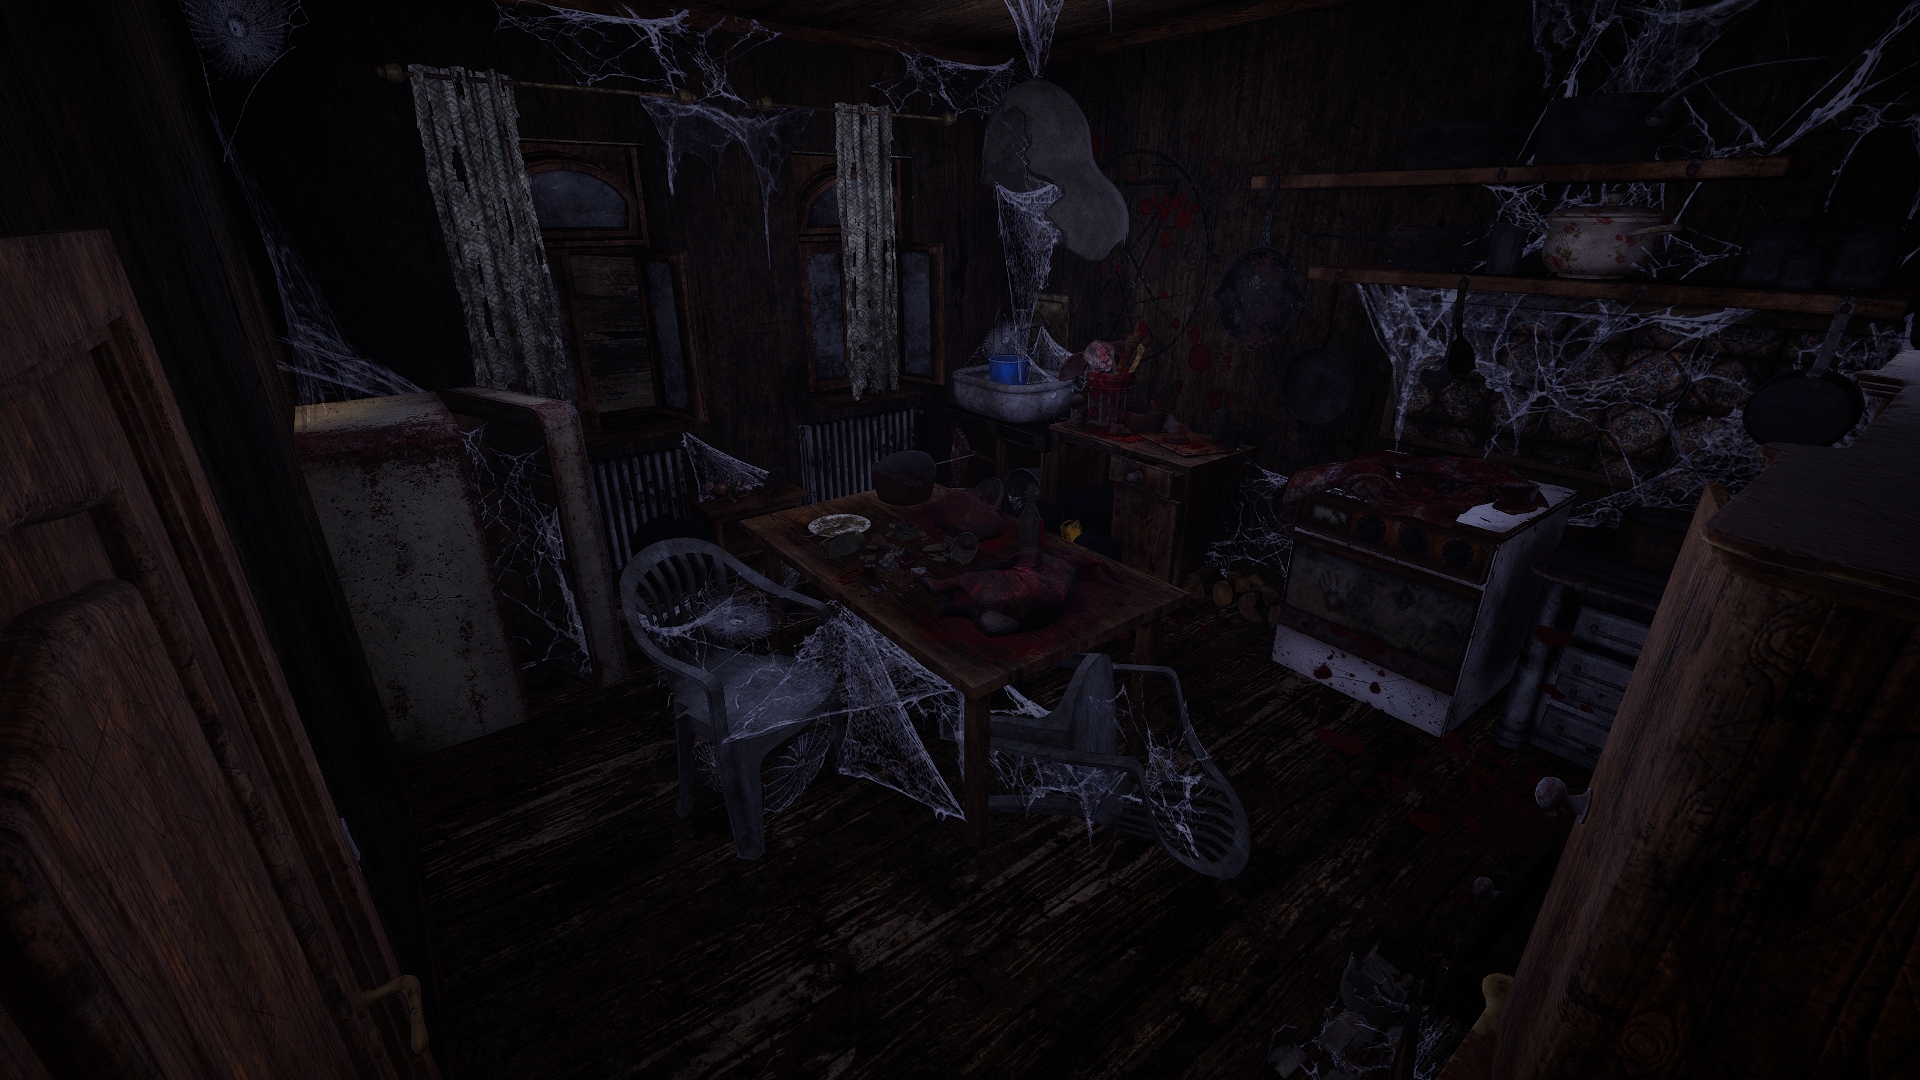
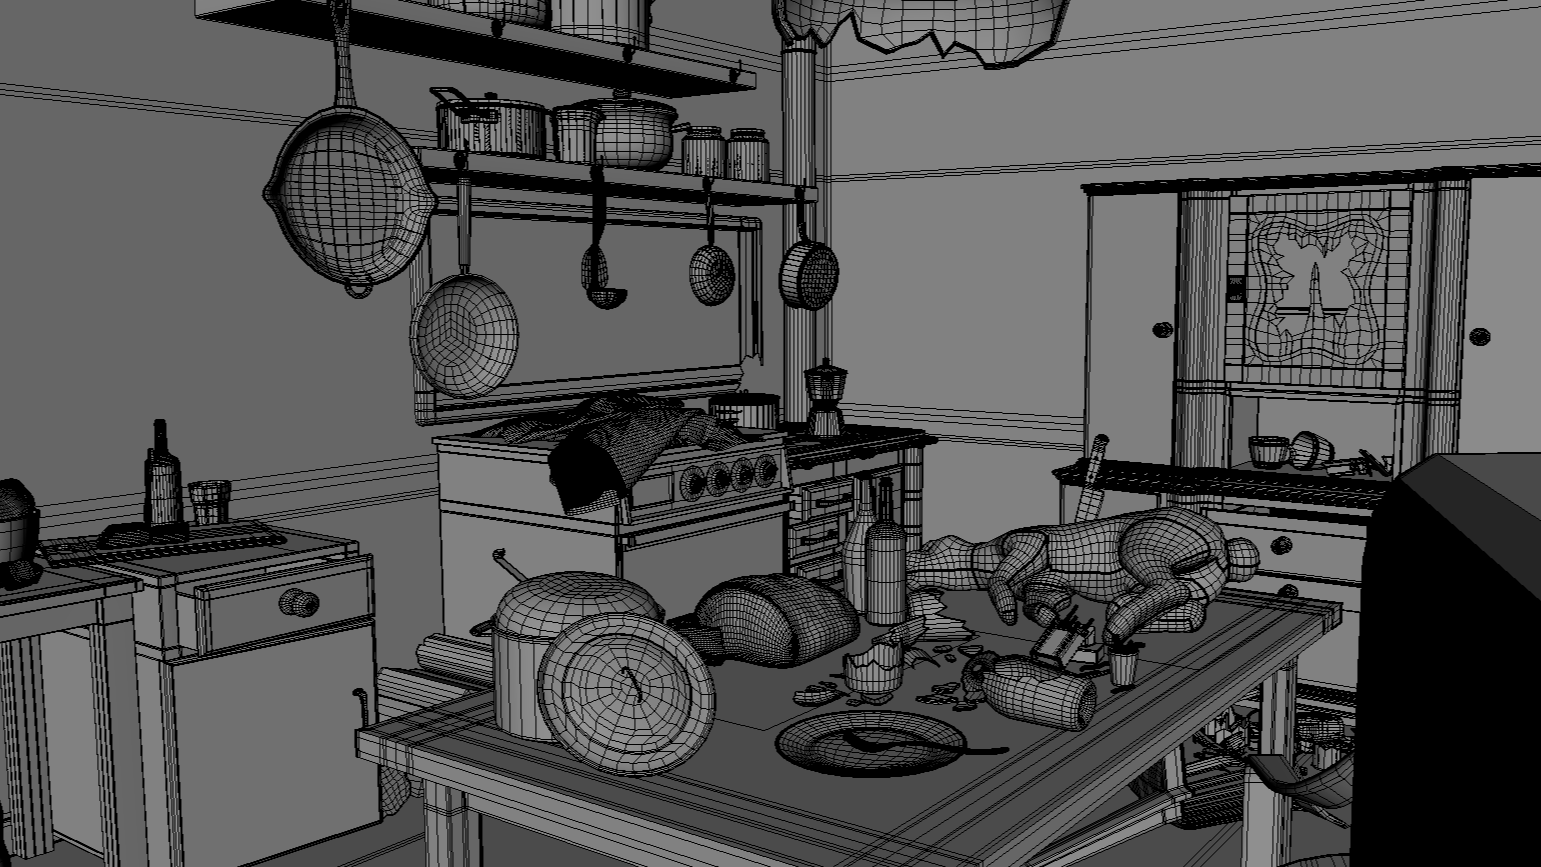
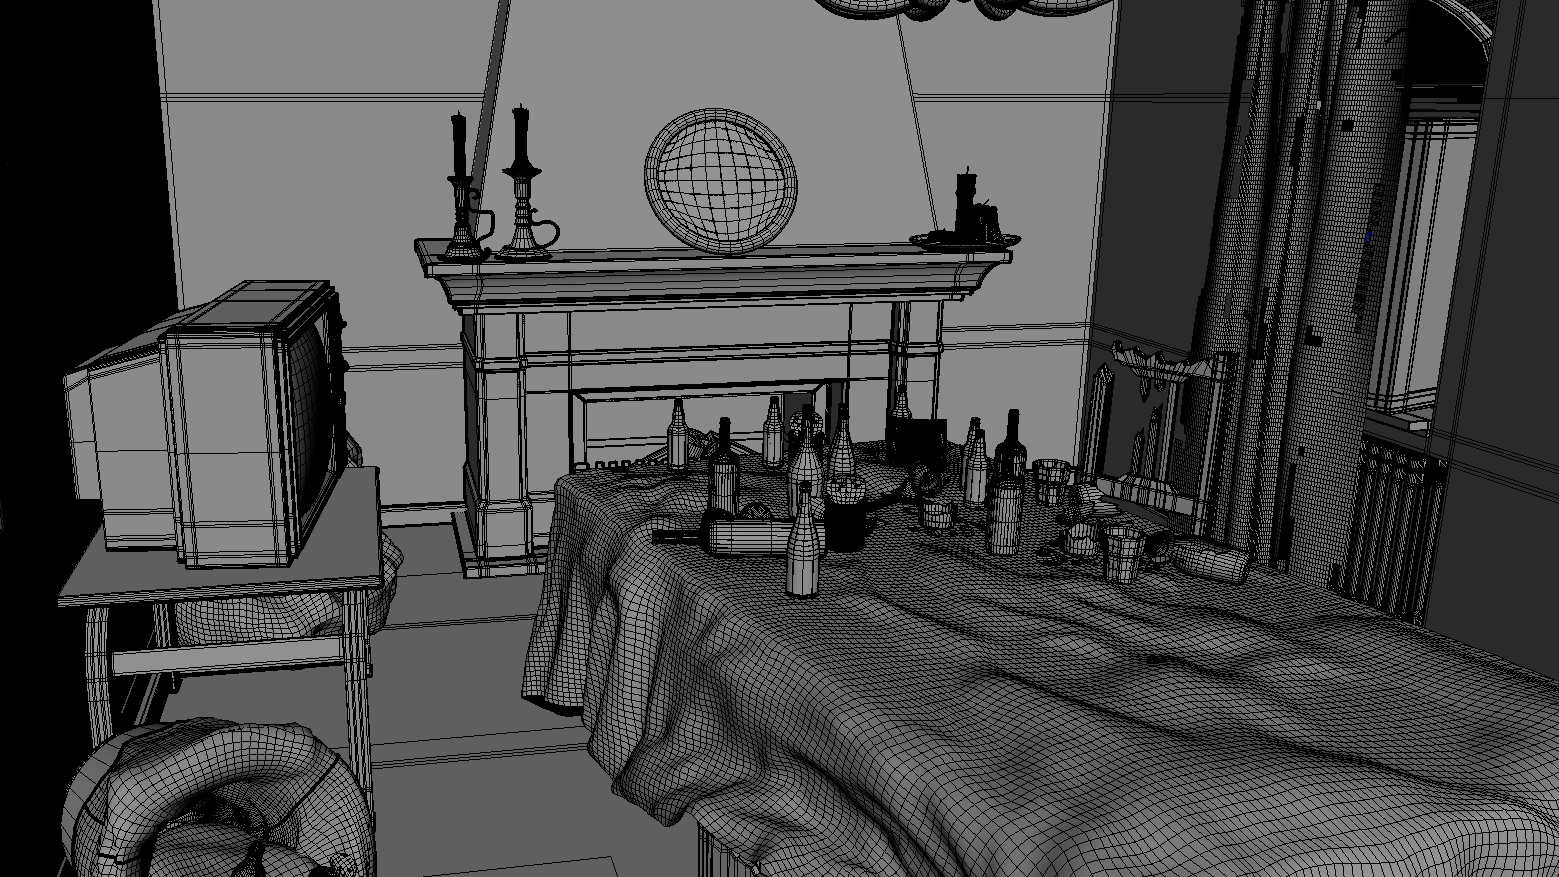
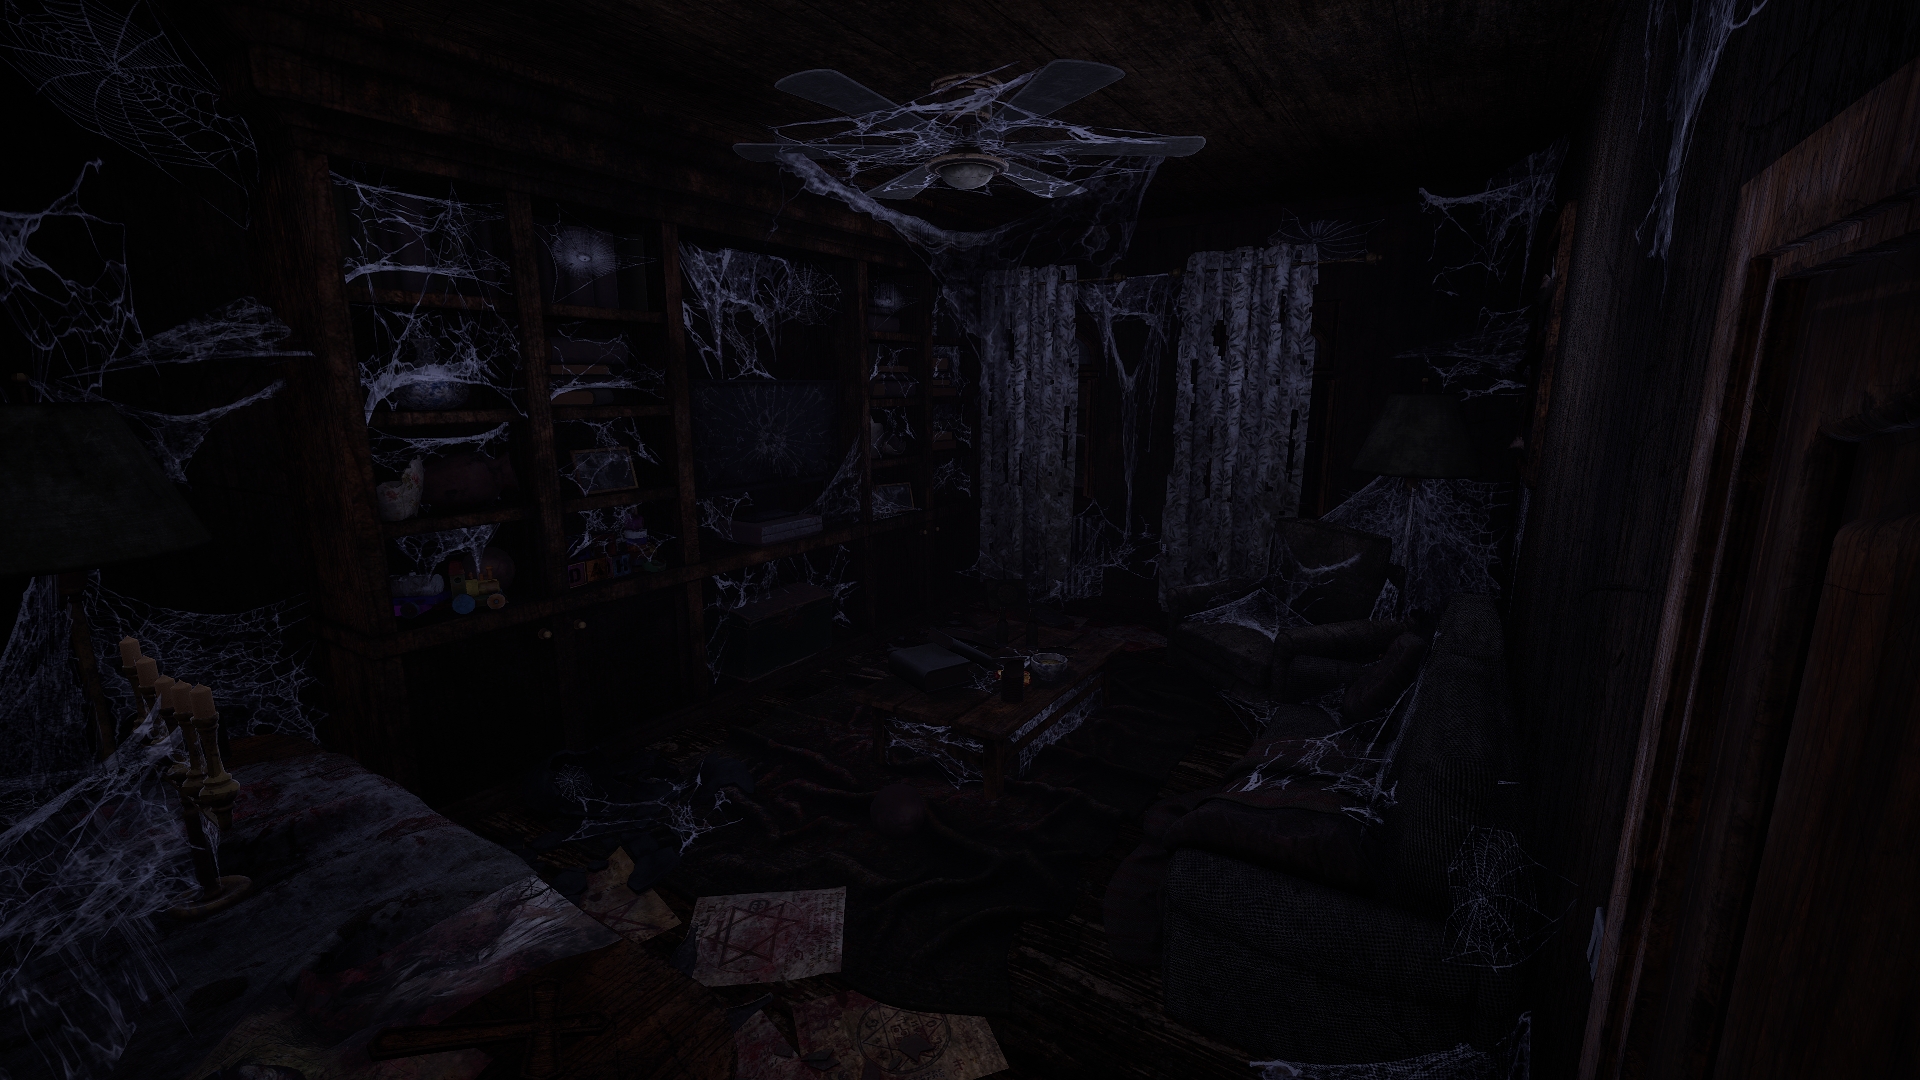
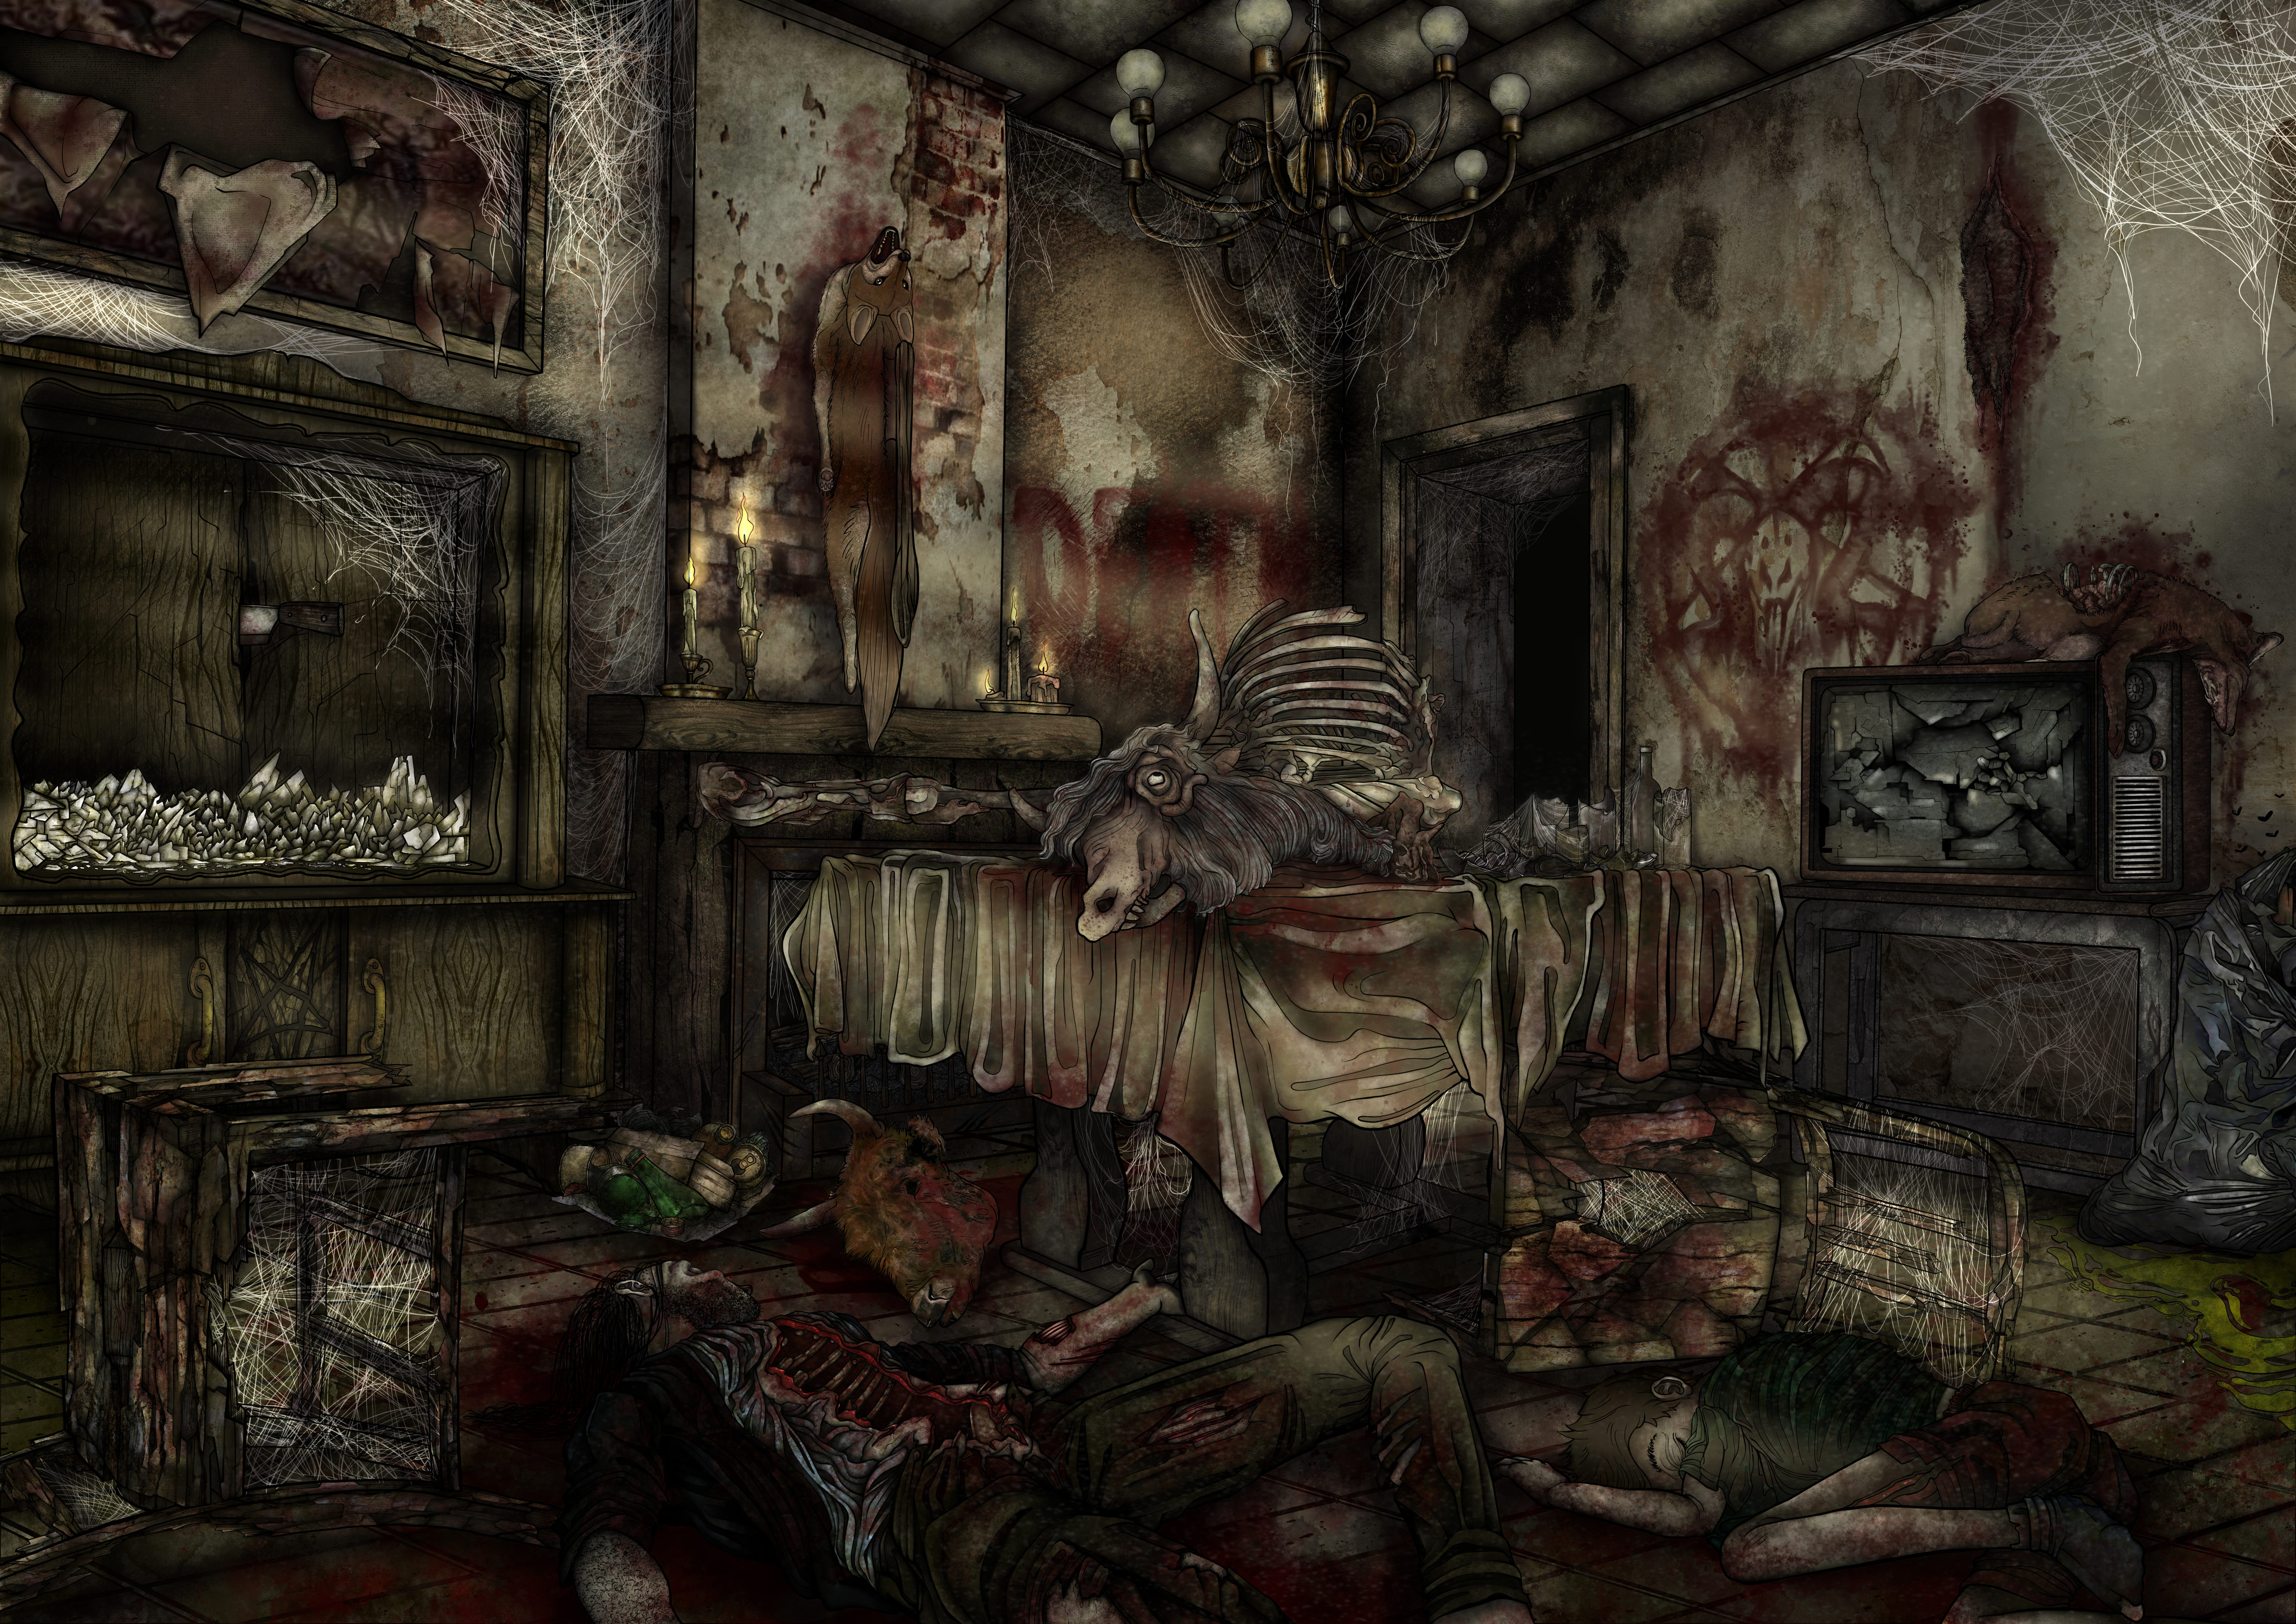
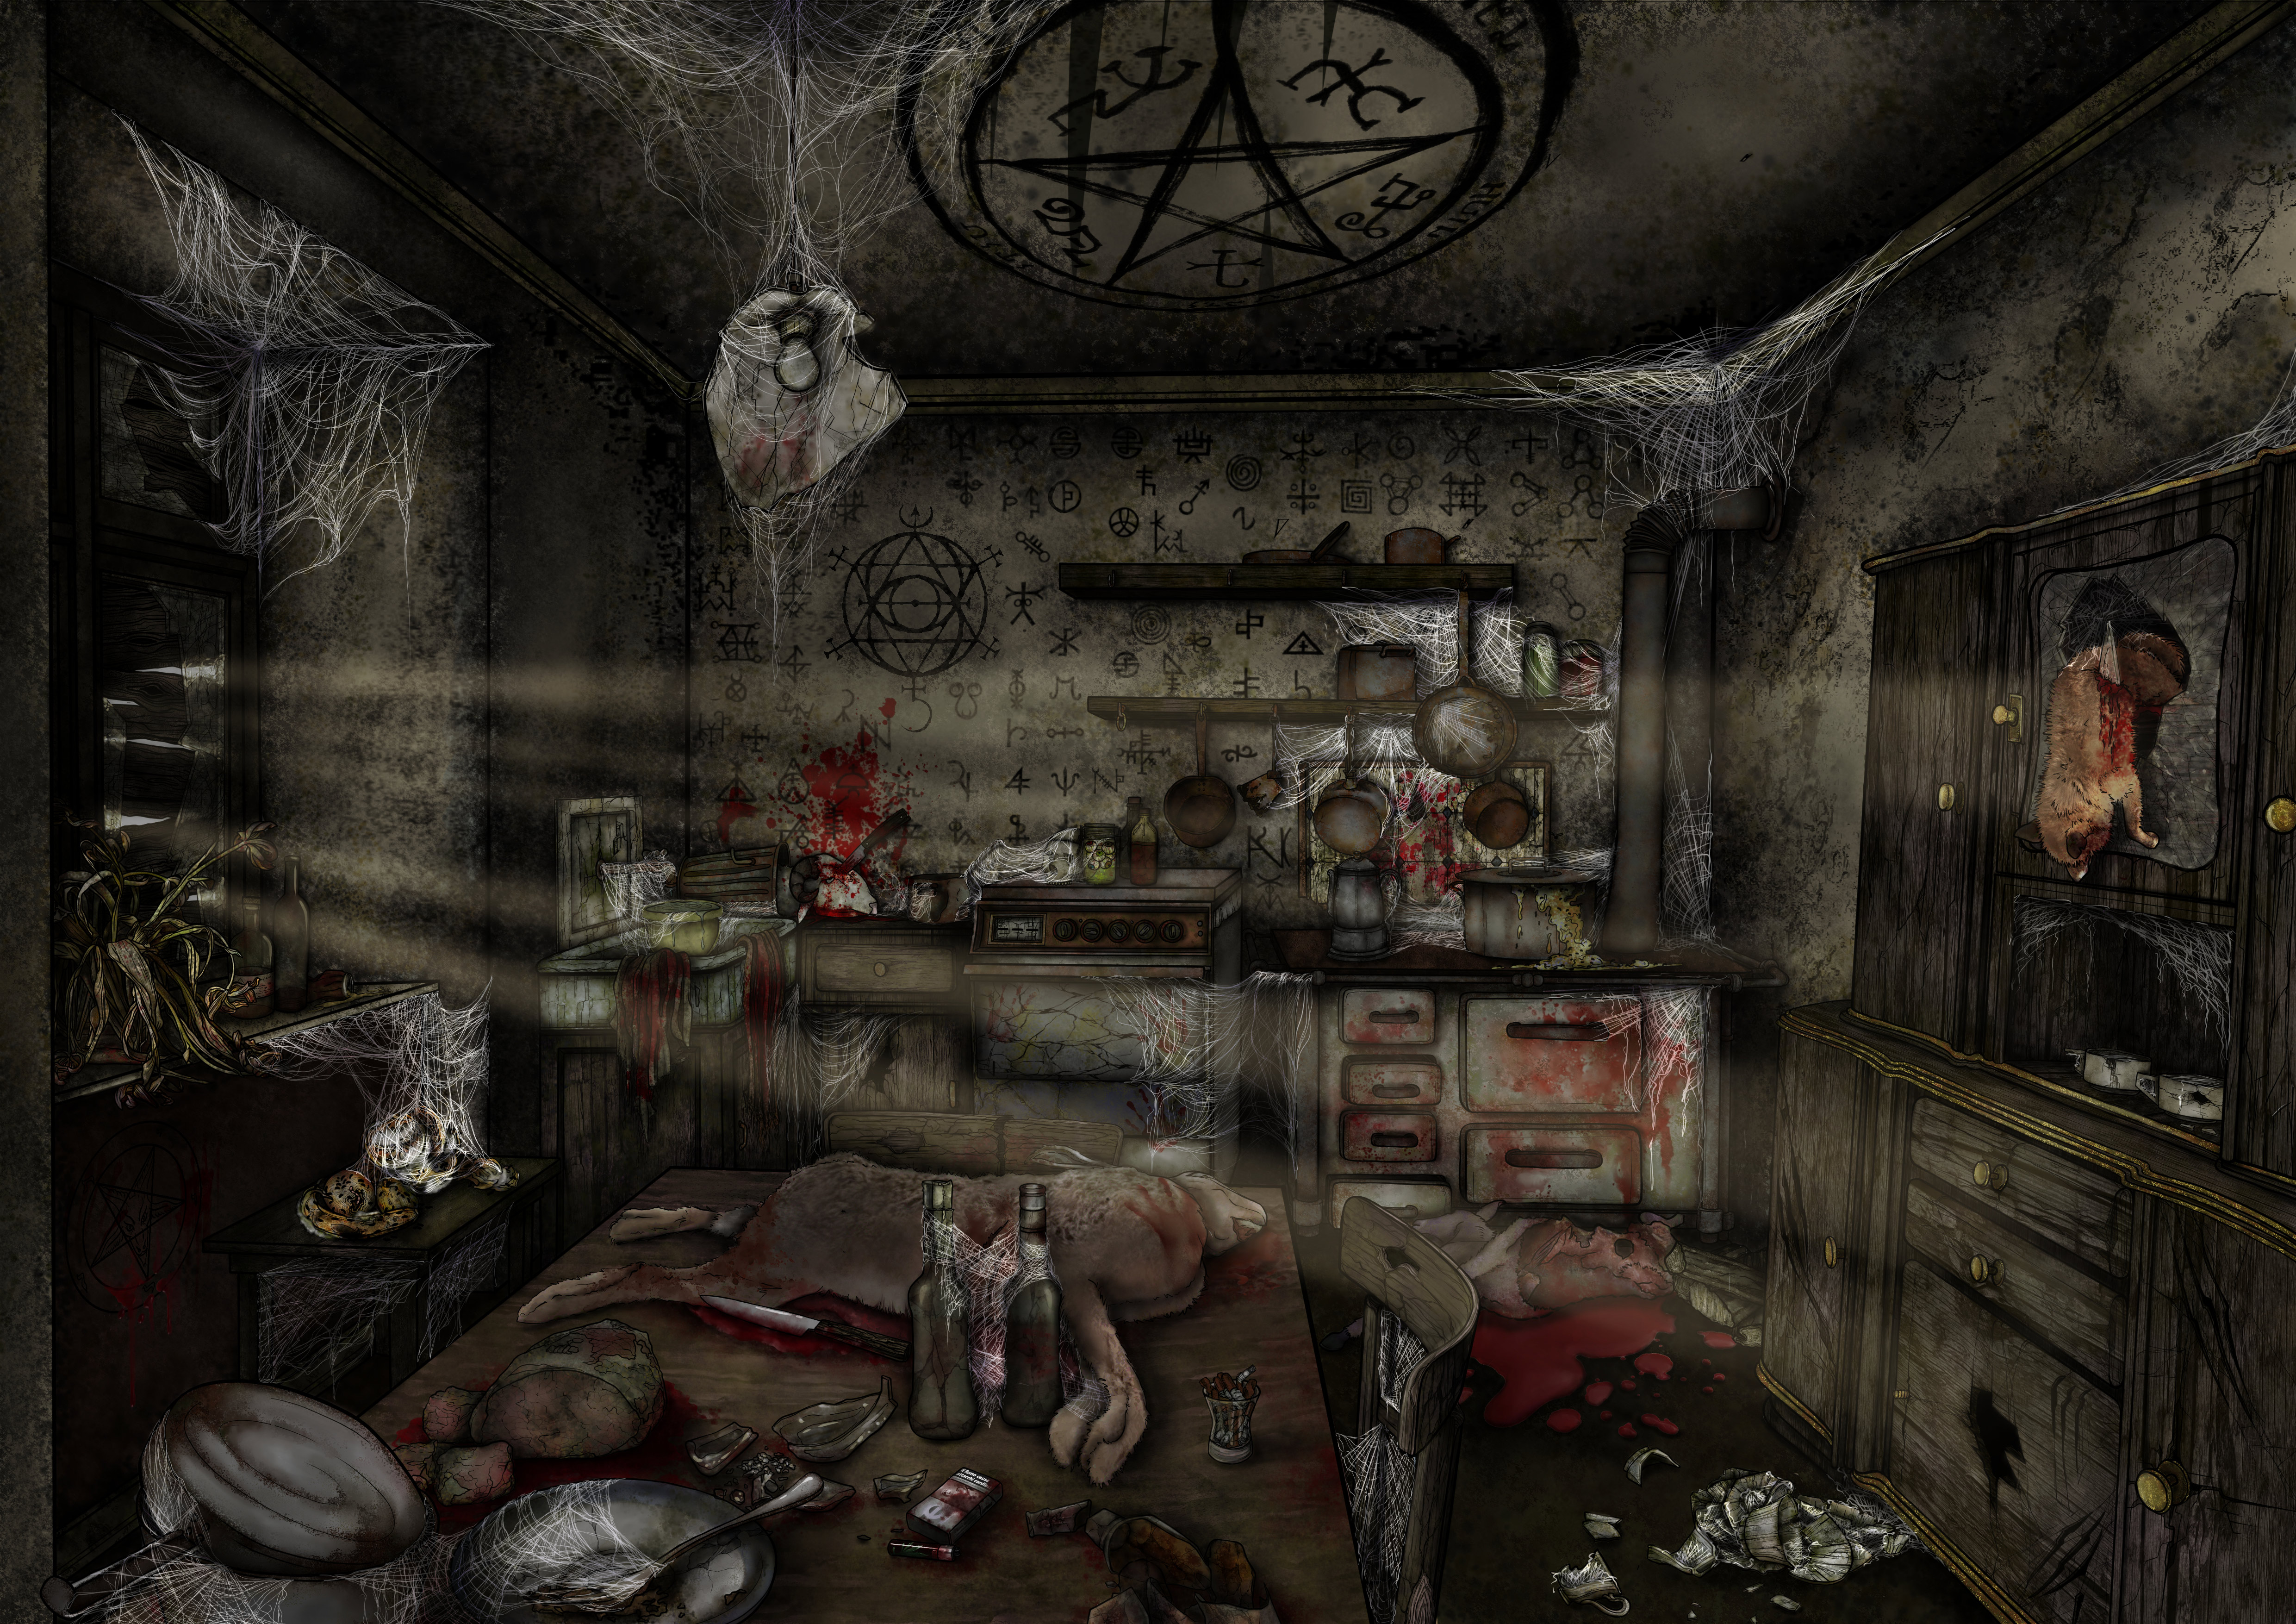
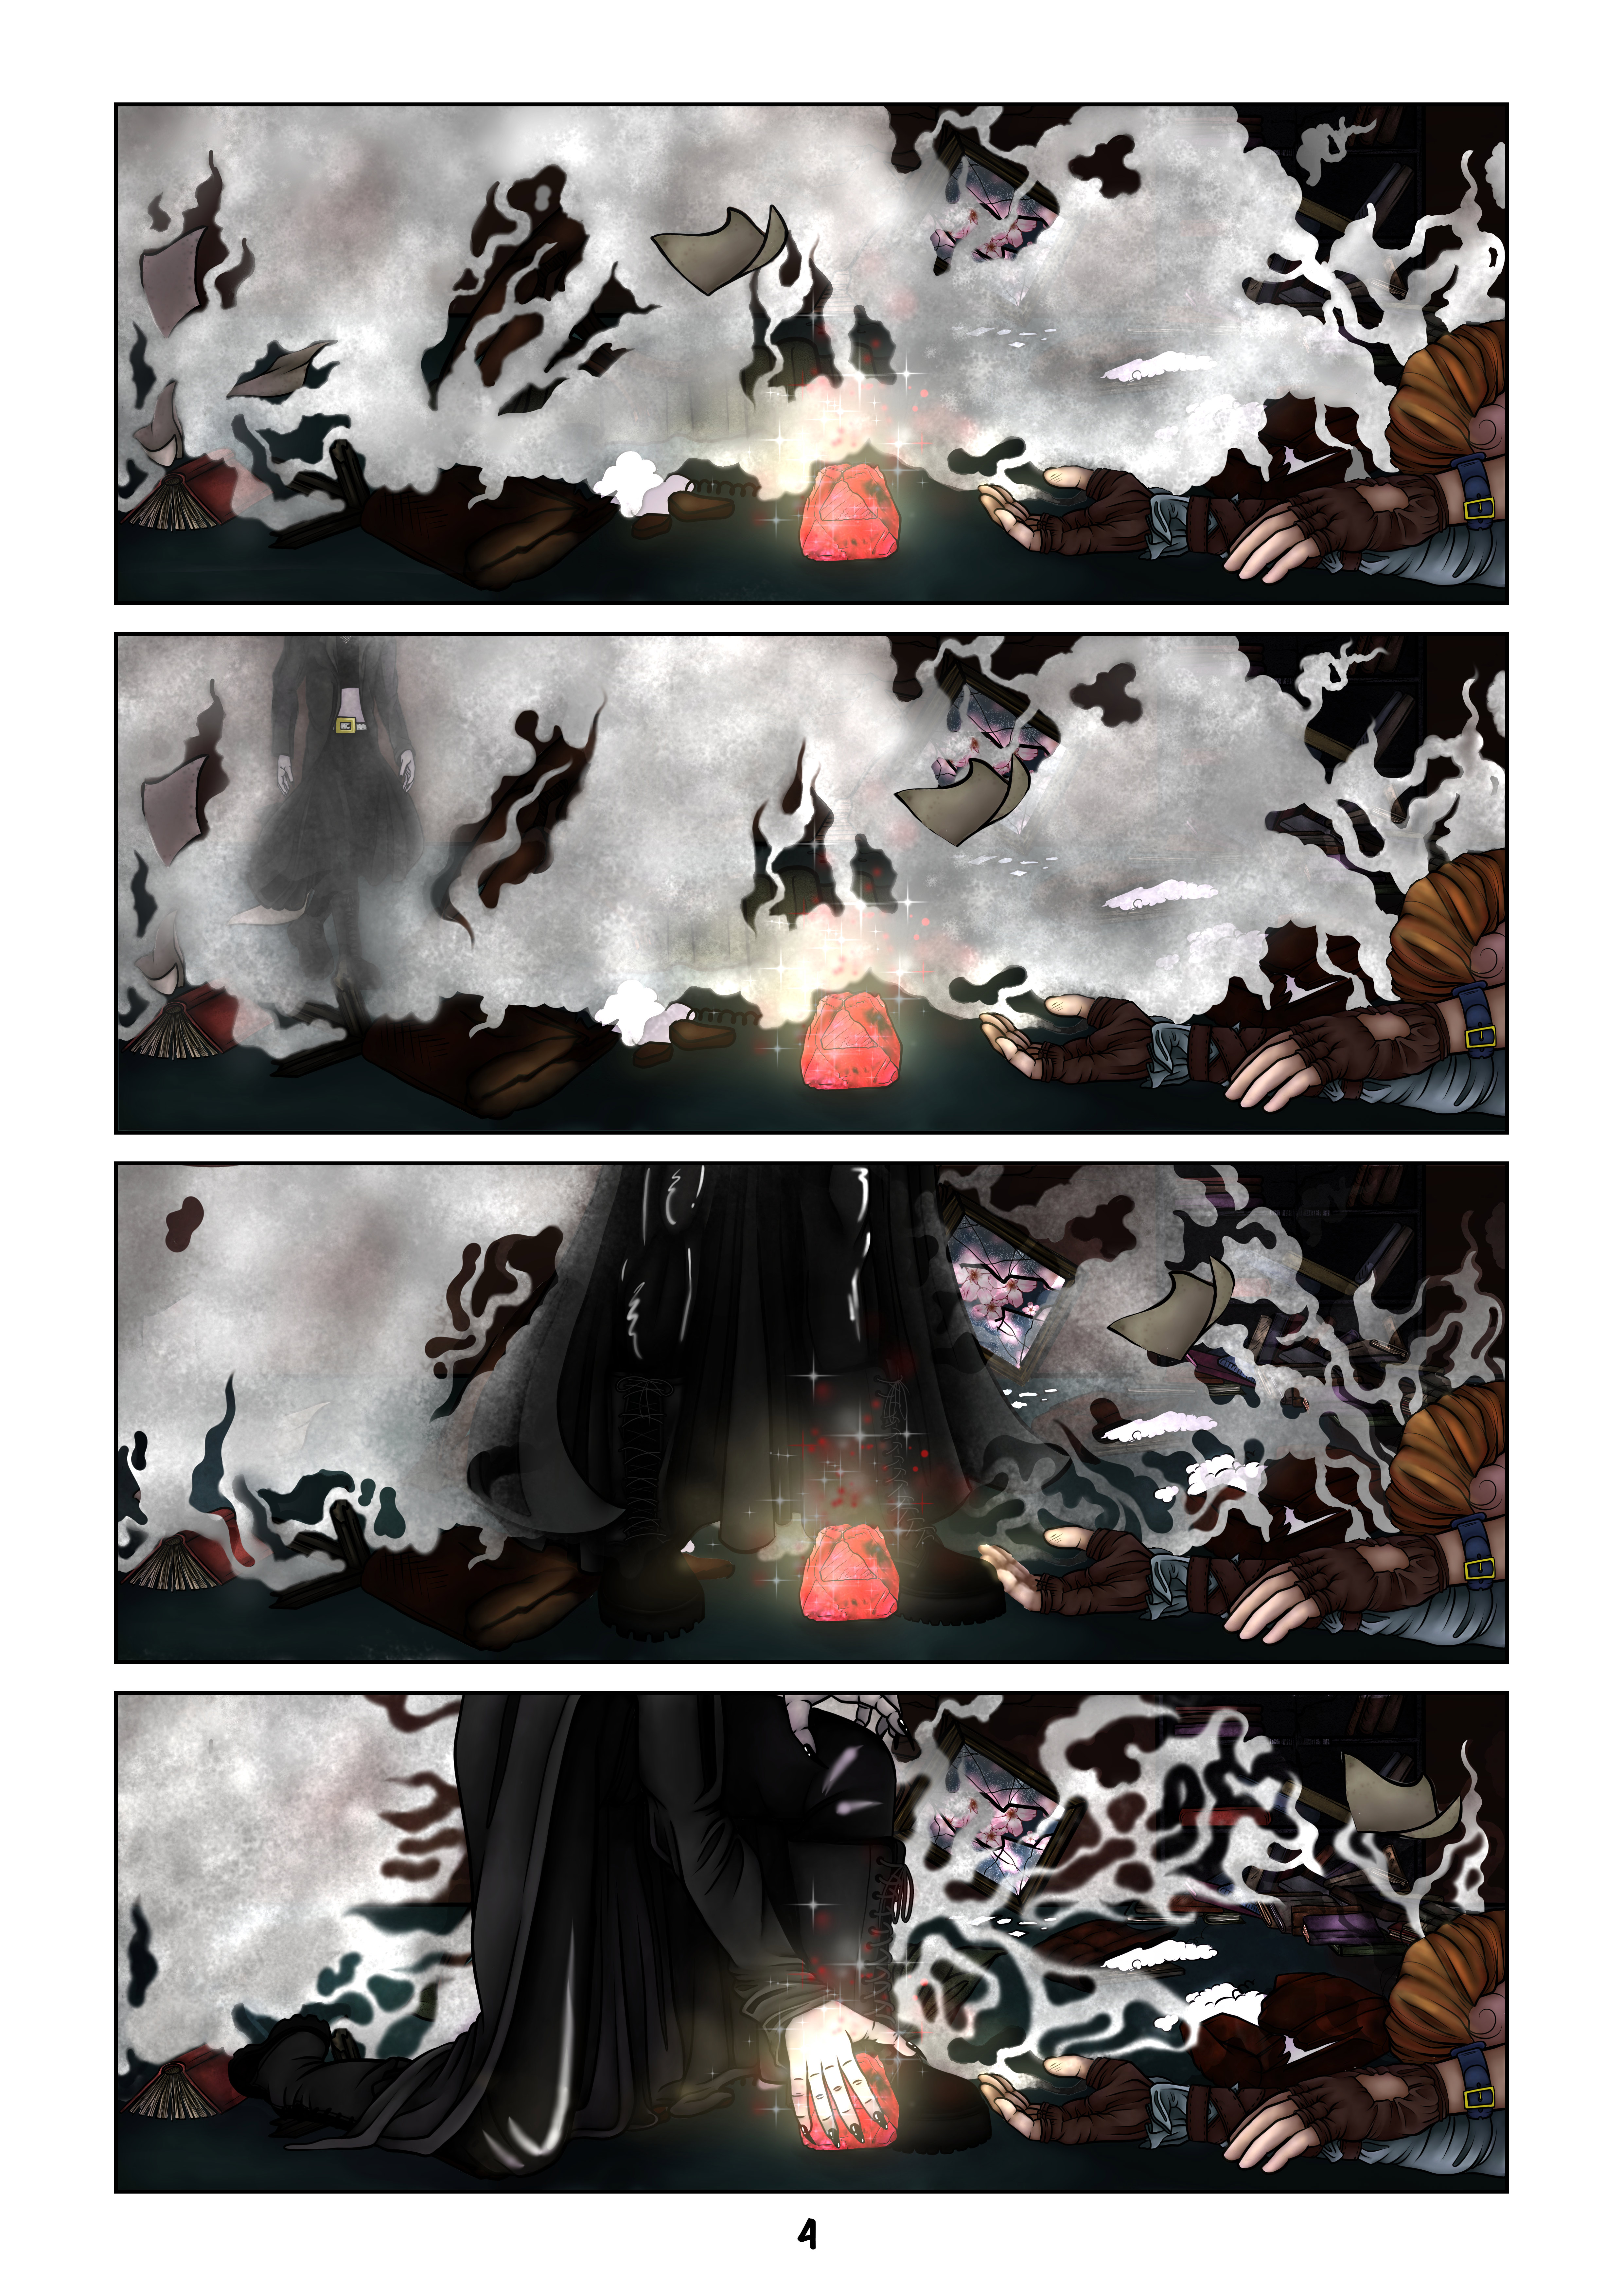
The images showcase environments created for The Quiet Boy, a horror short film set in an abandoned, decaying house. I handled the entire environment design process: from asset modeling and scene composition to lighting setup and atmospheric rendering. Every element — objects, textures, and lights — was carefully designed to reinforce the narrative tone and evoke a sense of decay, unease, and temporal suspension. Each room tells its own story: from the blood-stained kitchen to the cobweb-filled living room, every detail enhances the feeling of abandonment and discomfort.
The assets were modeled in Maya and ZBrush, with special attention given to foreground elements and light-interacting surfaces. The nighttime lighting, deliberately dark, was calibrated to emphasize the psychological and unsettling aspects of the space. Materials were optimized for real-time rendering in Unreal Engine 5.4, while the outdoor vegetation was generated using the engine’s native foliage tools.
Environment Design
CGI Production
Visual Storytelling
.jpeg)


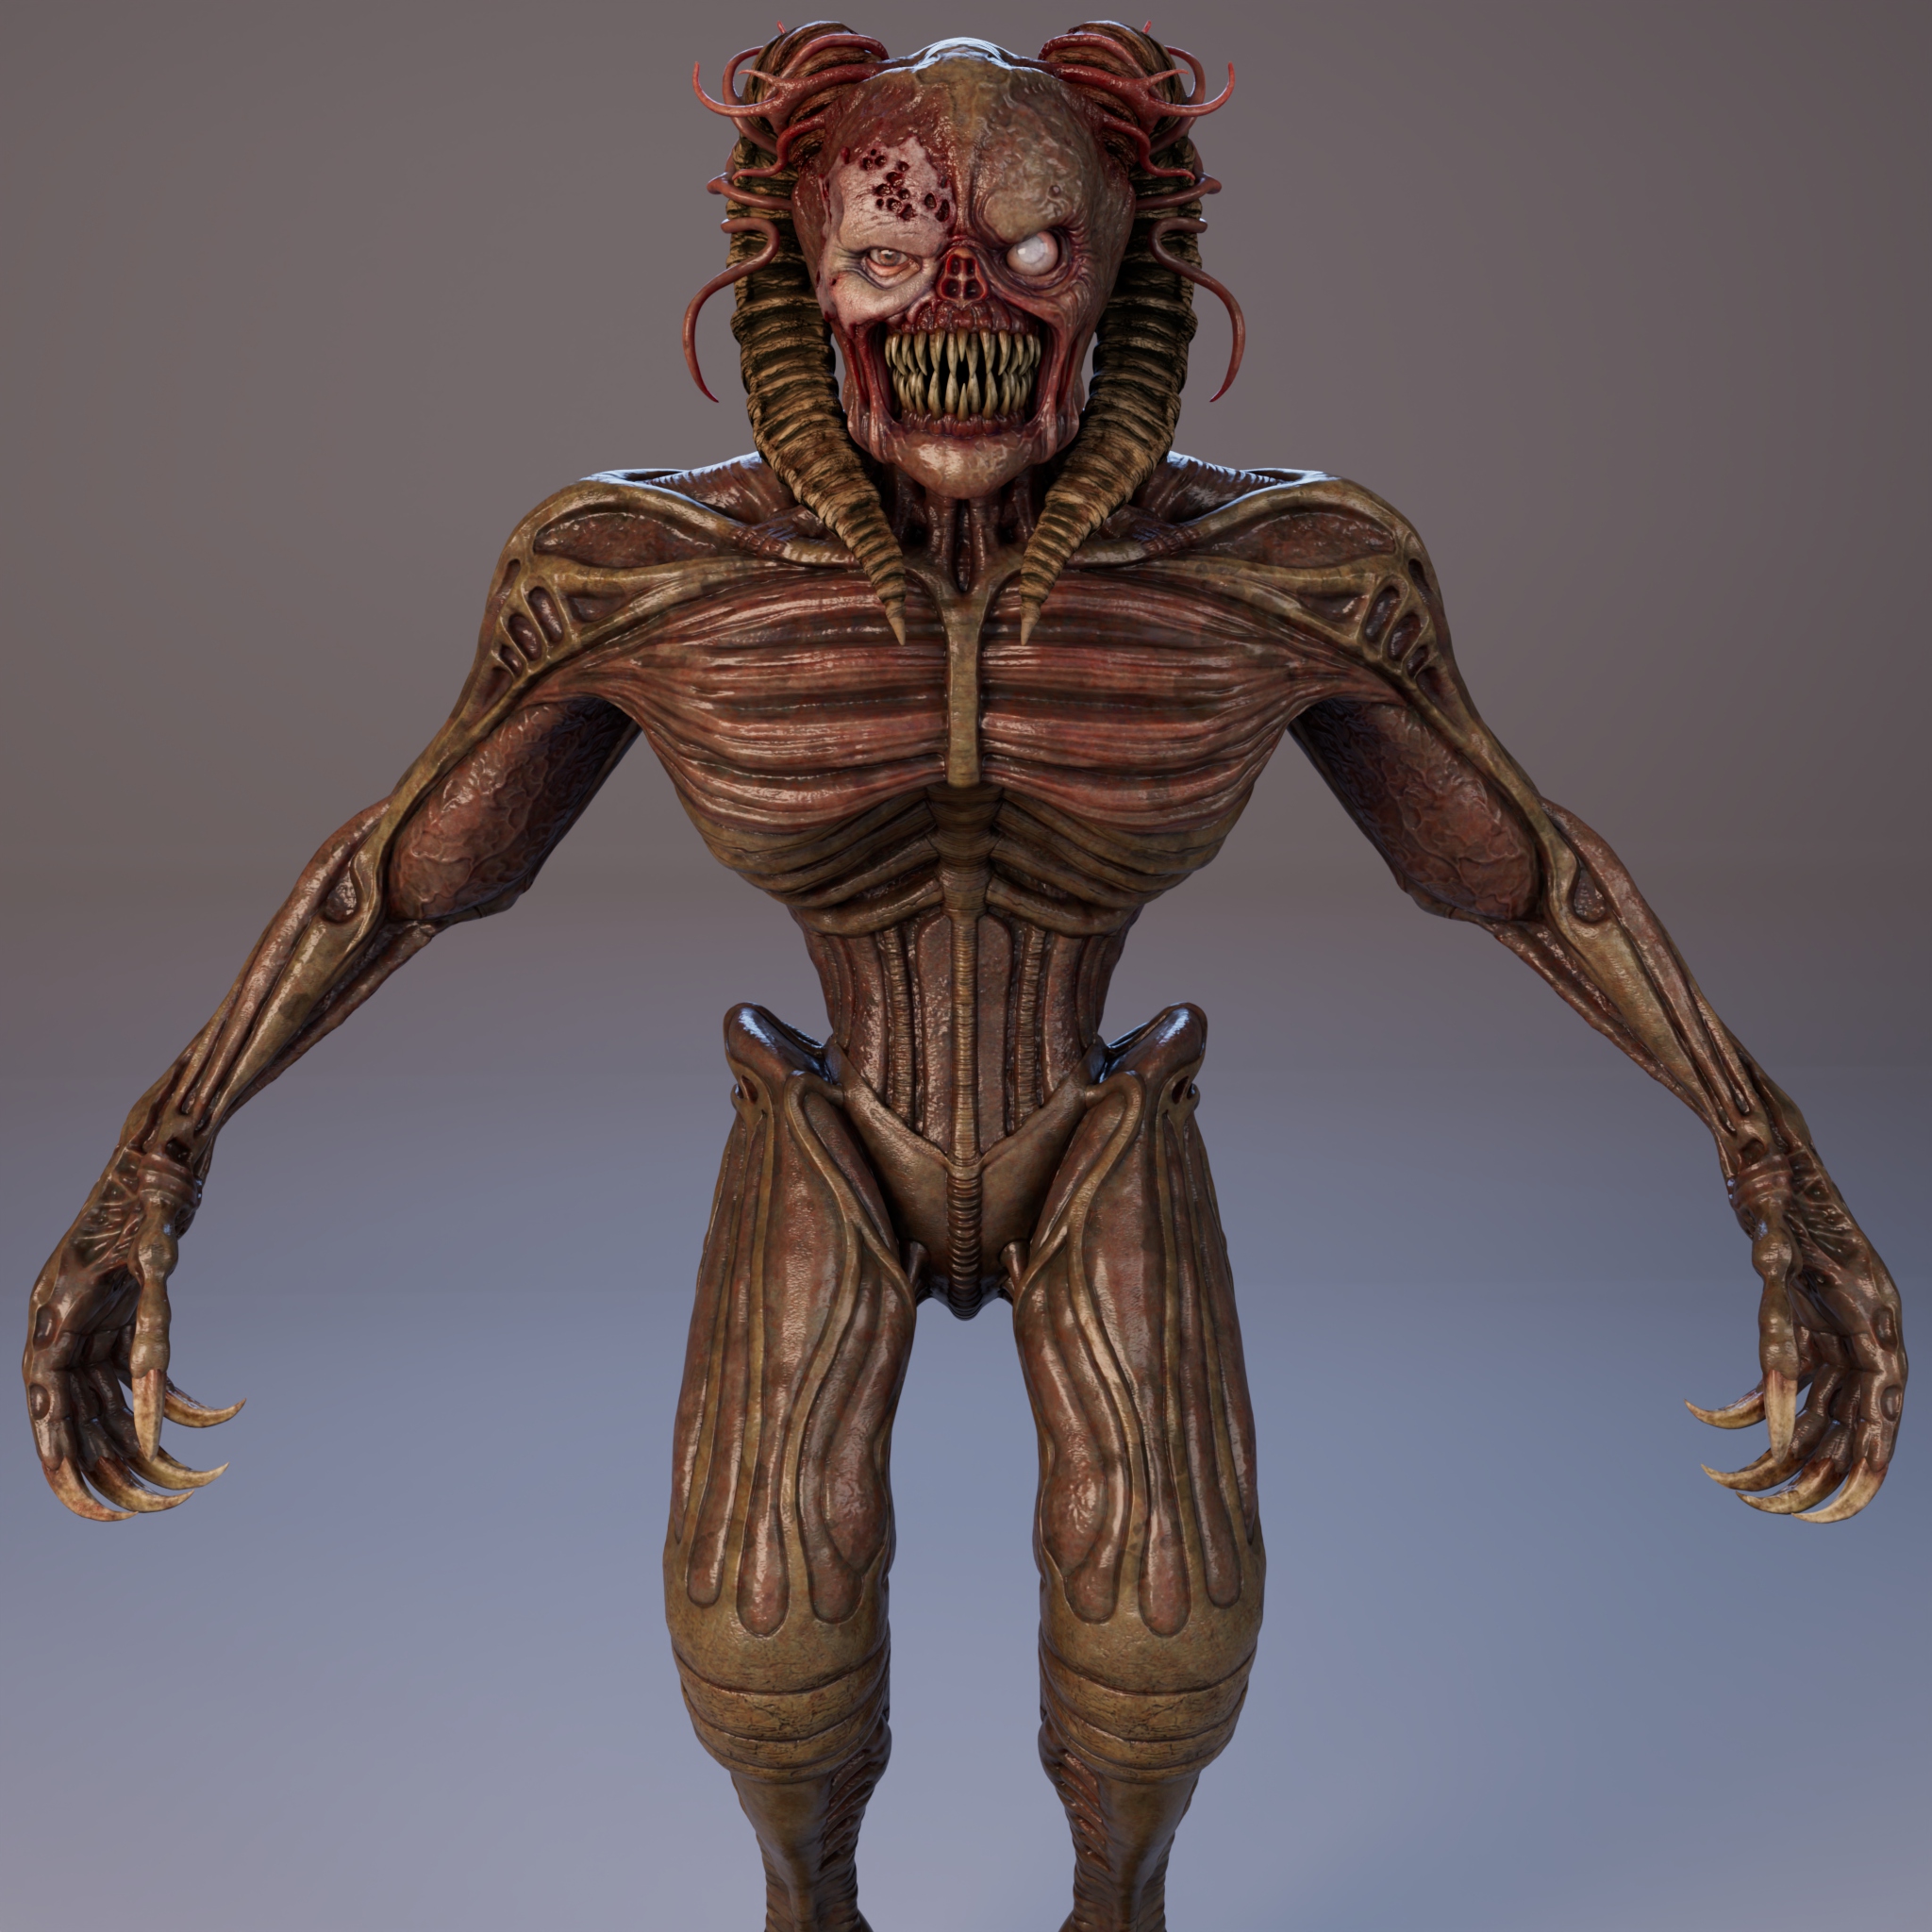
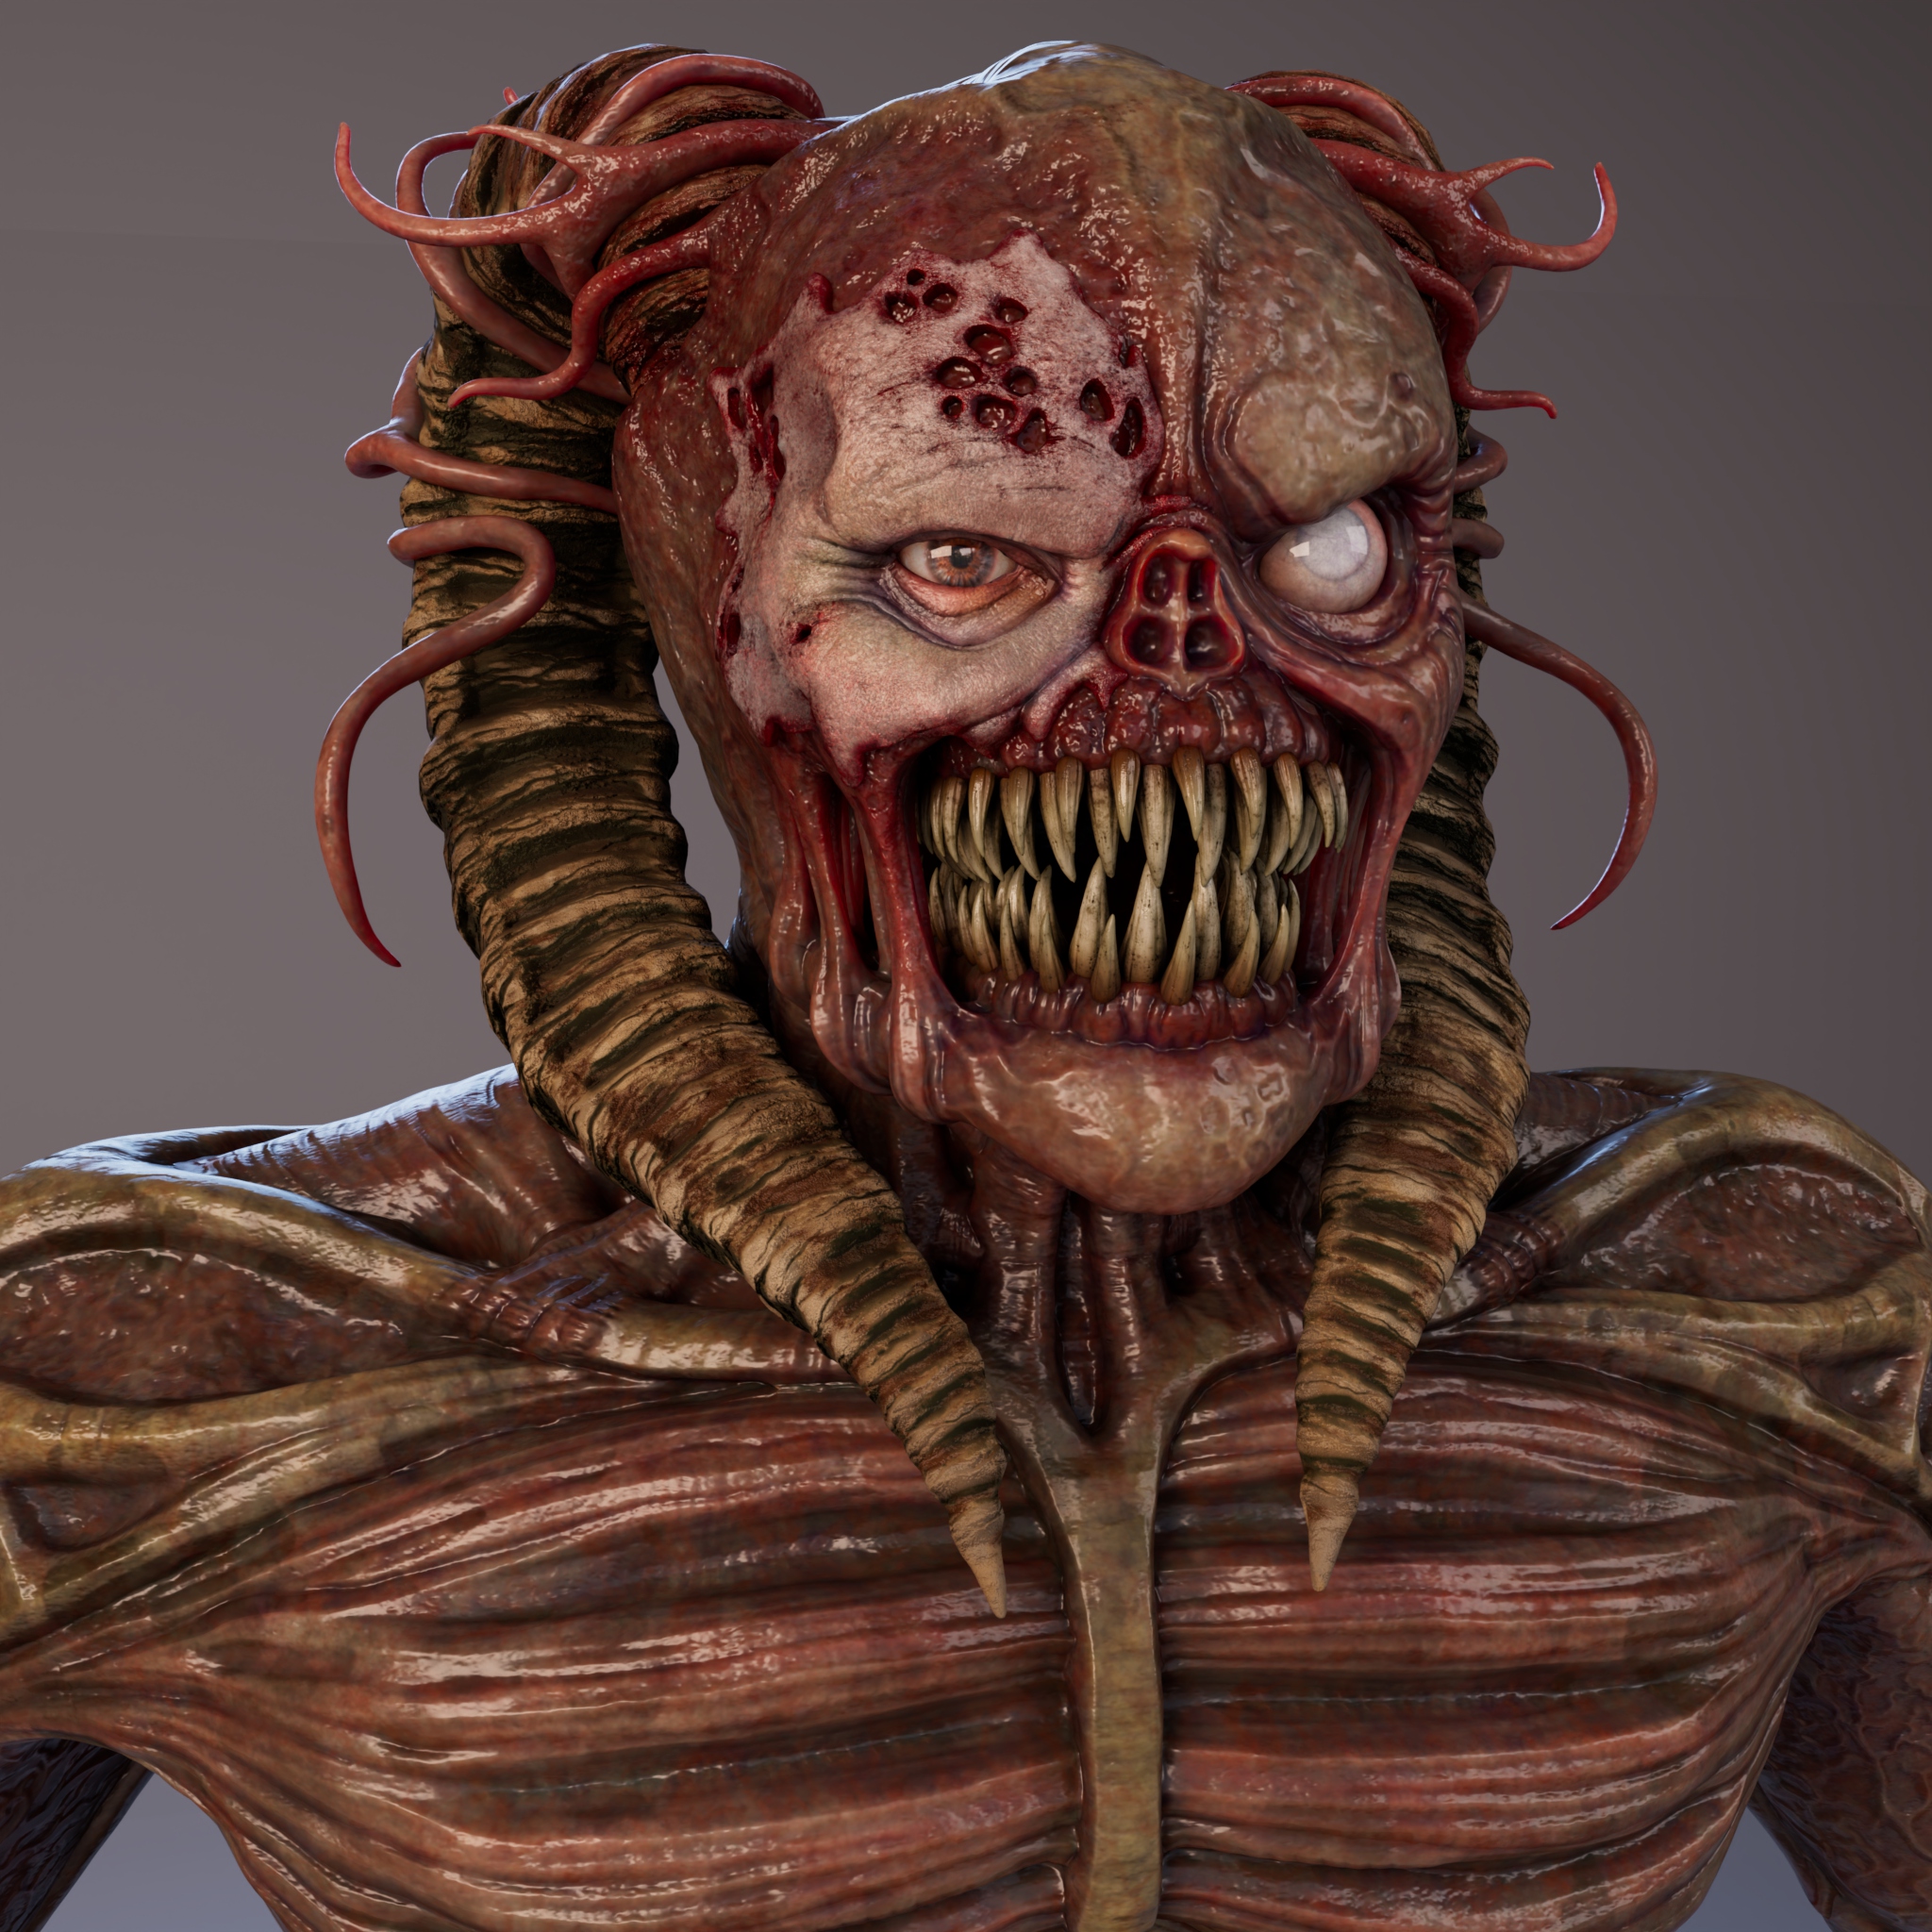
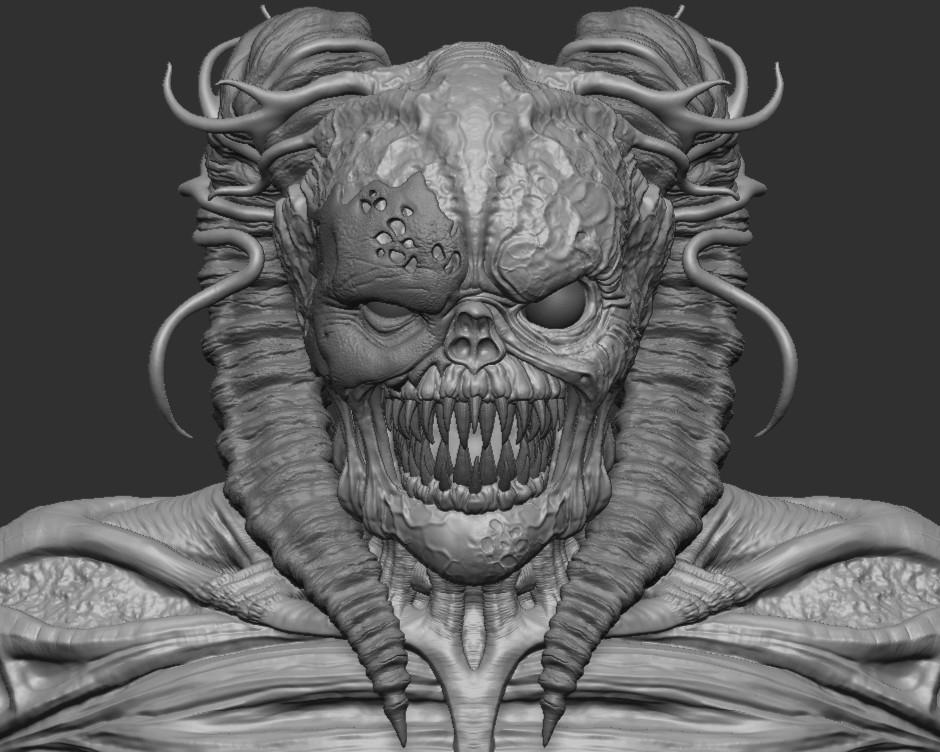
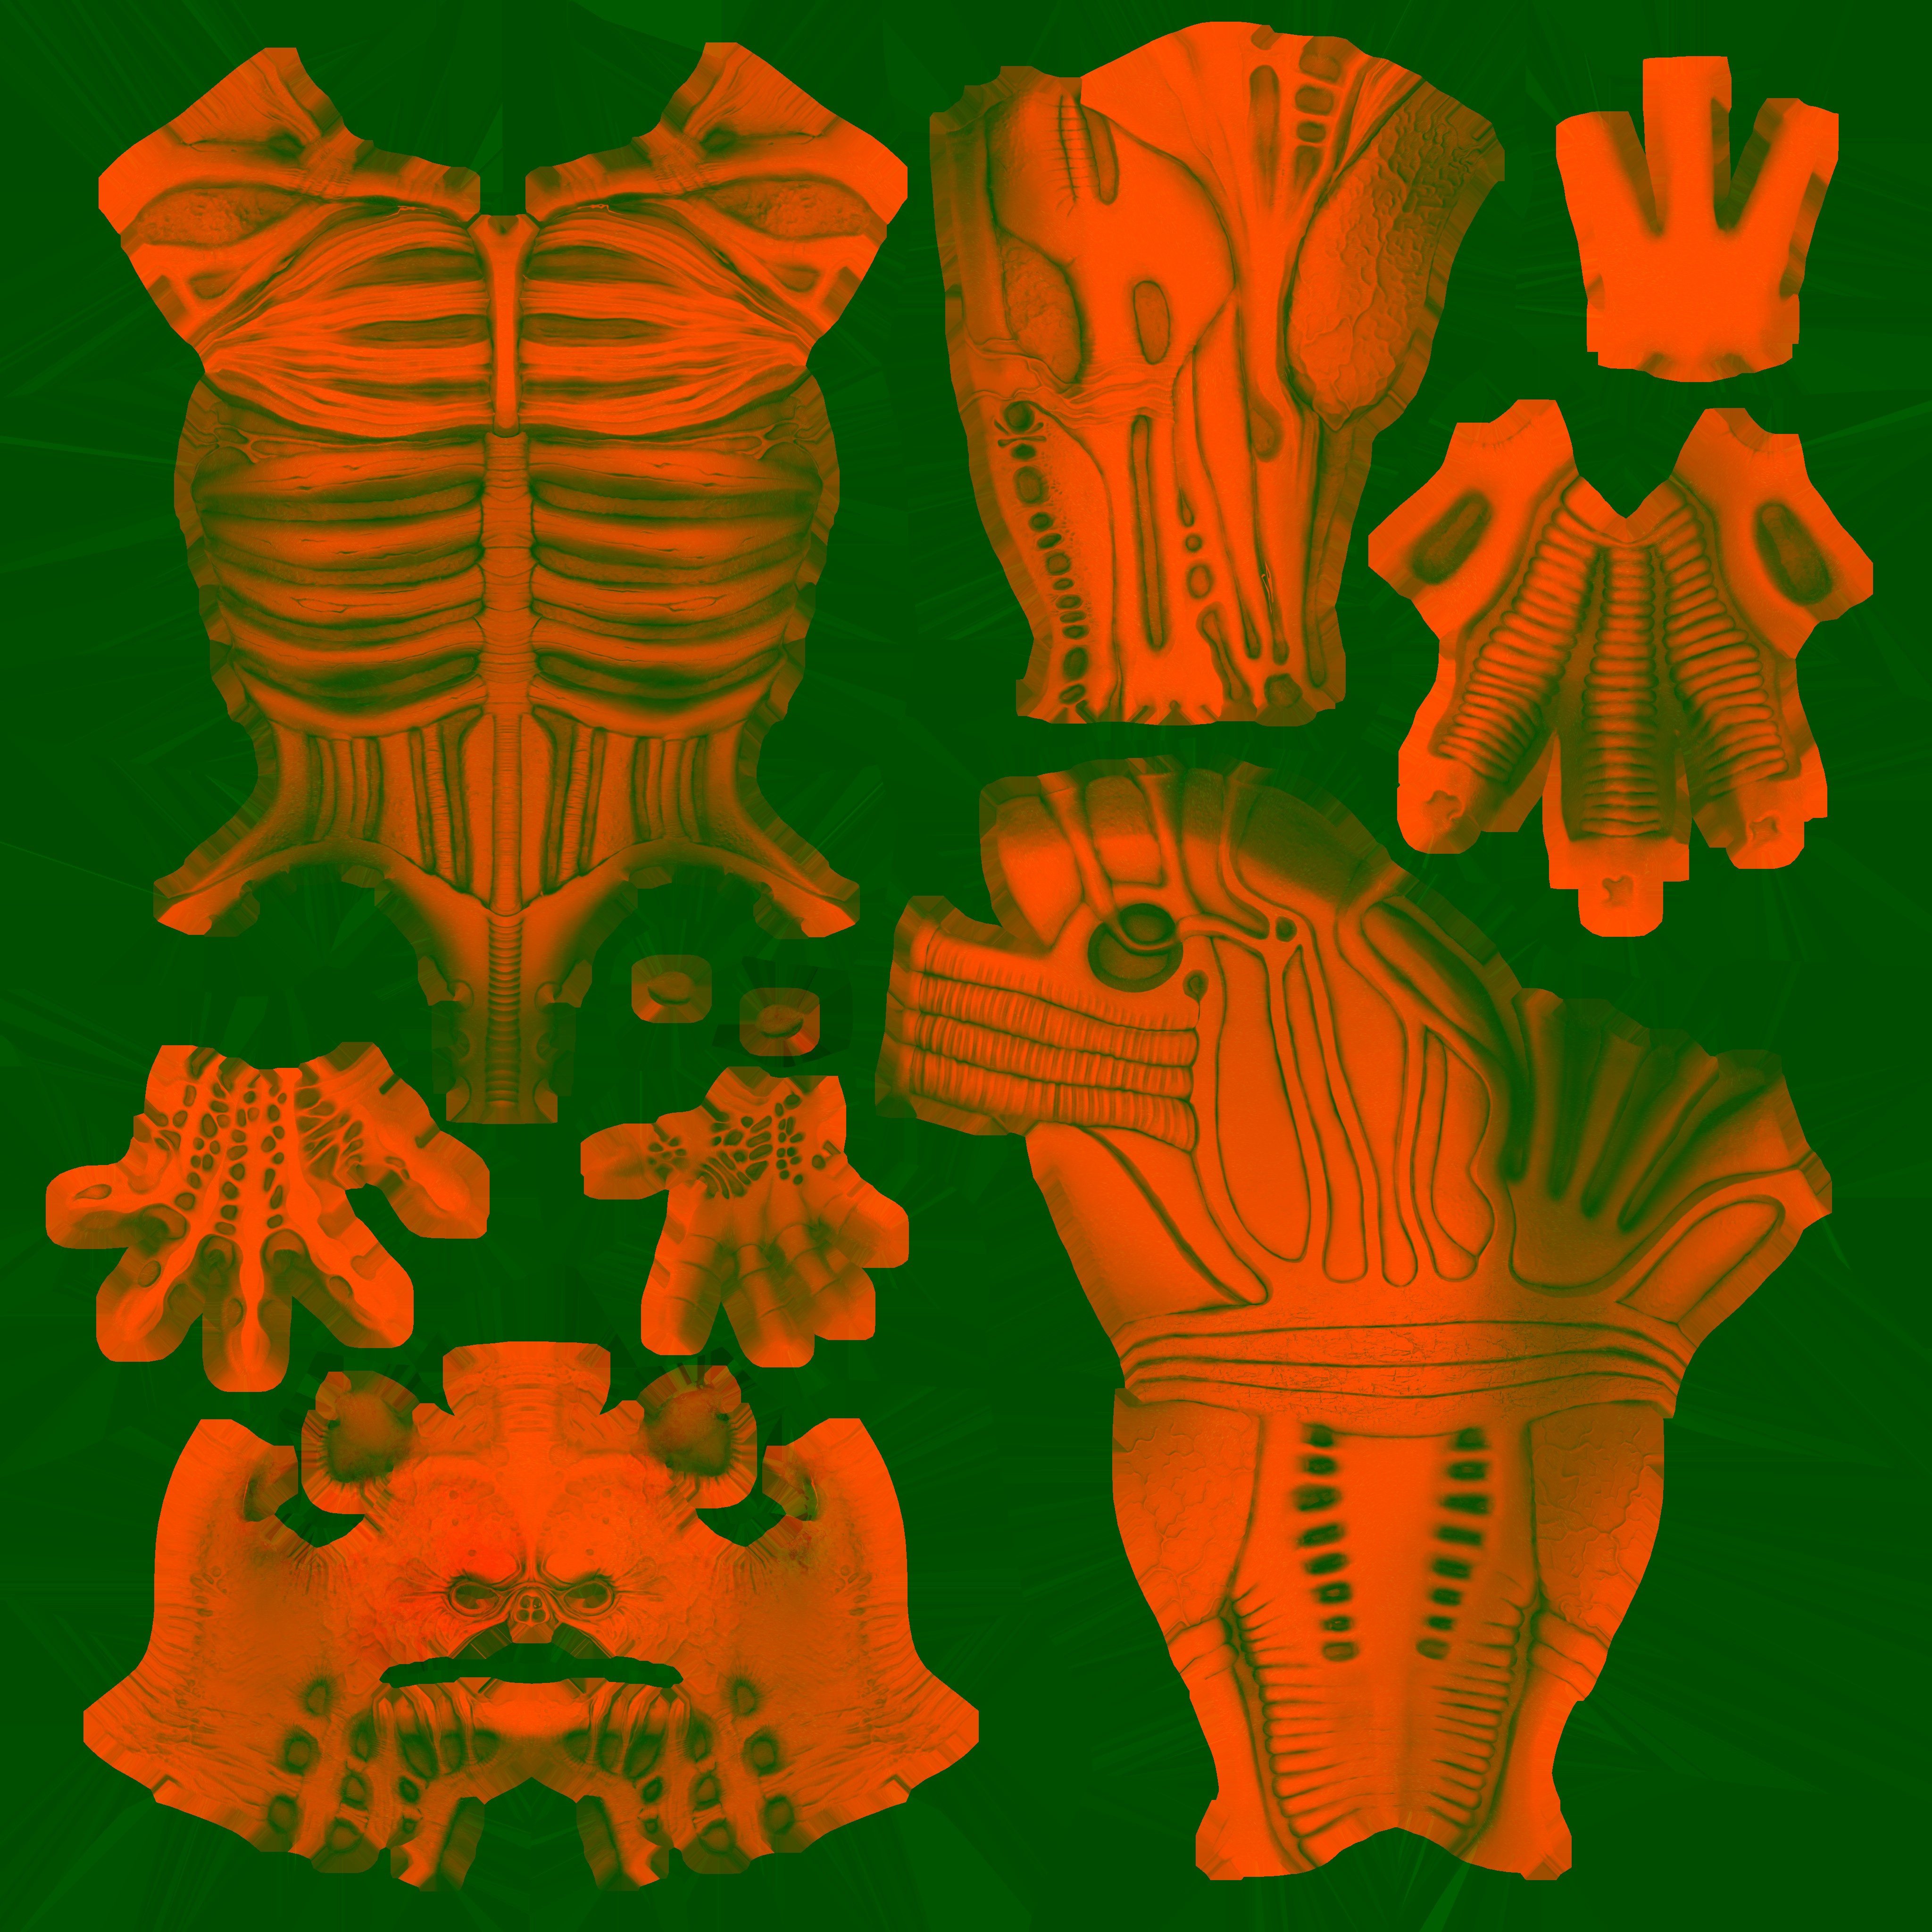
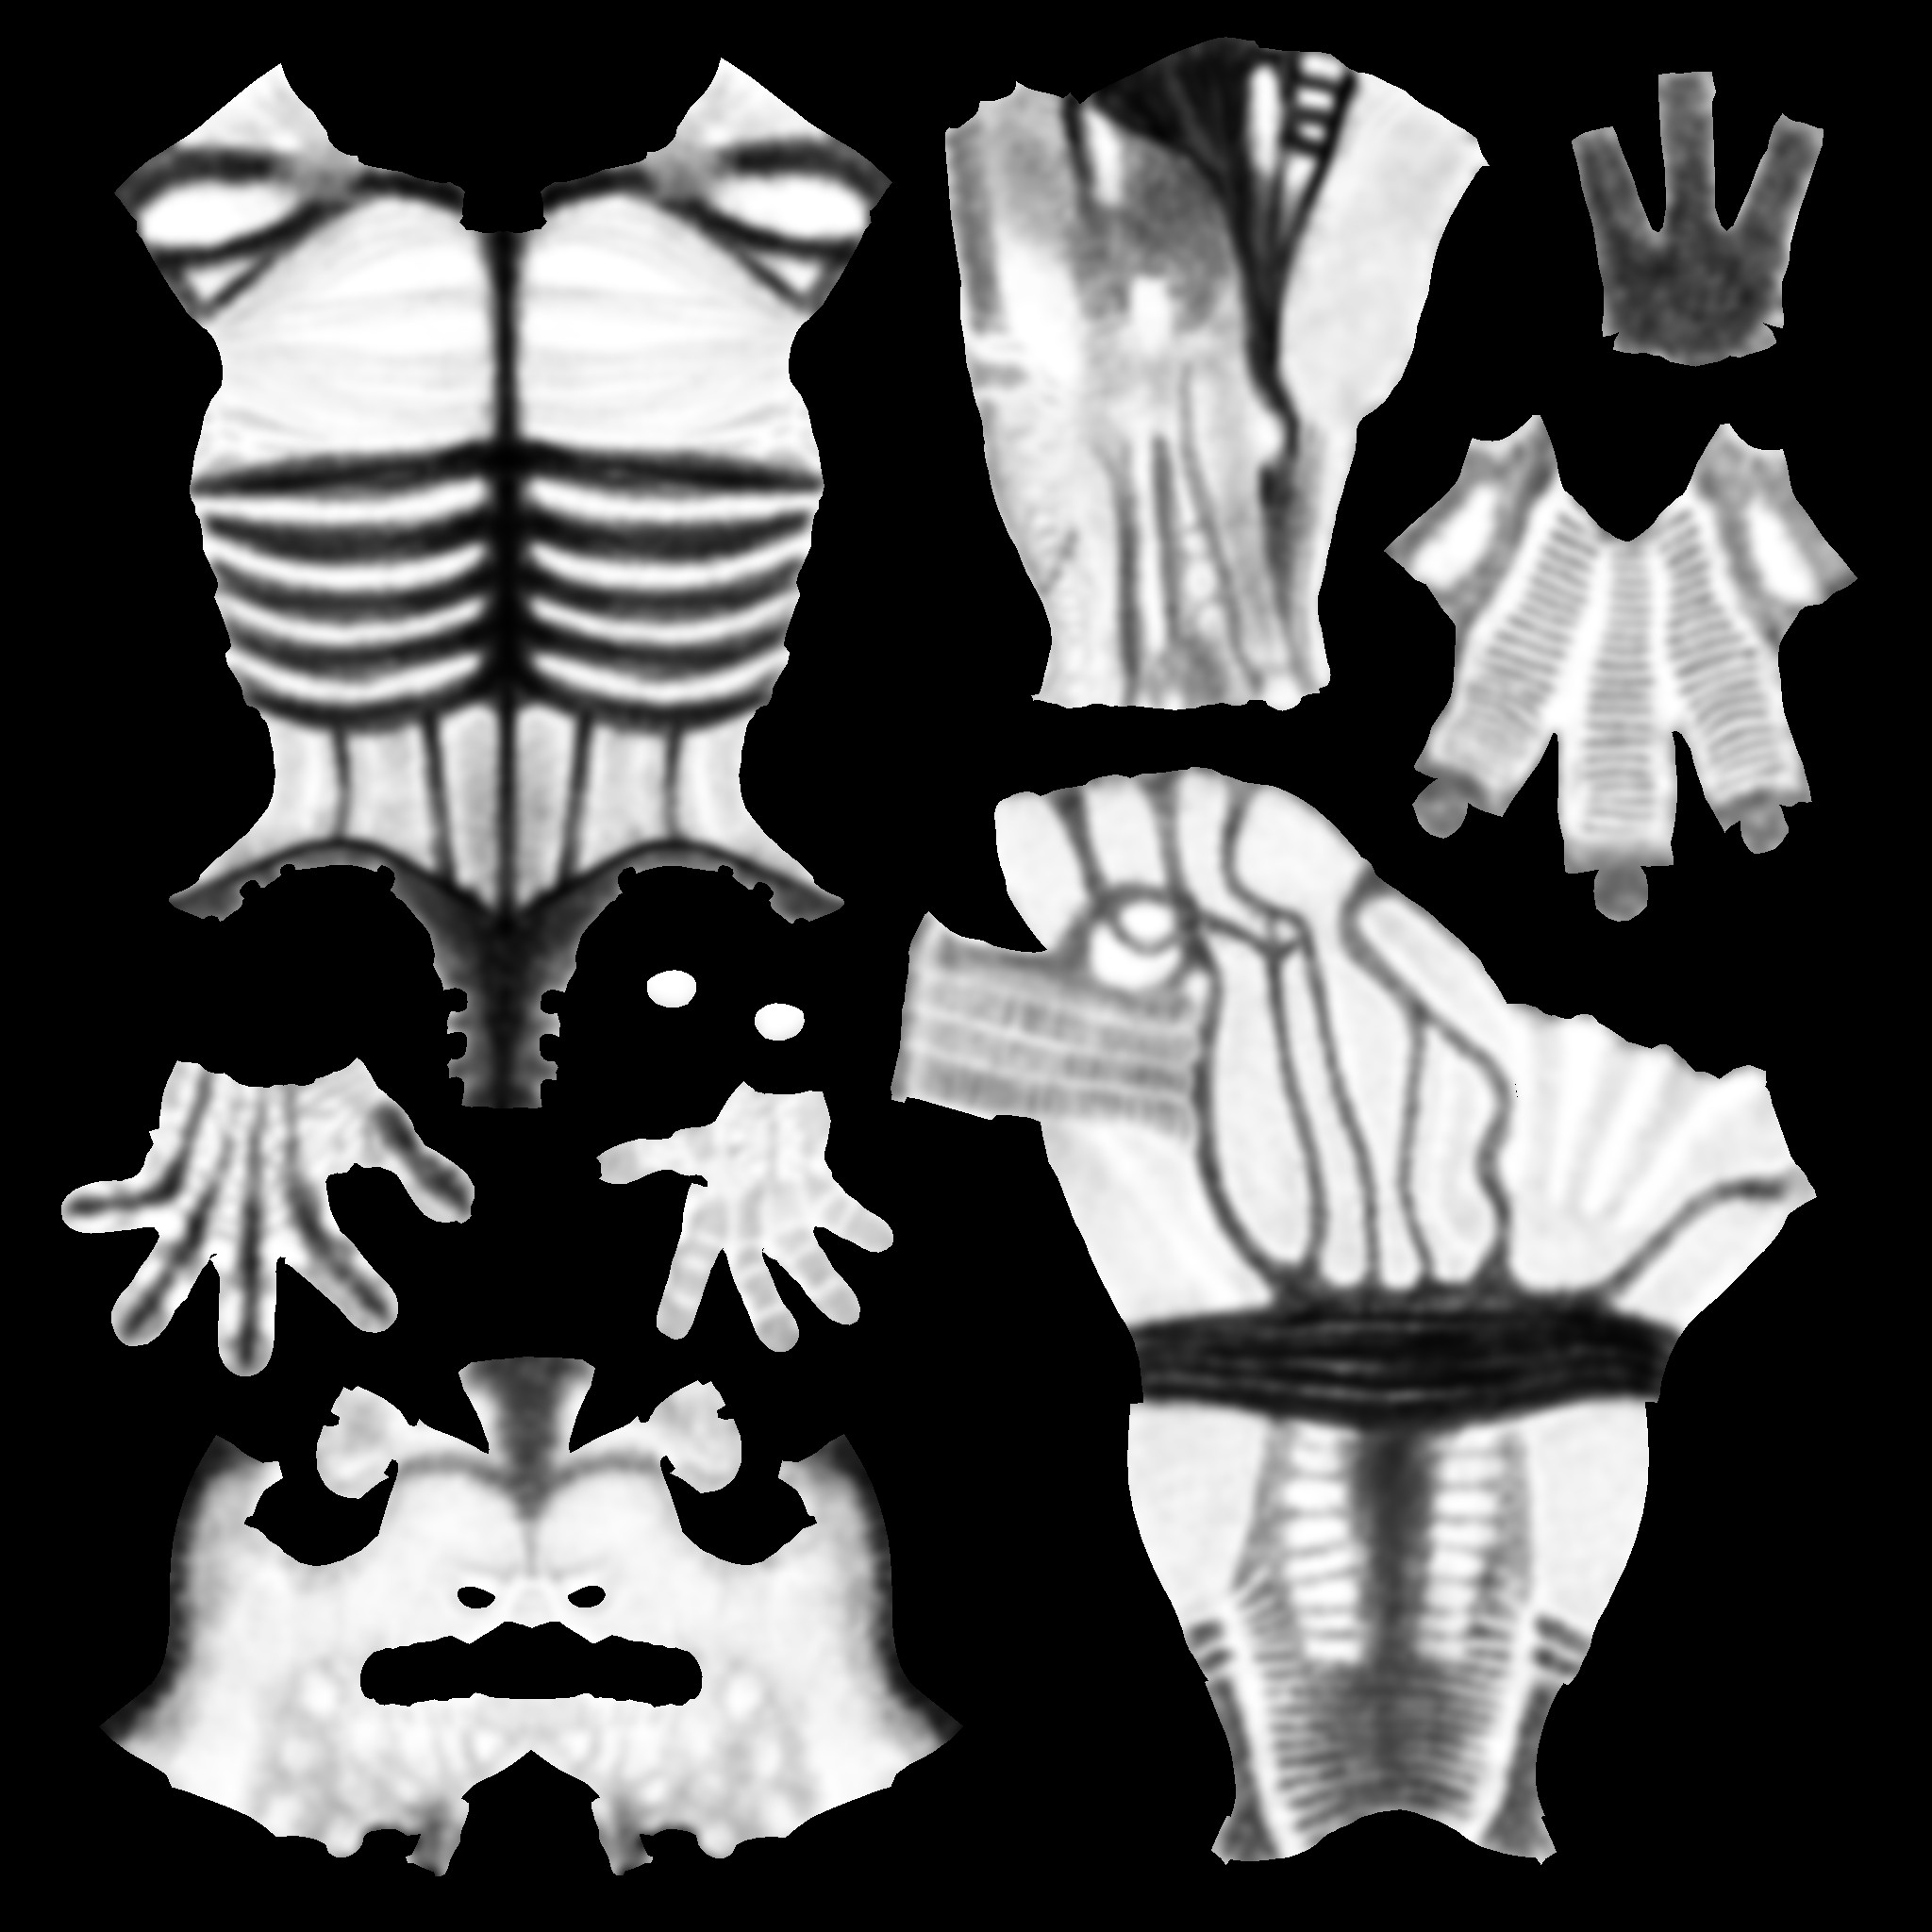
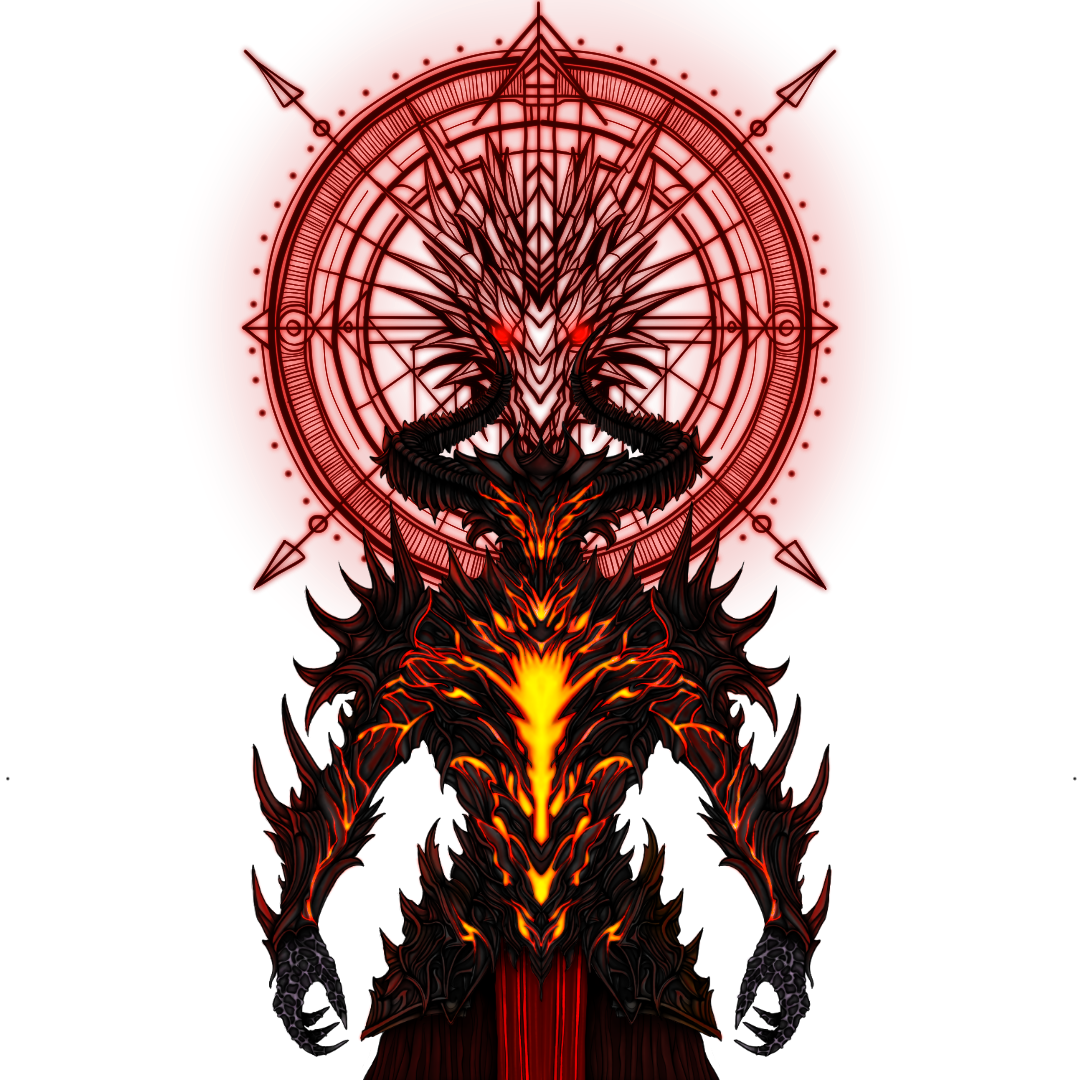
Moodboard and visual research for the development of the project’s main creature. The study phase focused on monstrous anatomy, human contaminations, and organic details, explored through targeted references for the body, face, and dentition. The final concept merges these influences into a coherent and distinctive design, featuring a dedicated color palette and a layout optimized for the next stages of 3D sculpting and texturing.
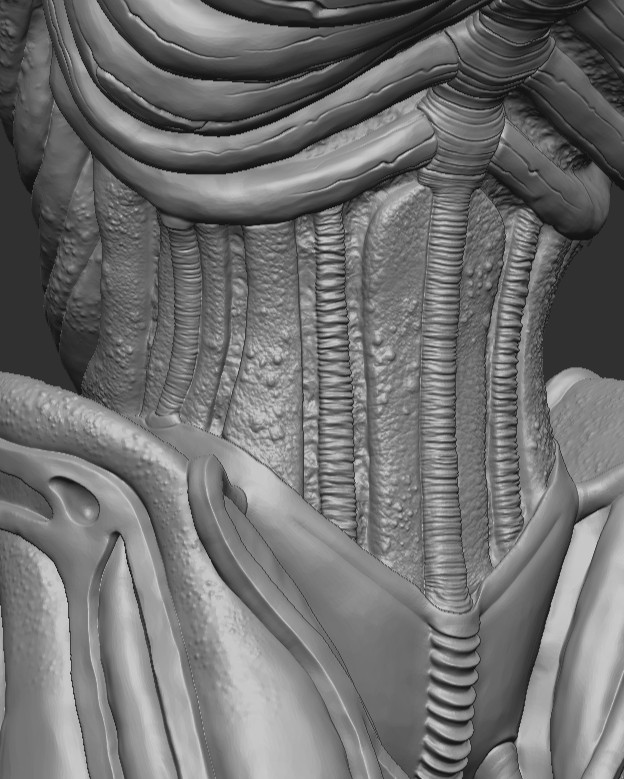
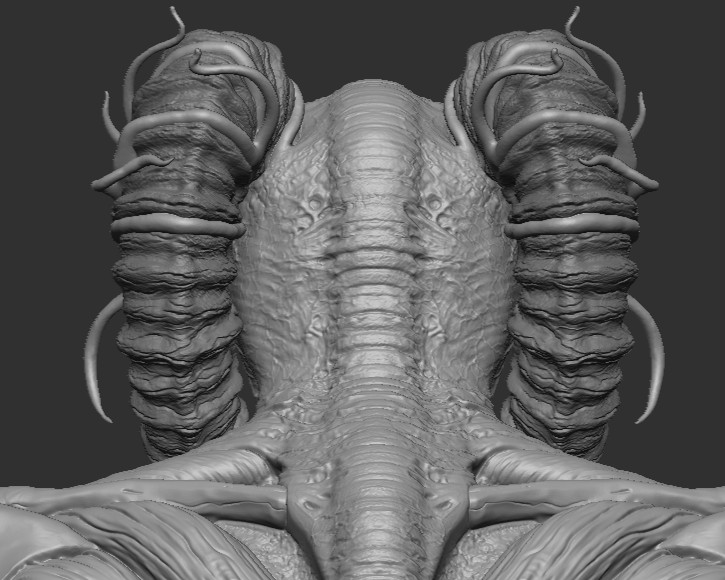
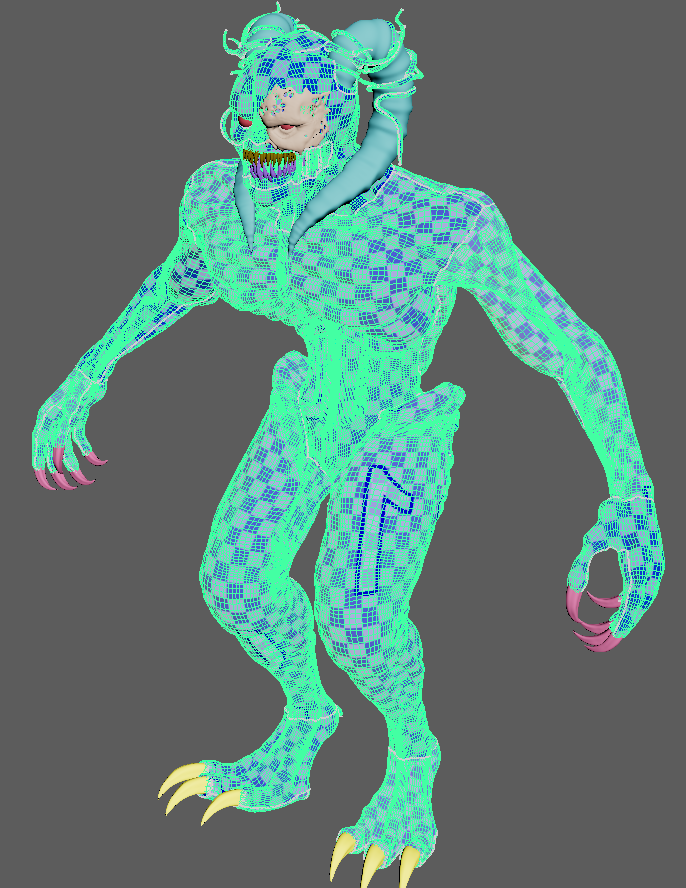
High-poly sculpting of the creature, created in ZBrush based on references and the initial concept. The goal was to achieve a believable yet unsettling morphology, consistent with the project’s horror-fantasy atmosphere.
The workflow was divided into several stages:


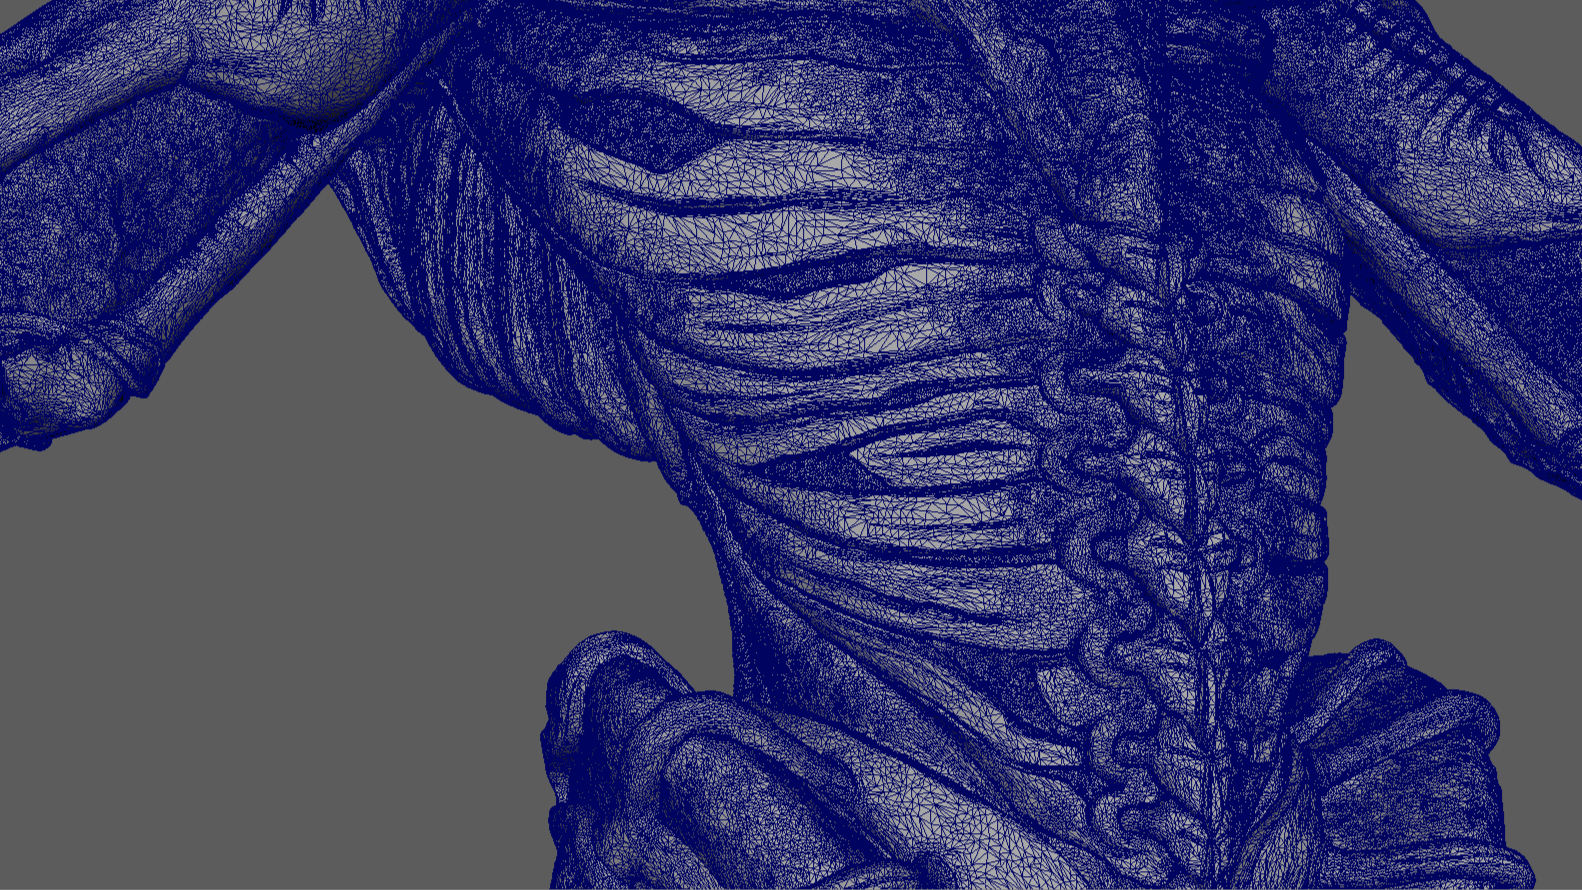
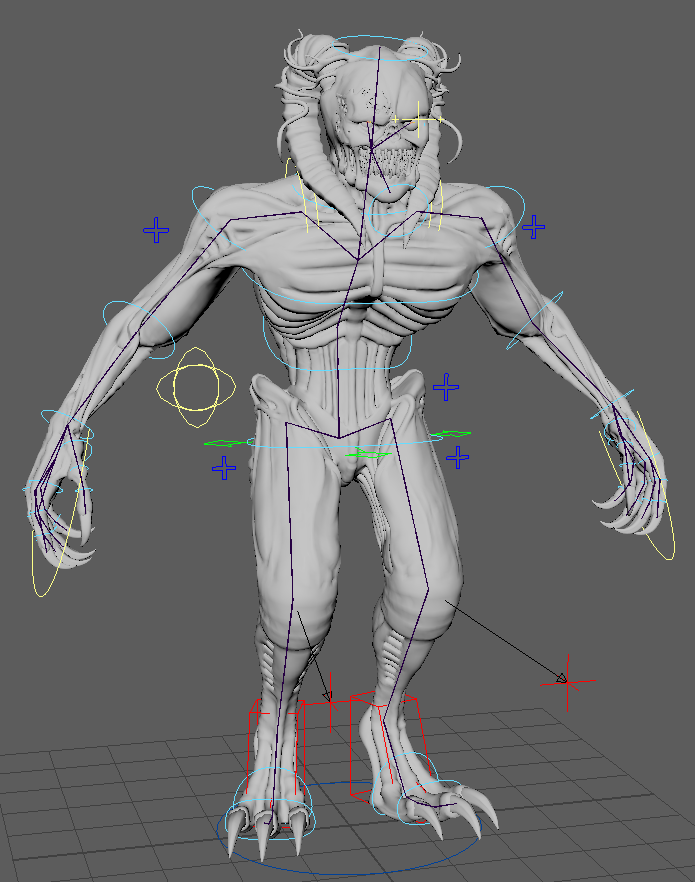
After the sculpting phase, I used Decimation Master in ZBrush to reduce the high-resolution mesh while preserving all primary details. The model was then exported as FBX and reworked in Maya through manual retopology using Quad Draw, creating a clean and optimized topology suitable for future animation rigs.
The polygon flow was carefully designed to ensure natural deformation in critical areas (shoulders, elbows, pelvis, knees), with strategically placed loops to maintain smoothness and stability during movement.


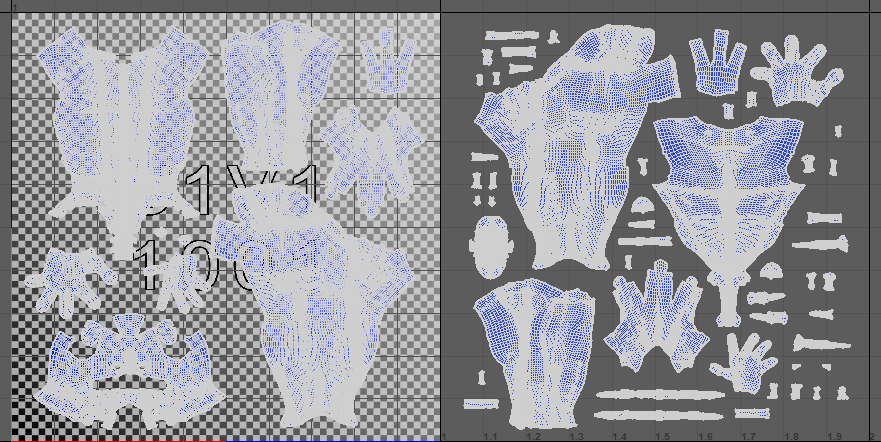
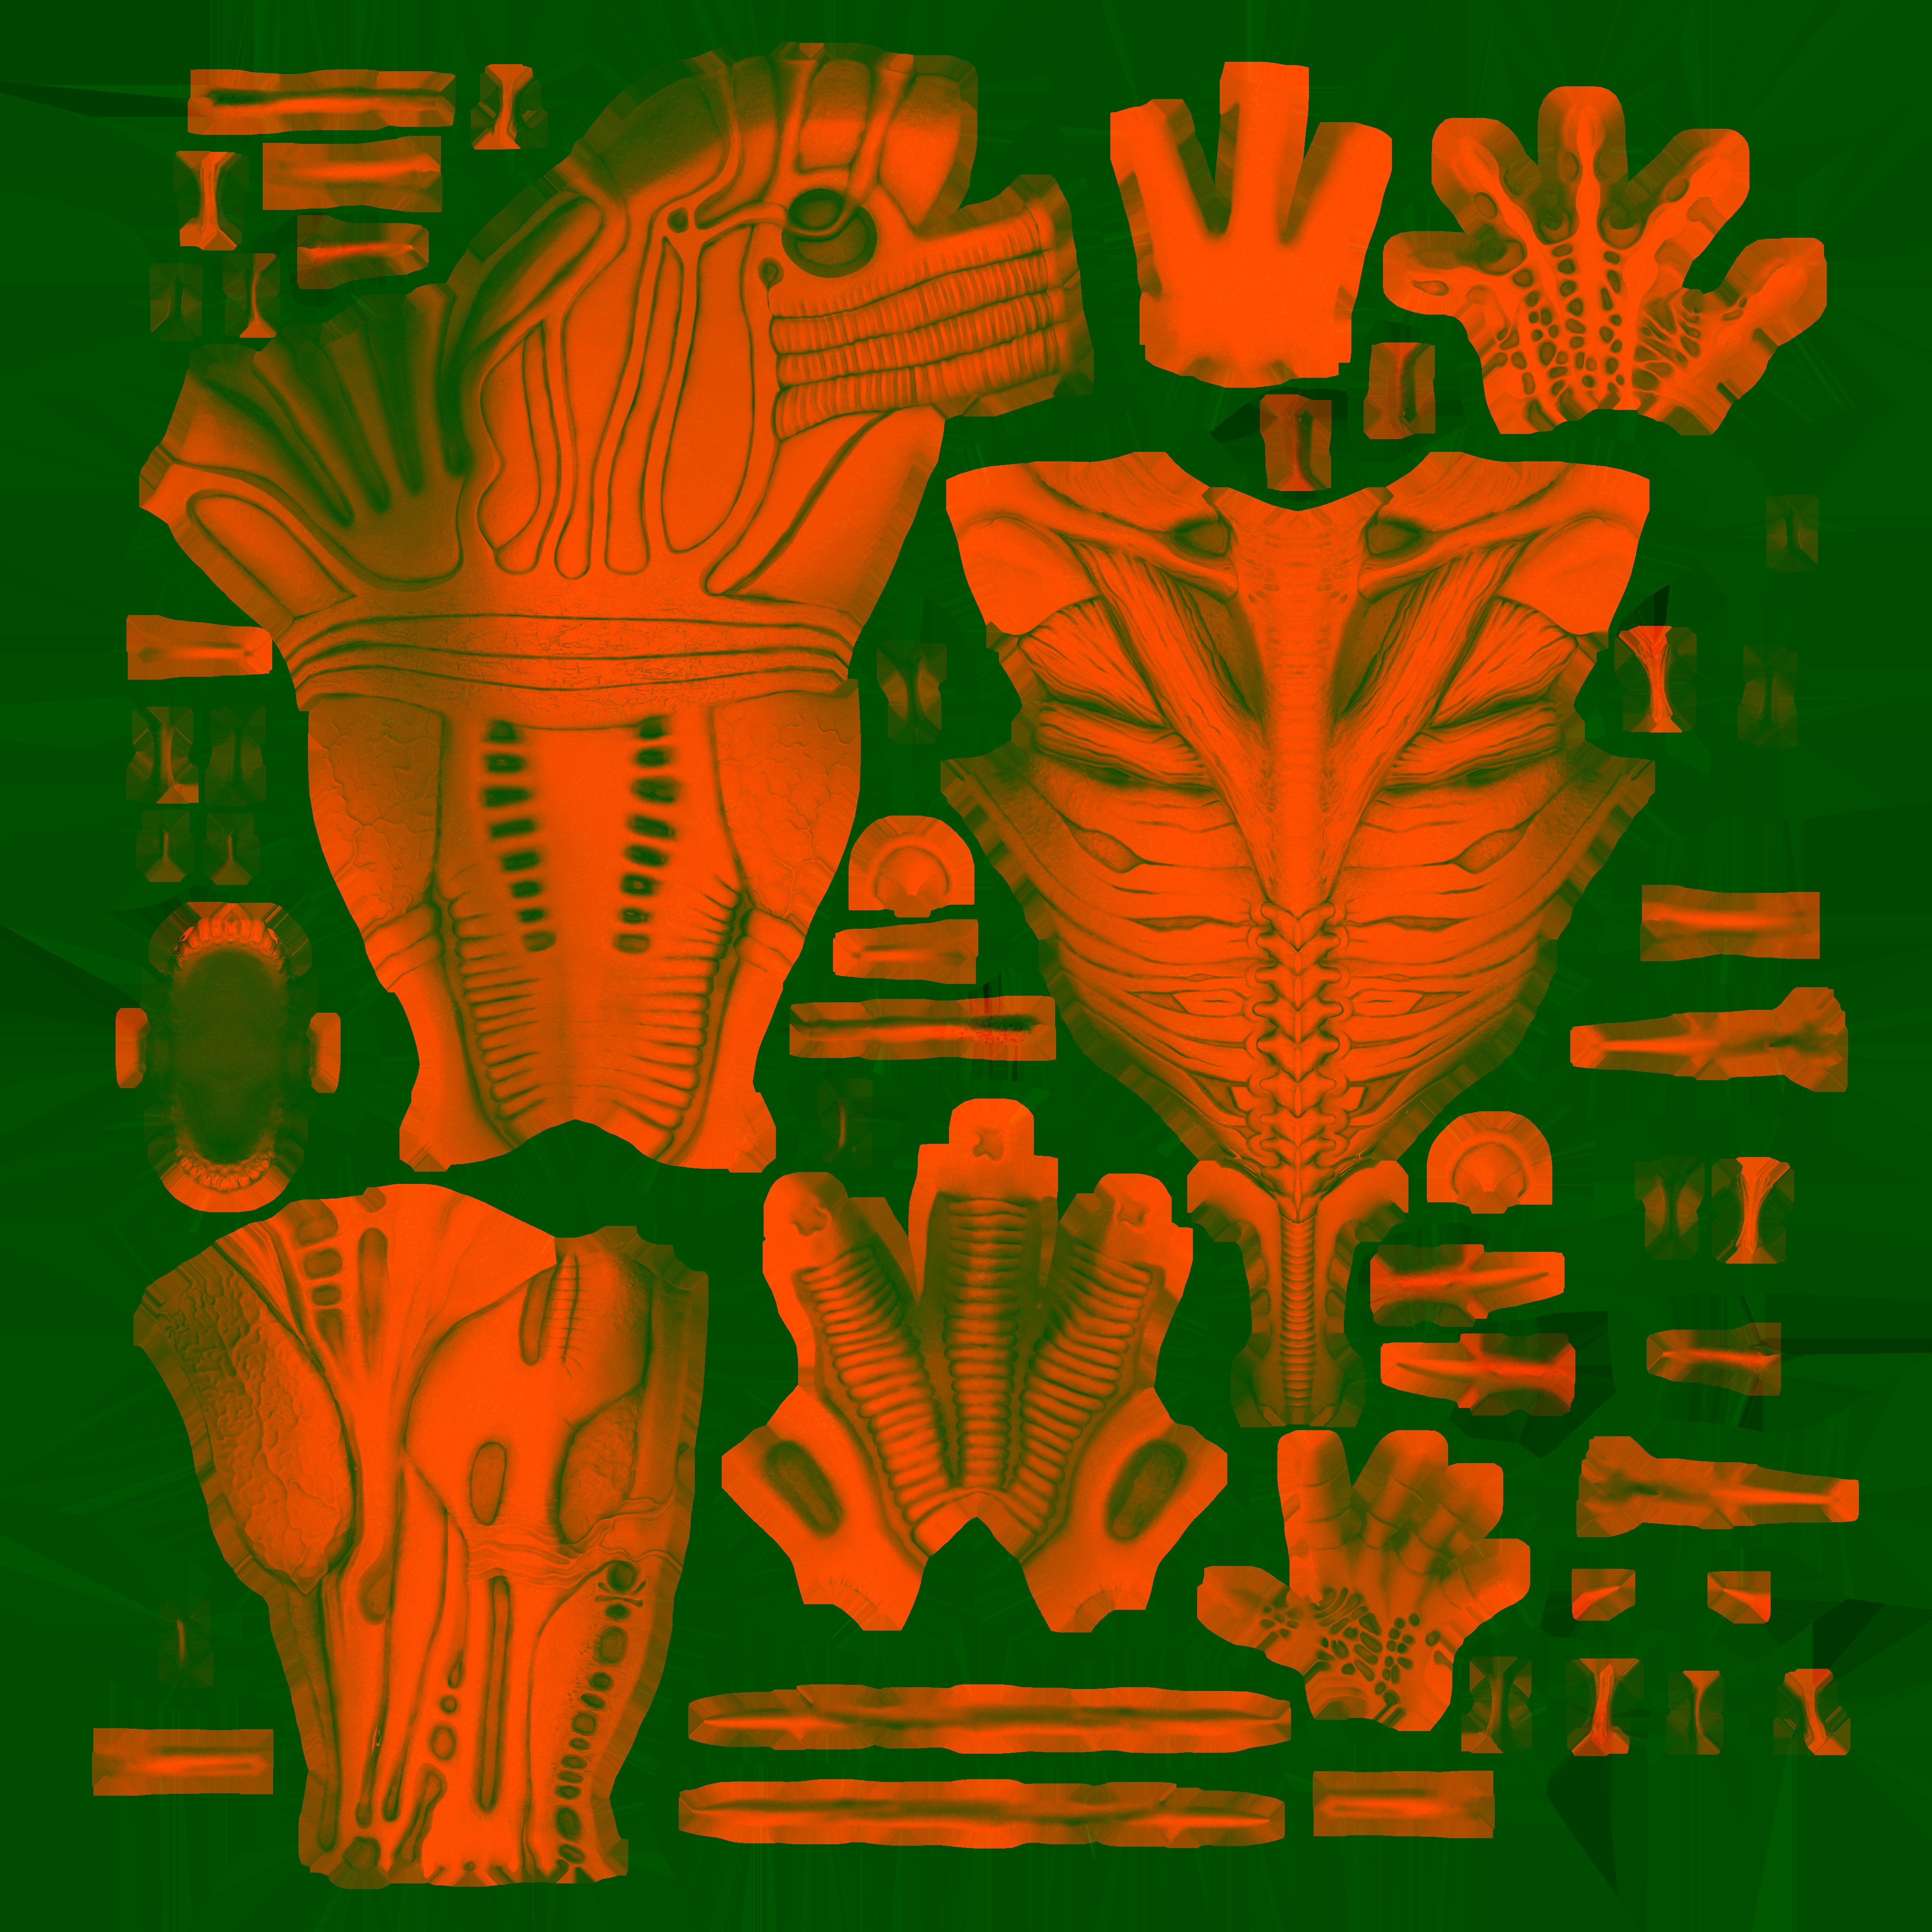
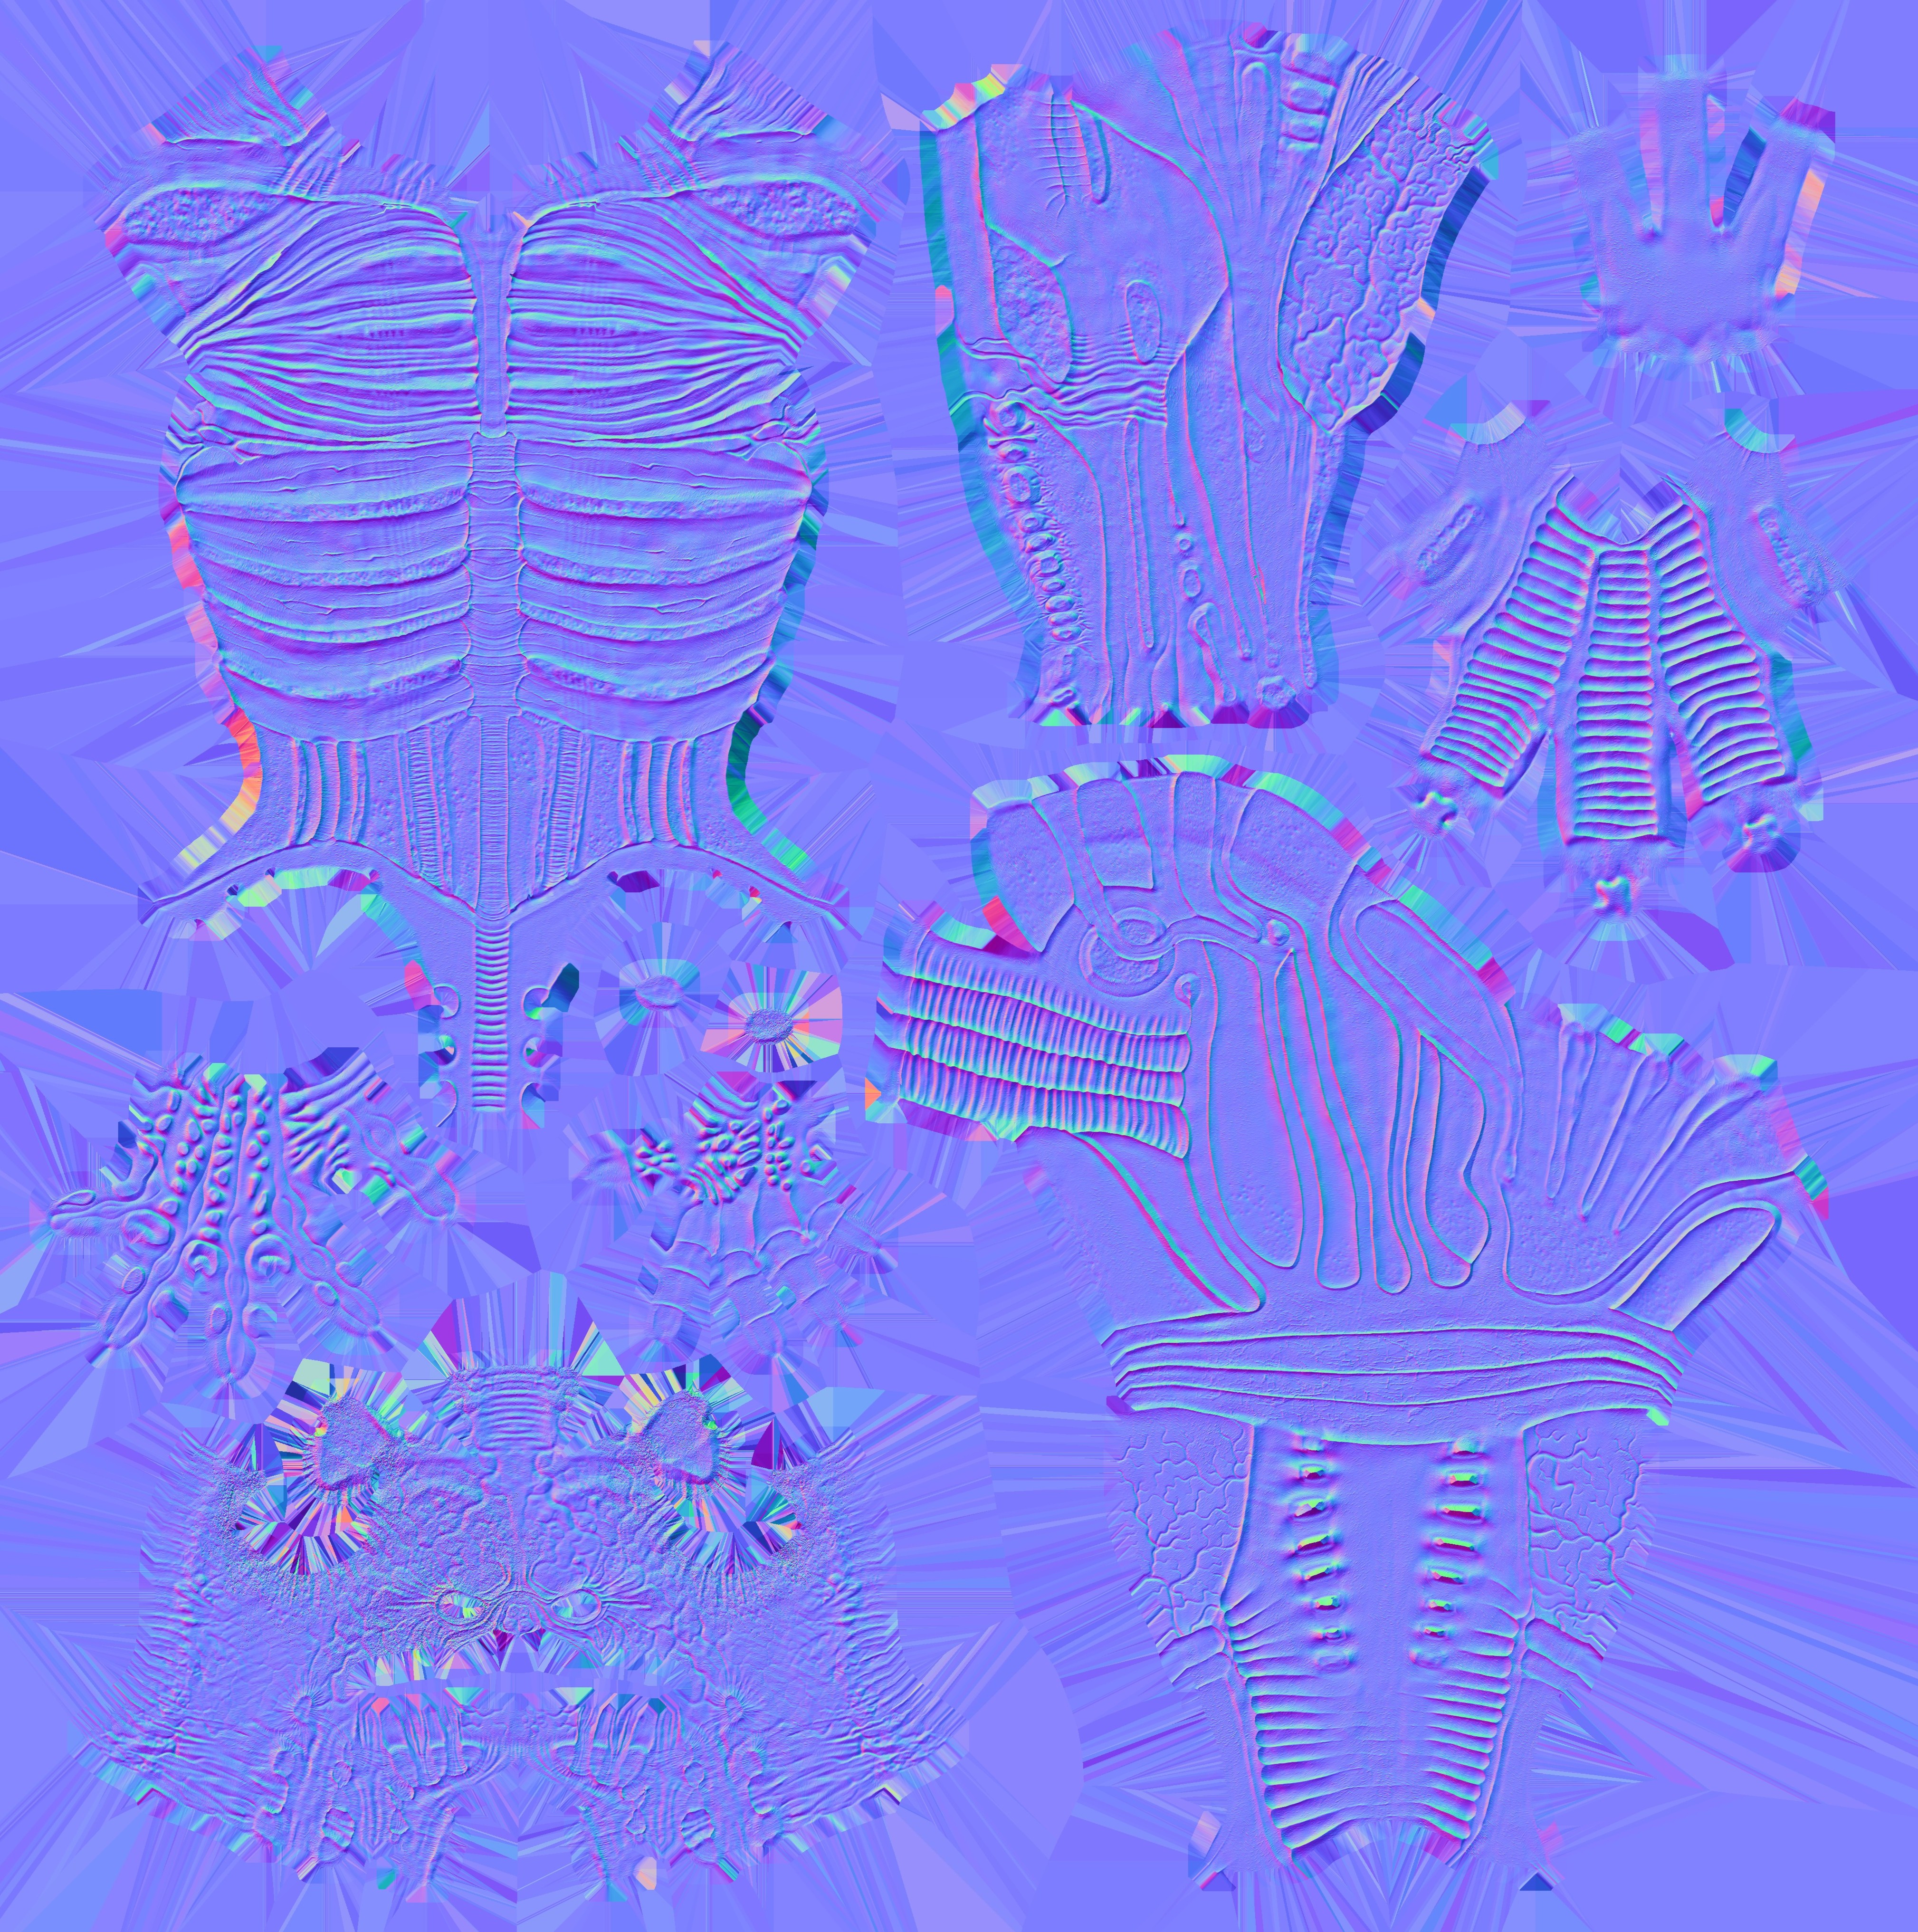
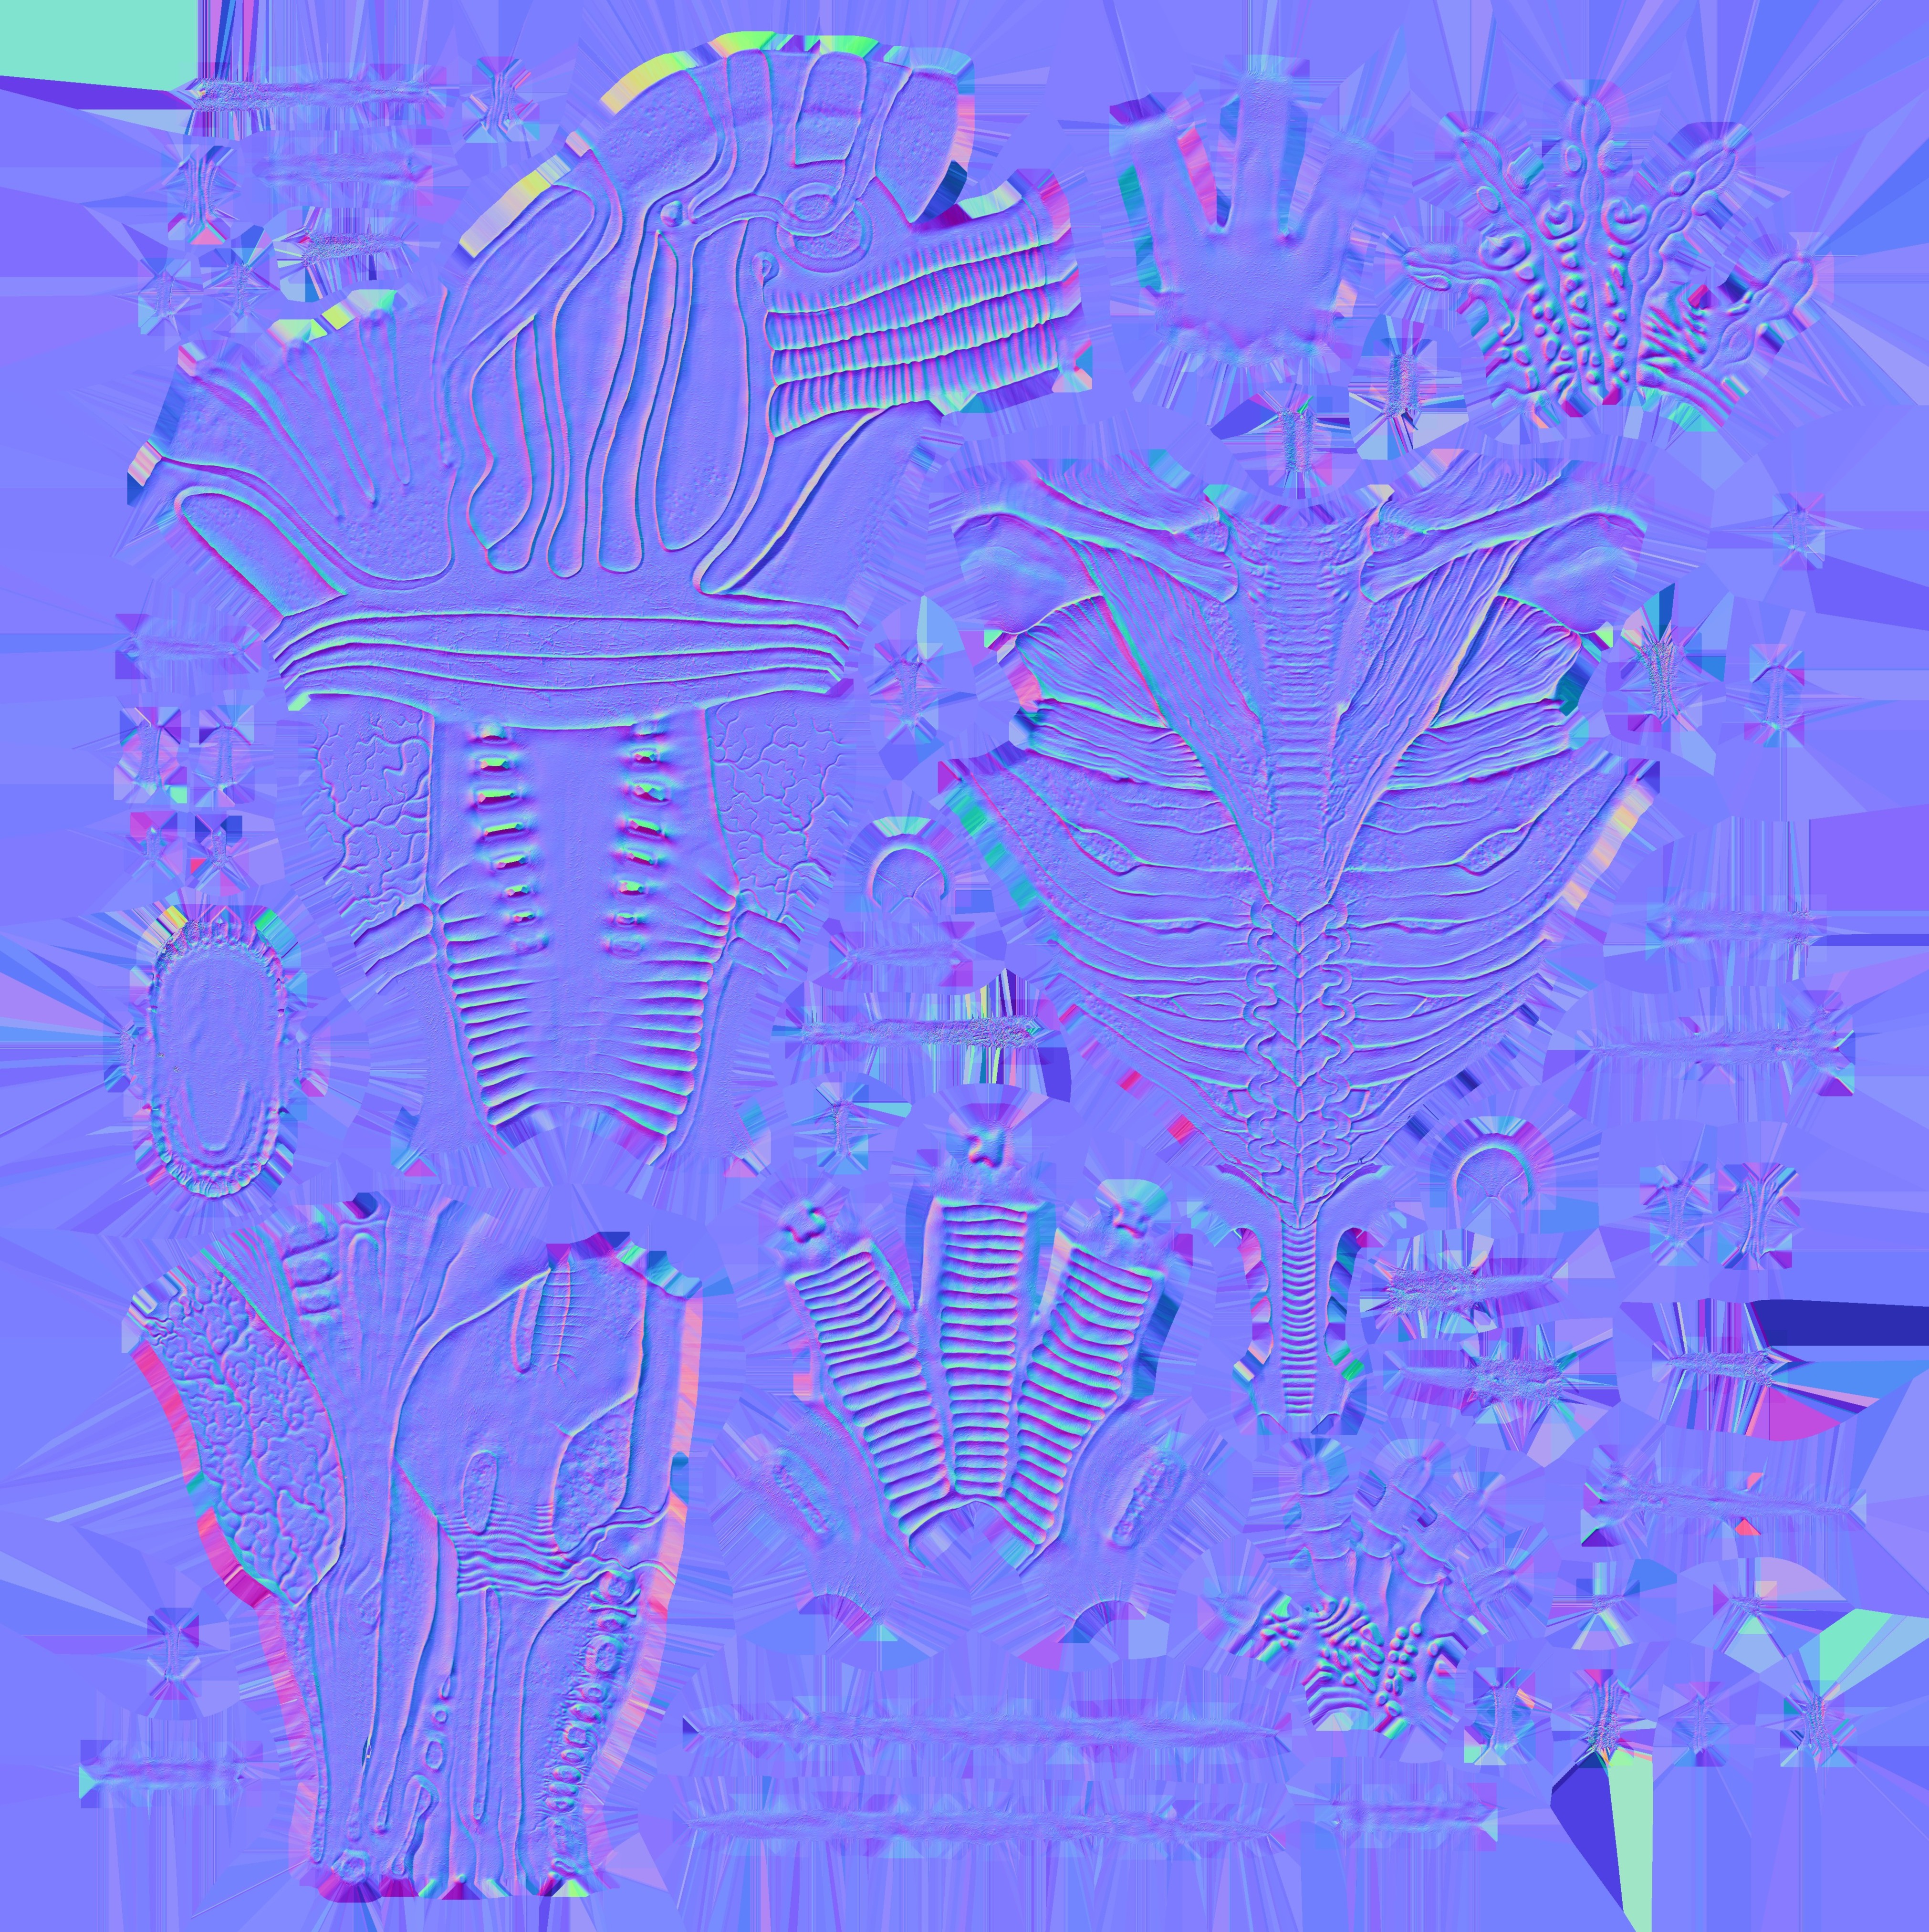
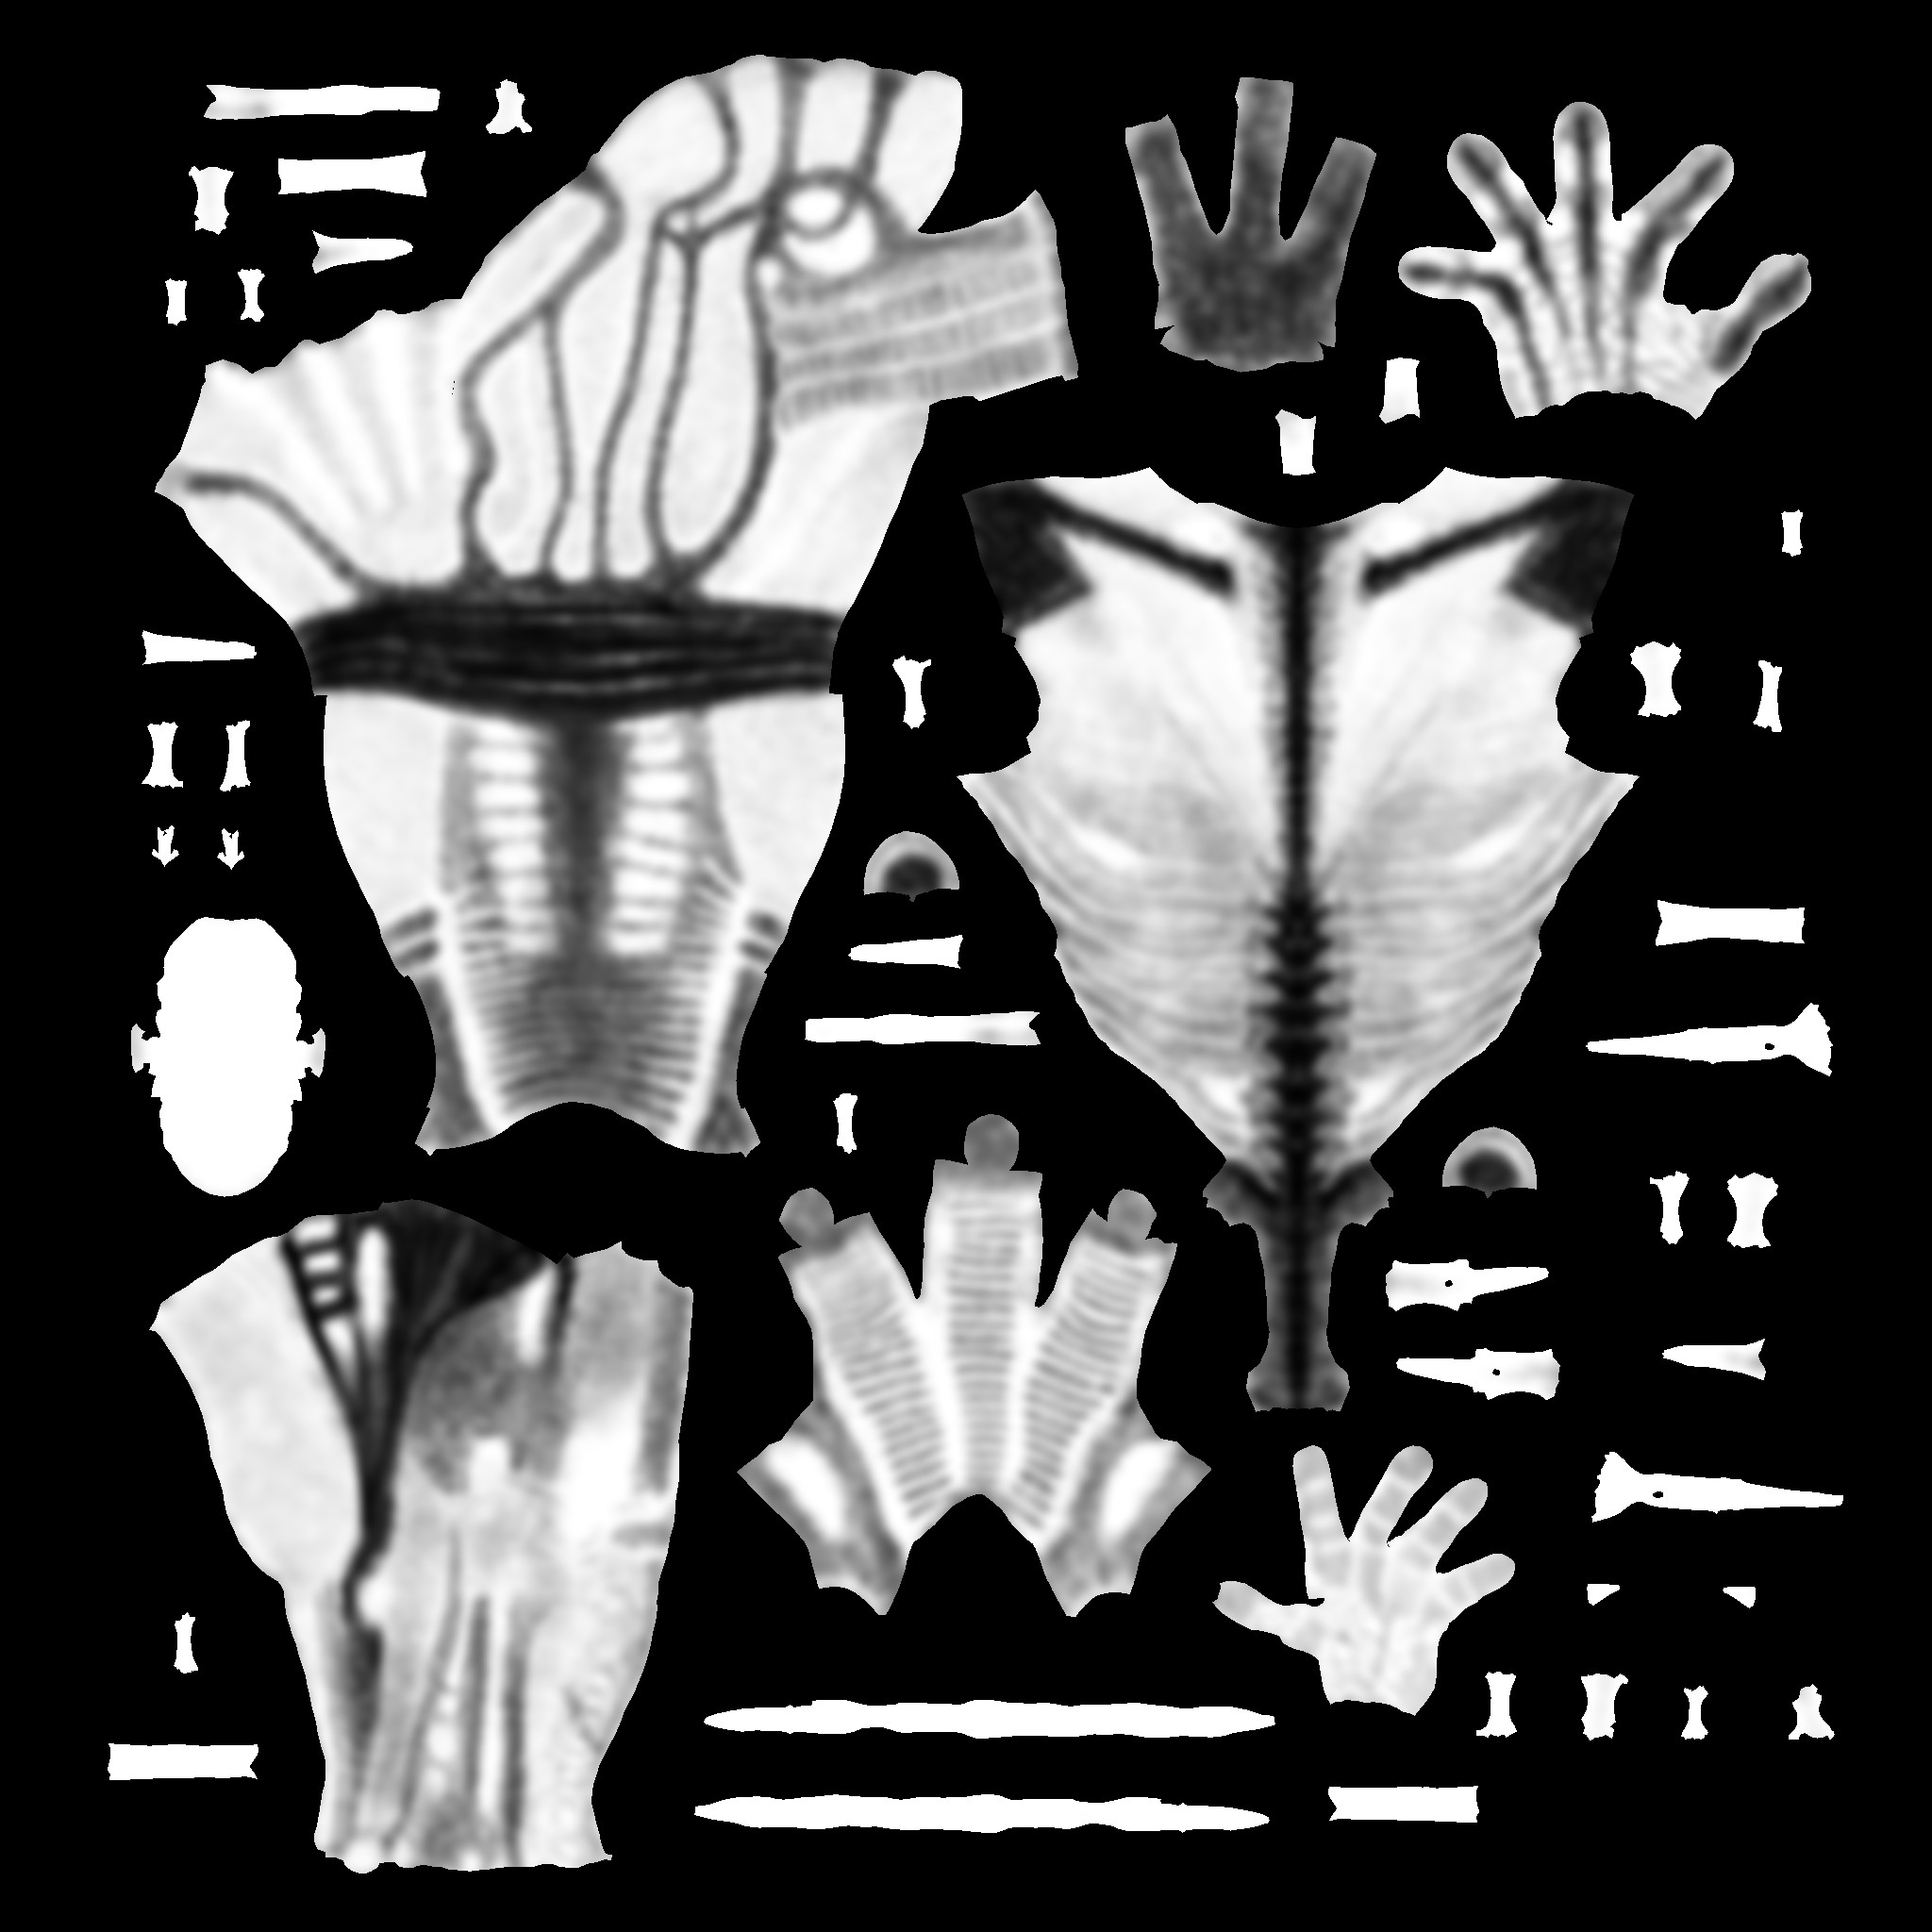
After the retopology phase, I created a clean and optimized UV layout designed for PBR texturing in Substance Painter. To ensure high visual quality on the main character, I adopted the UDIM workflow on the primary body mesh, distributing the UVs across multiple tiles to increase texture resolution. The tile organization was carefully structured to maximize visual fidelity, simplify material management, and maintain full compatibility with real-time rendering engines.
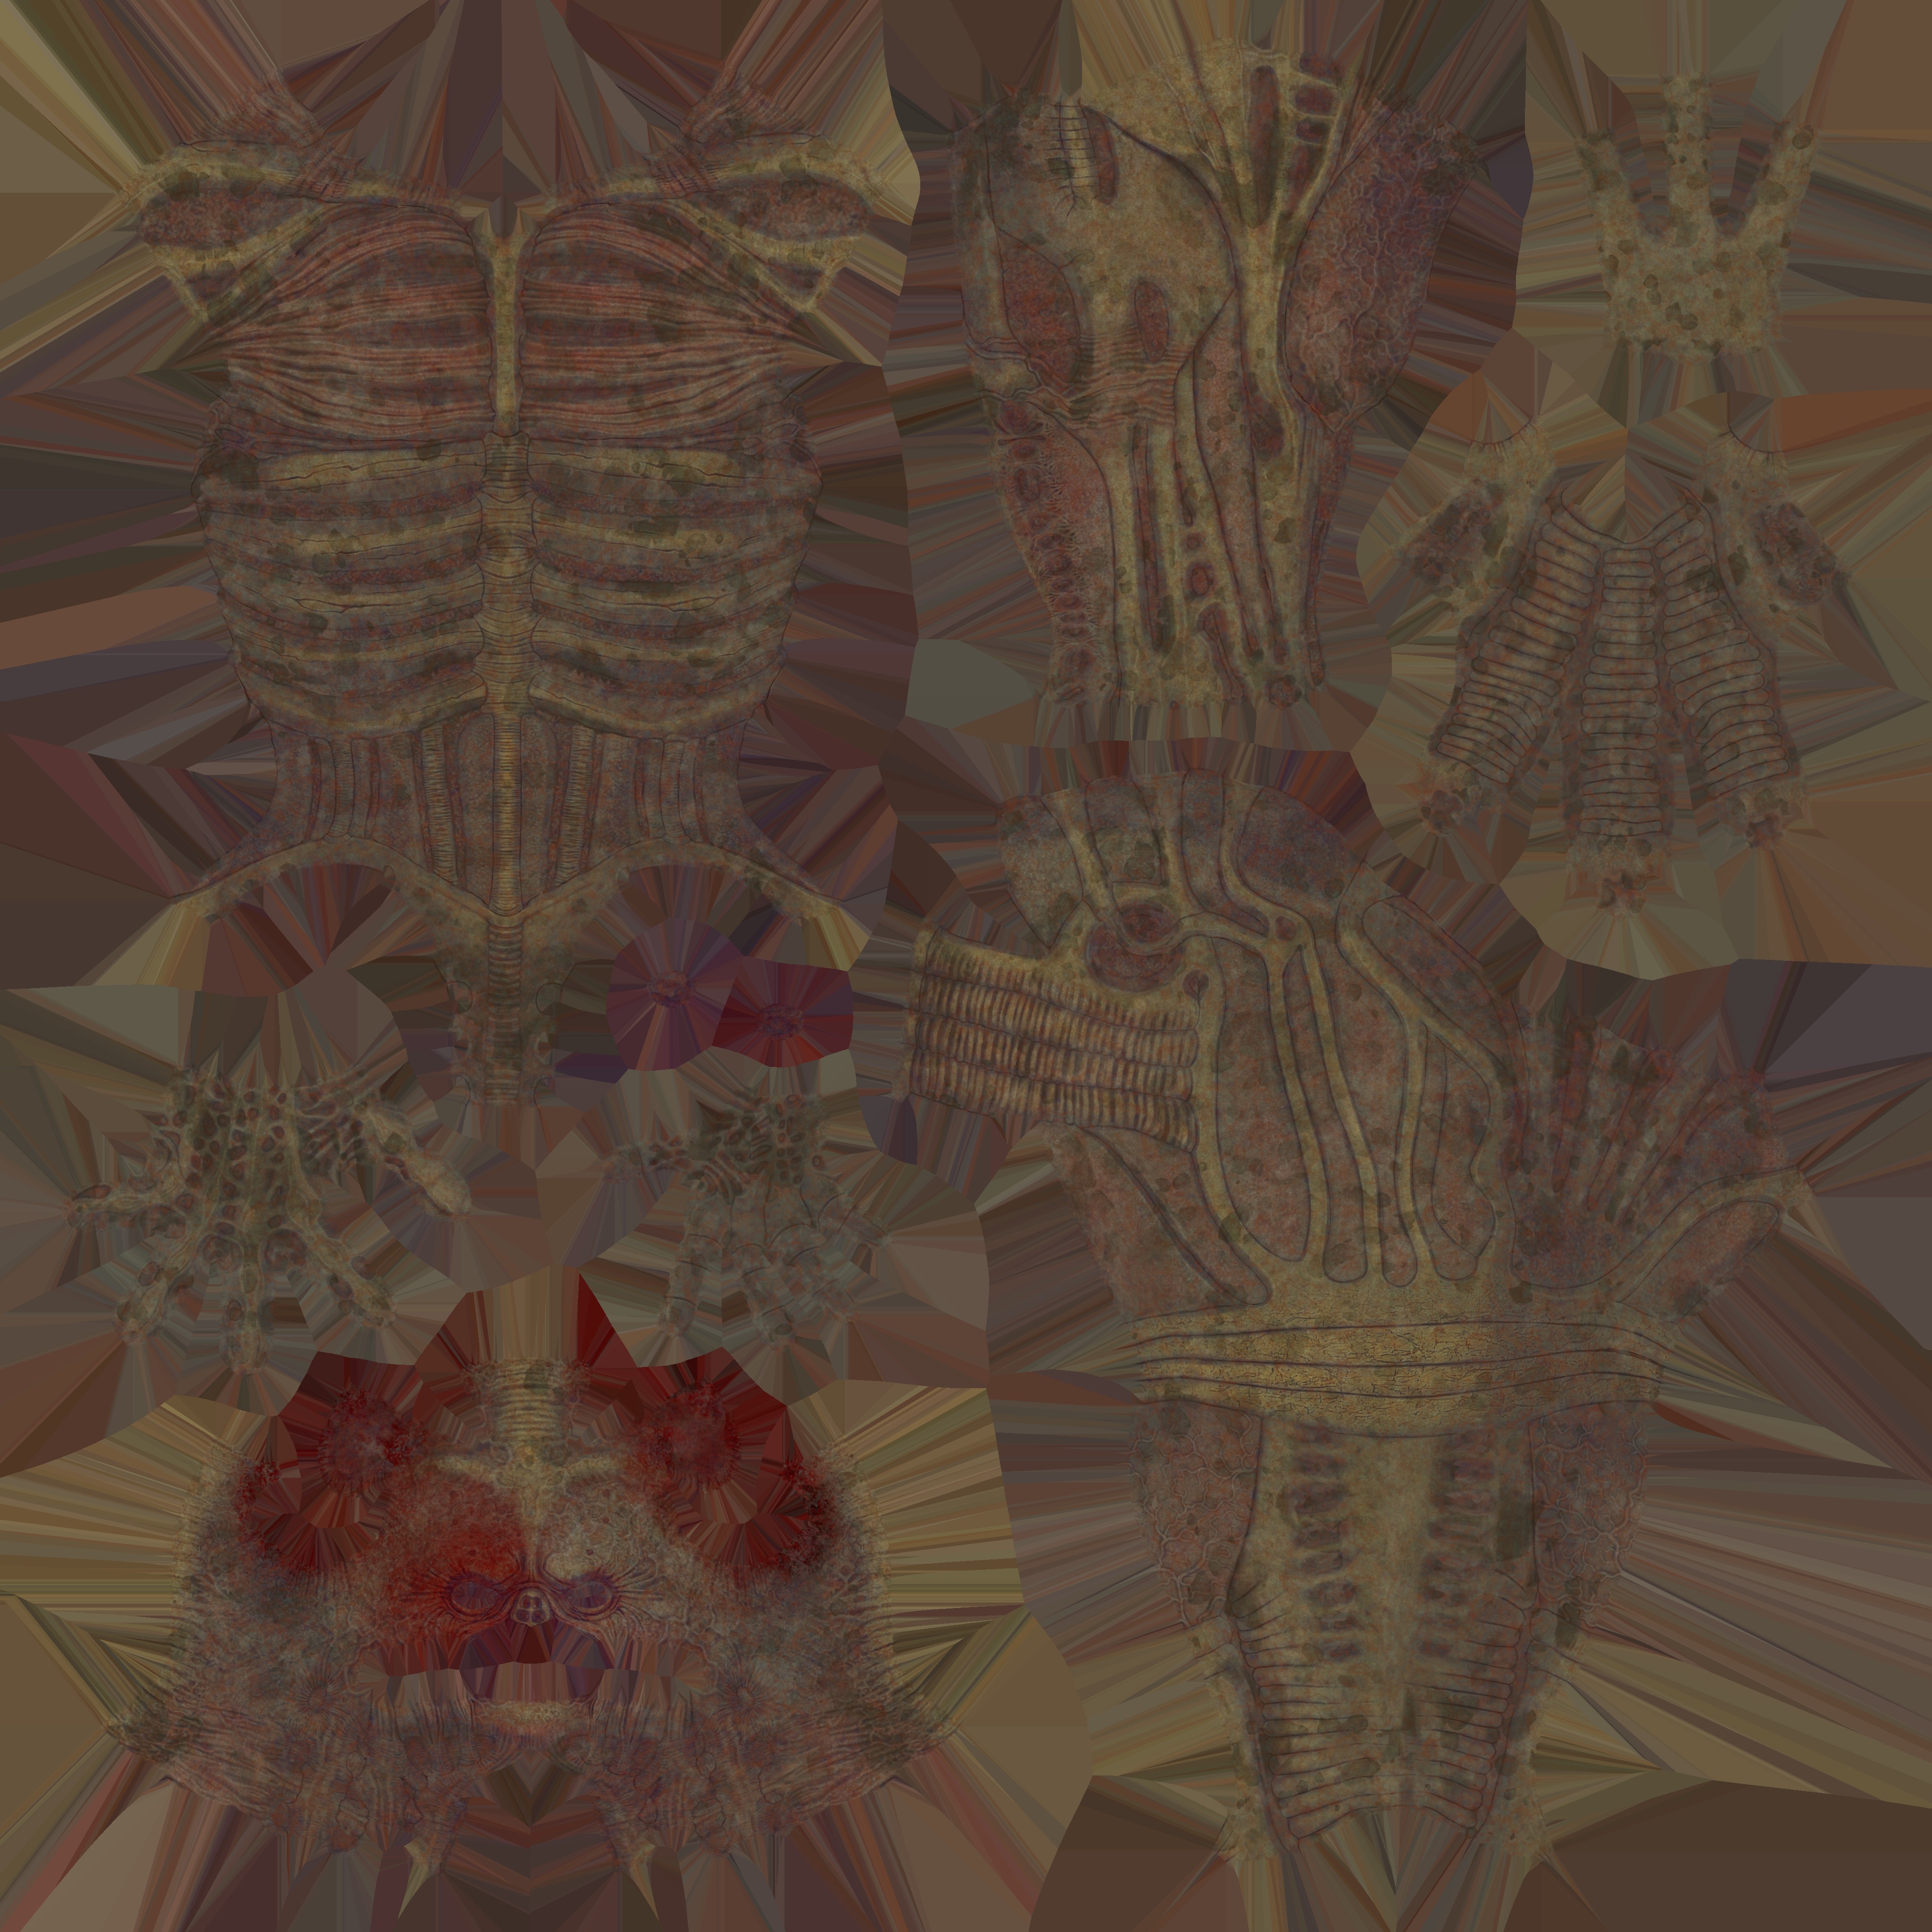
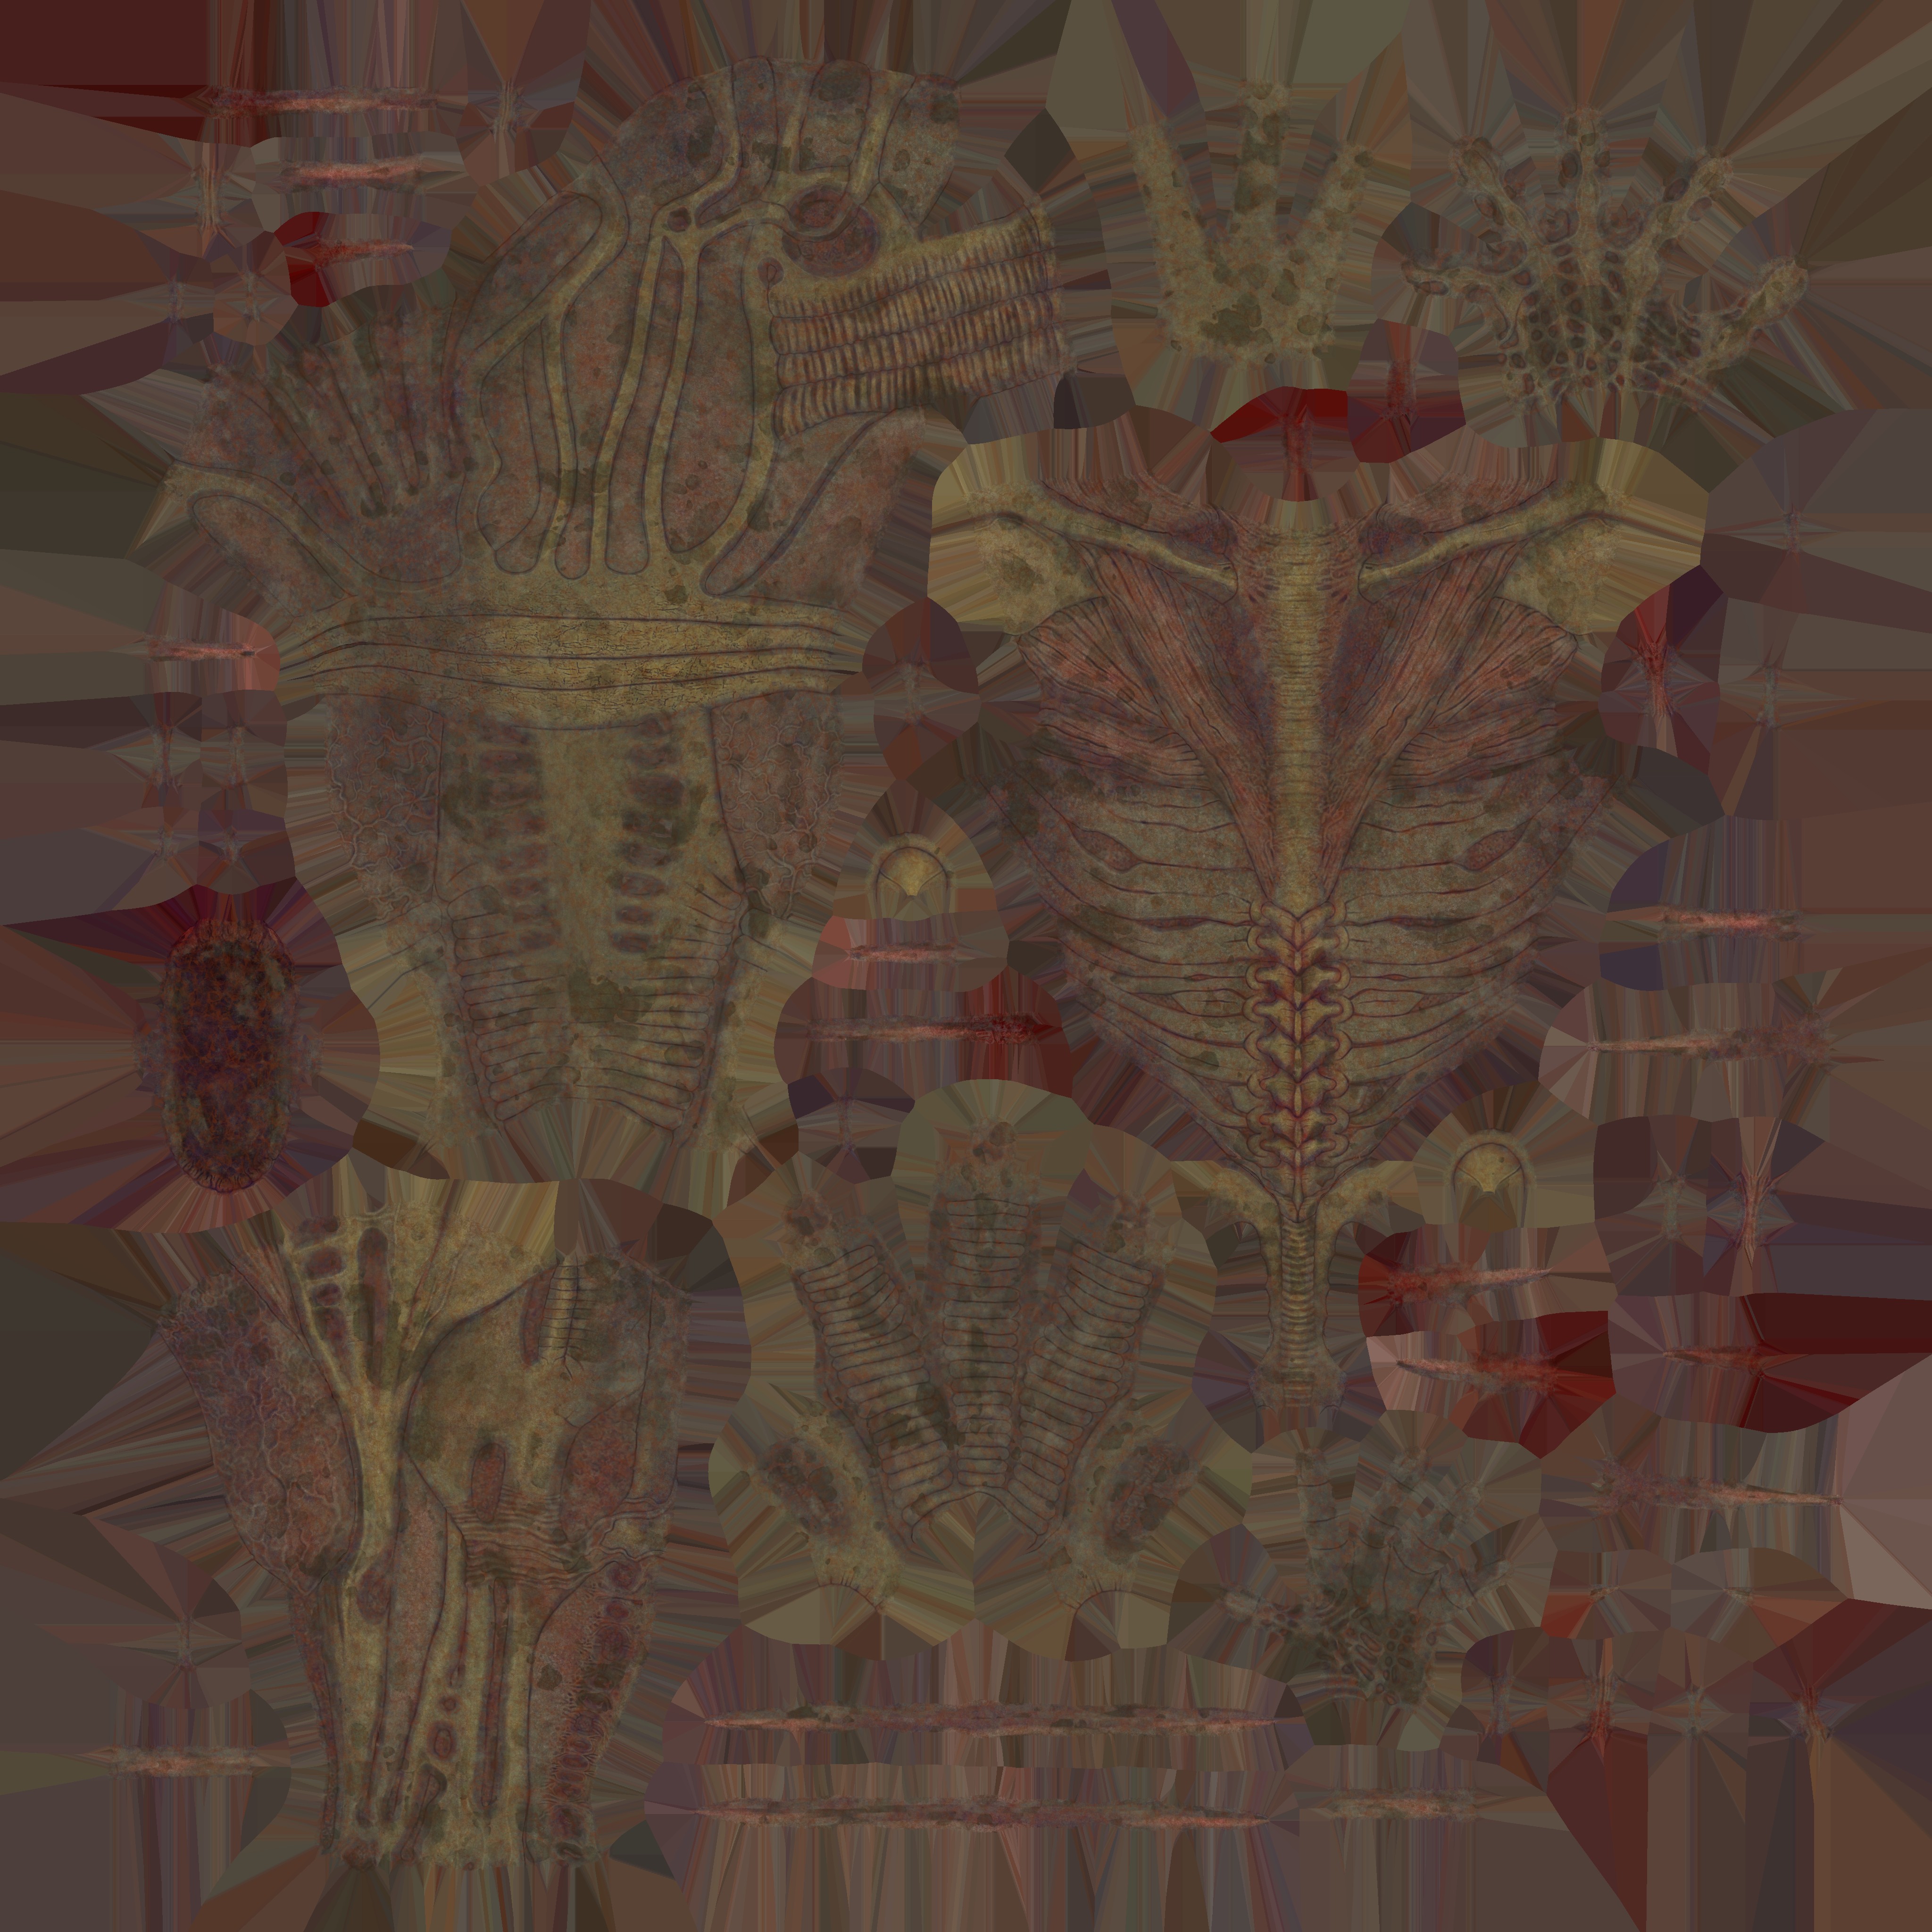
To preserve the high-resolution sculpt details while optimizing performance, I performed targeted baking in Substance Painter, transferring data from high poly to low poly (normal, curvature, AO). The model, previously retopologized and UV-mapped using UDIMs, was thus prepared for real-time PBR texturing.
The texturing process followed a layered approach inspired by human physiology:

To animate the creature, I implemented a complete rigging and skinning system in Maya, using Advanced Skeleton for automated biped skeleton generation and NG Skin Tools for advanced influence management. The process followed a professional pipeline optimized for game engine integration:
For the creature’s animation, I initially explored a gorilla-style walk, but the narrow corridor space limited its feasibility. I then opted for a dinosaur-inspired gait, analyzing a frame-by-frame video reference (Reference: Dinosaur Walk Cycle Tutorial ) to study posture, balance, and motion dynamics. These movements were then adapted to my character to achieve a threatening, non-human walk cycle that remains fluid, immersive, and fully consistent with the creature’s identity and the environmental constraints.
After creating the rig with Advanced Skeleton, I cleaned up the Outliner by removing automatically generated groups to prevent errors during export. To ensure full compatibility with Unreal Engine, I performed a Bake Animation on the entire hierarchy starting from the Root node, explicitly saving every single frame.
This process prevents interpolation issues in real-time engines and guarantees accurate animation playback. The export was carried out using Maya’s Game Exporter, with the Bake Animation option enabled in the FBX panel. The result is a clean, optimized file ready for direct integration into the game engine.
Animation created in Maya as the final project for the Digital Animation Techniques course. The choreography was entirely hand-crafted using keyframes, with a strong focus on fluidity, balance, and rhythm of motion.
Exercise created in Maya for the Digital Animation Techniques course. The animation was developed using keyframes on a pre-rigged character, exploring running dynamics, jump mechanics, and a superhero landing pose.

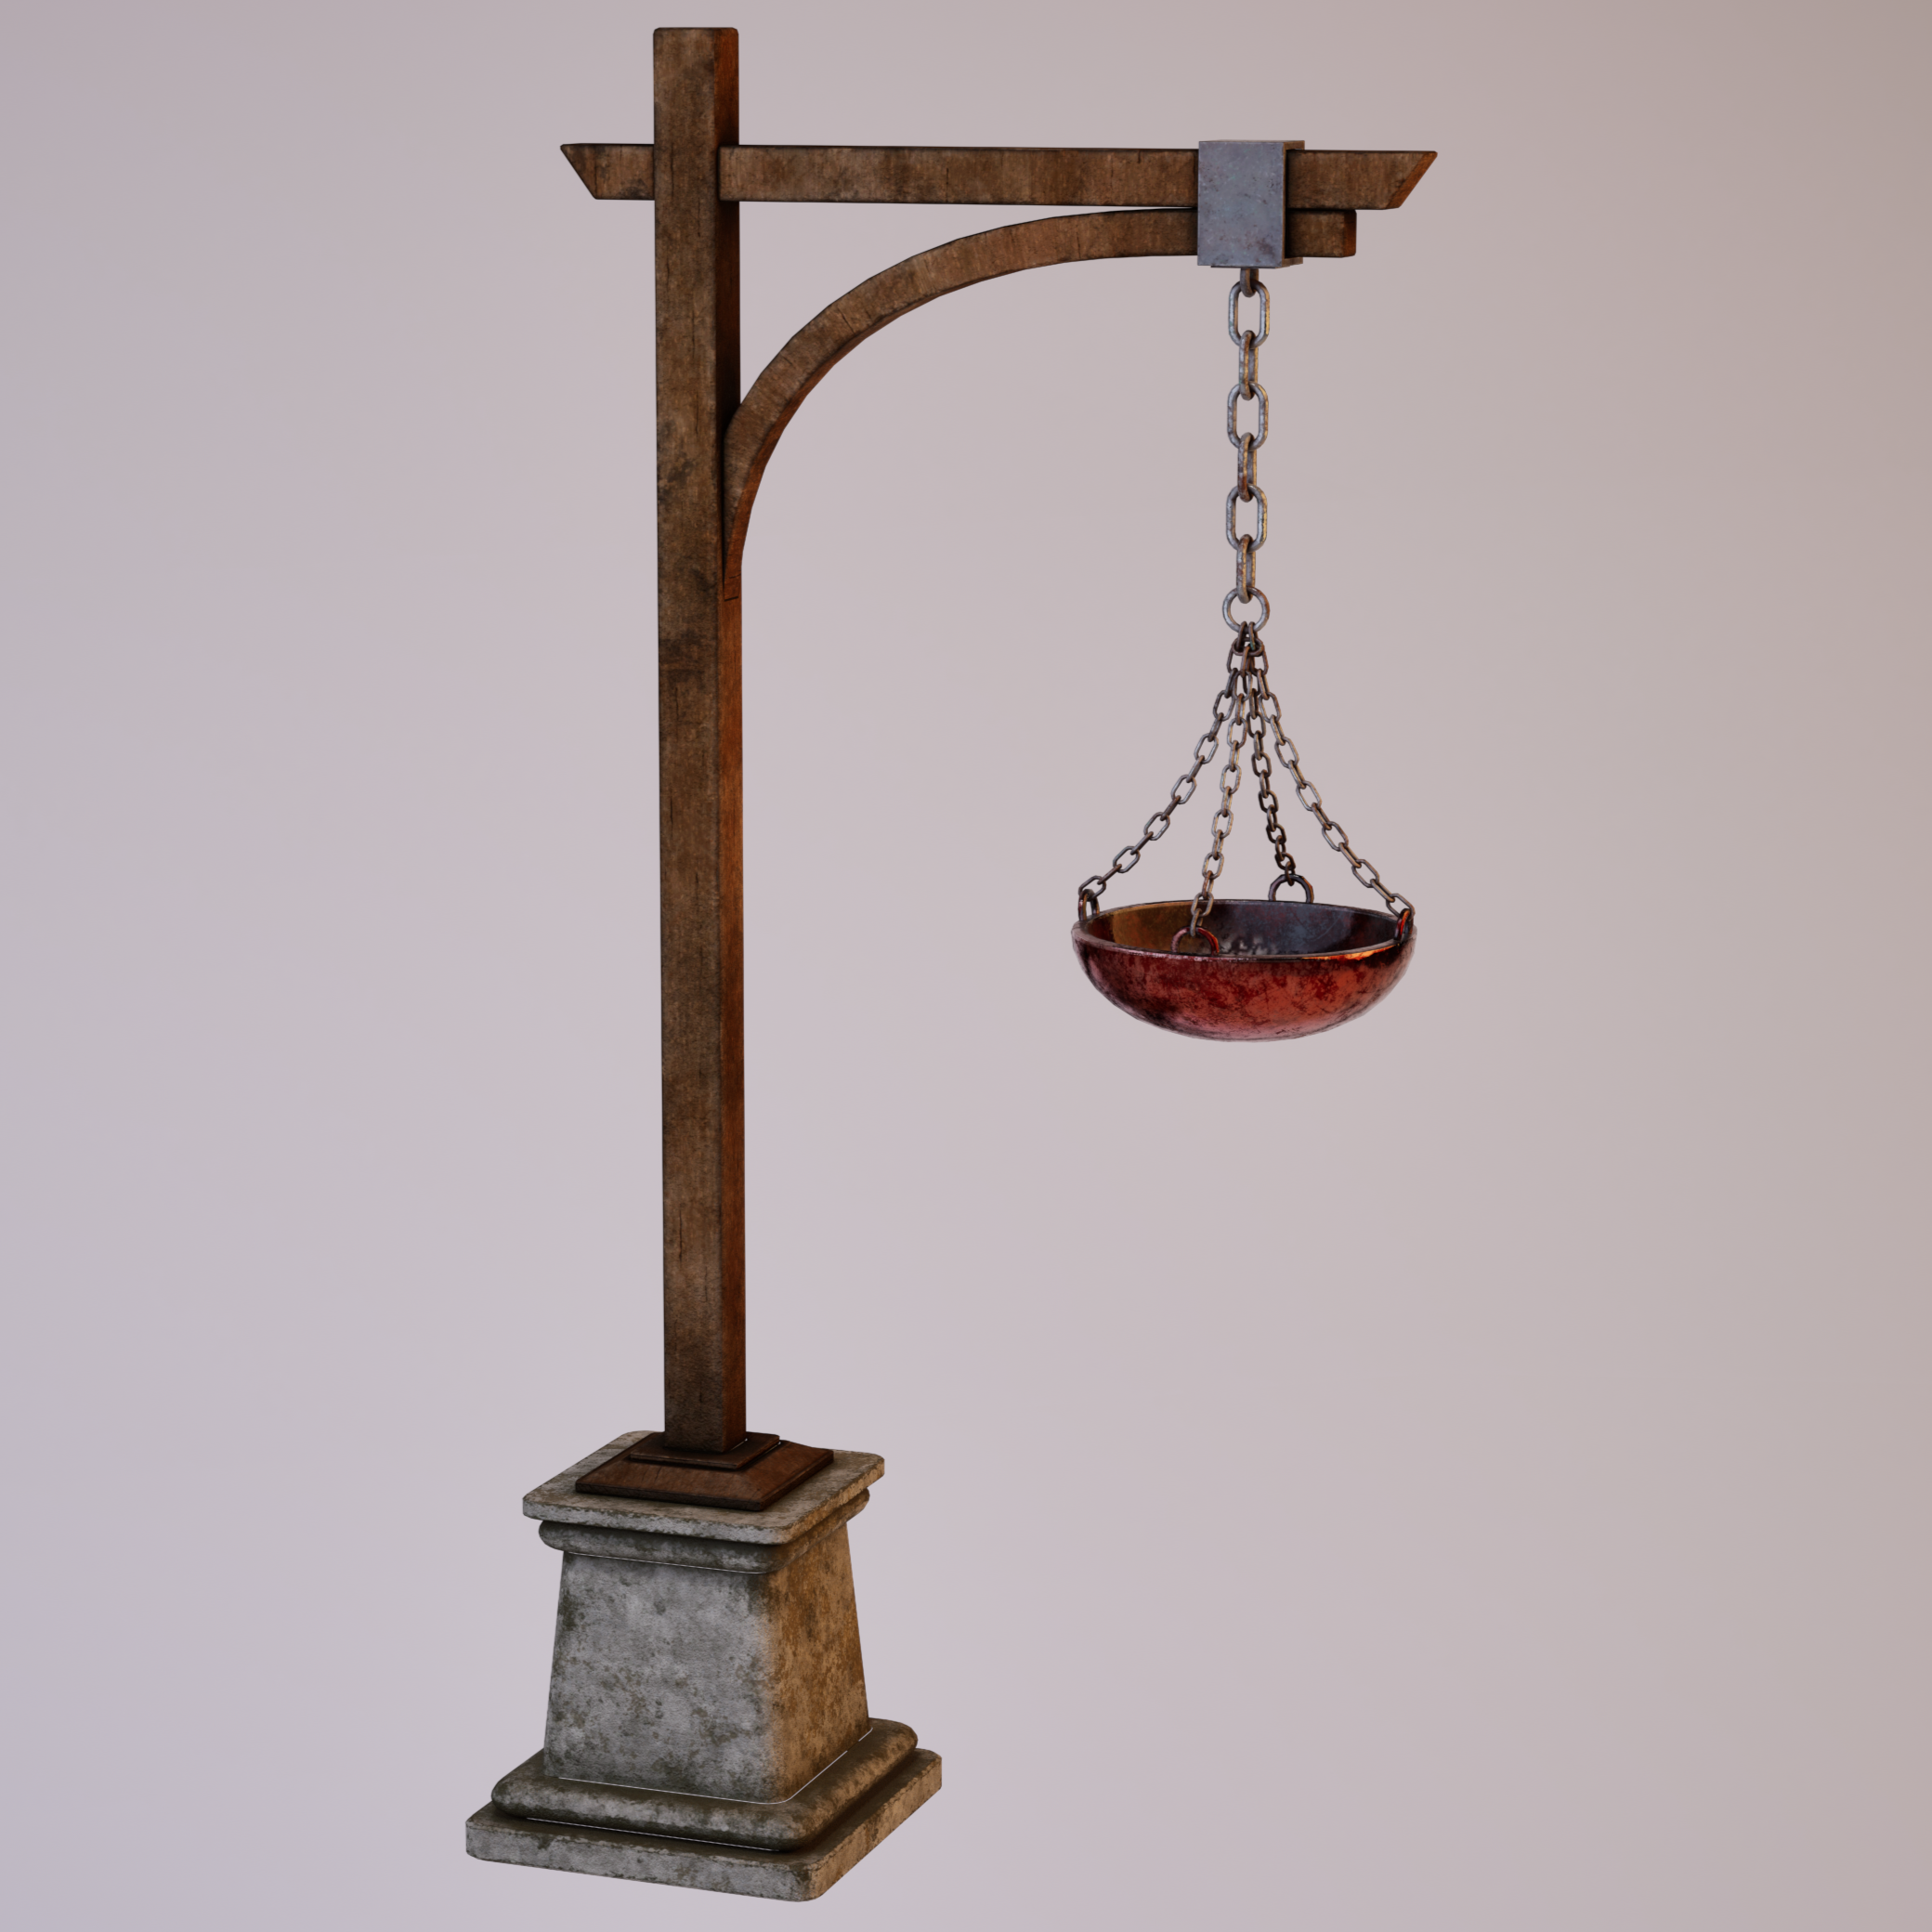
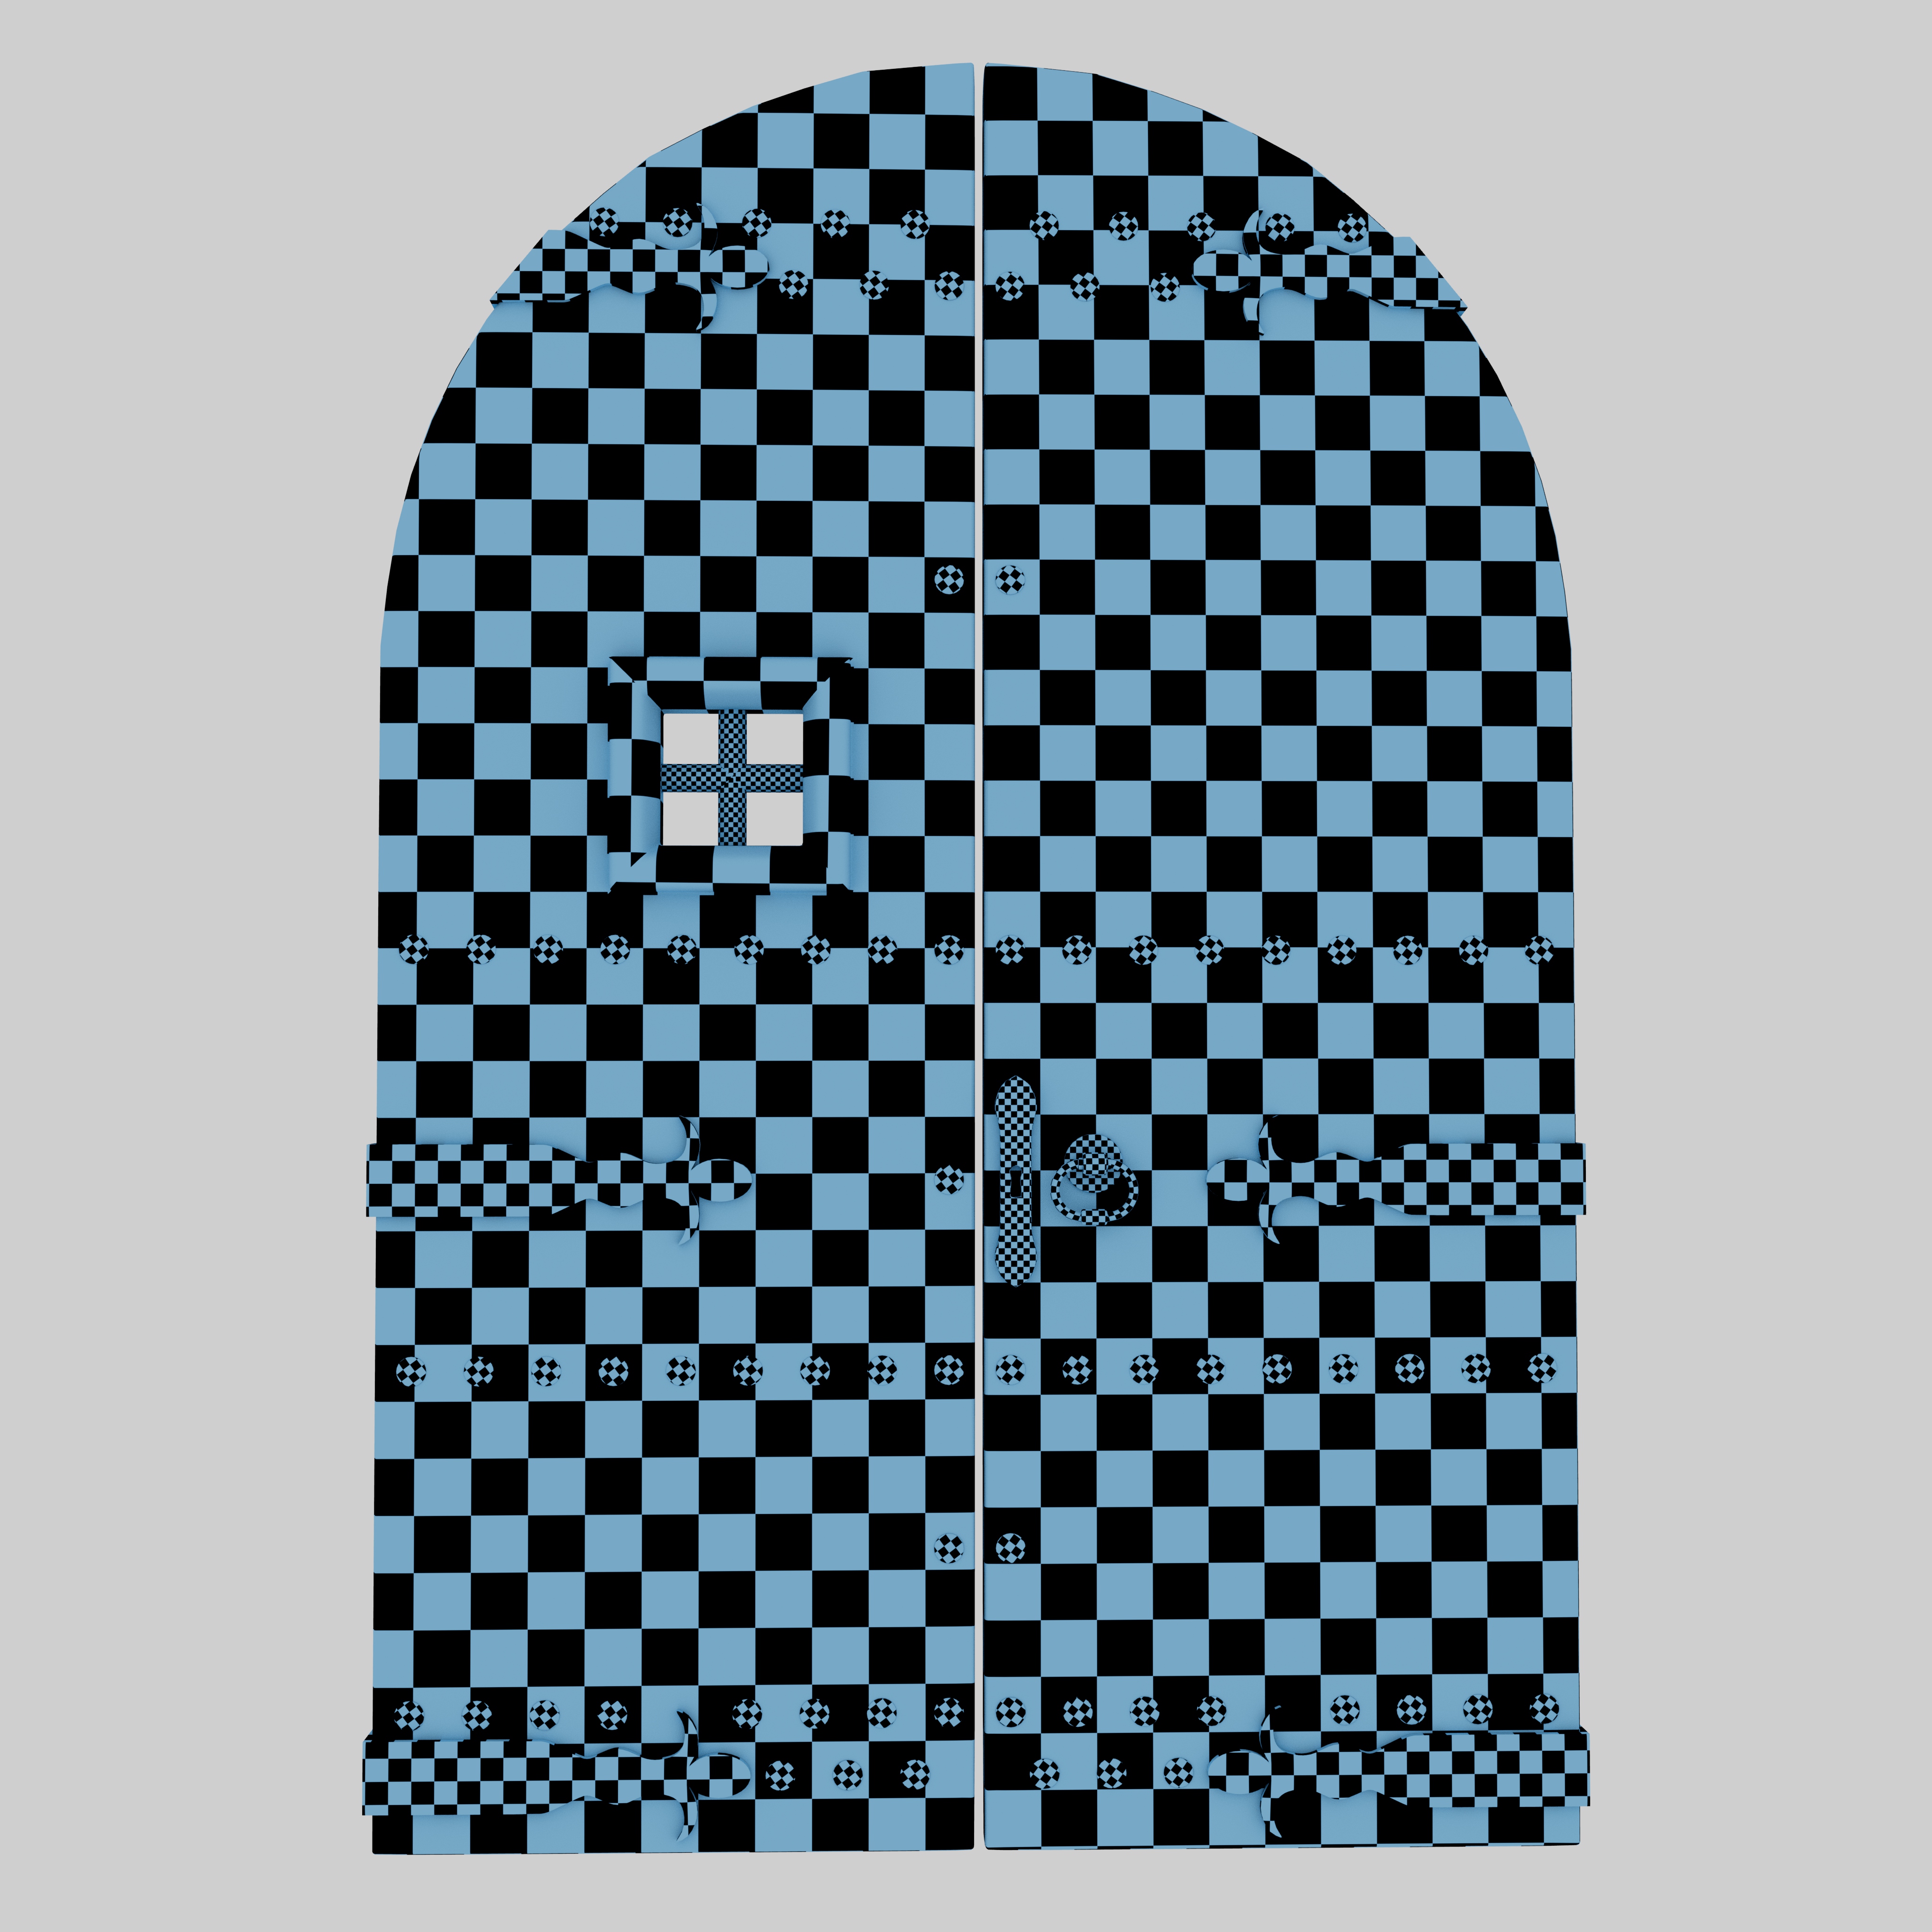
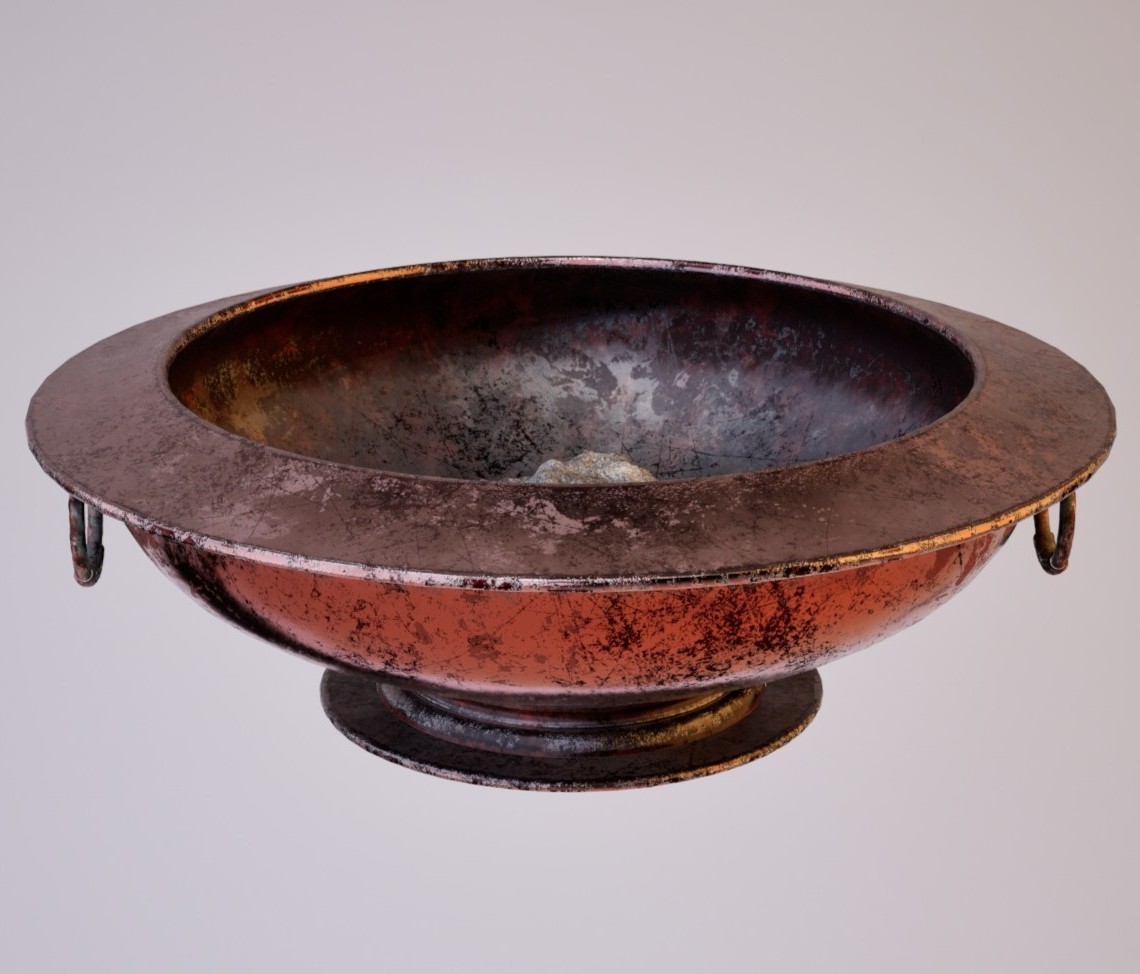
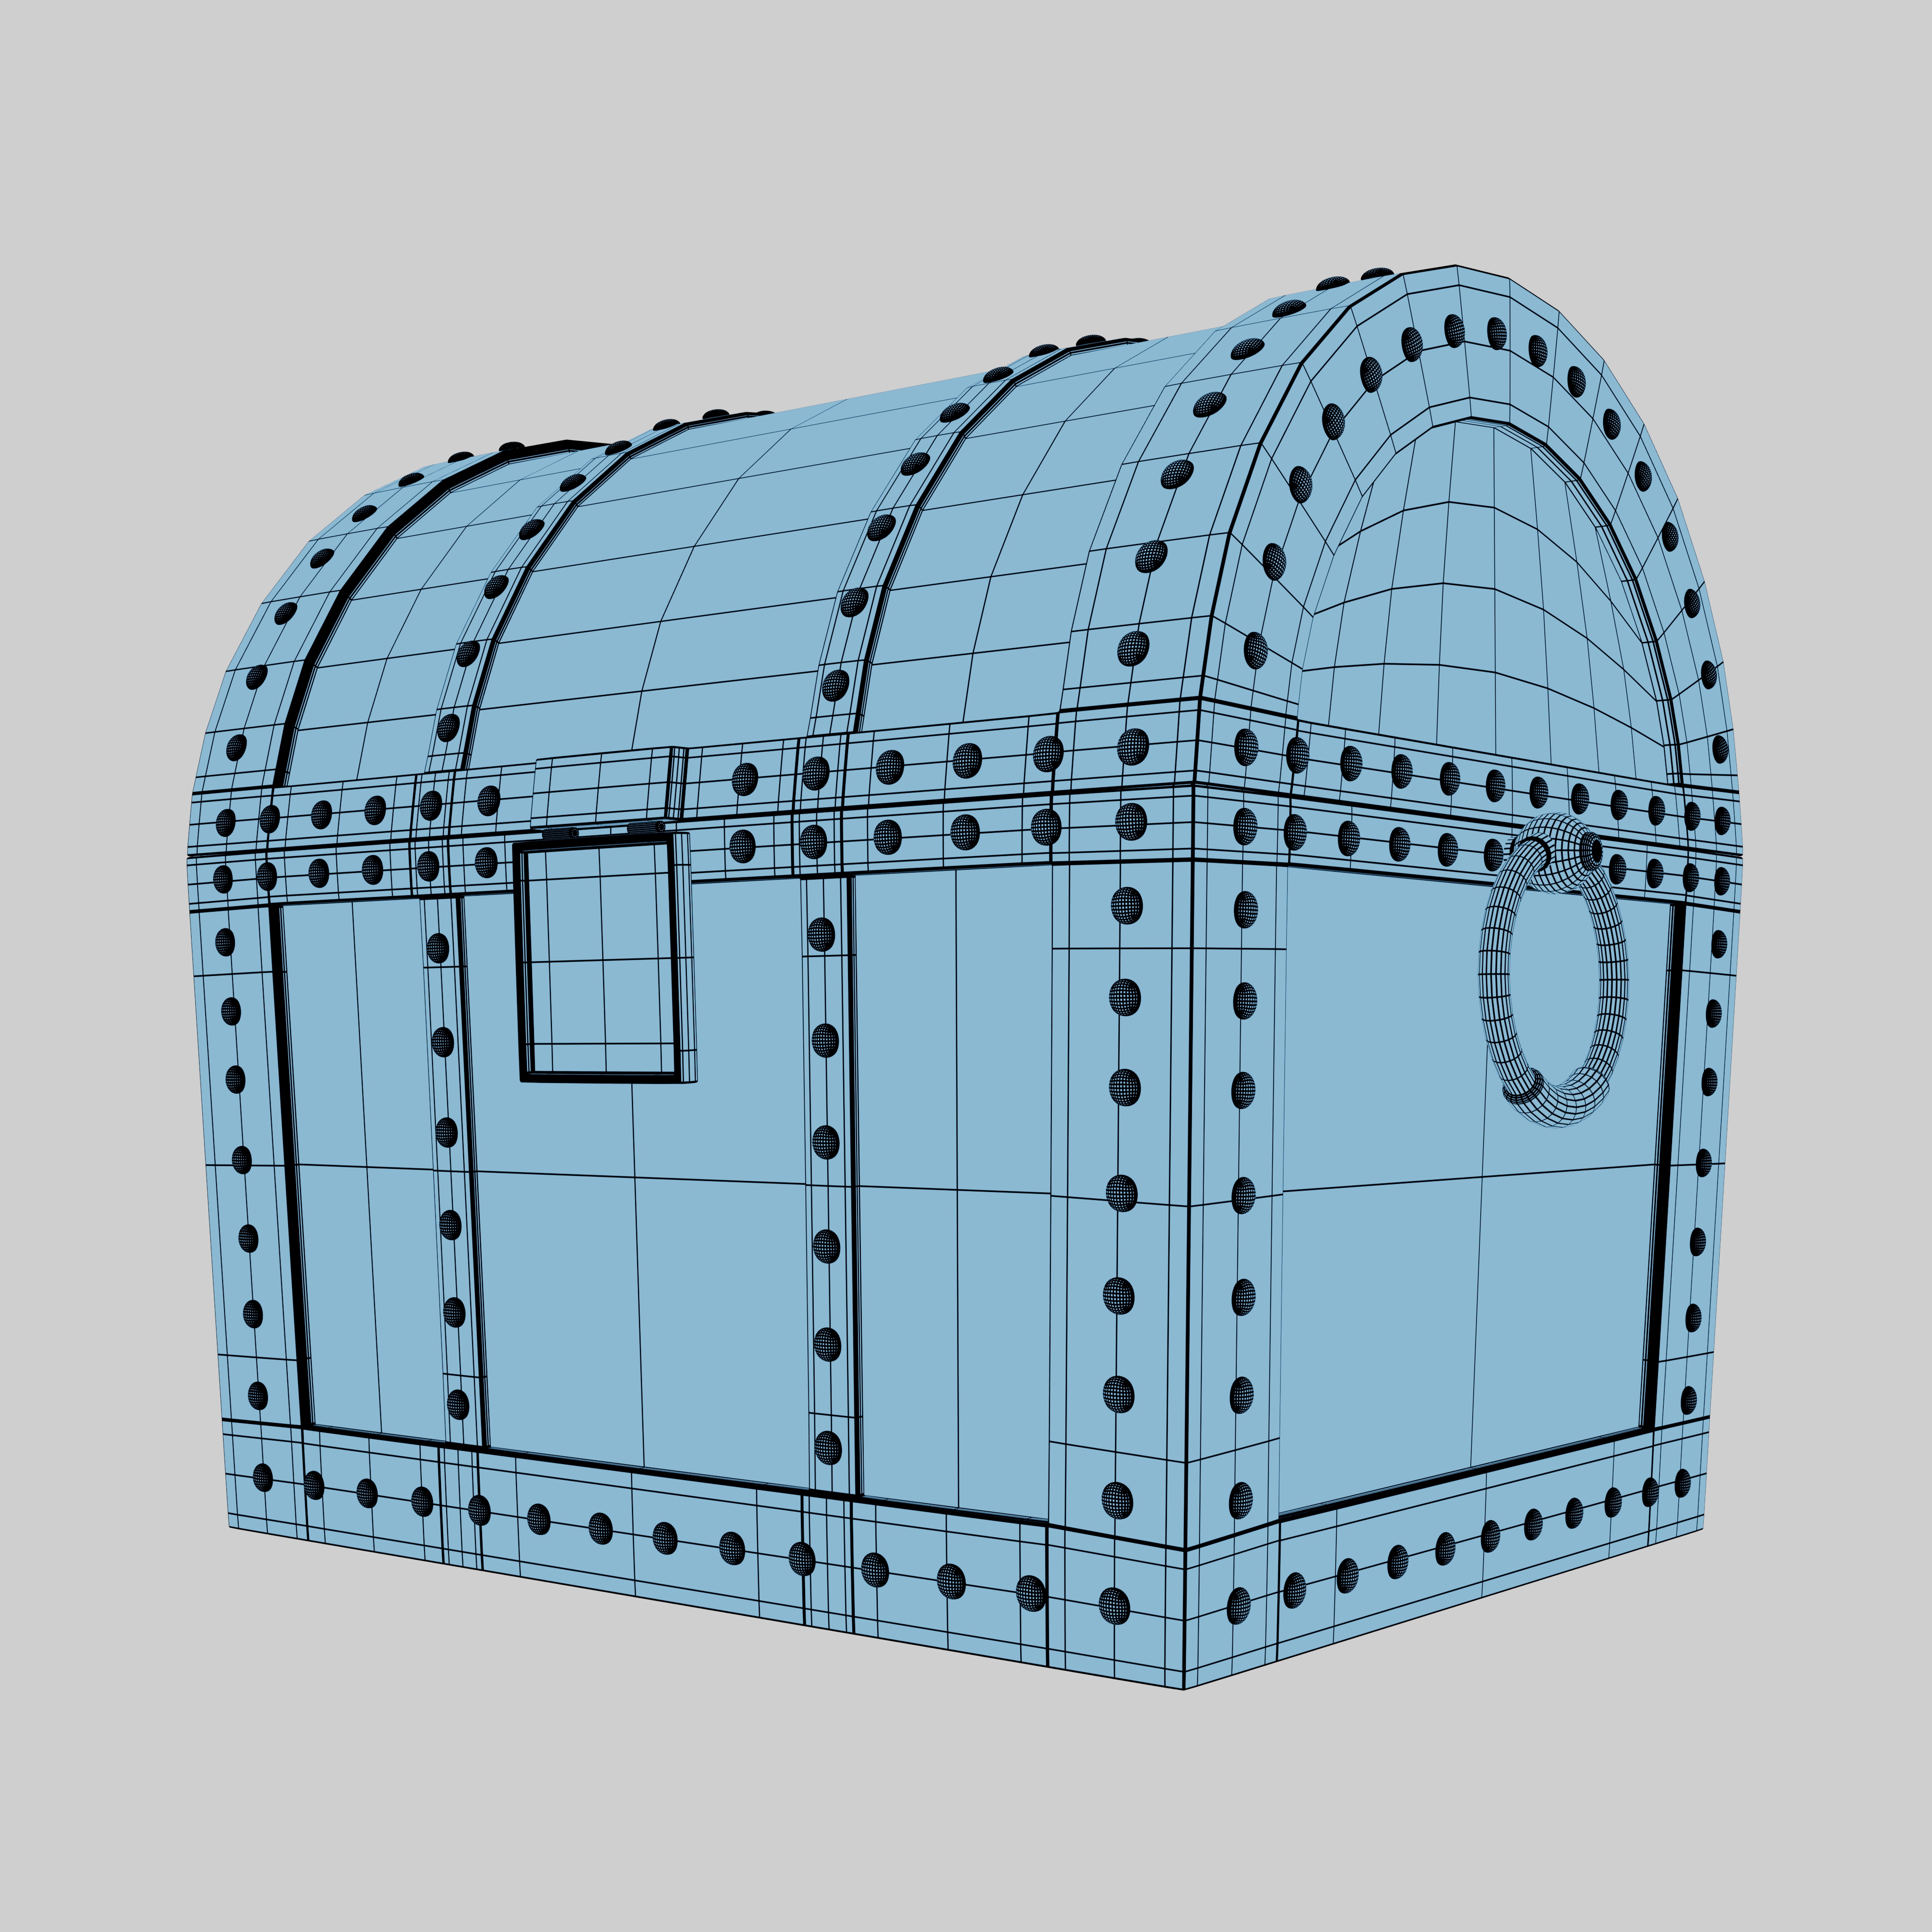
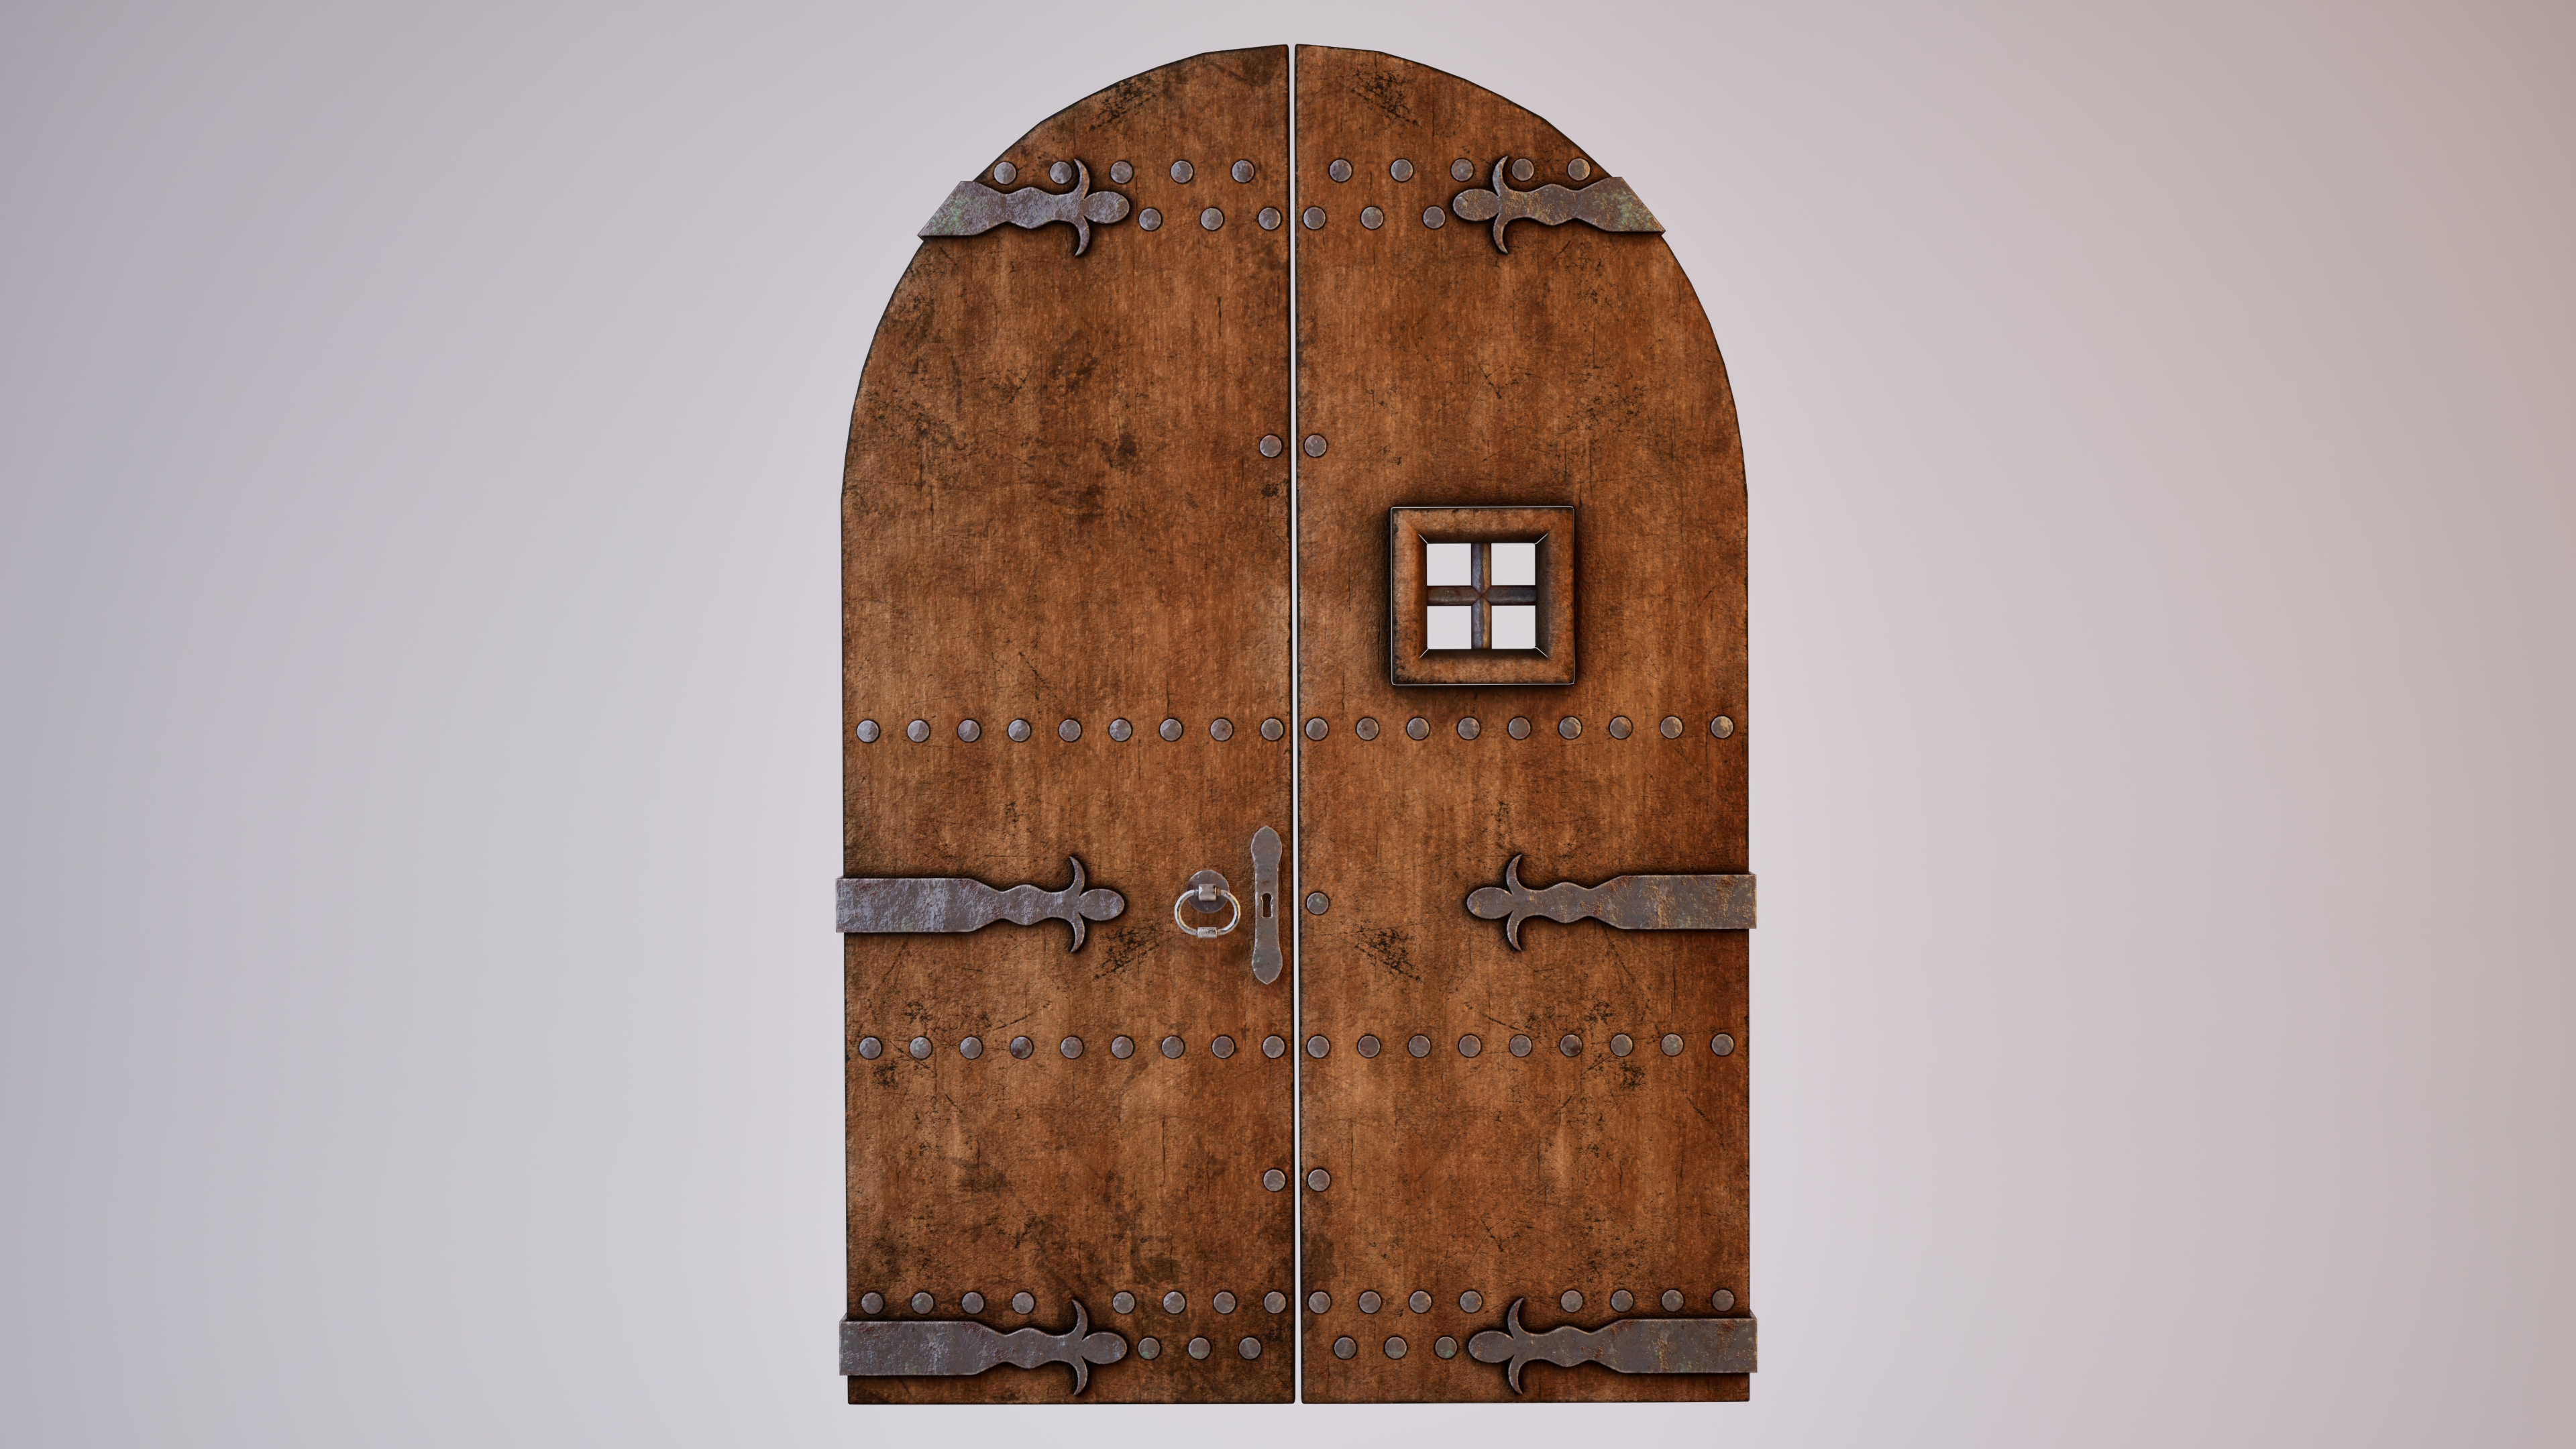
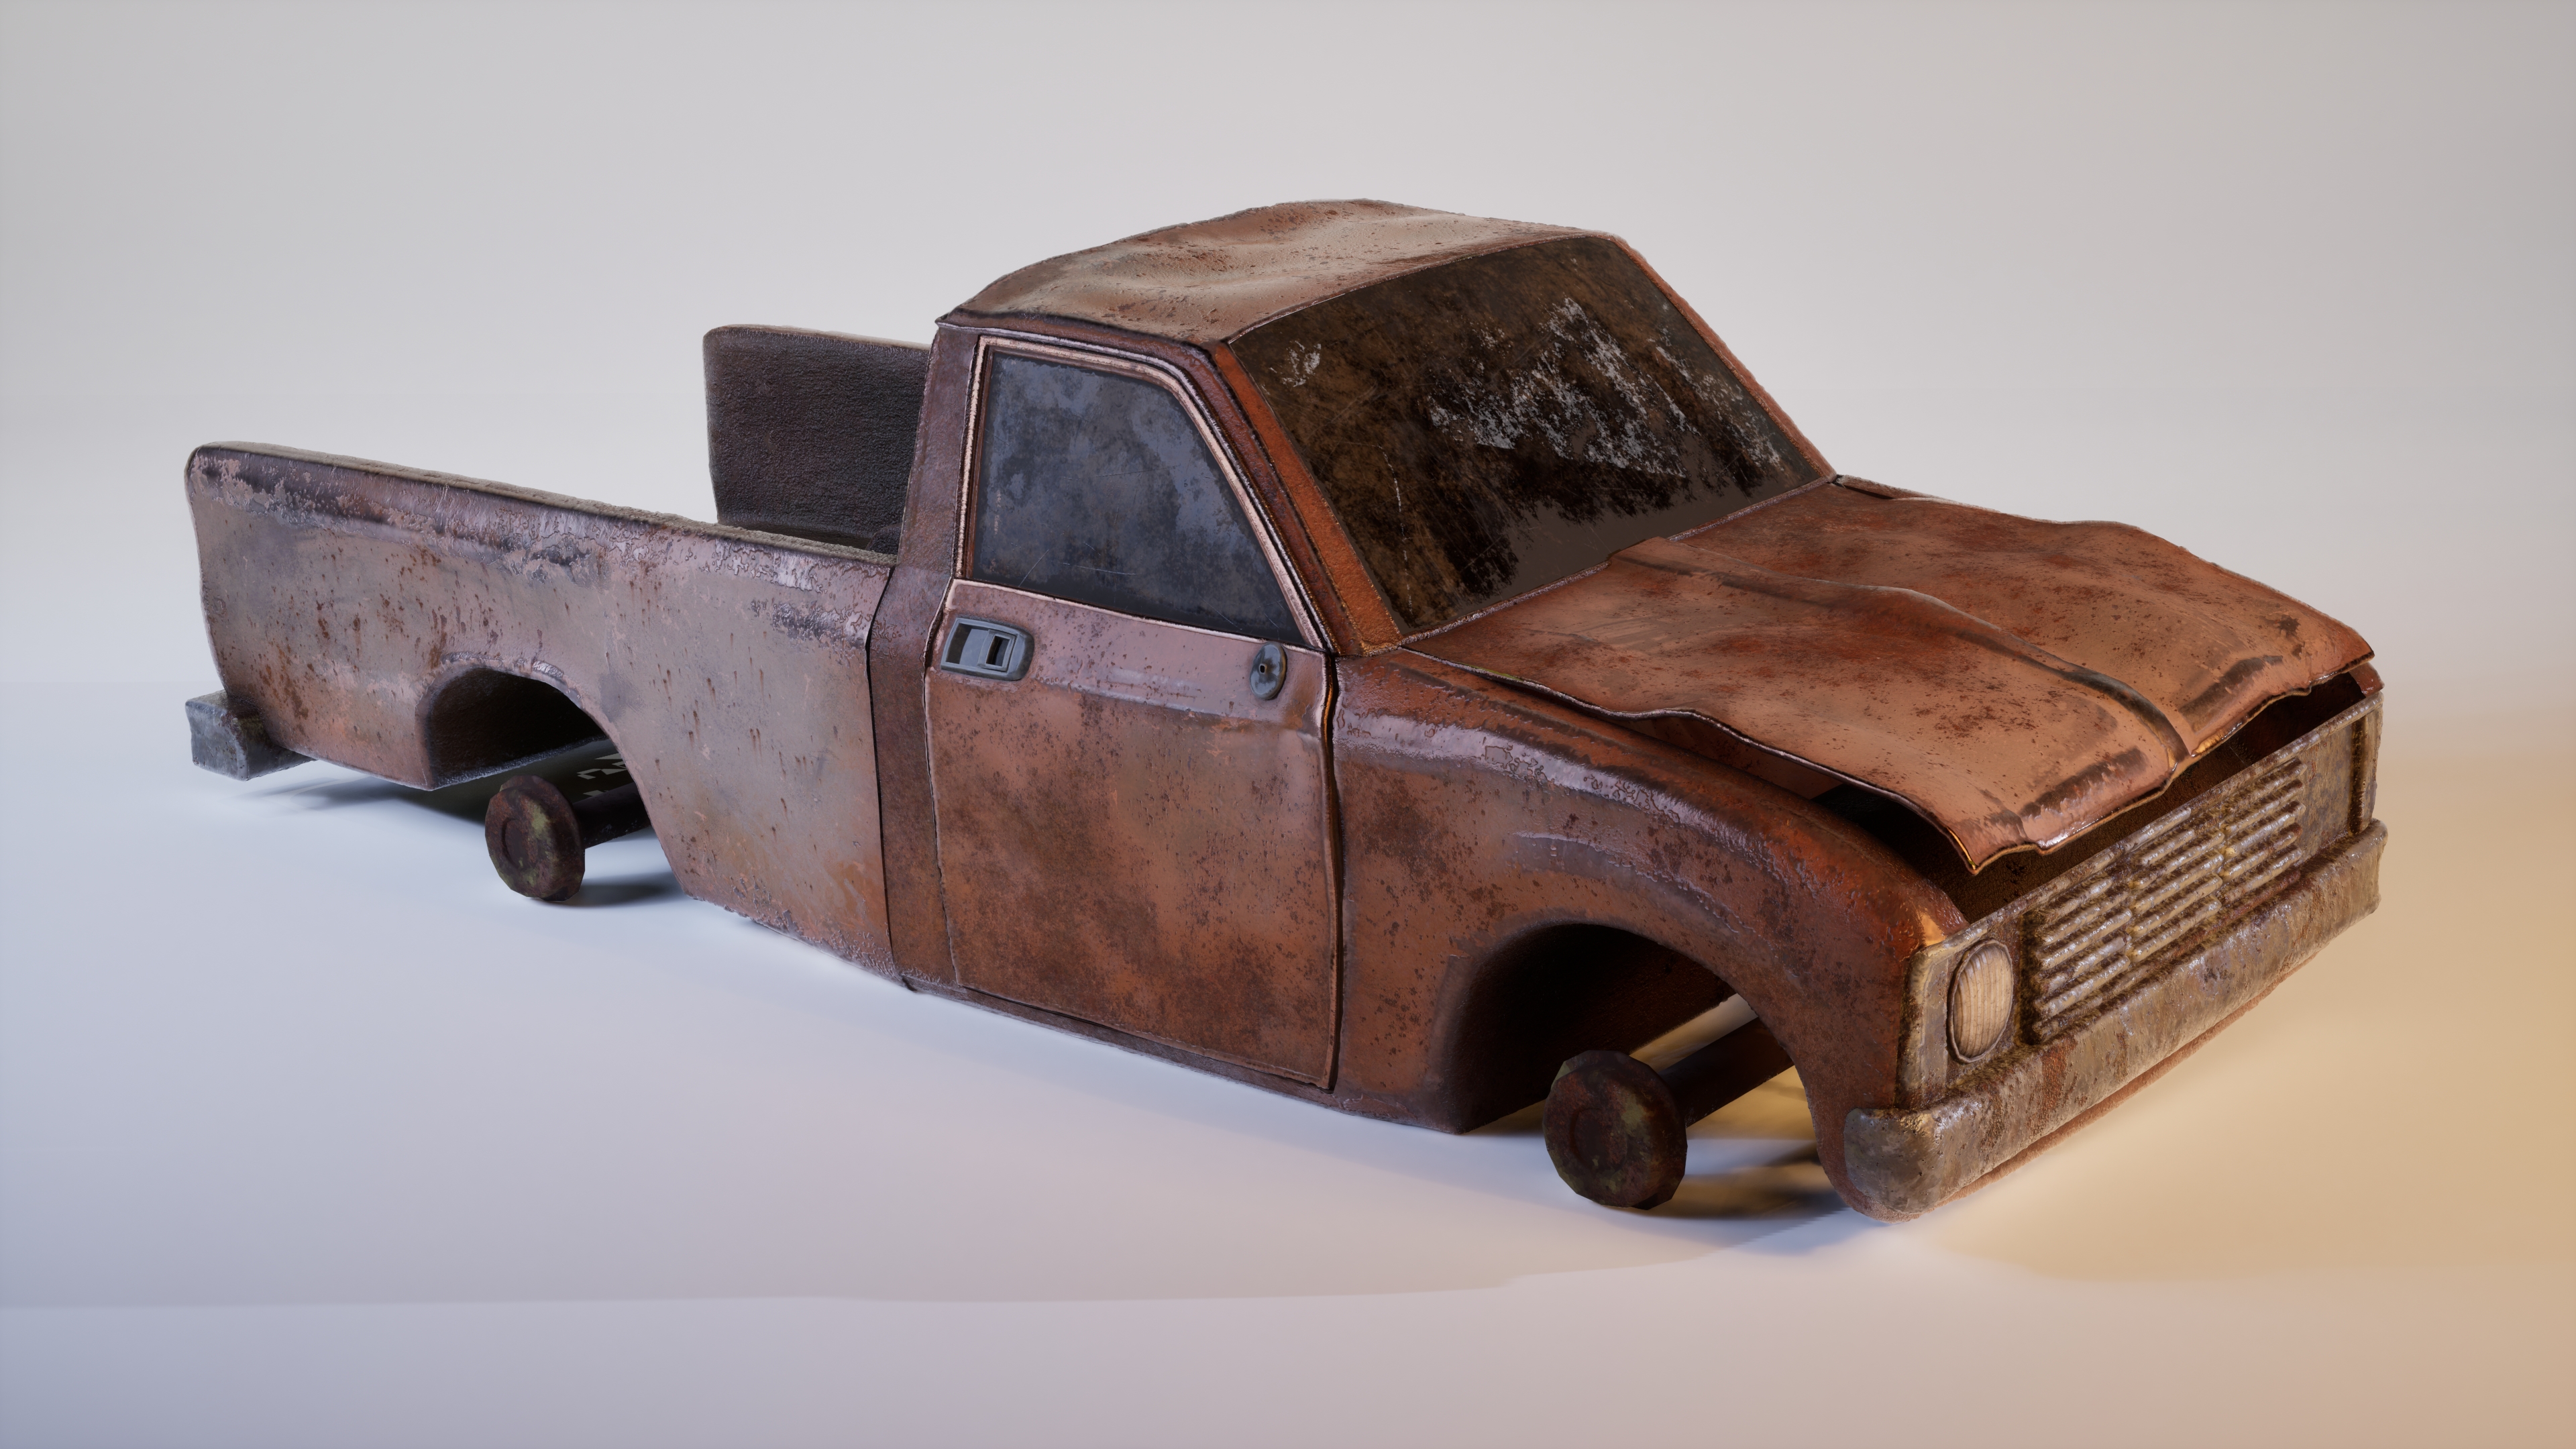
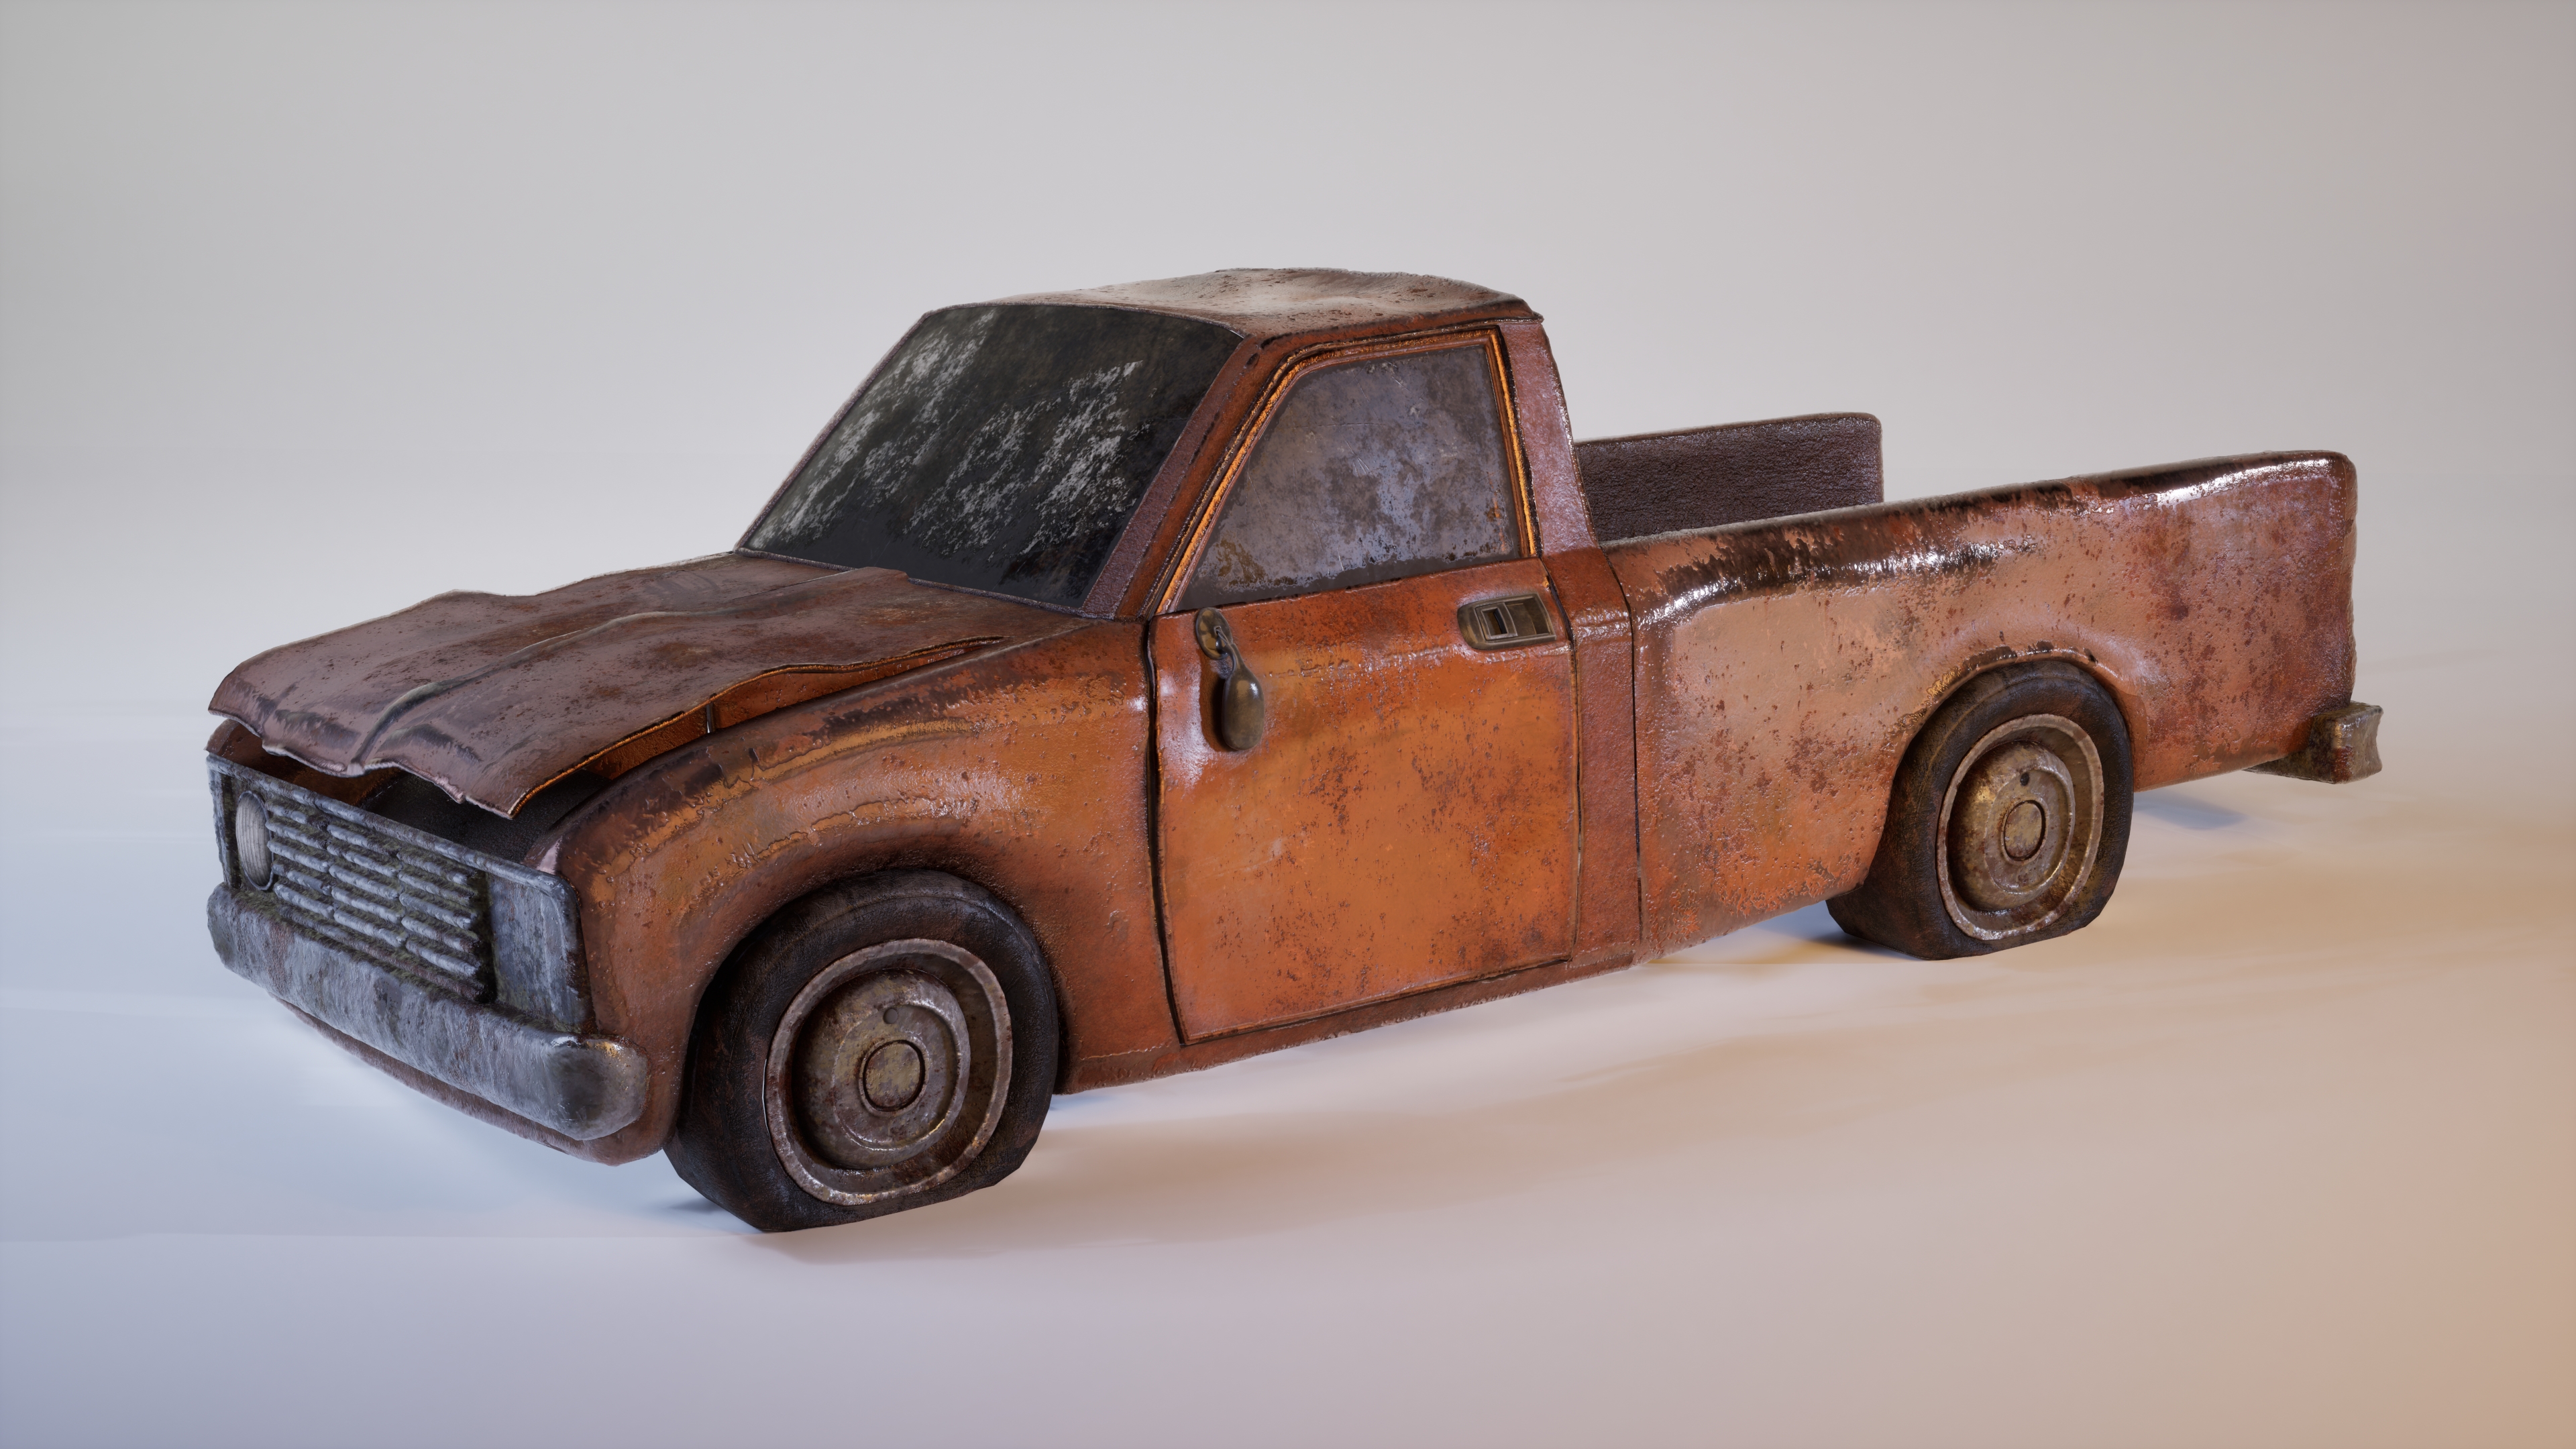
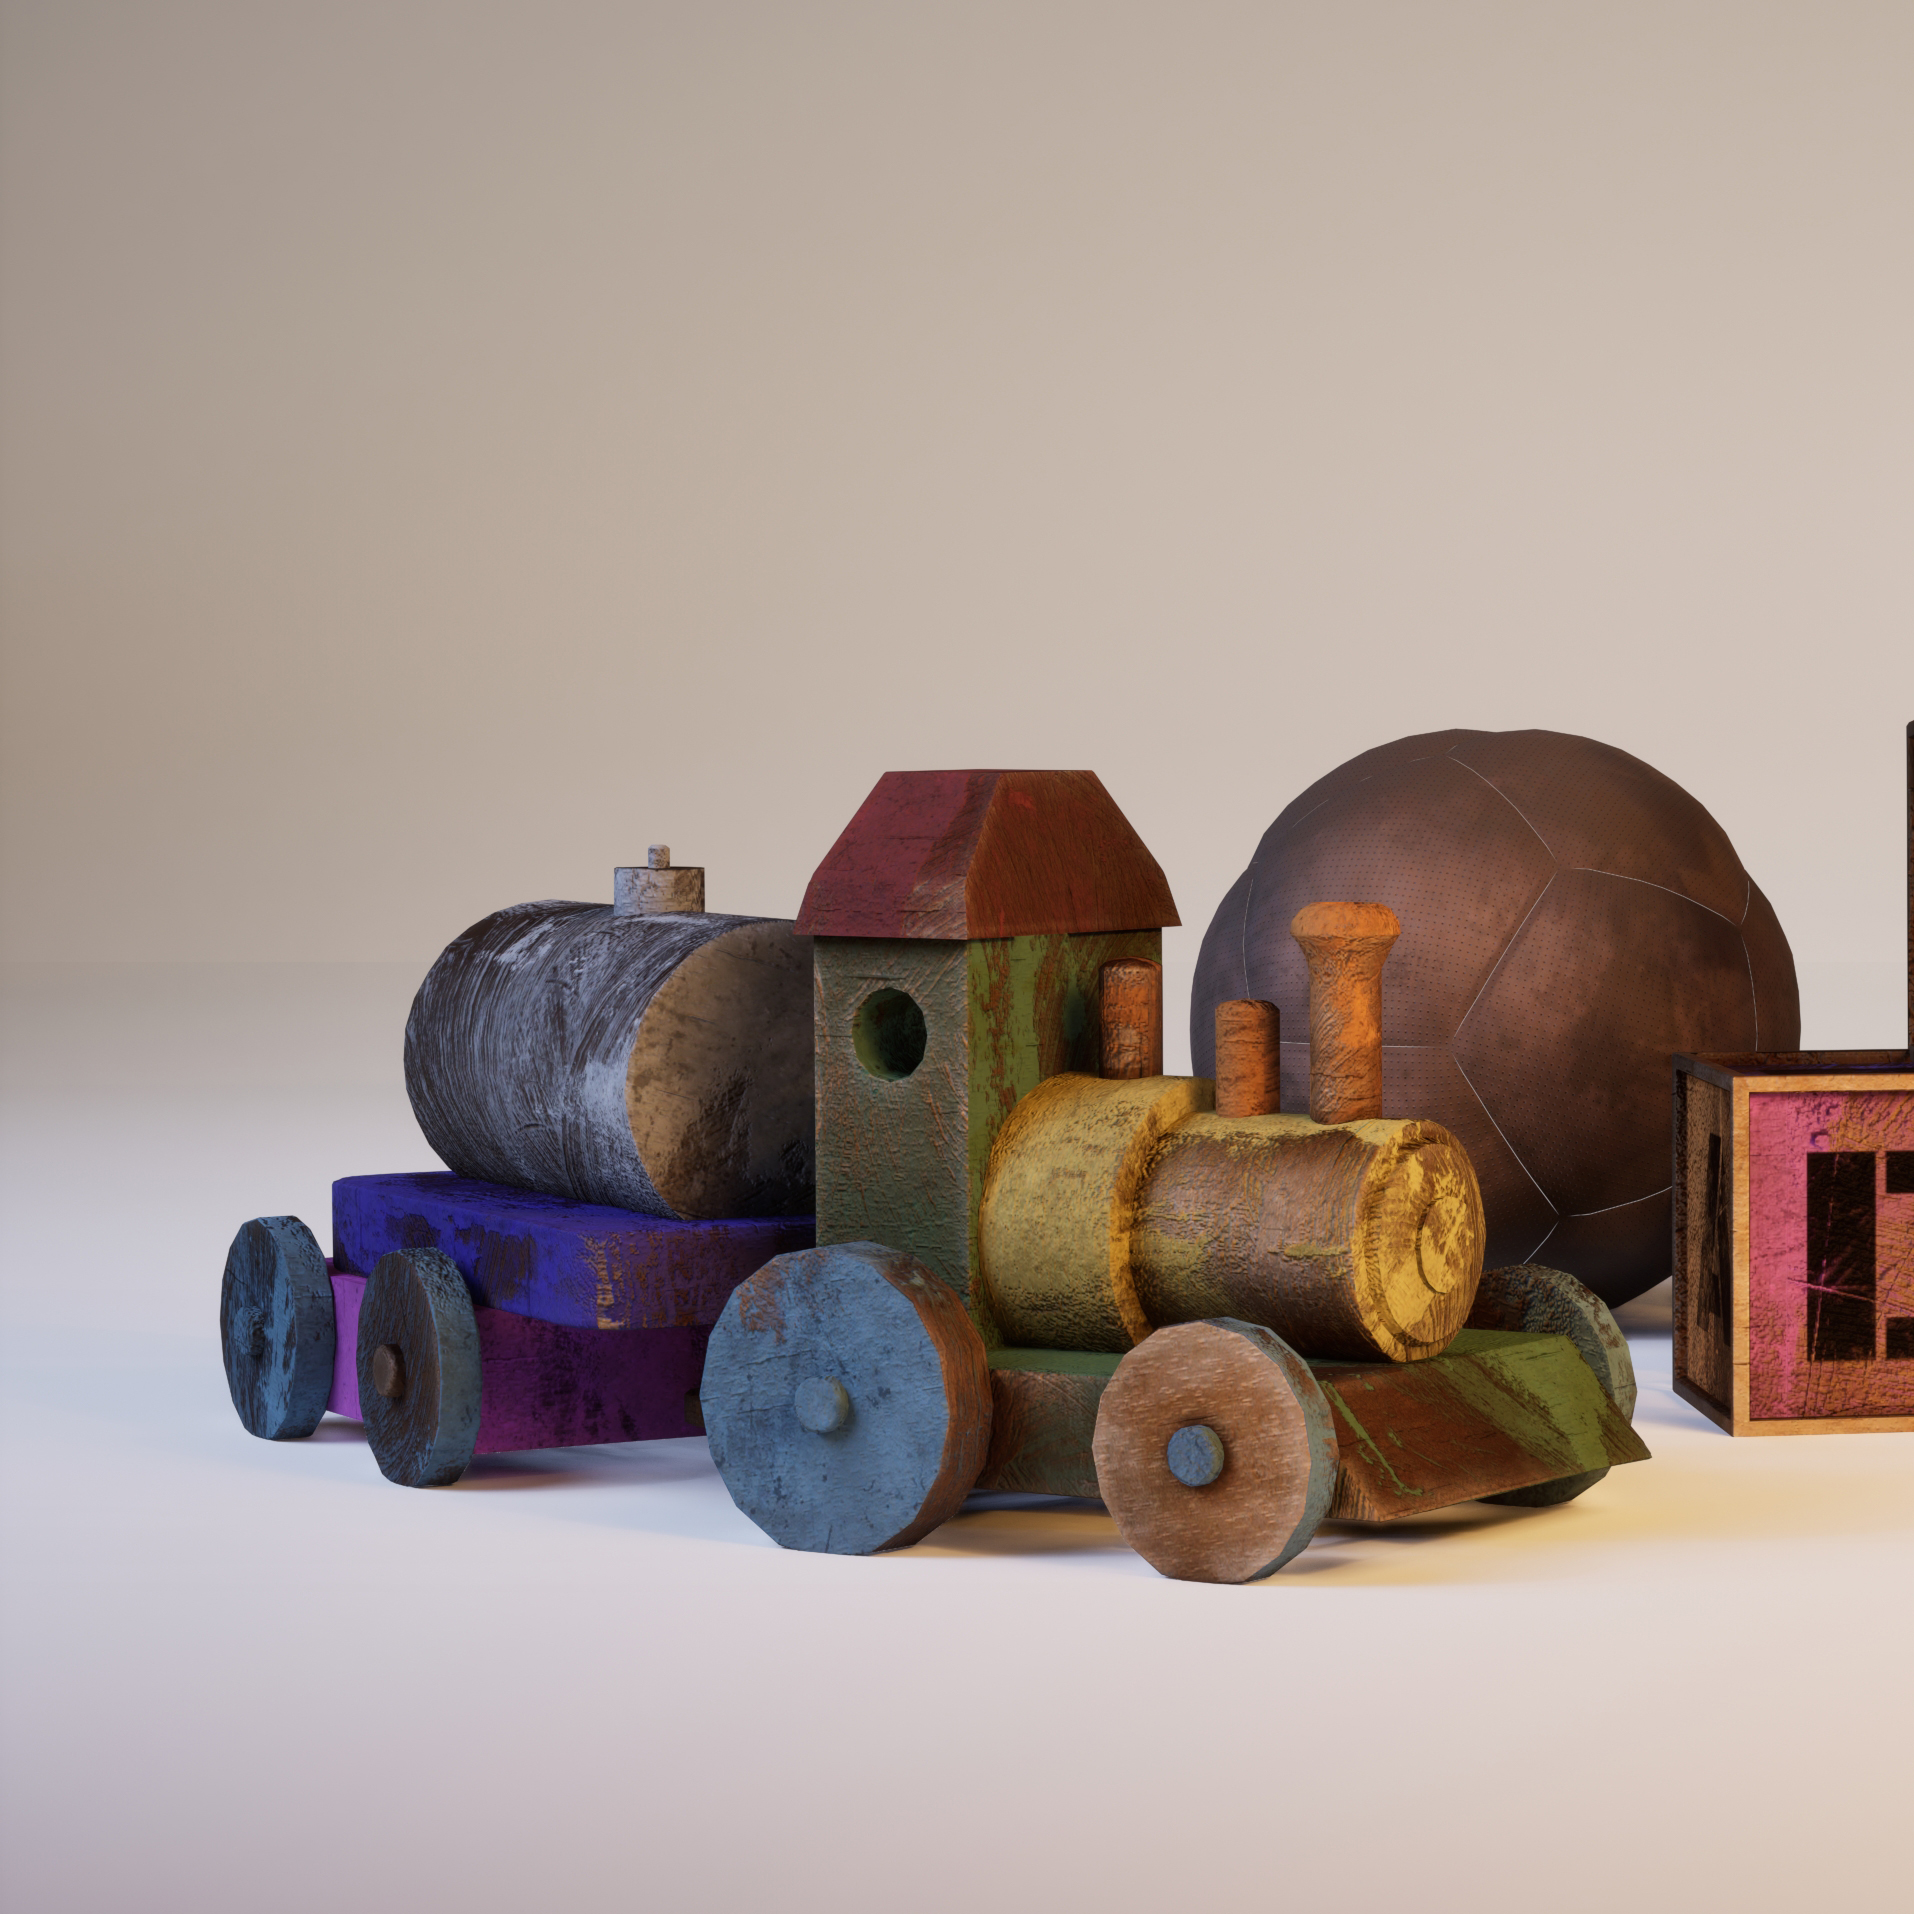
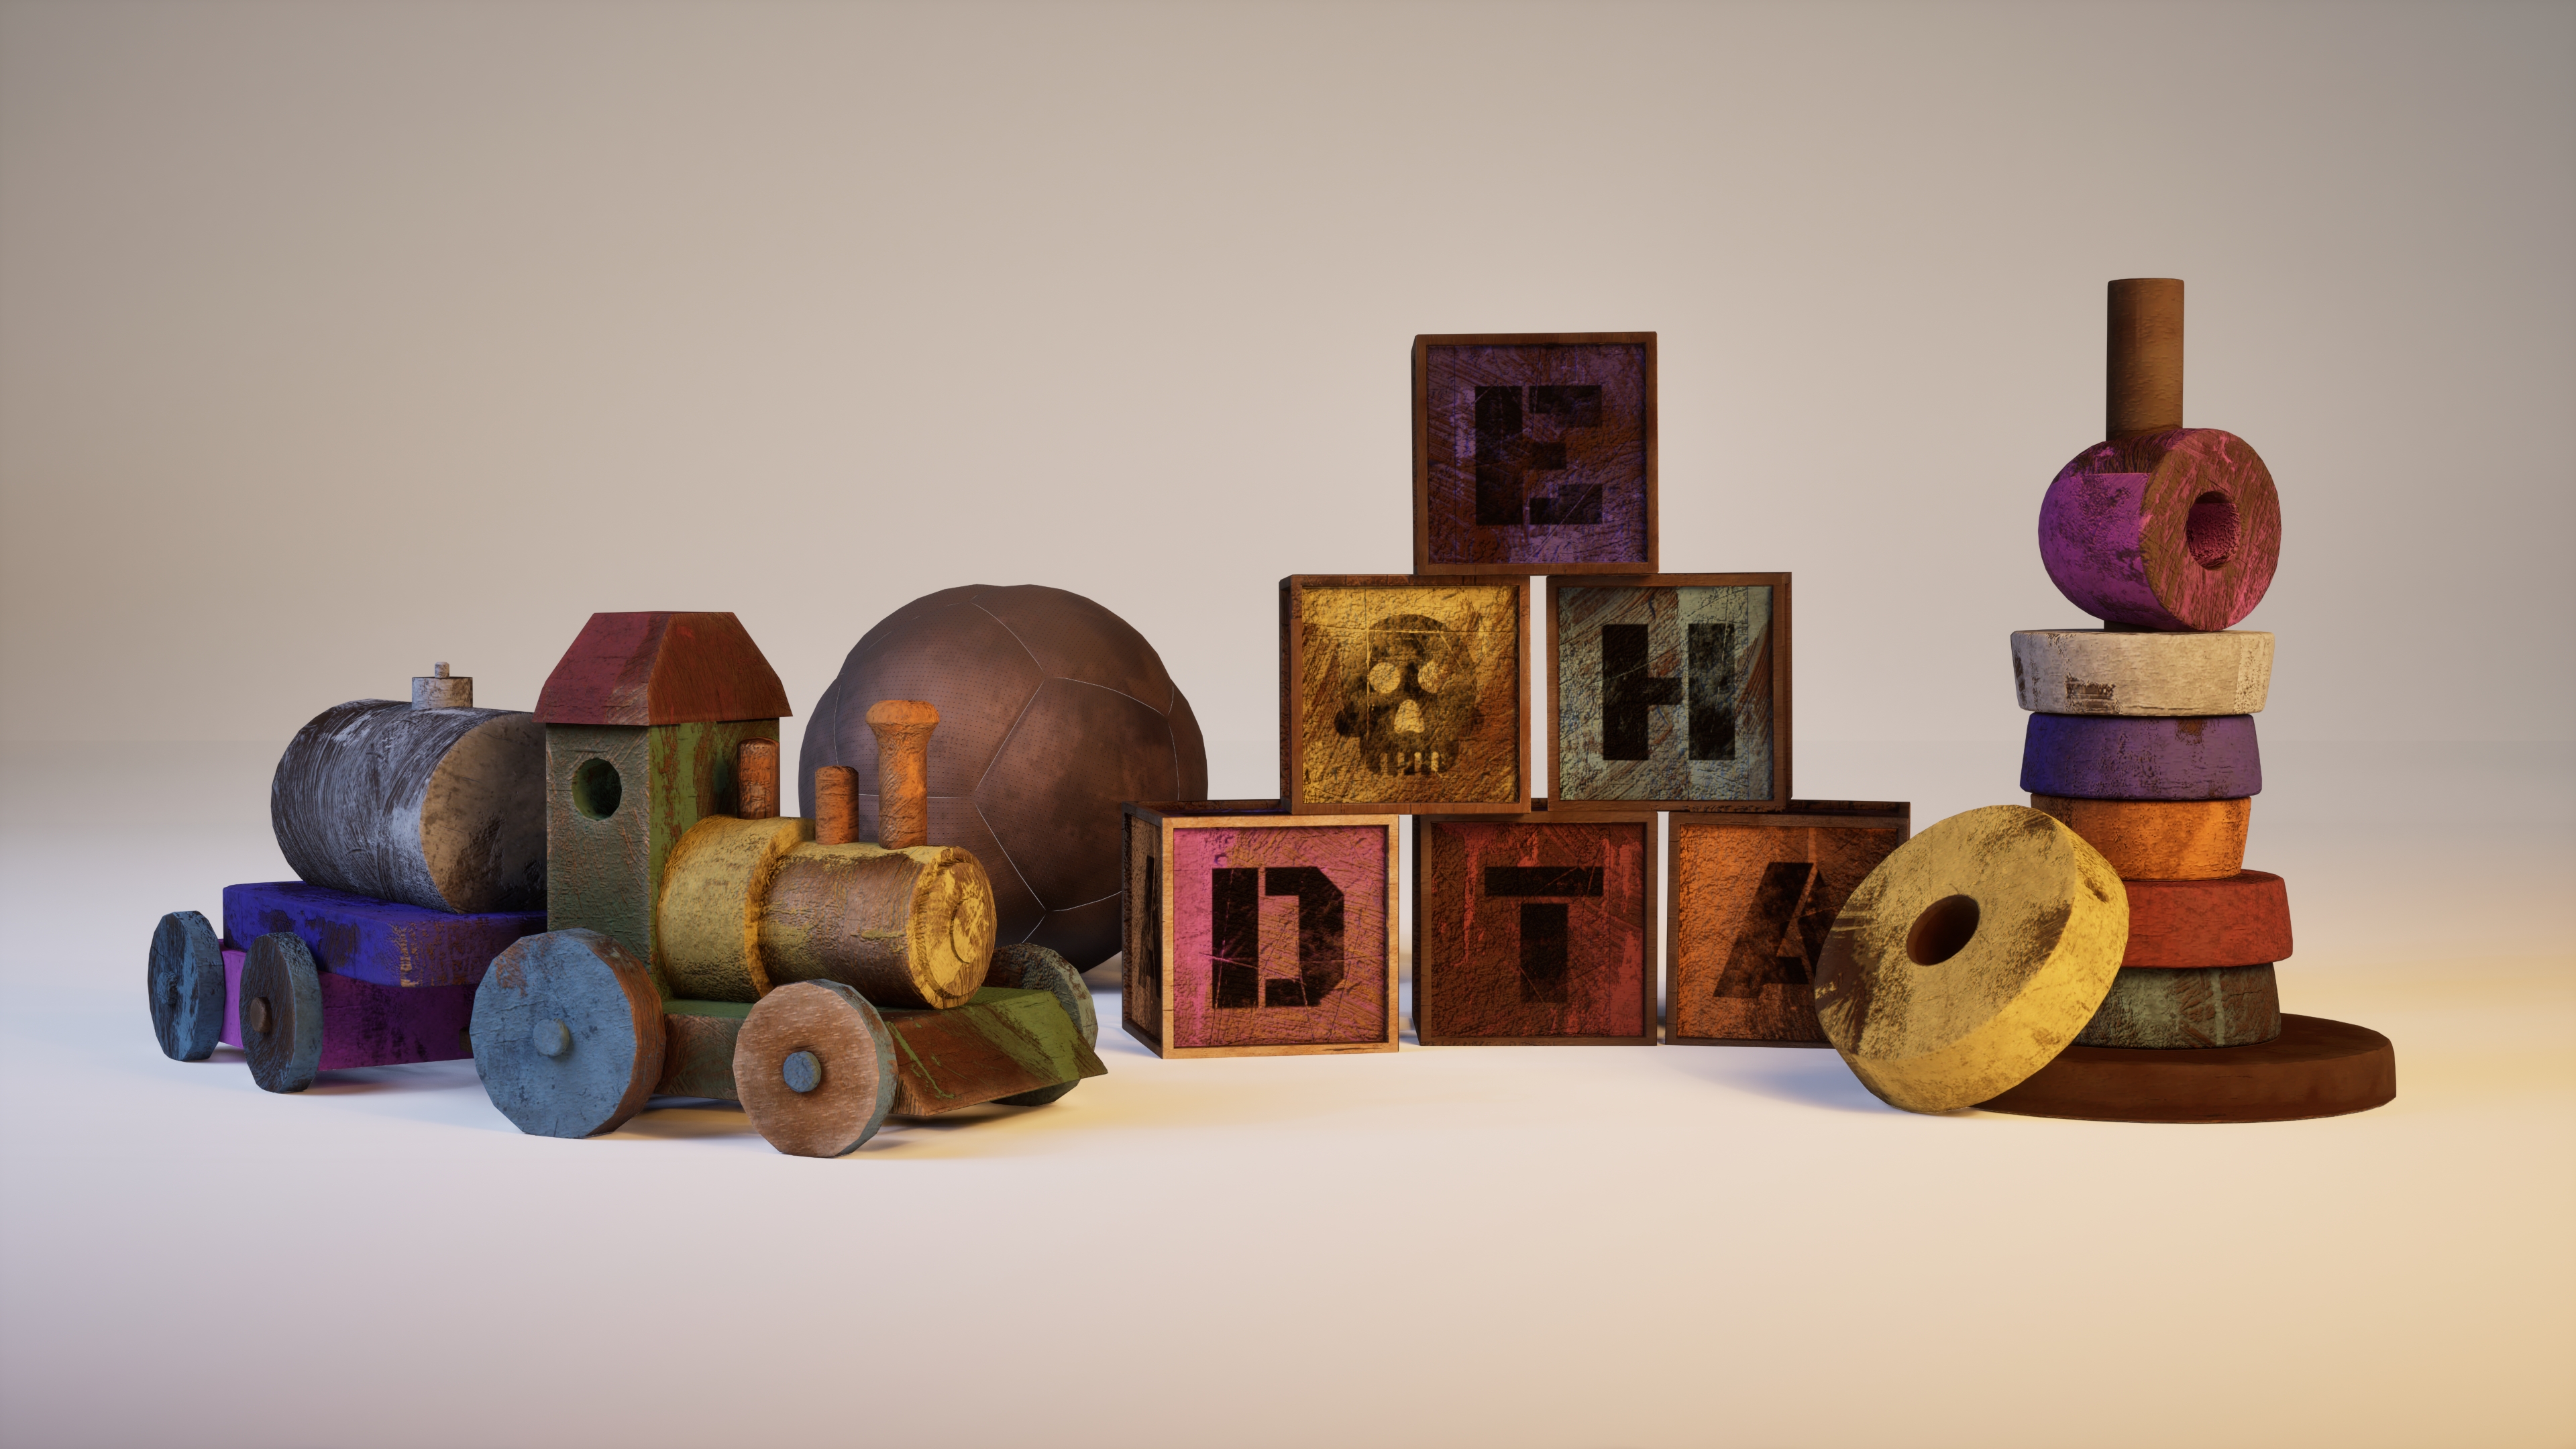
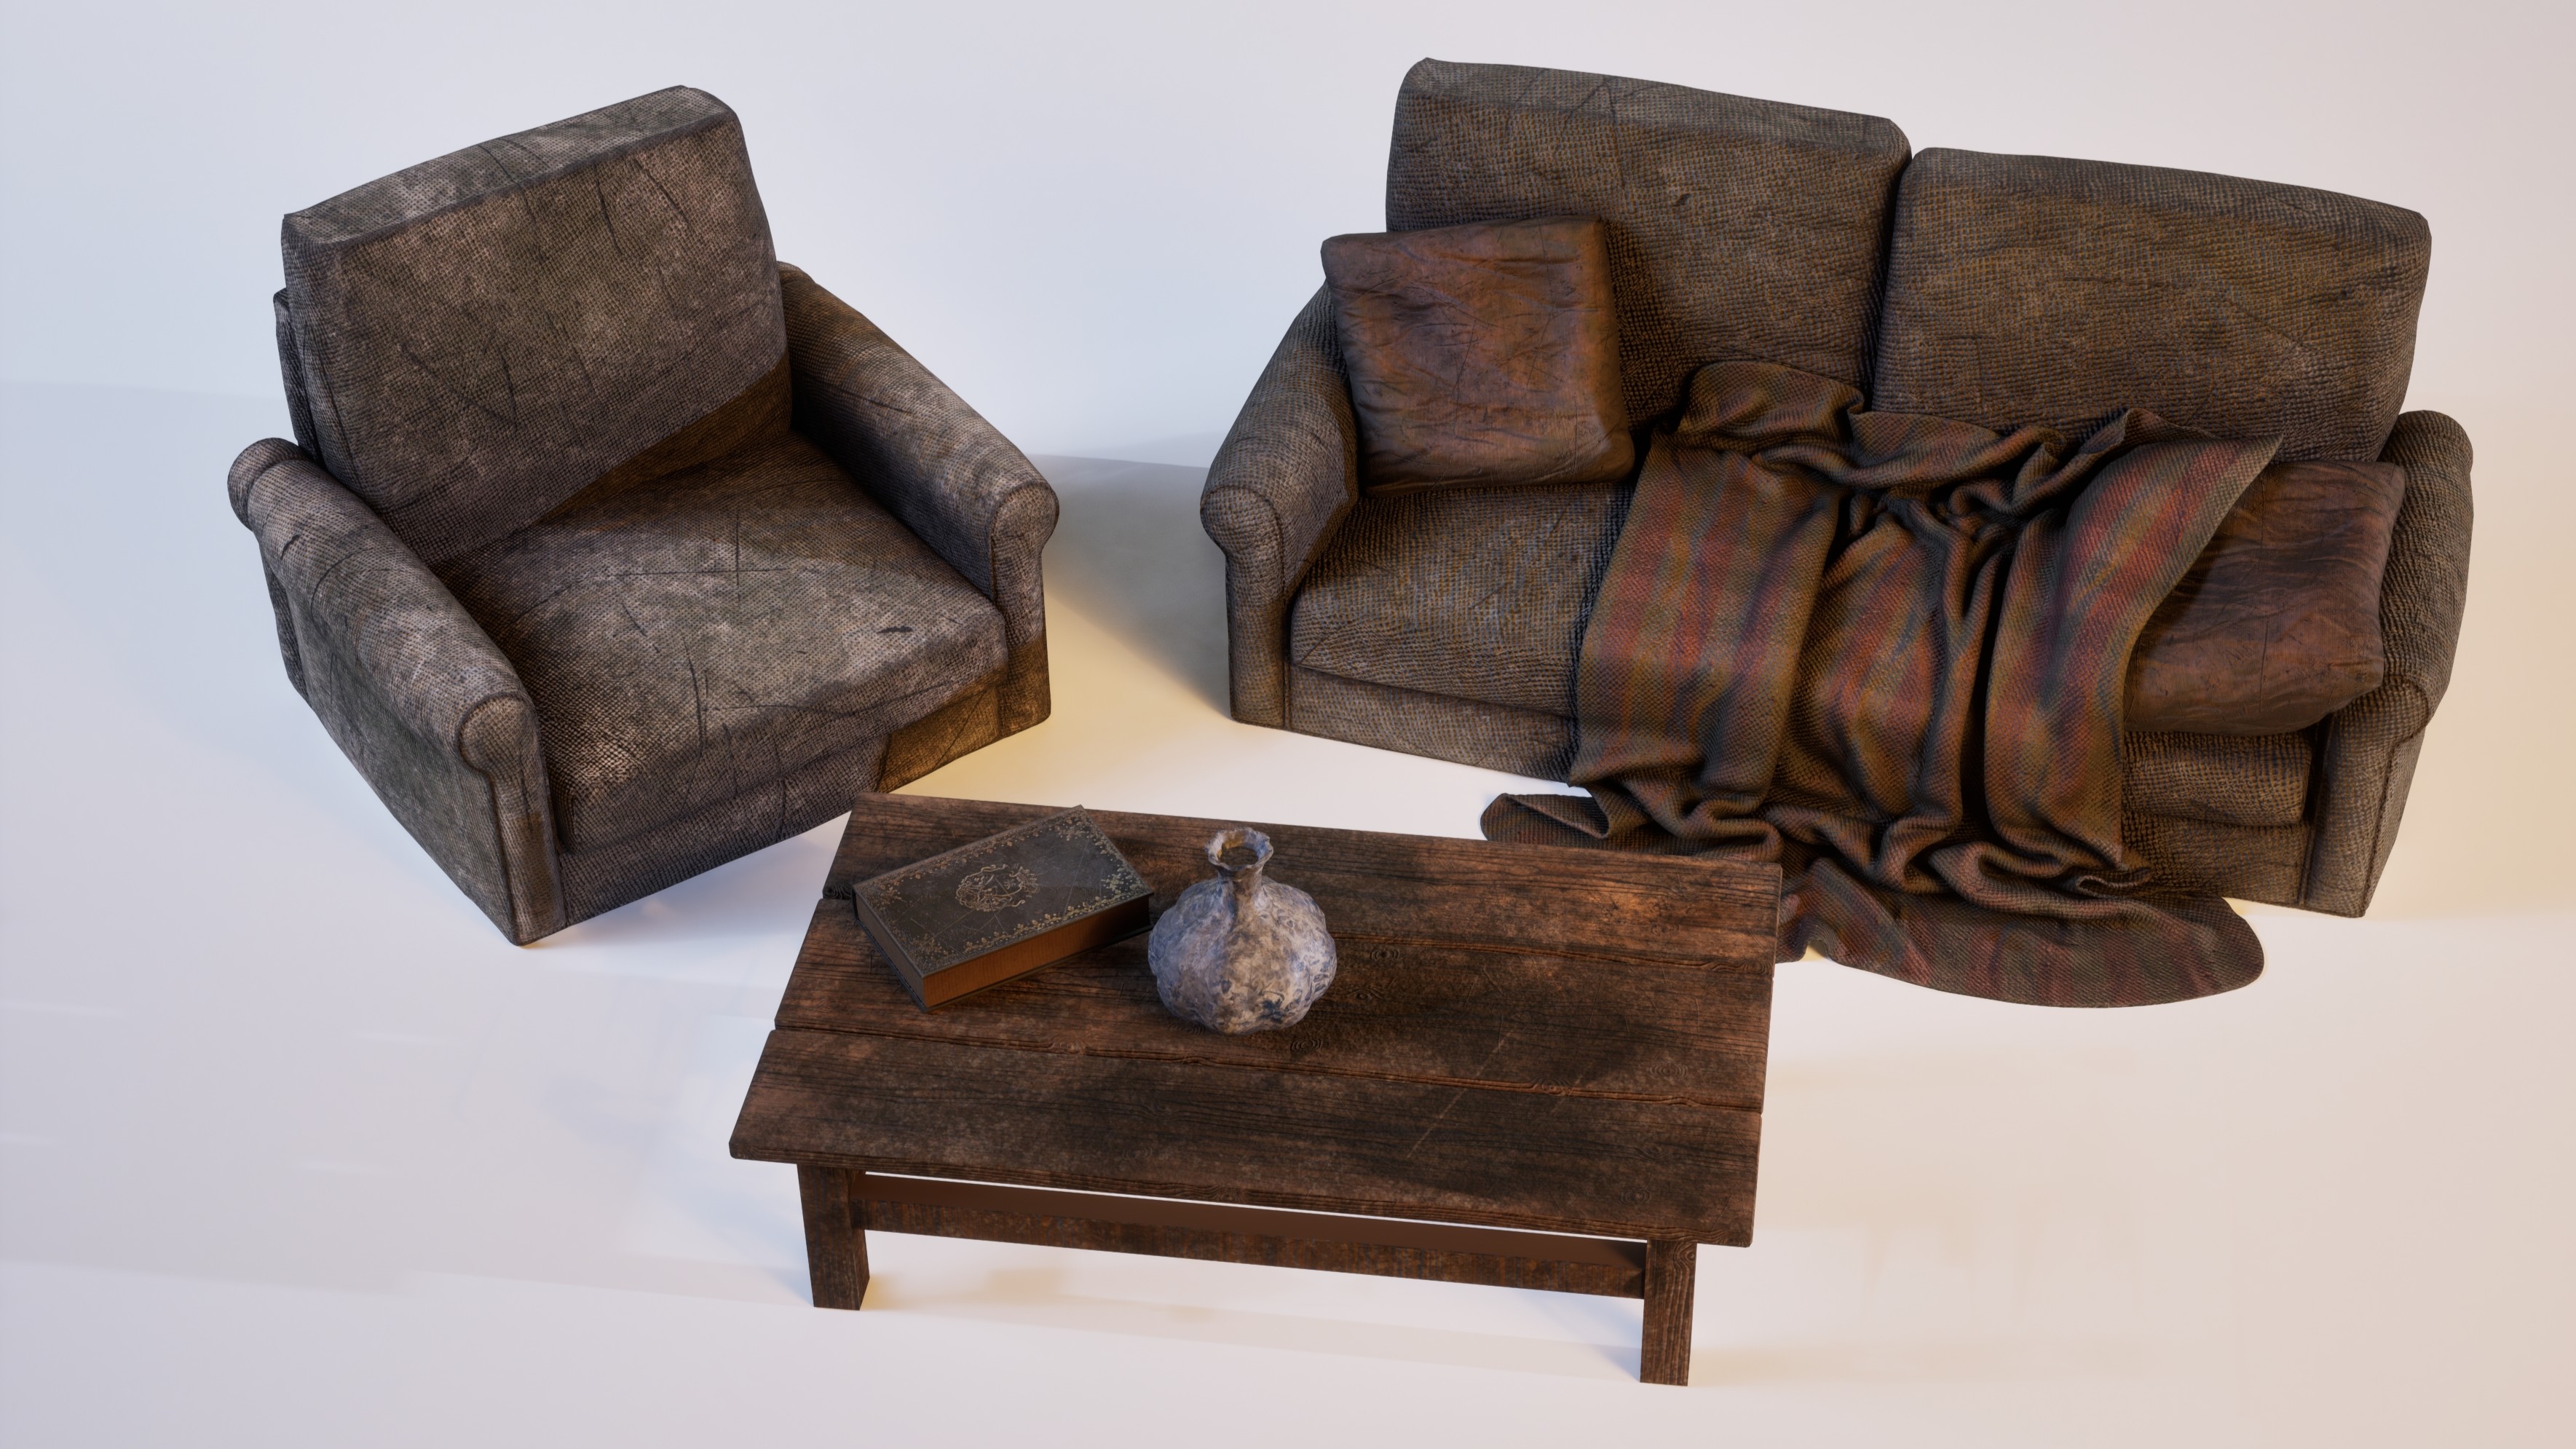
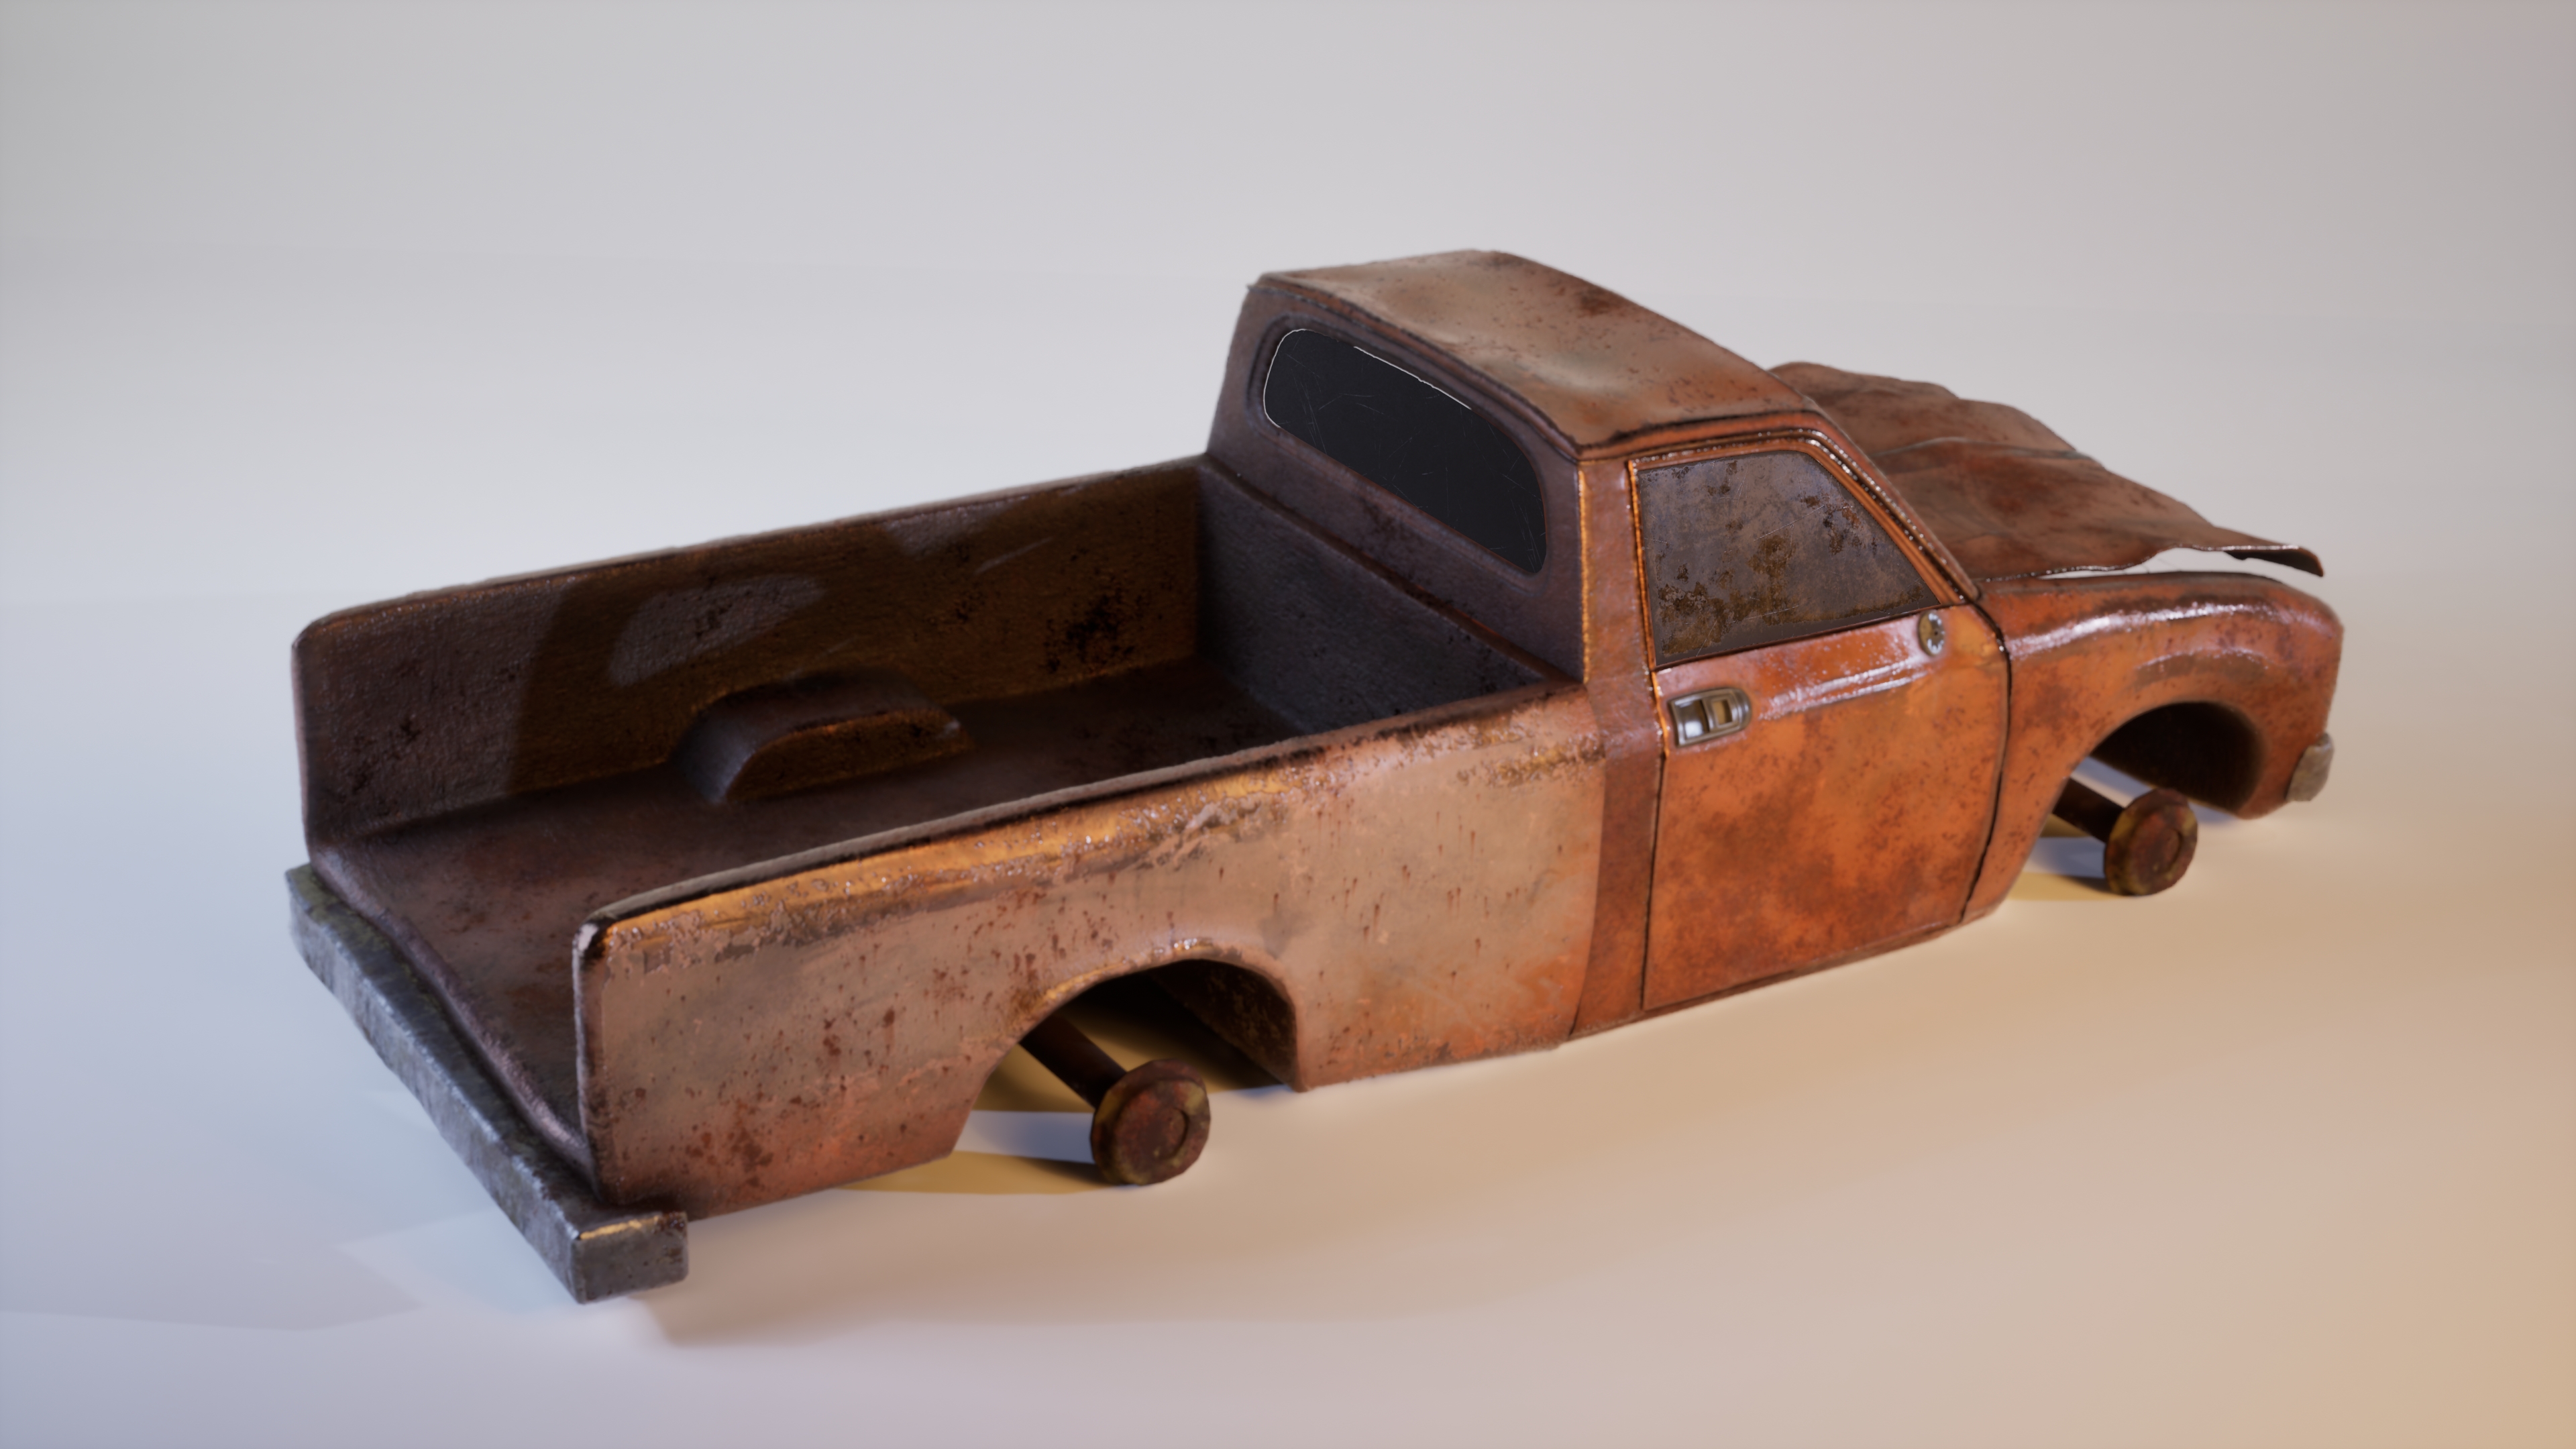
Render on a neutral background, created using Sequencer and Movie Render Queue (16×16 samples). The studio lighting setup is designed to enhance the metallic and wooden materials, highlighting wear, rust, and fine construction details.
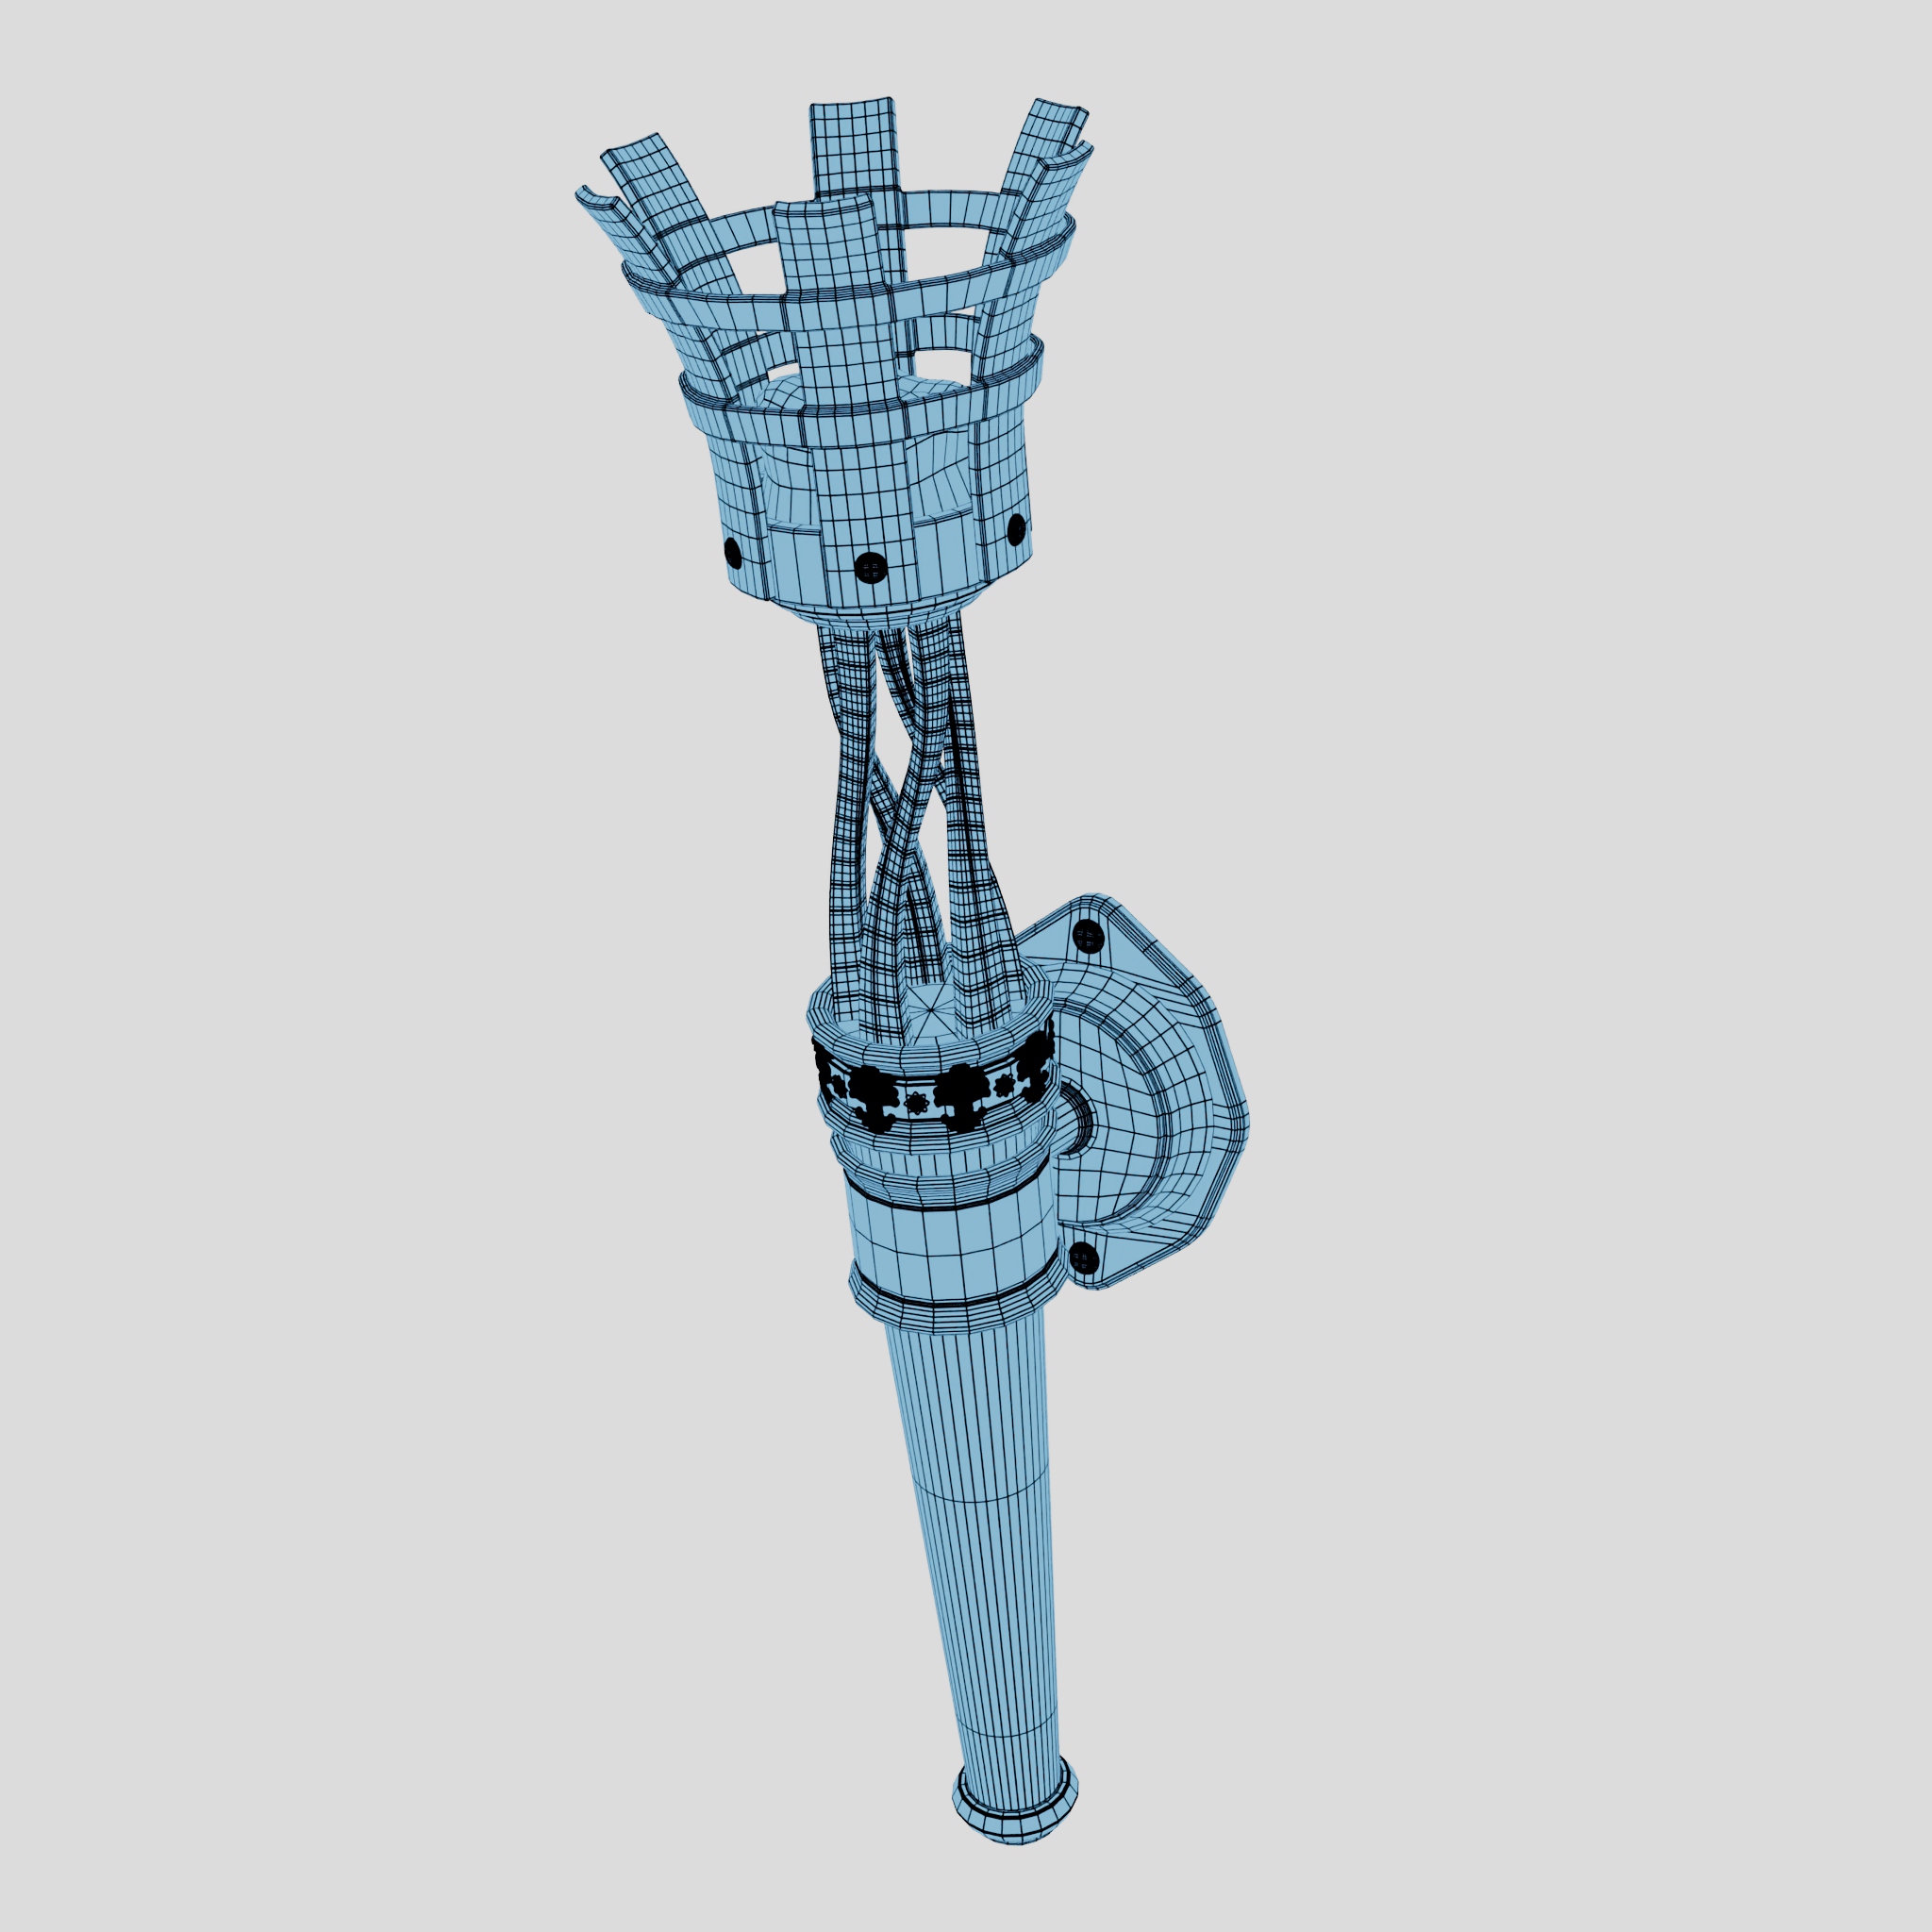
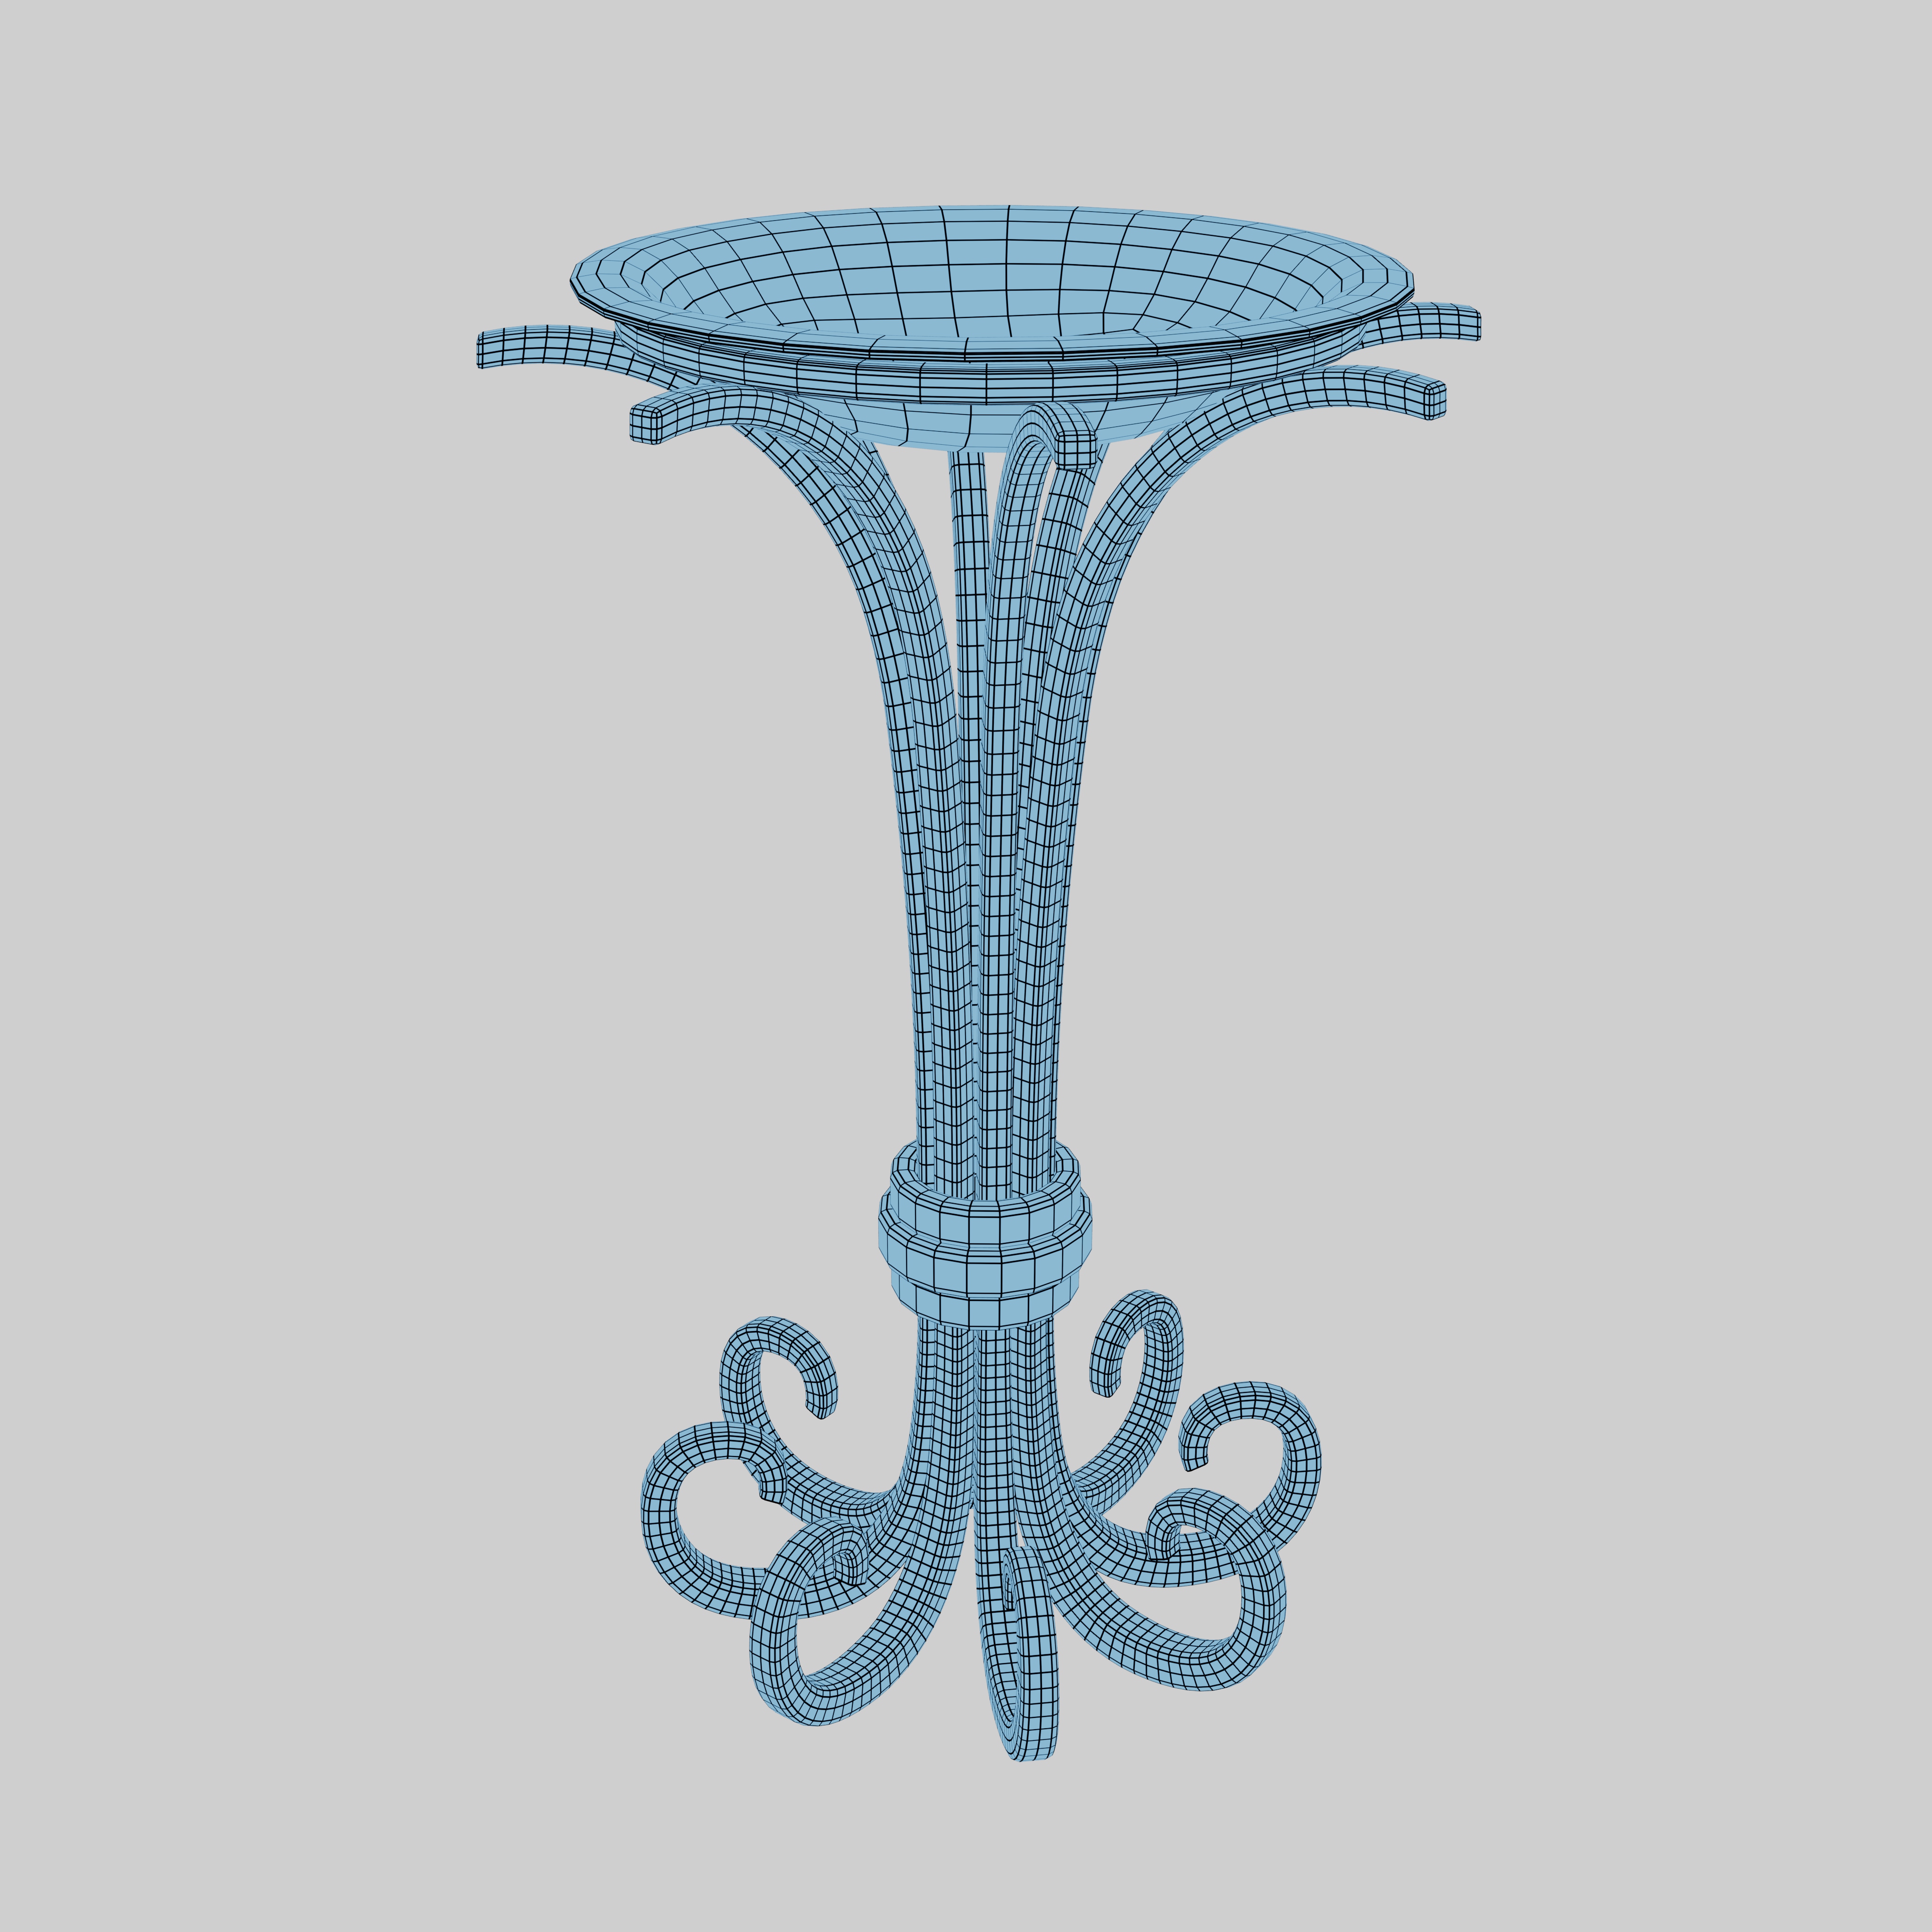
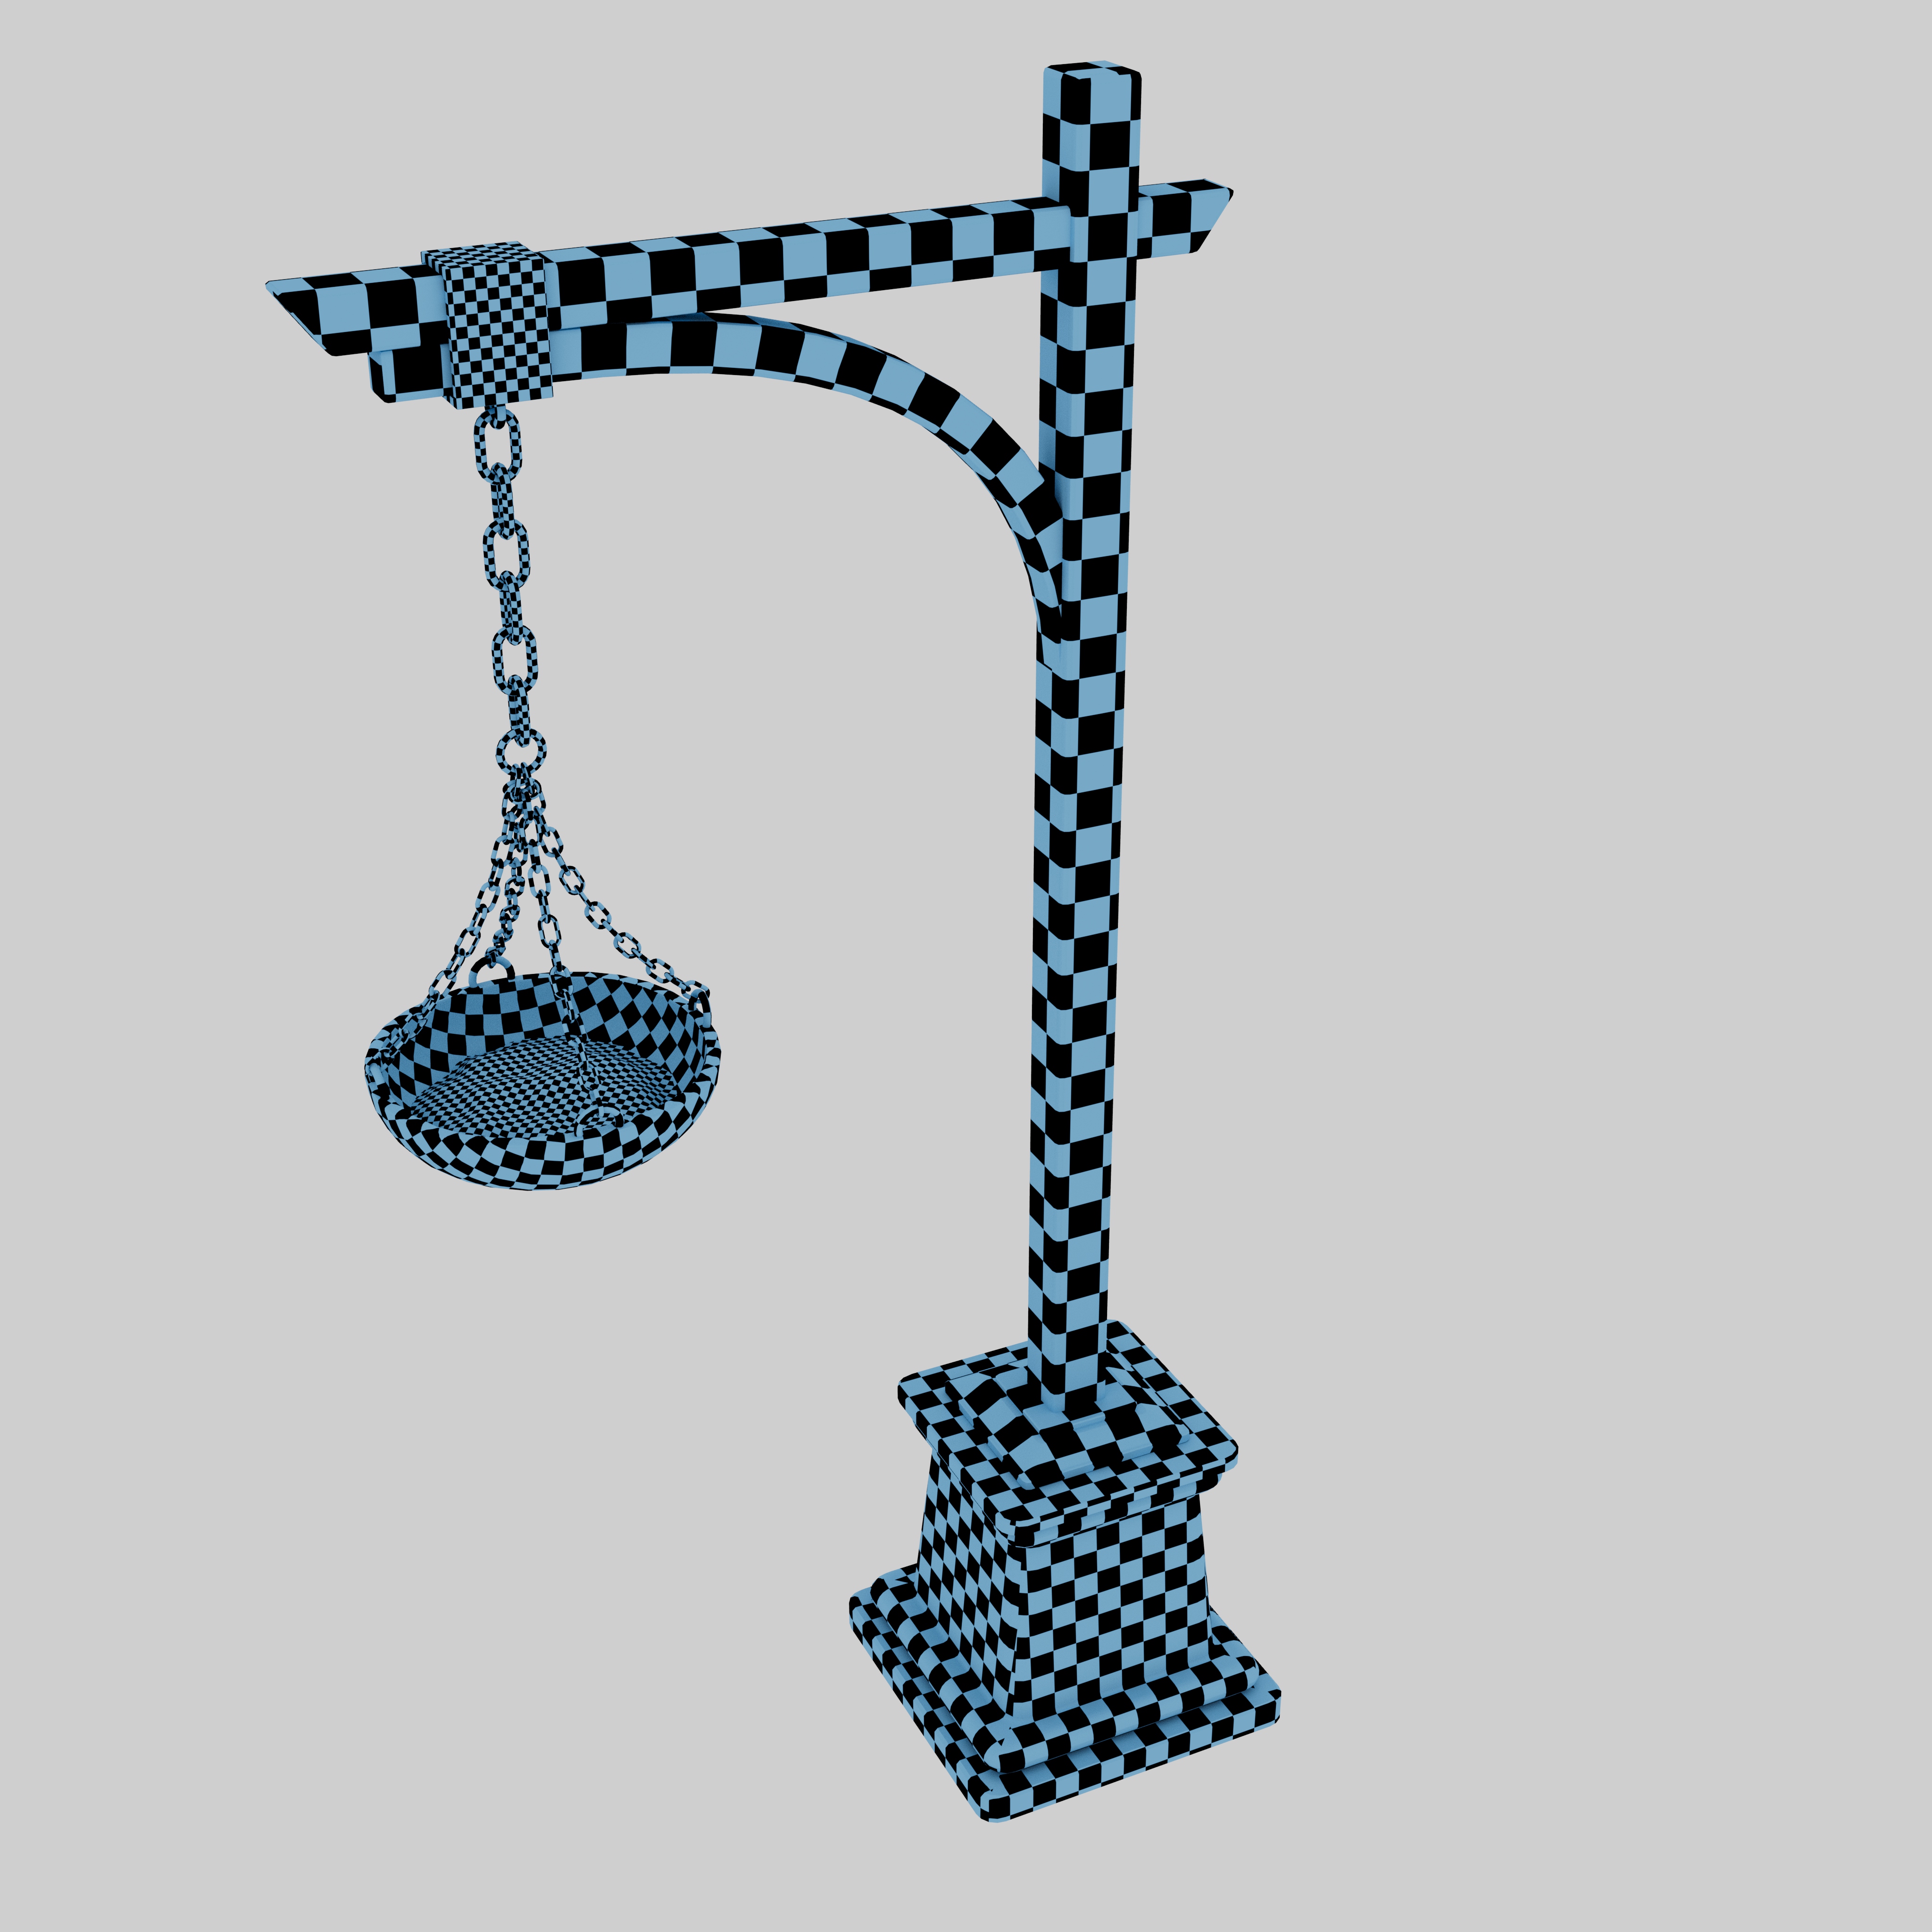
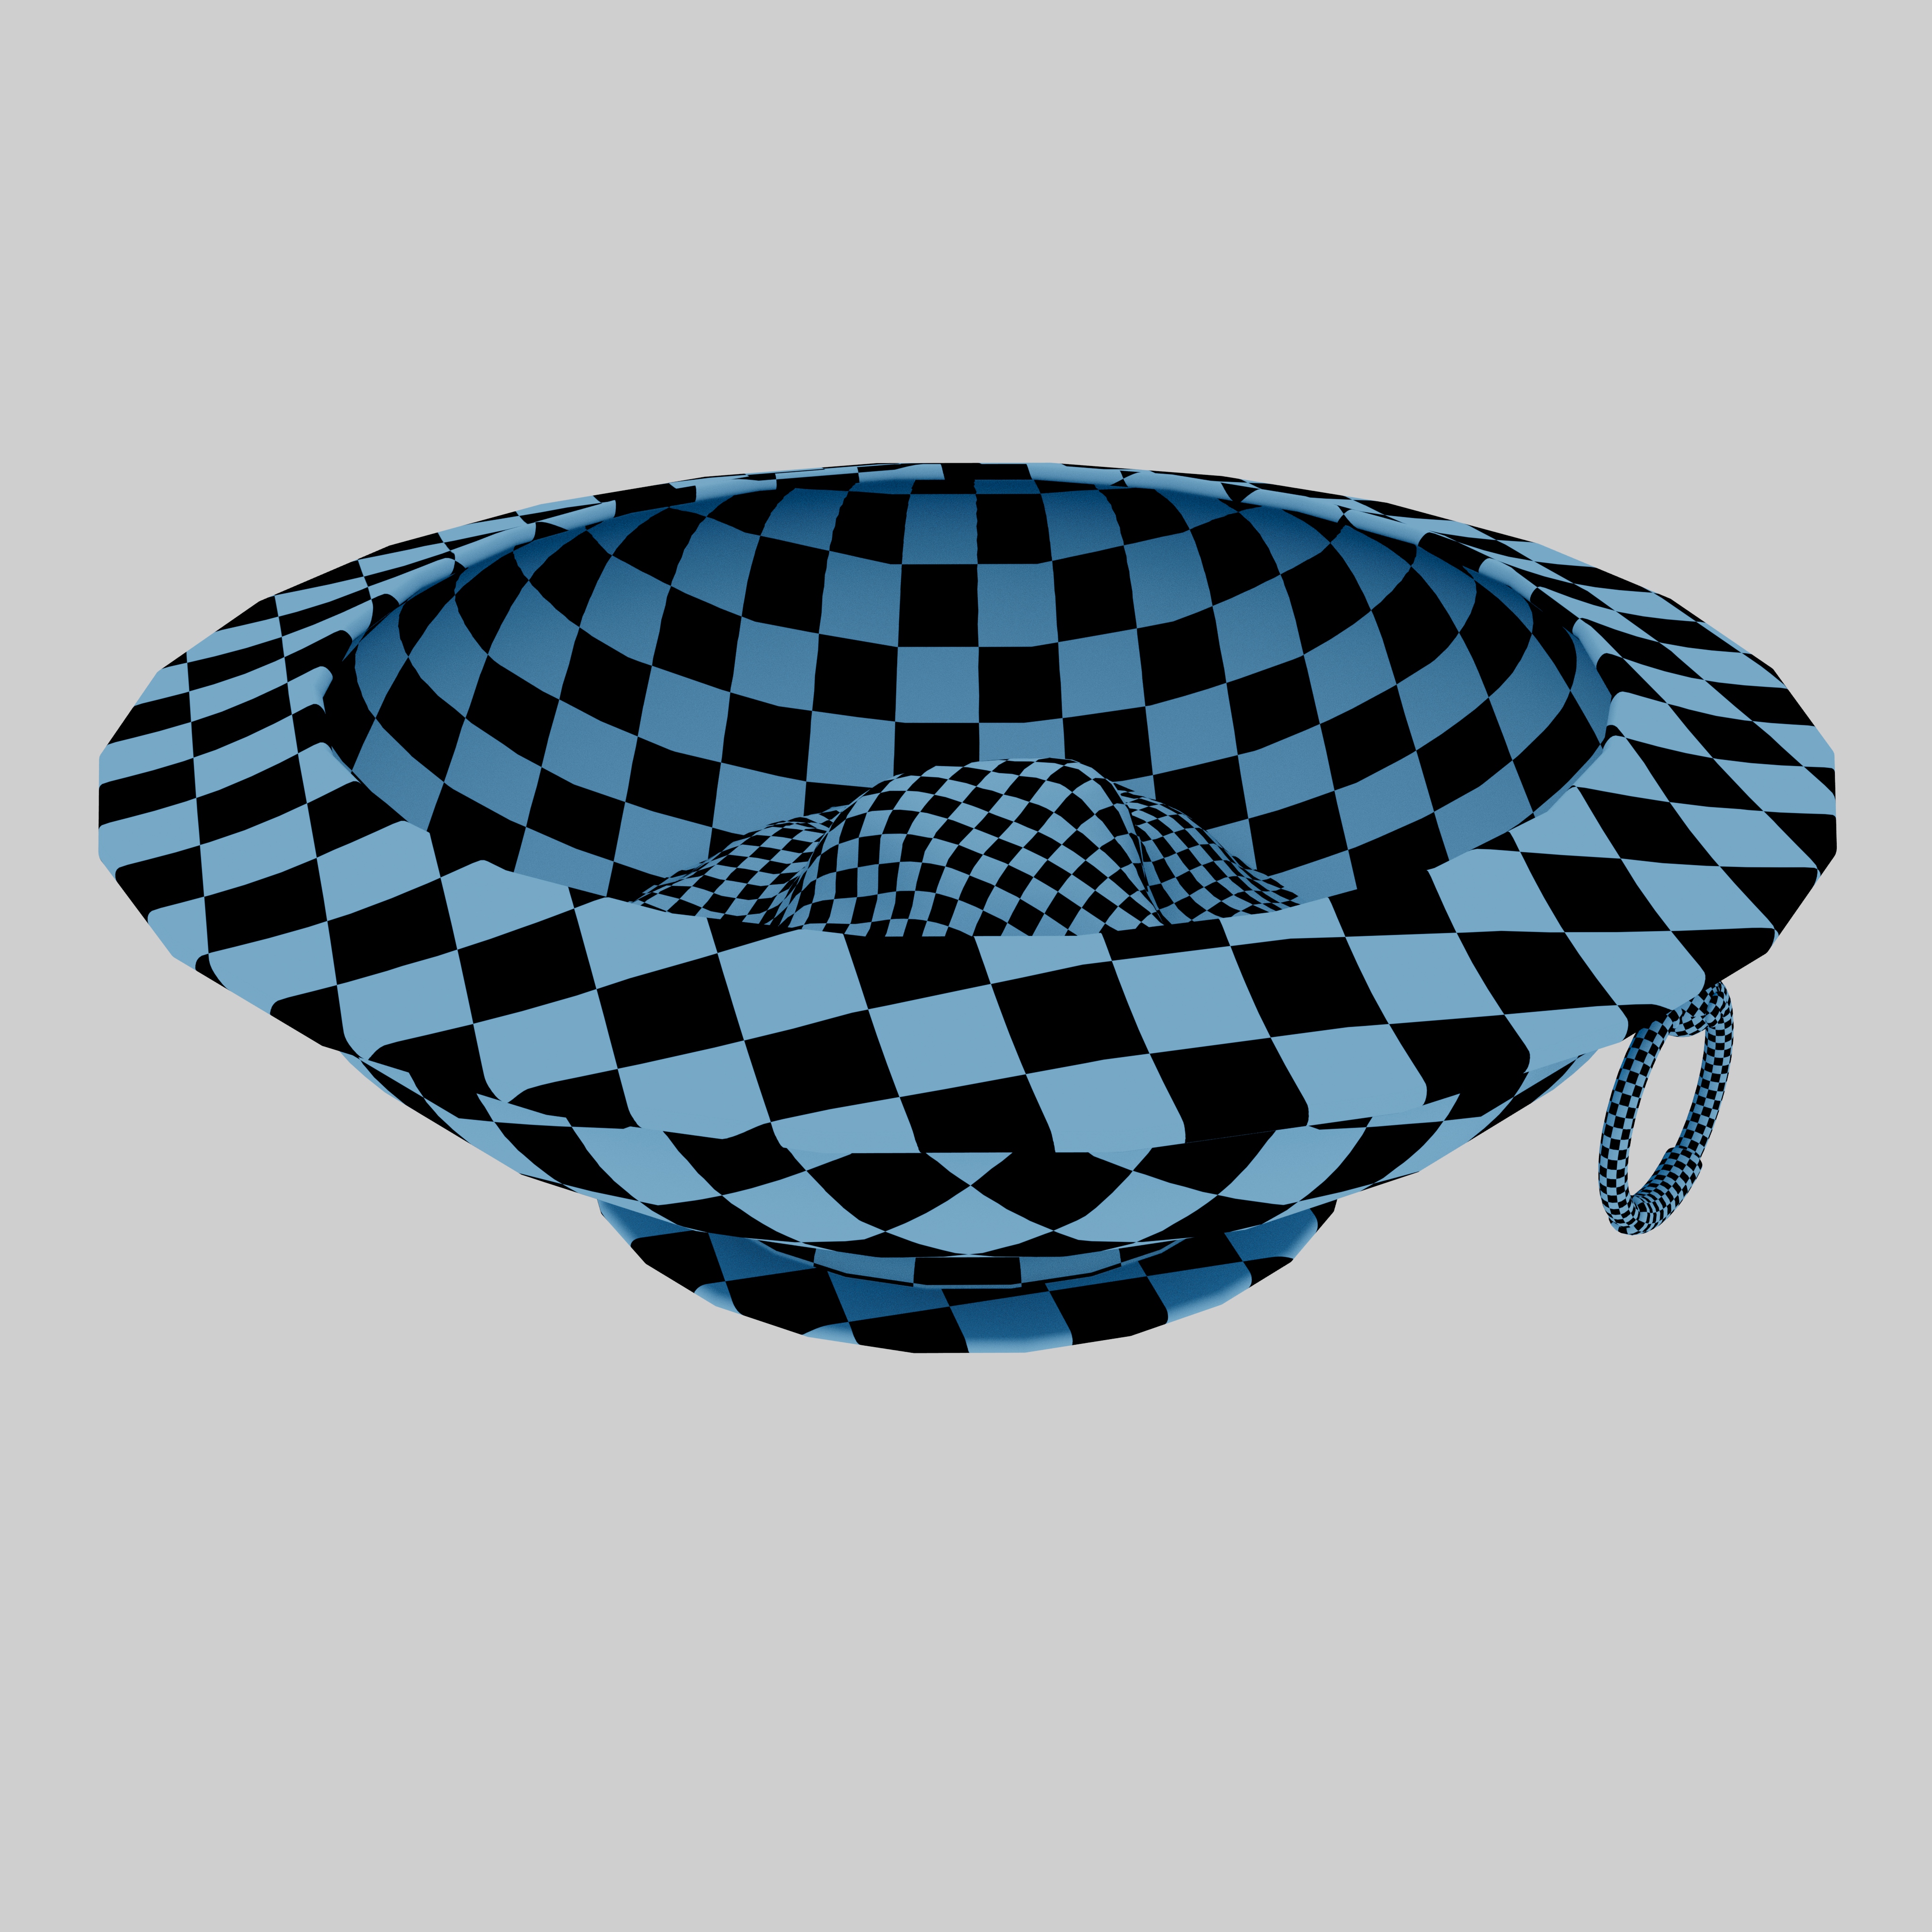
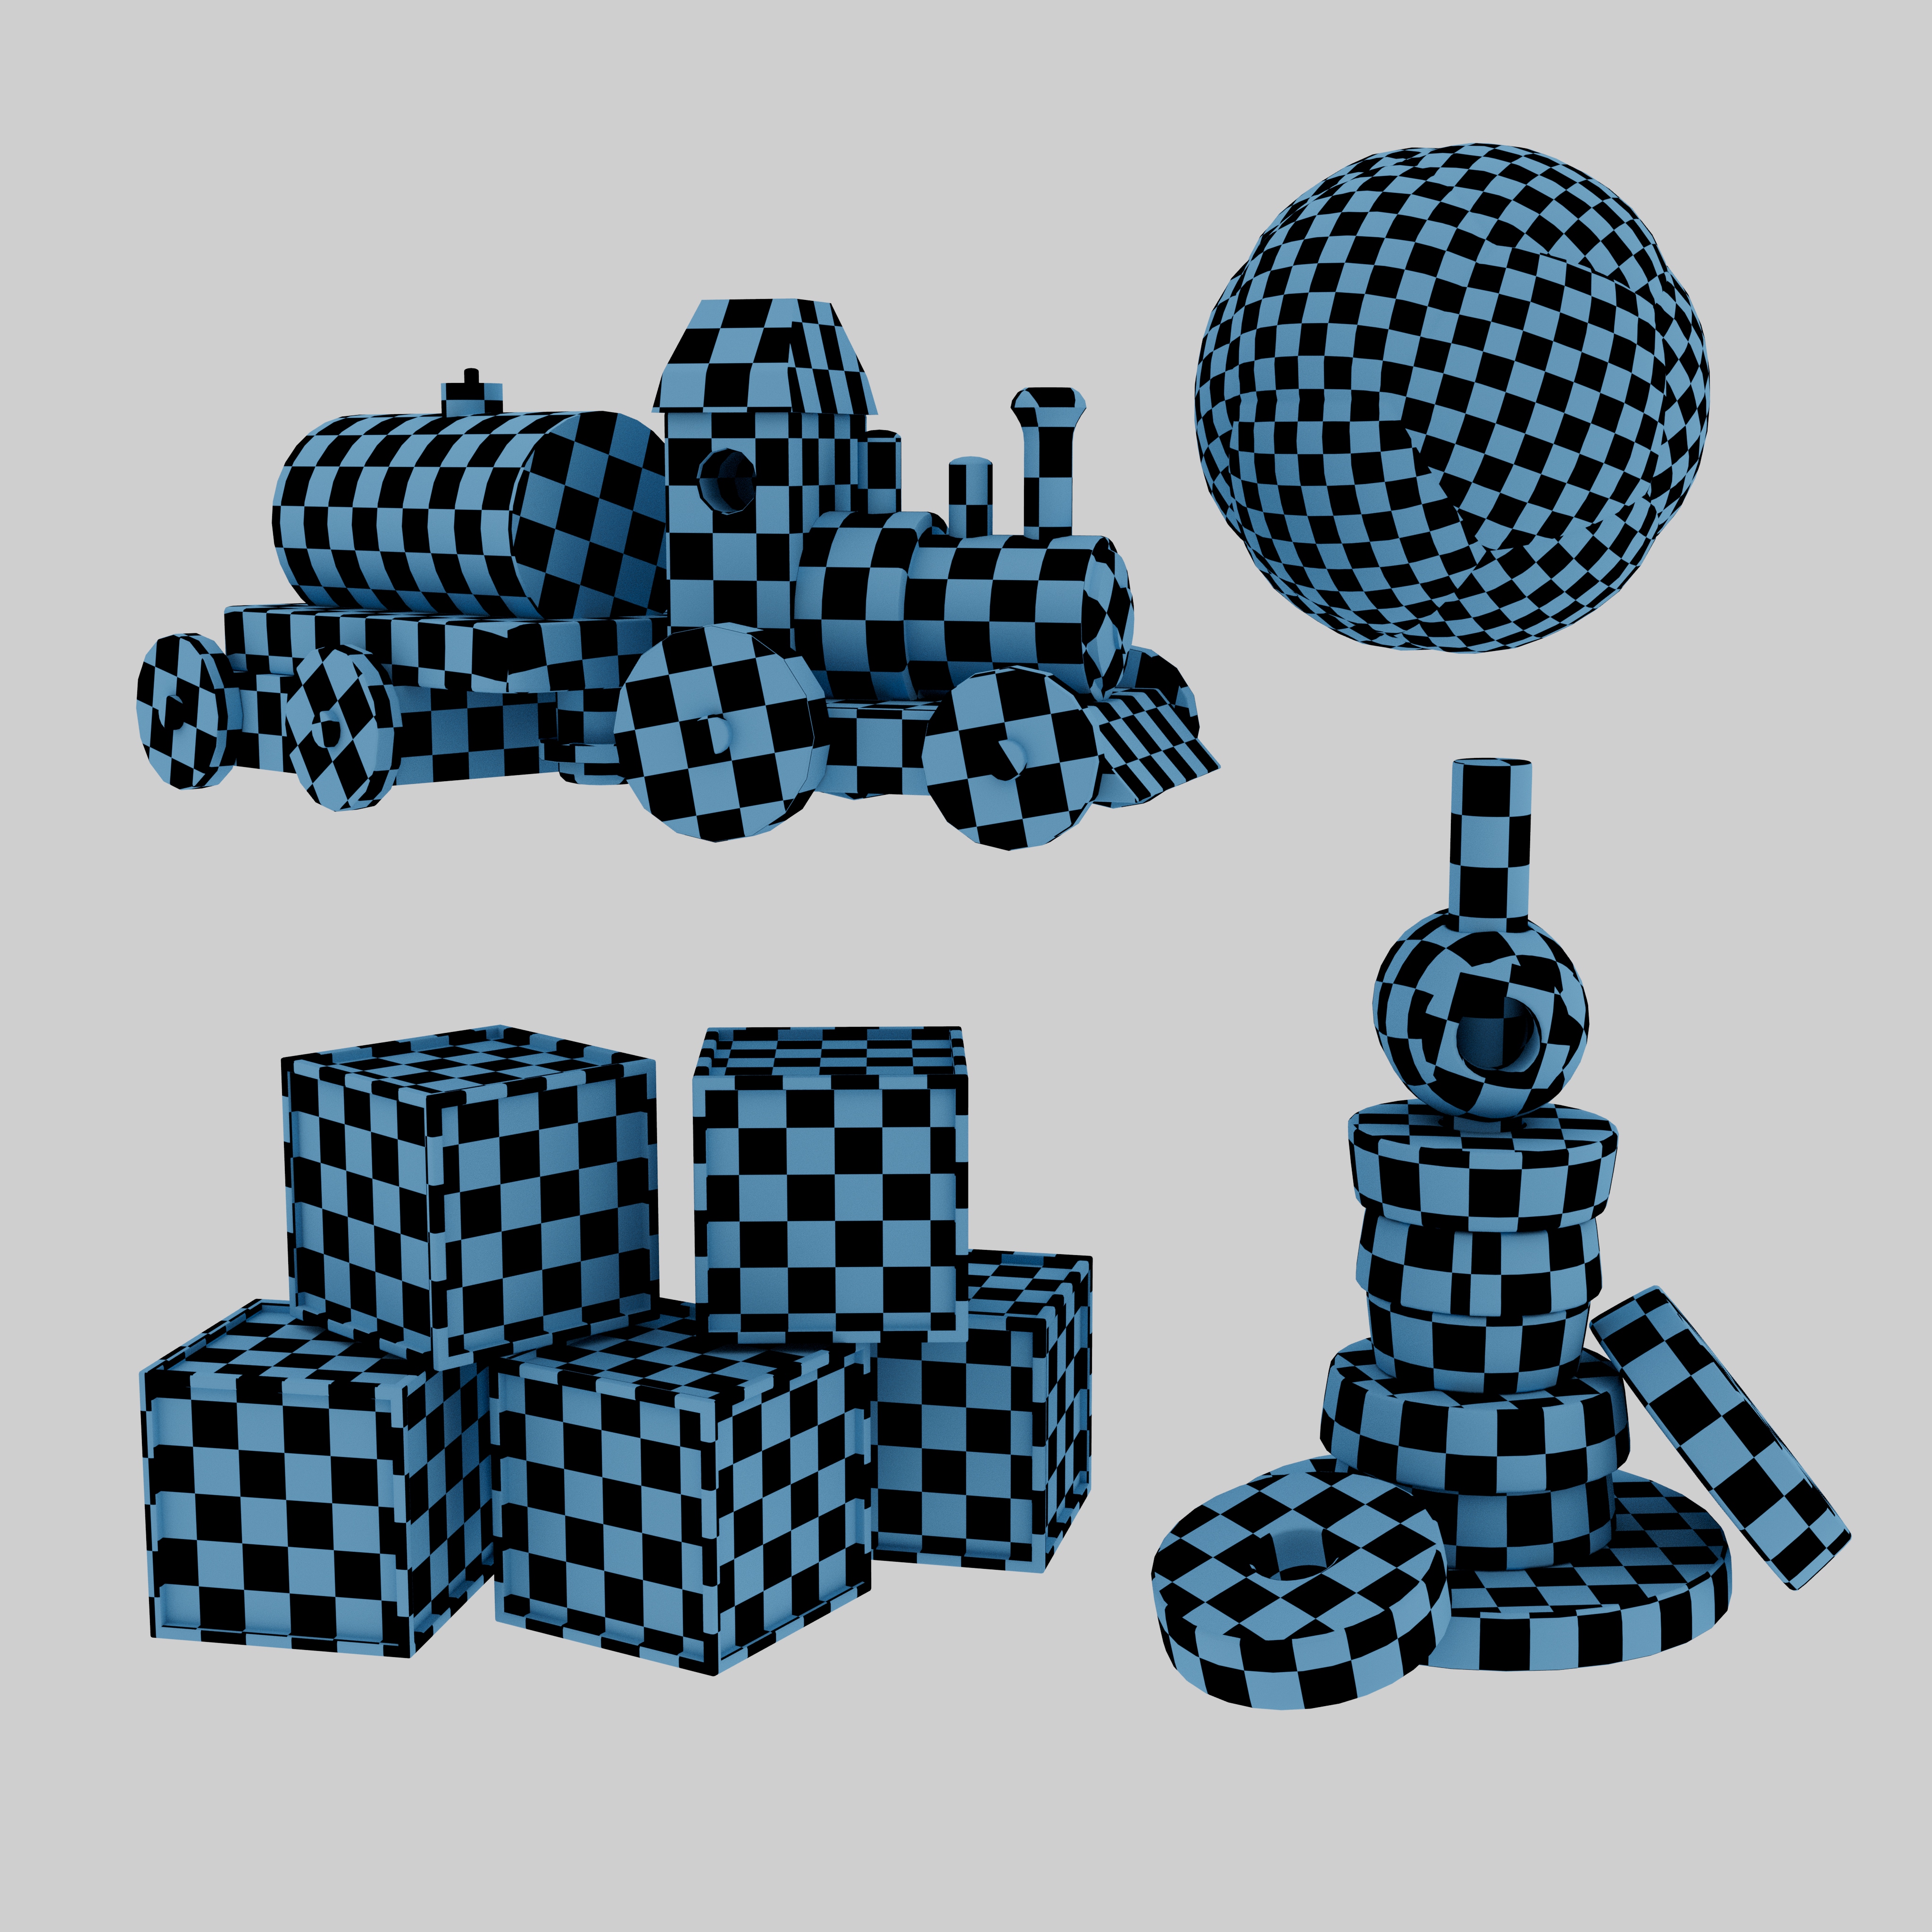
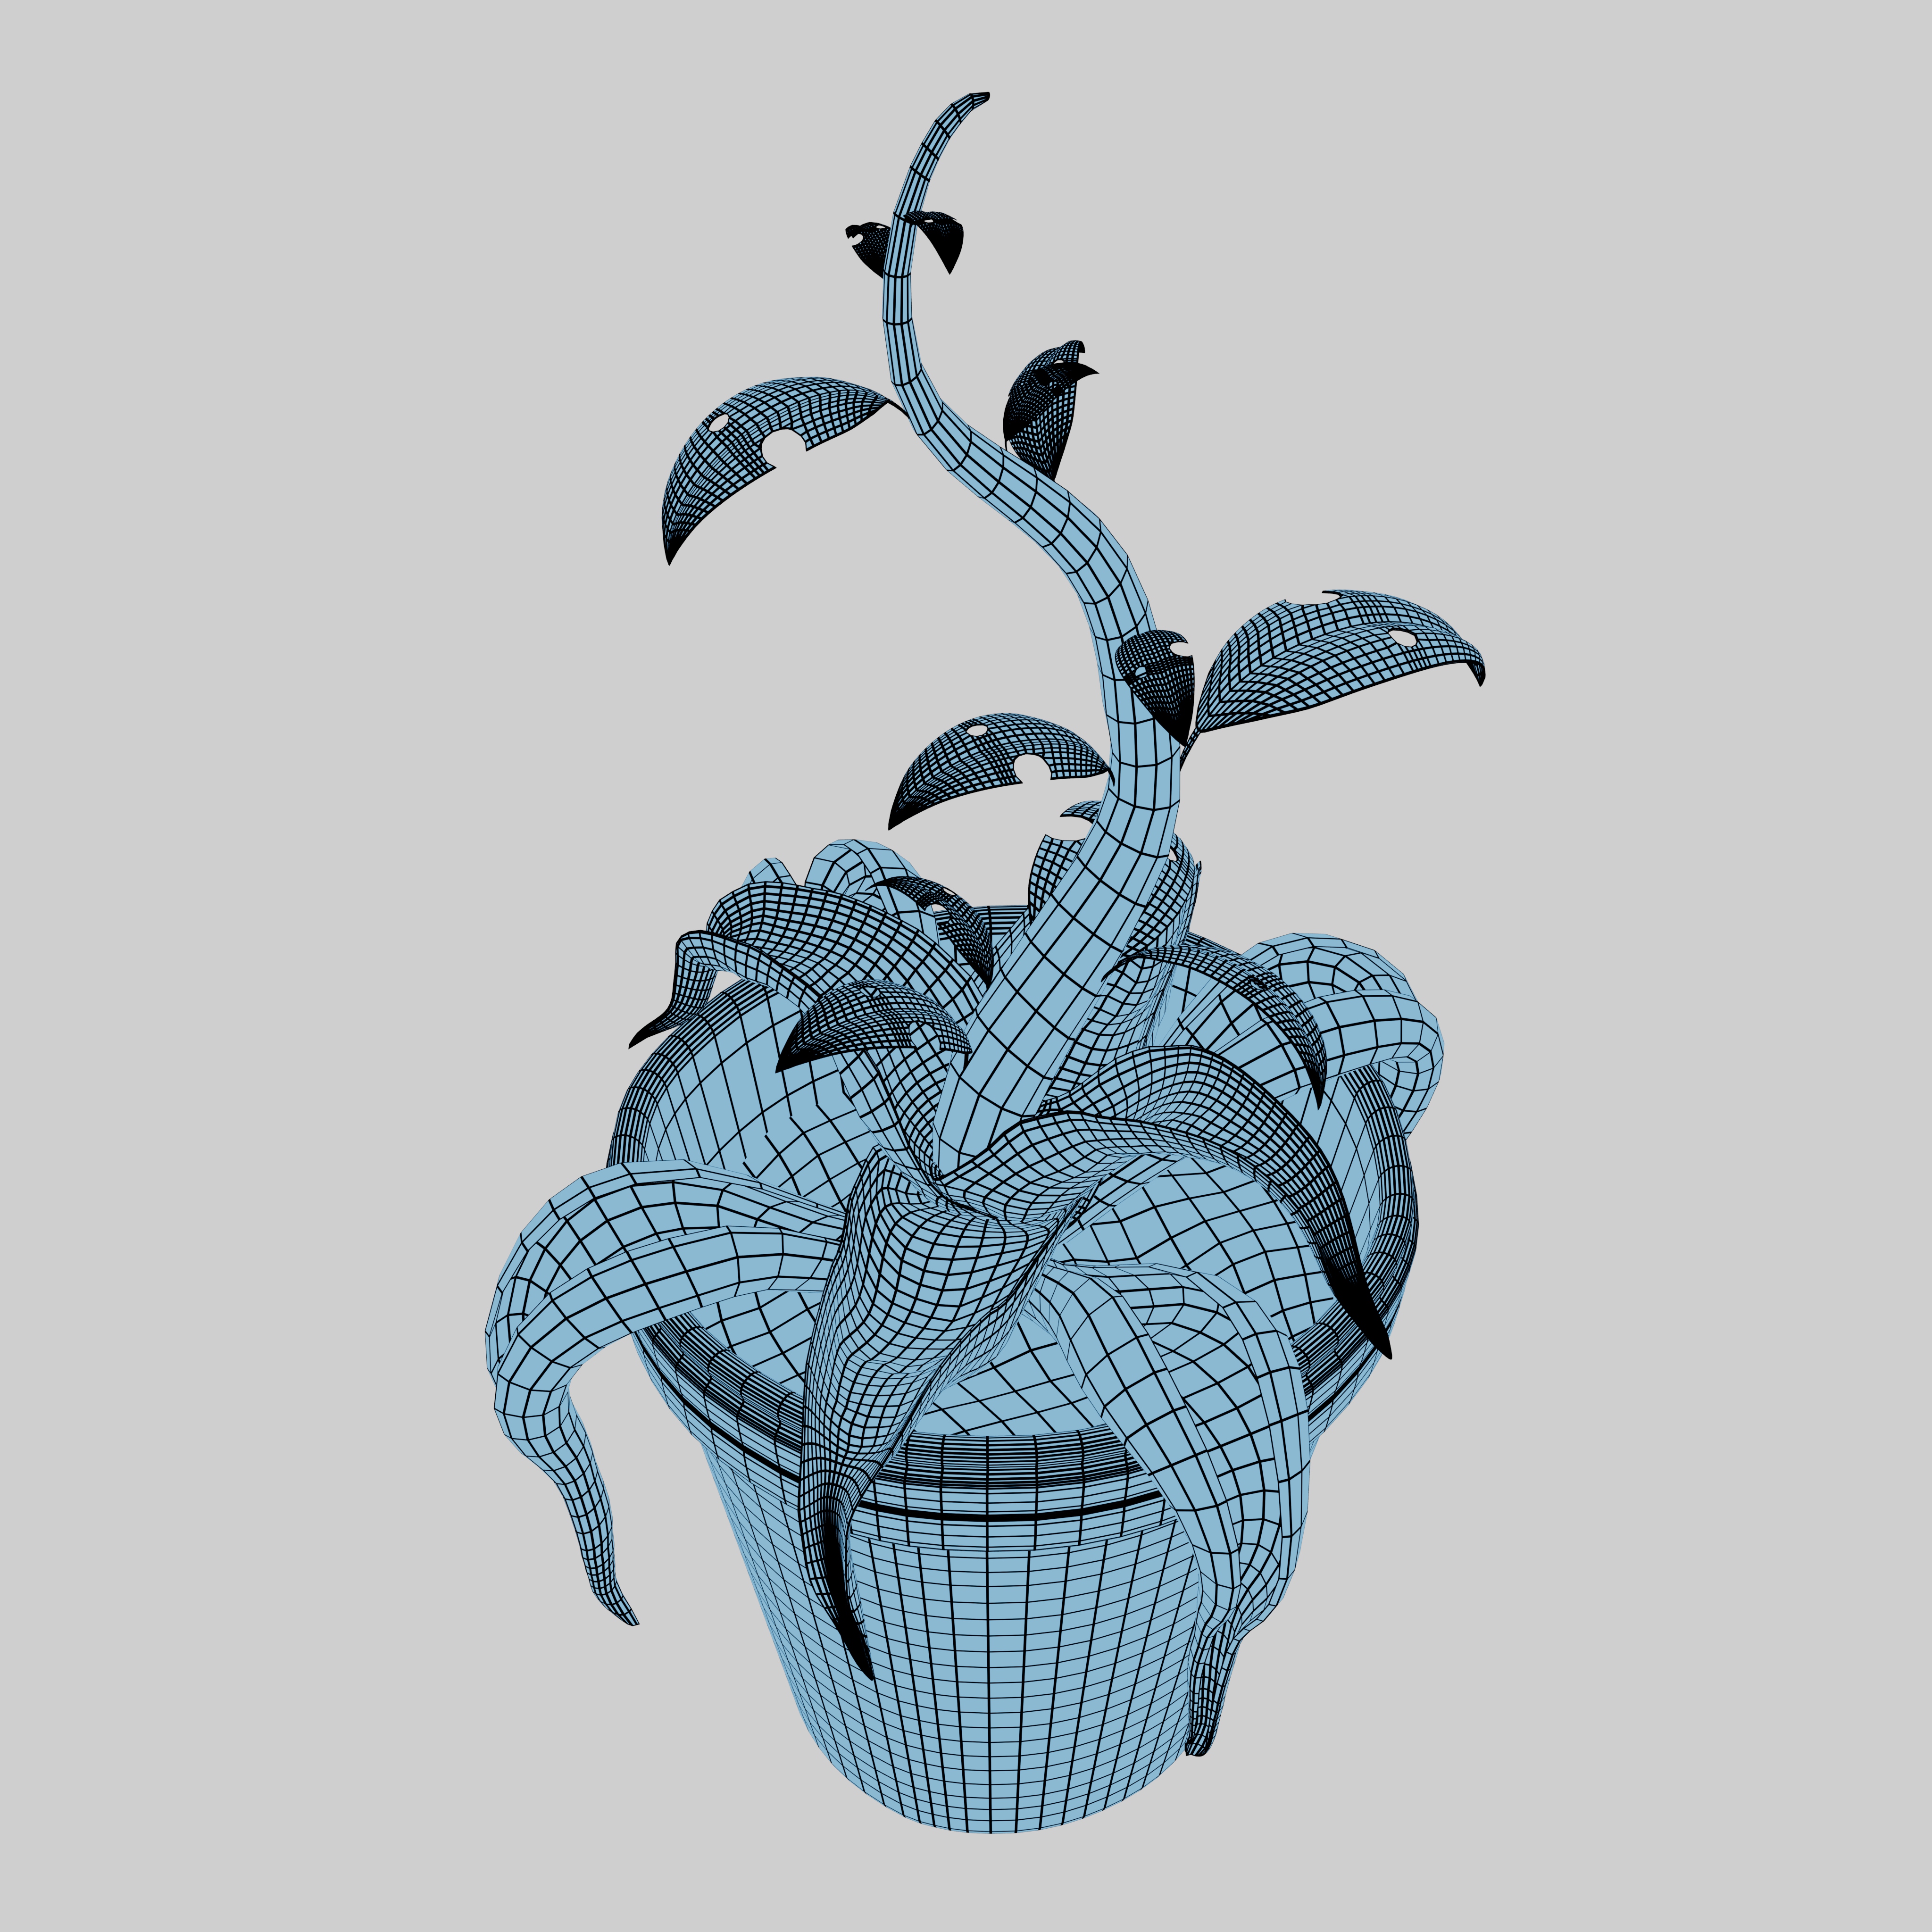
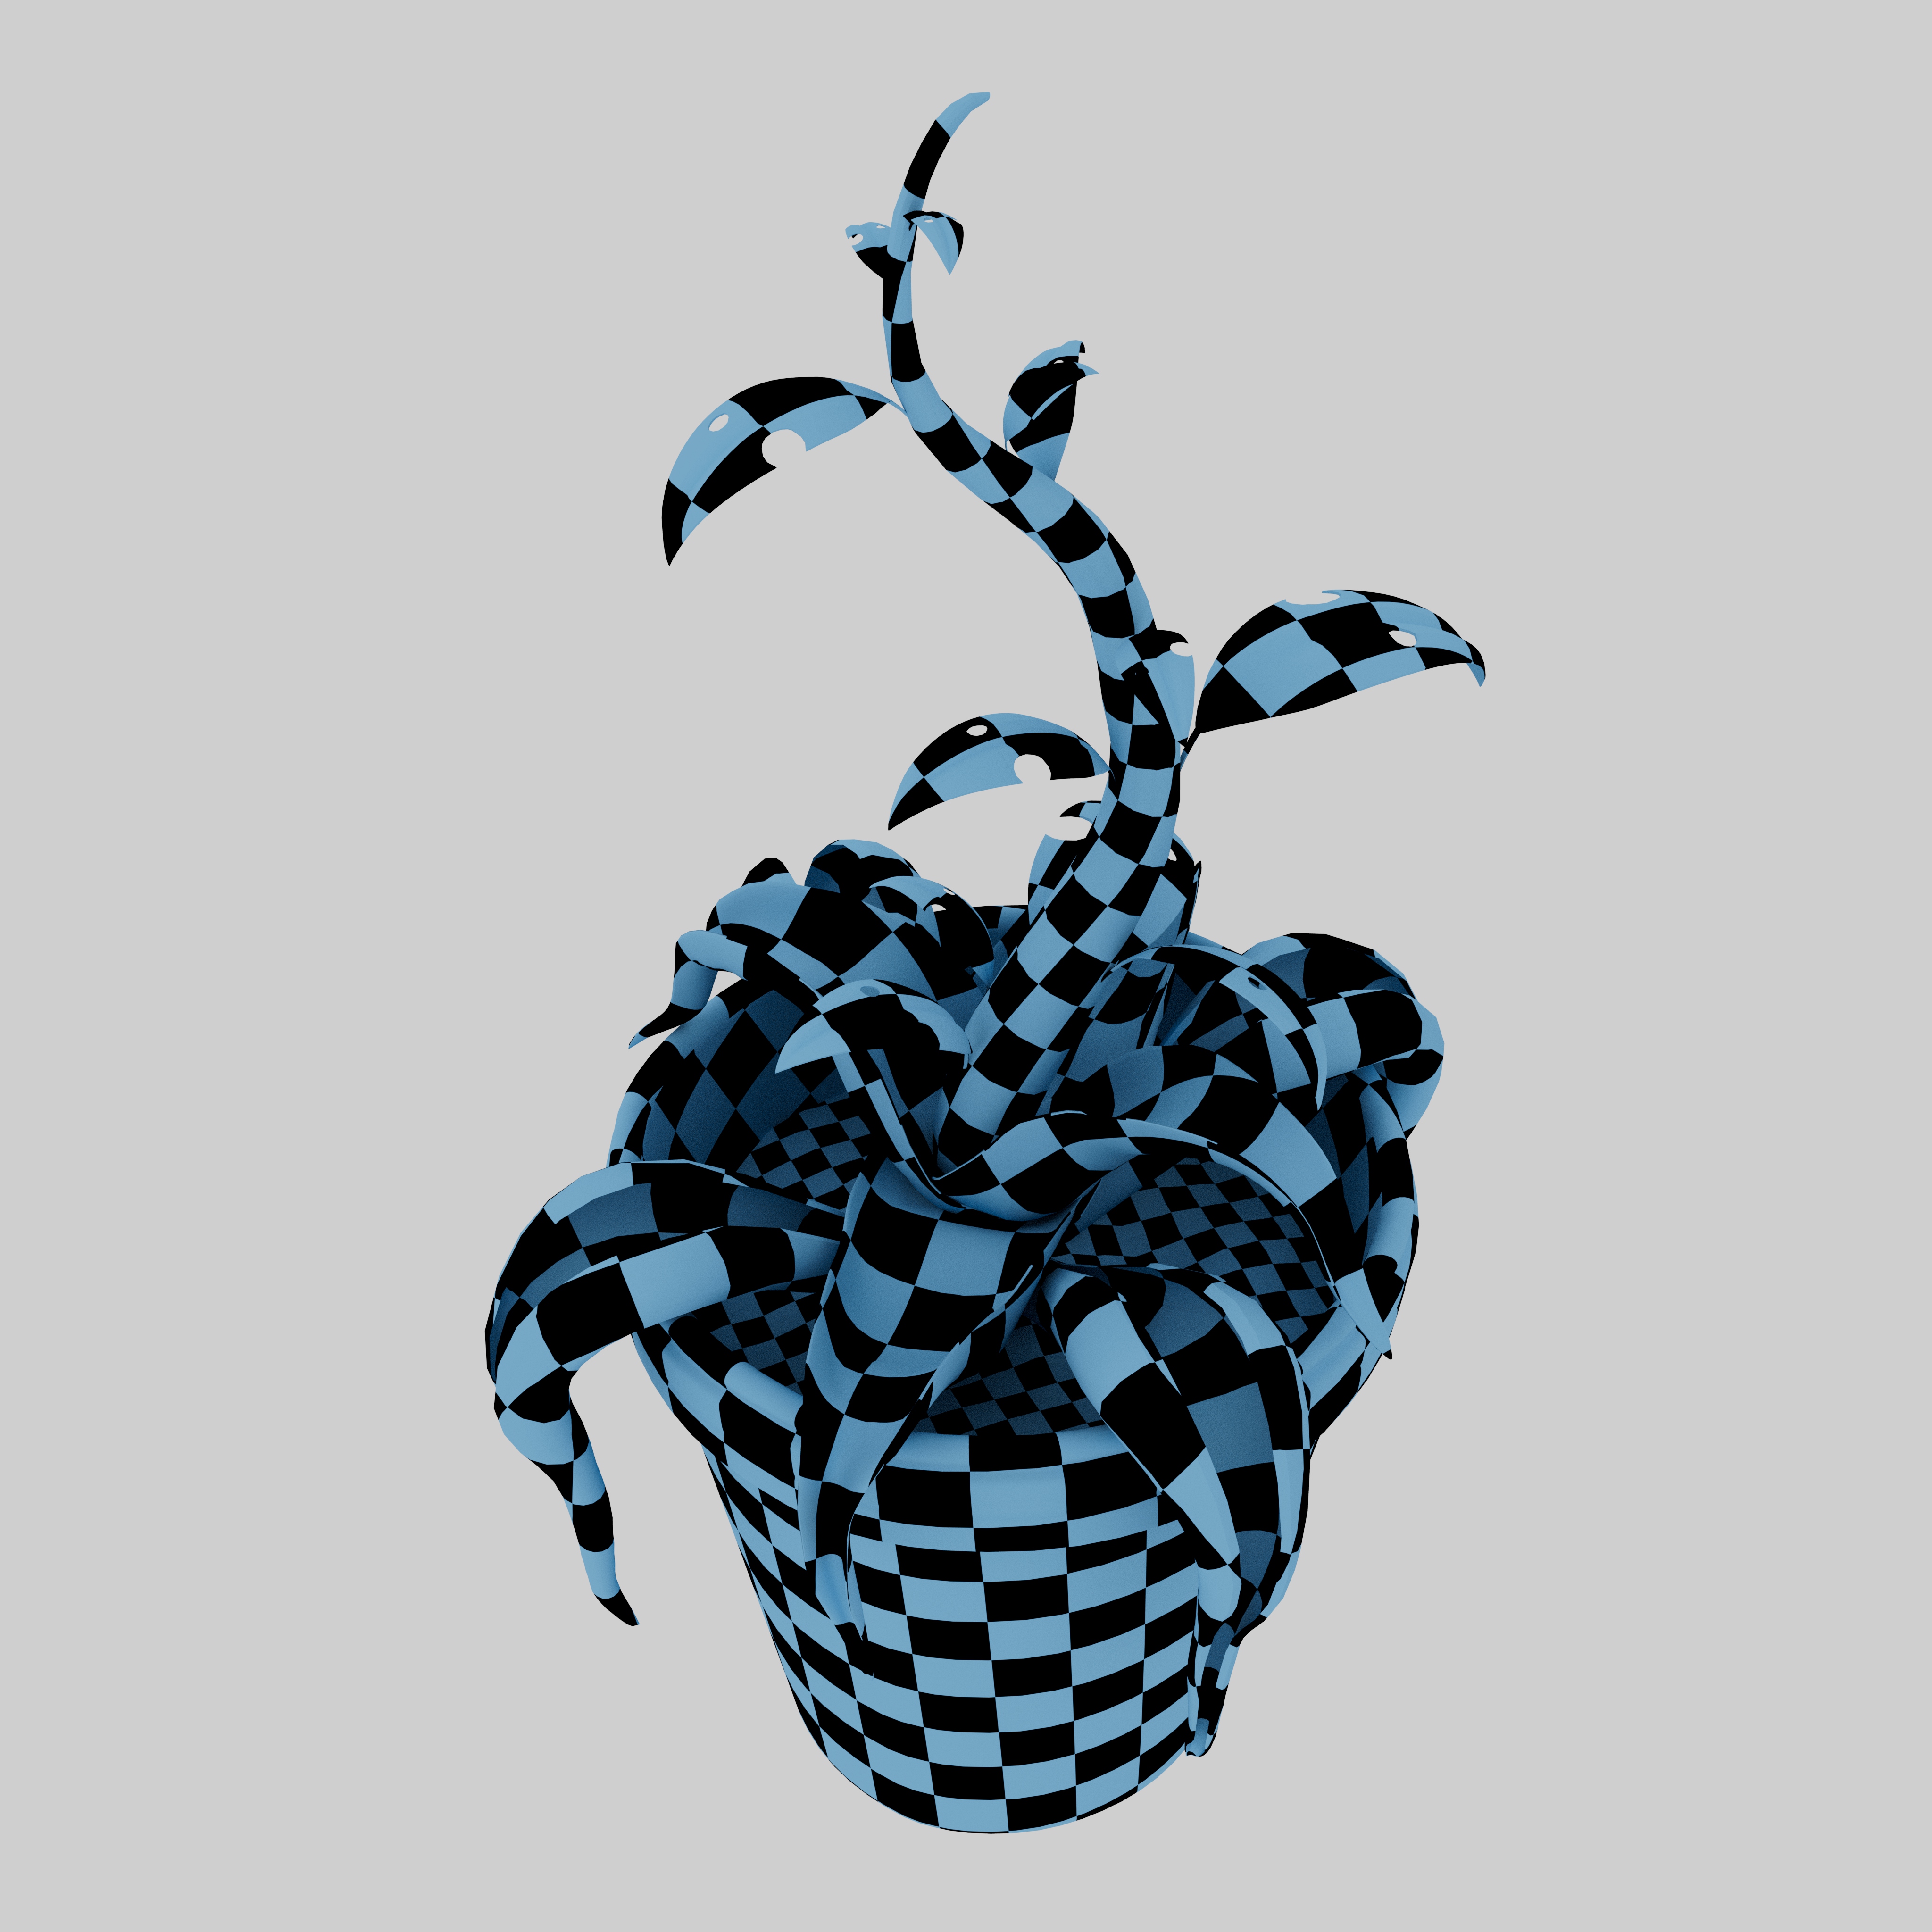
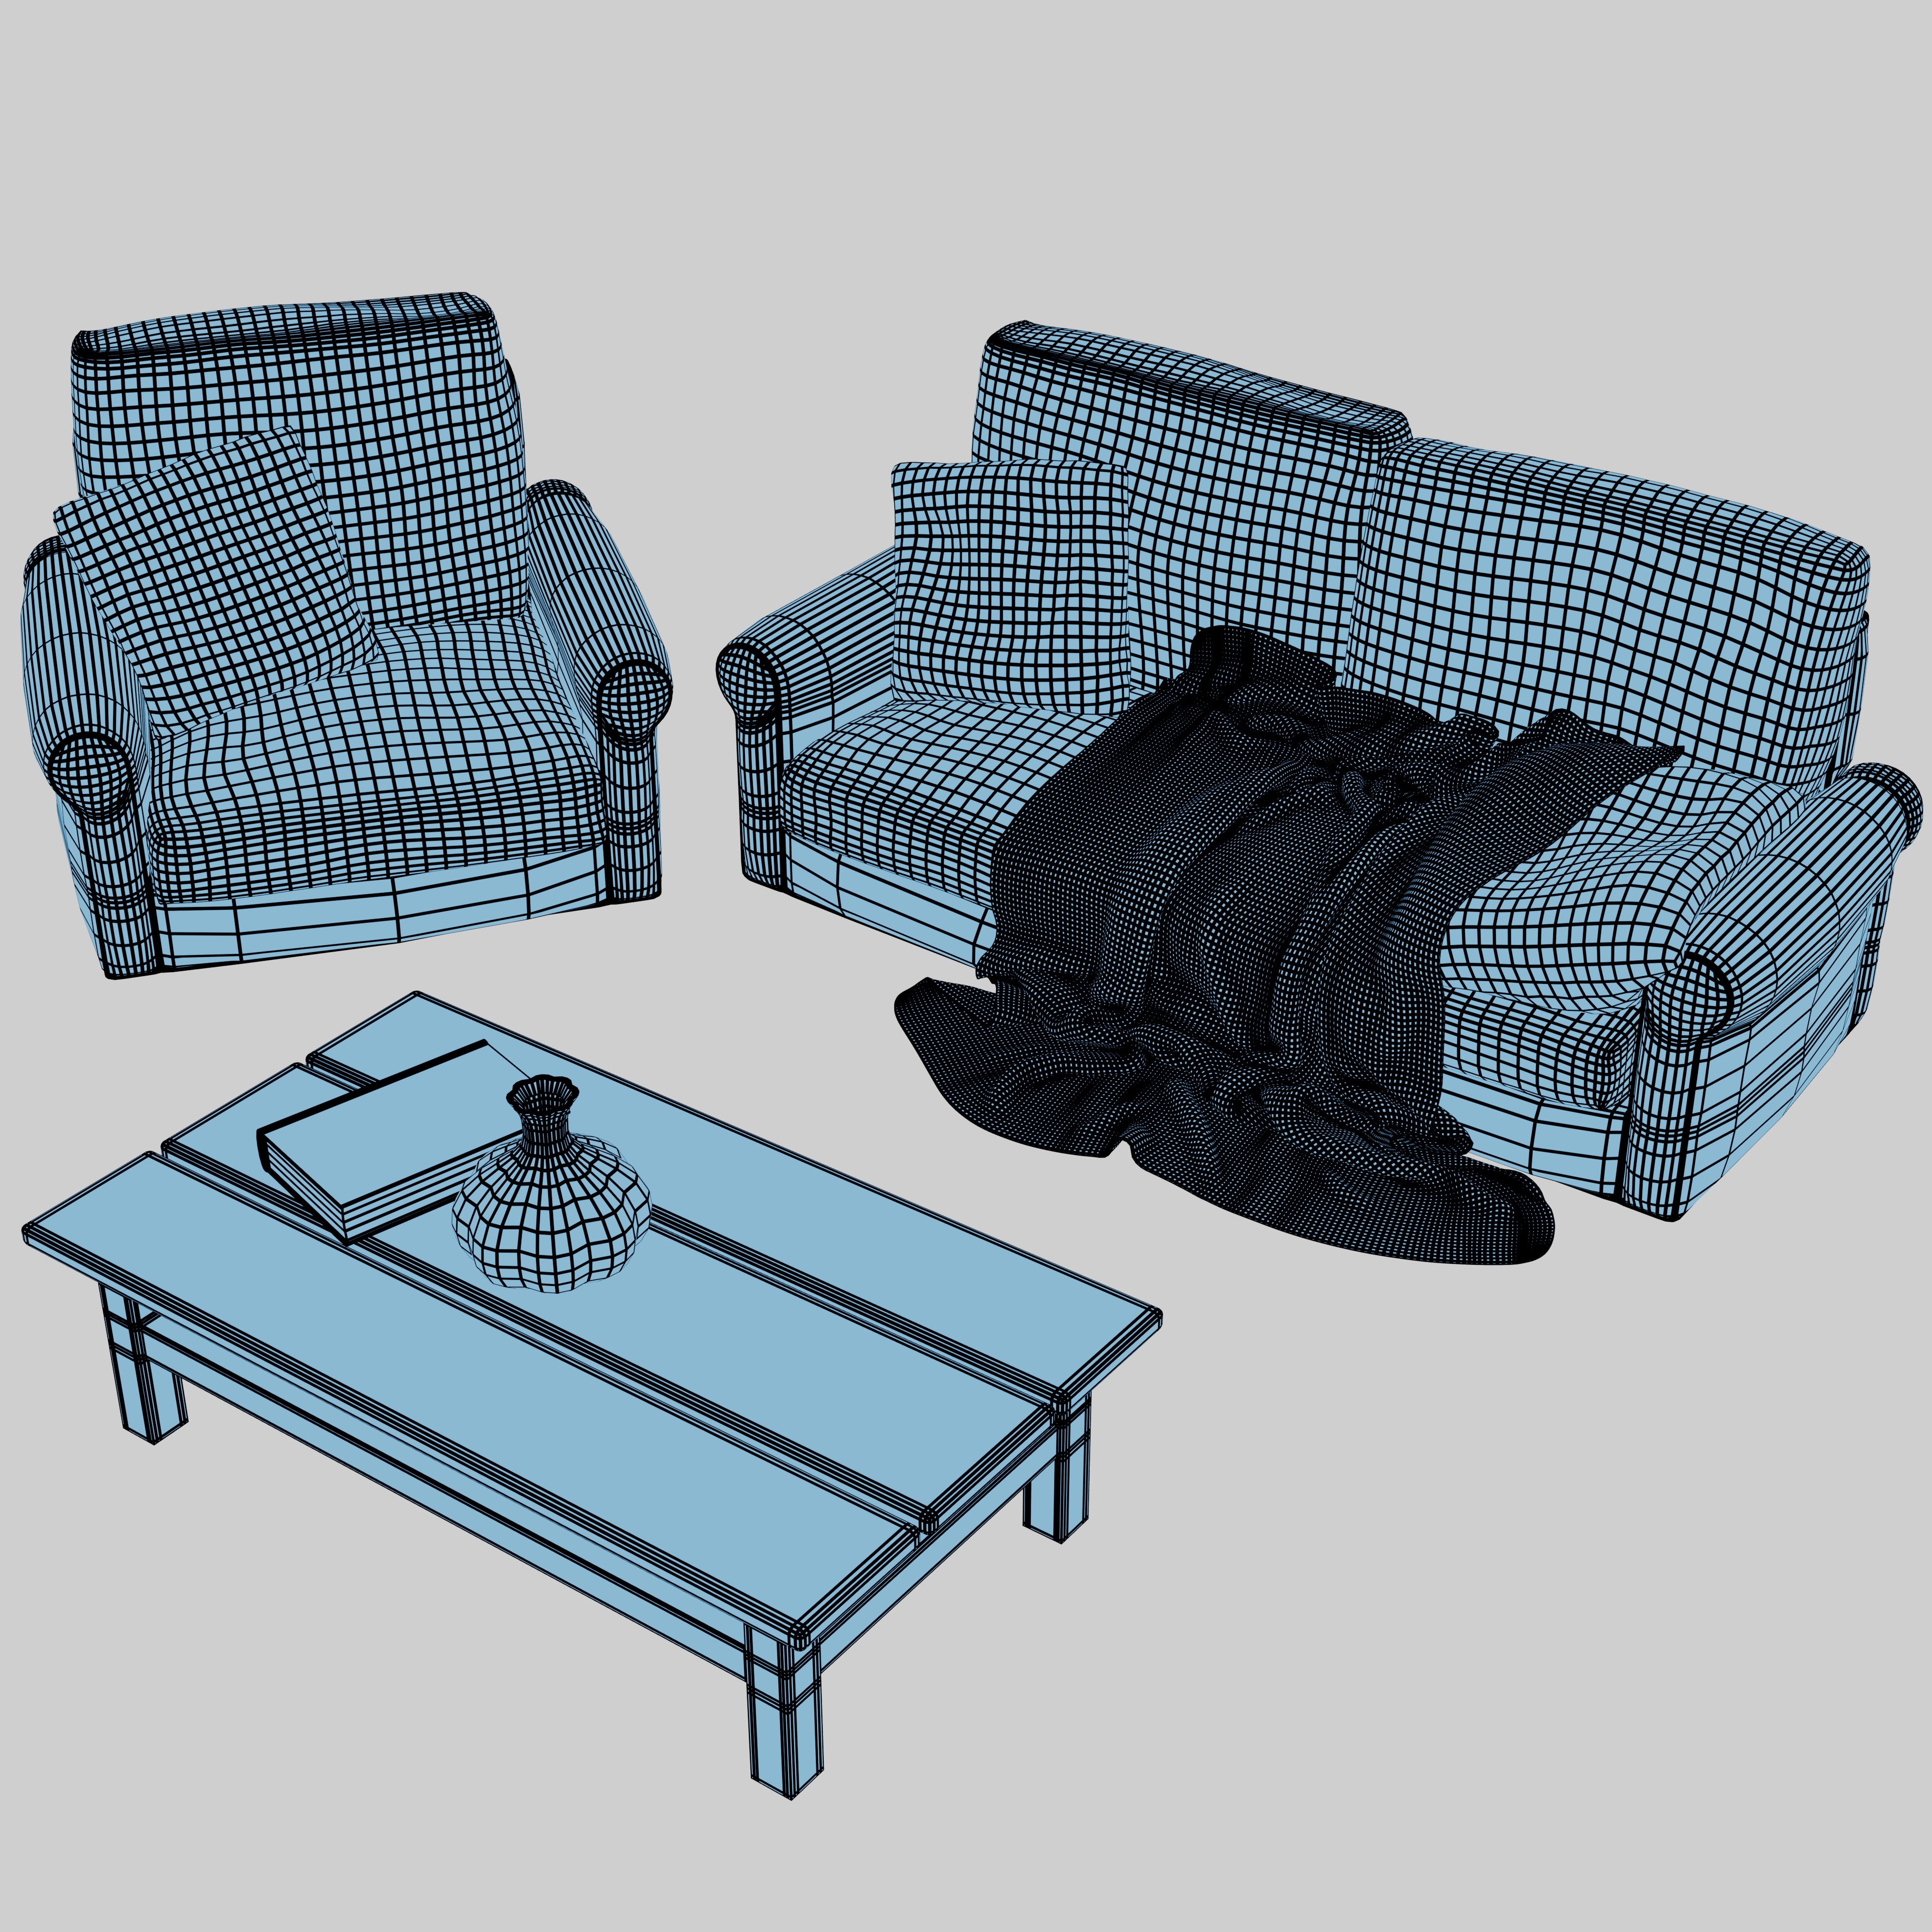
Low-poly model with clean, optimized topology designed for real-time applications. The structure is built with well-distributed edge loops to ensure a solid silhouette while balancing polygon count and structural detail.
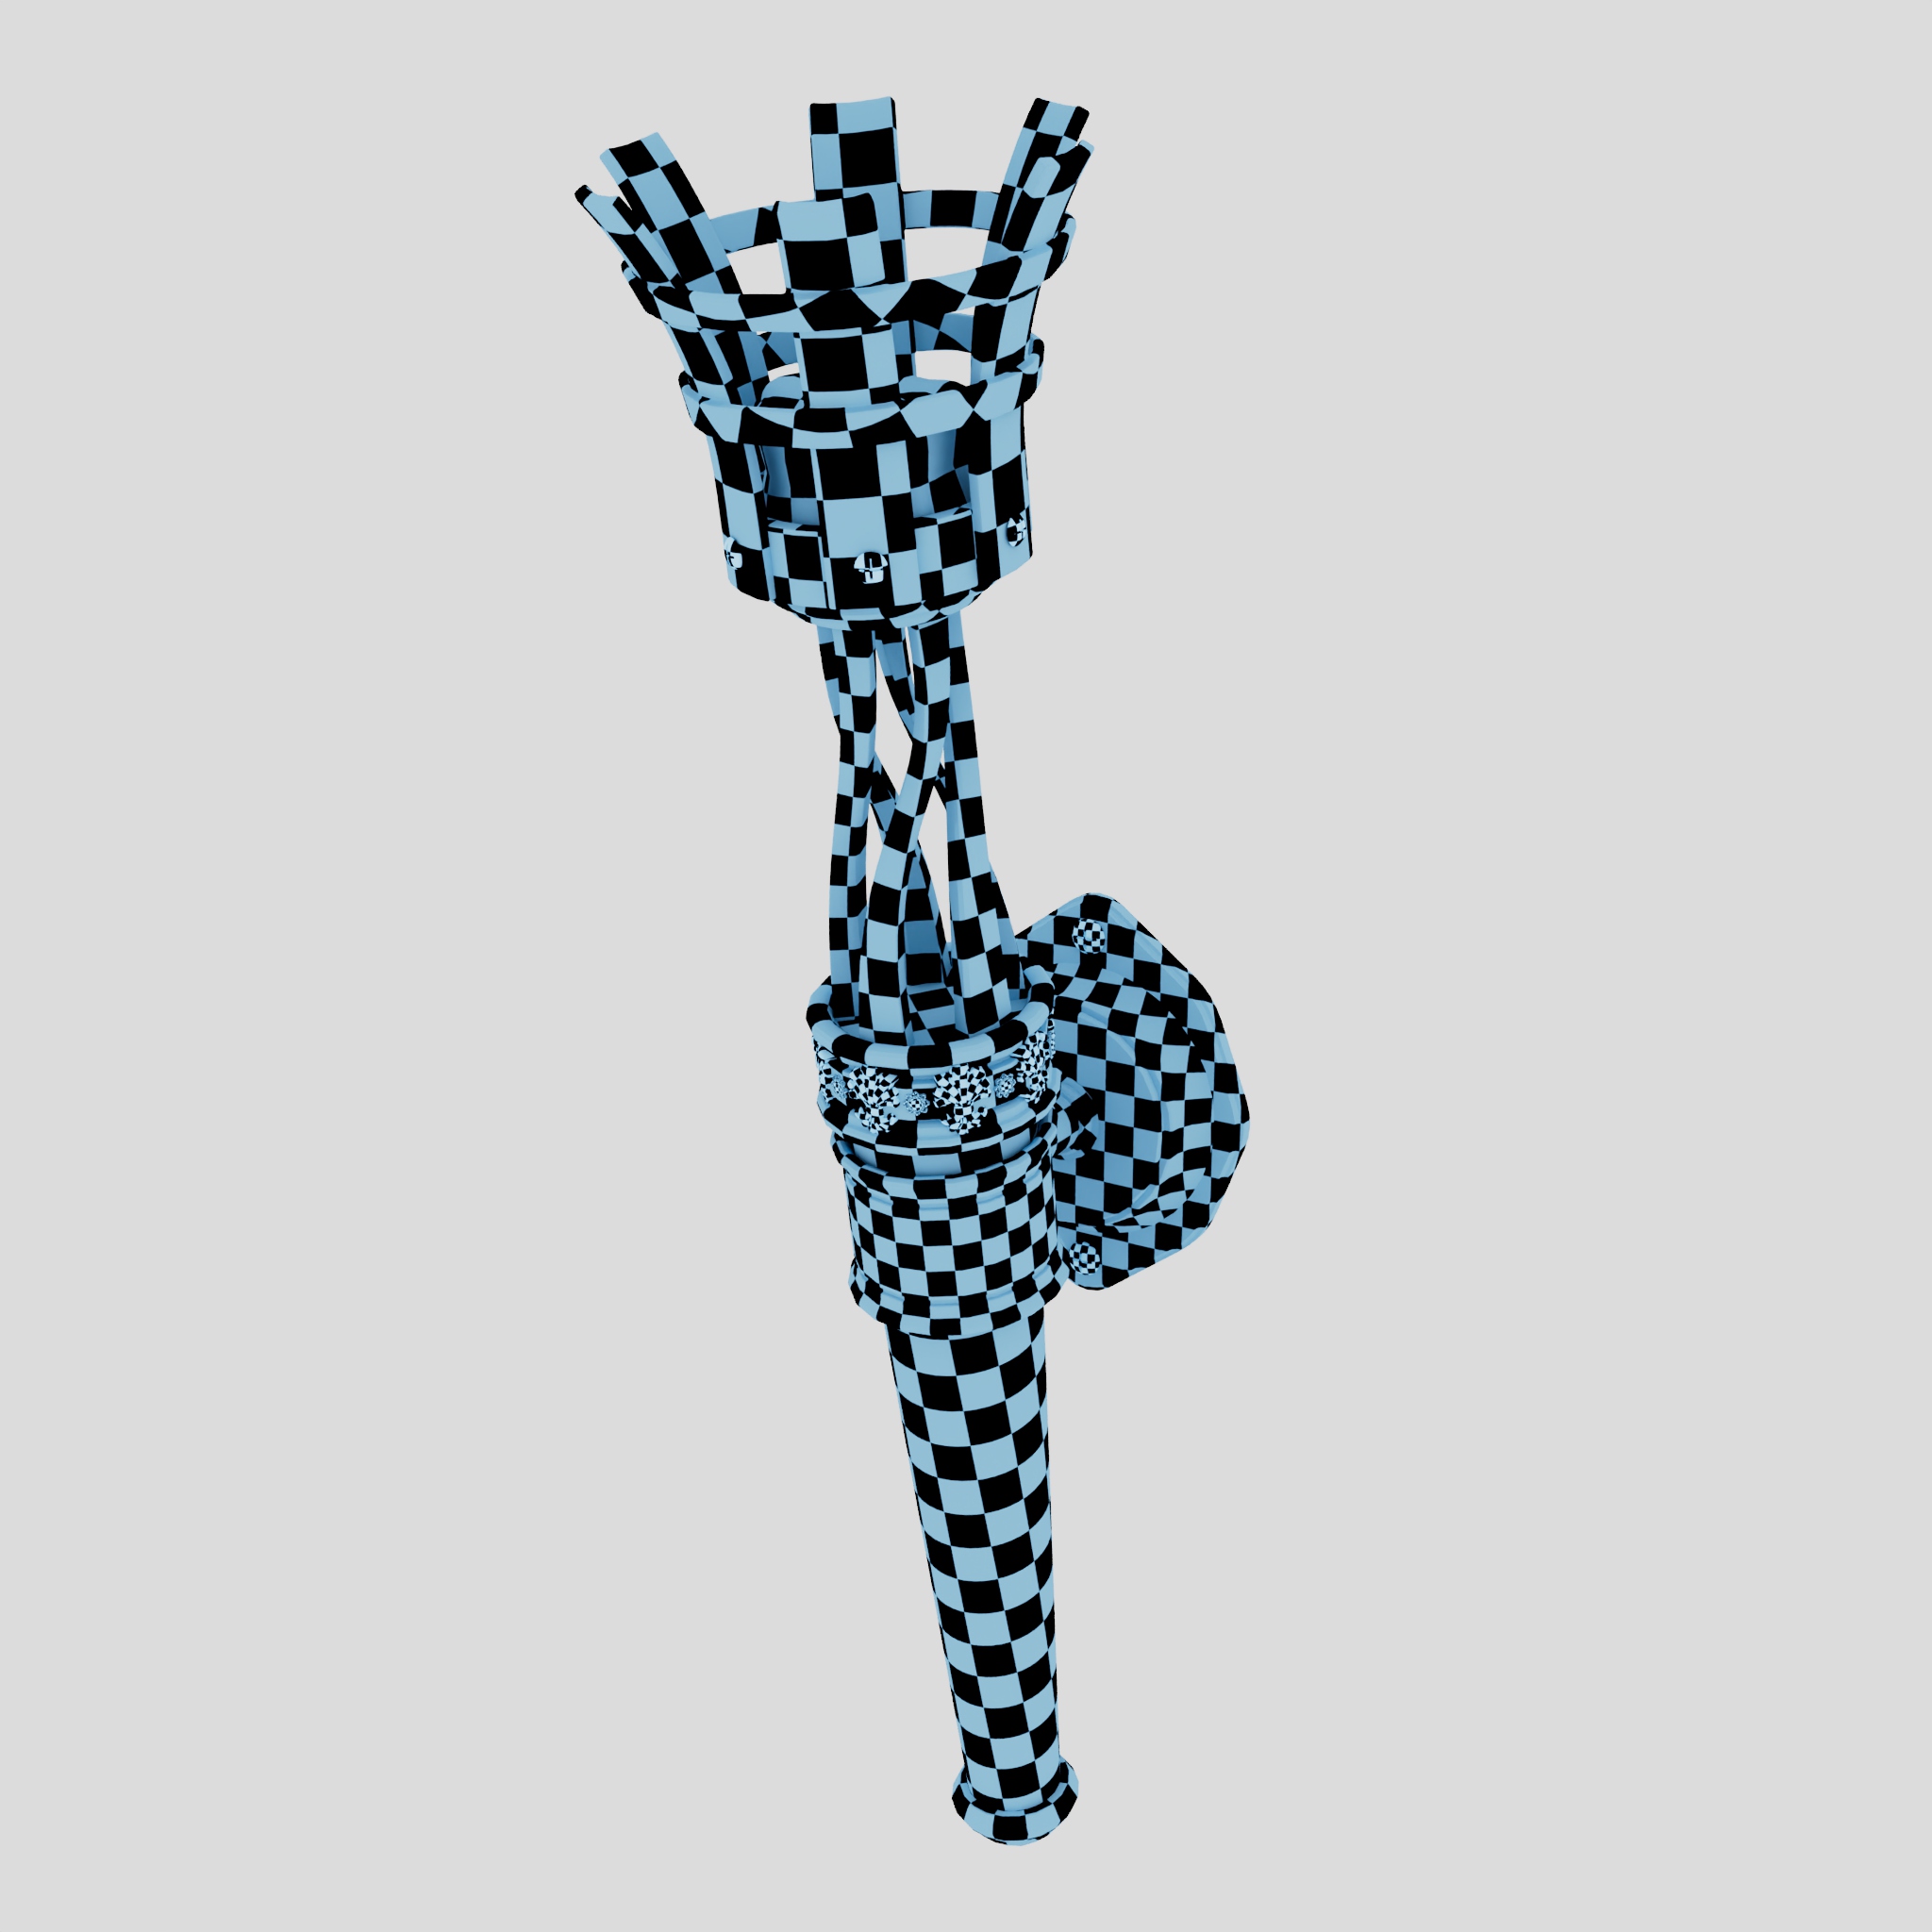
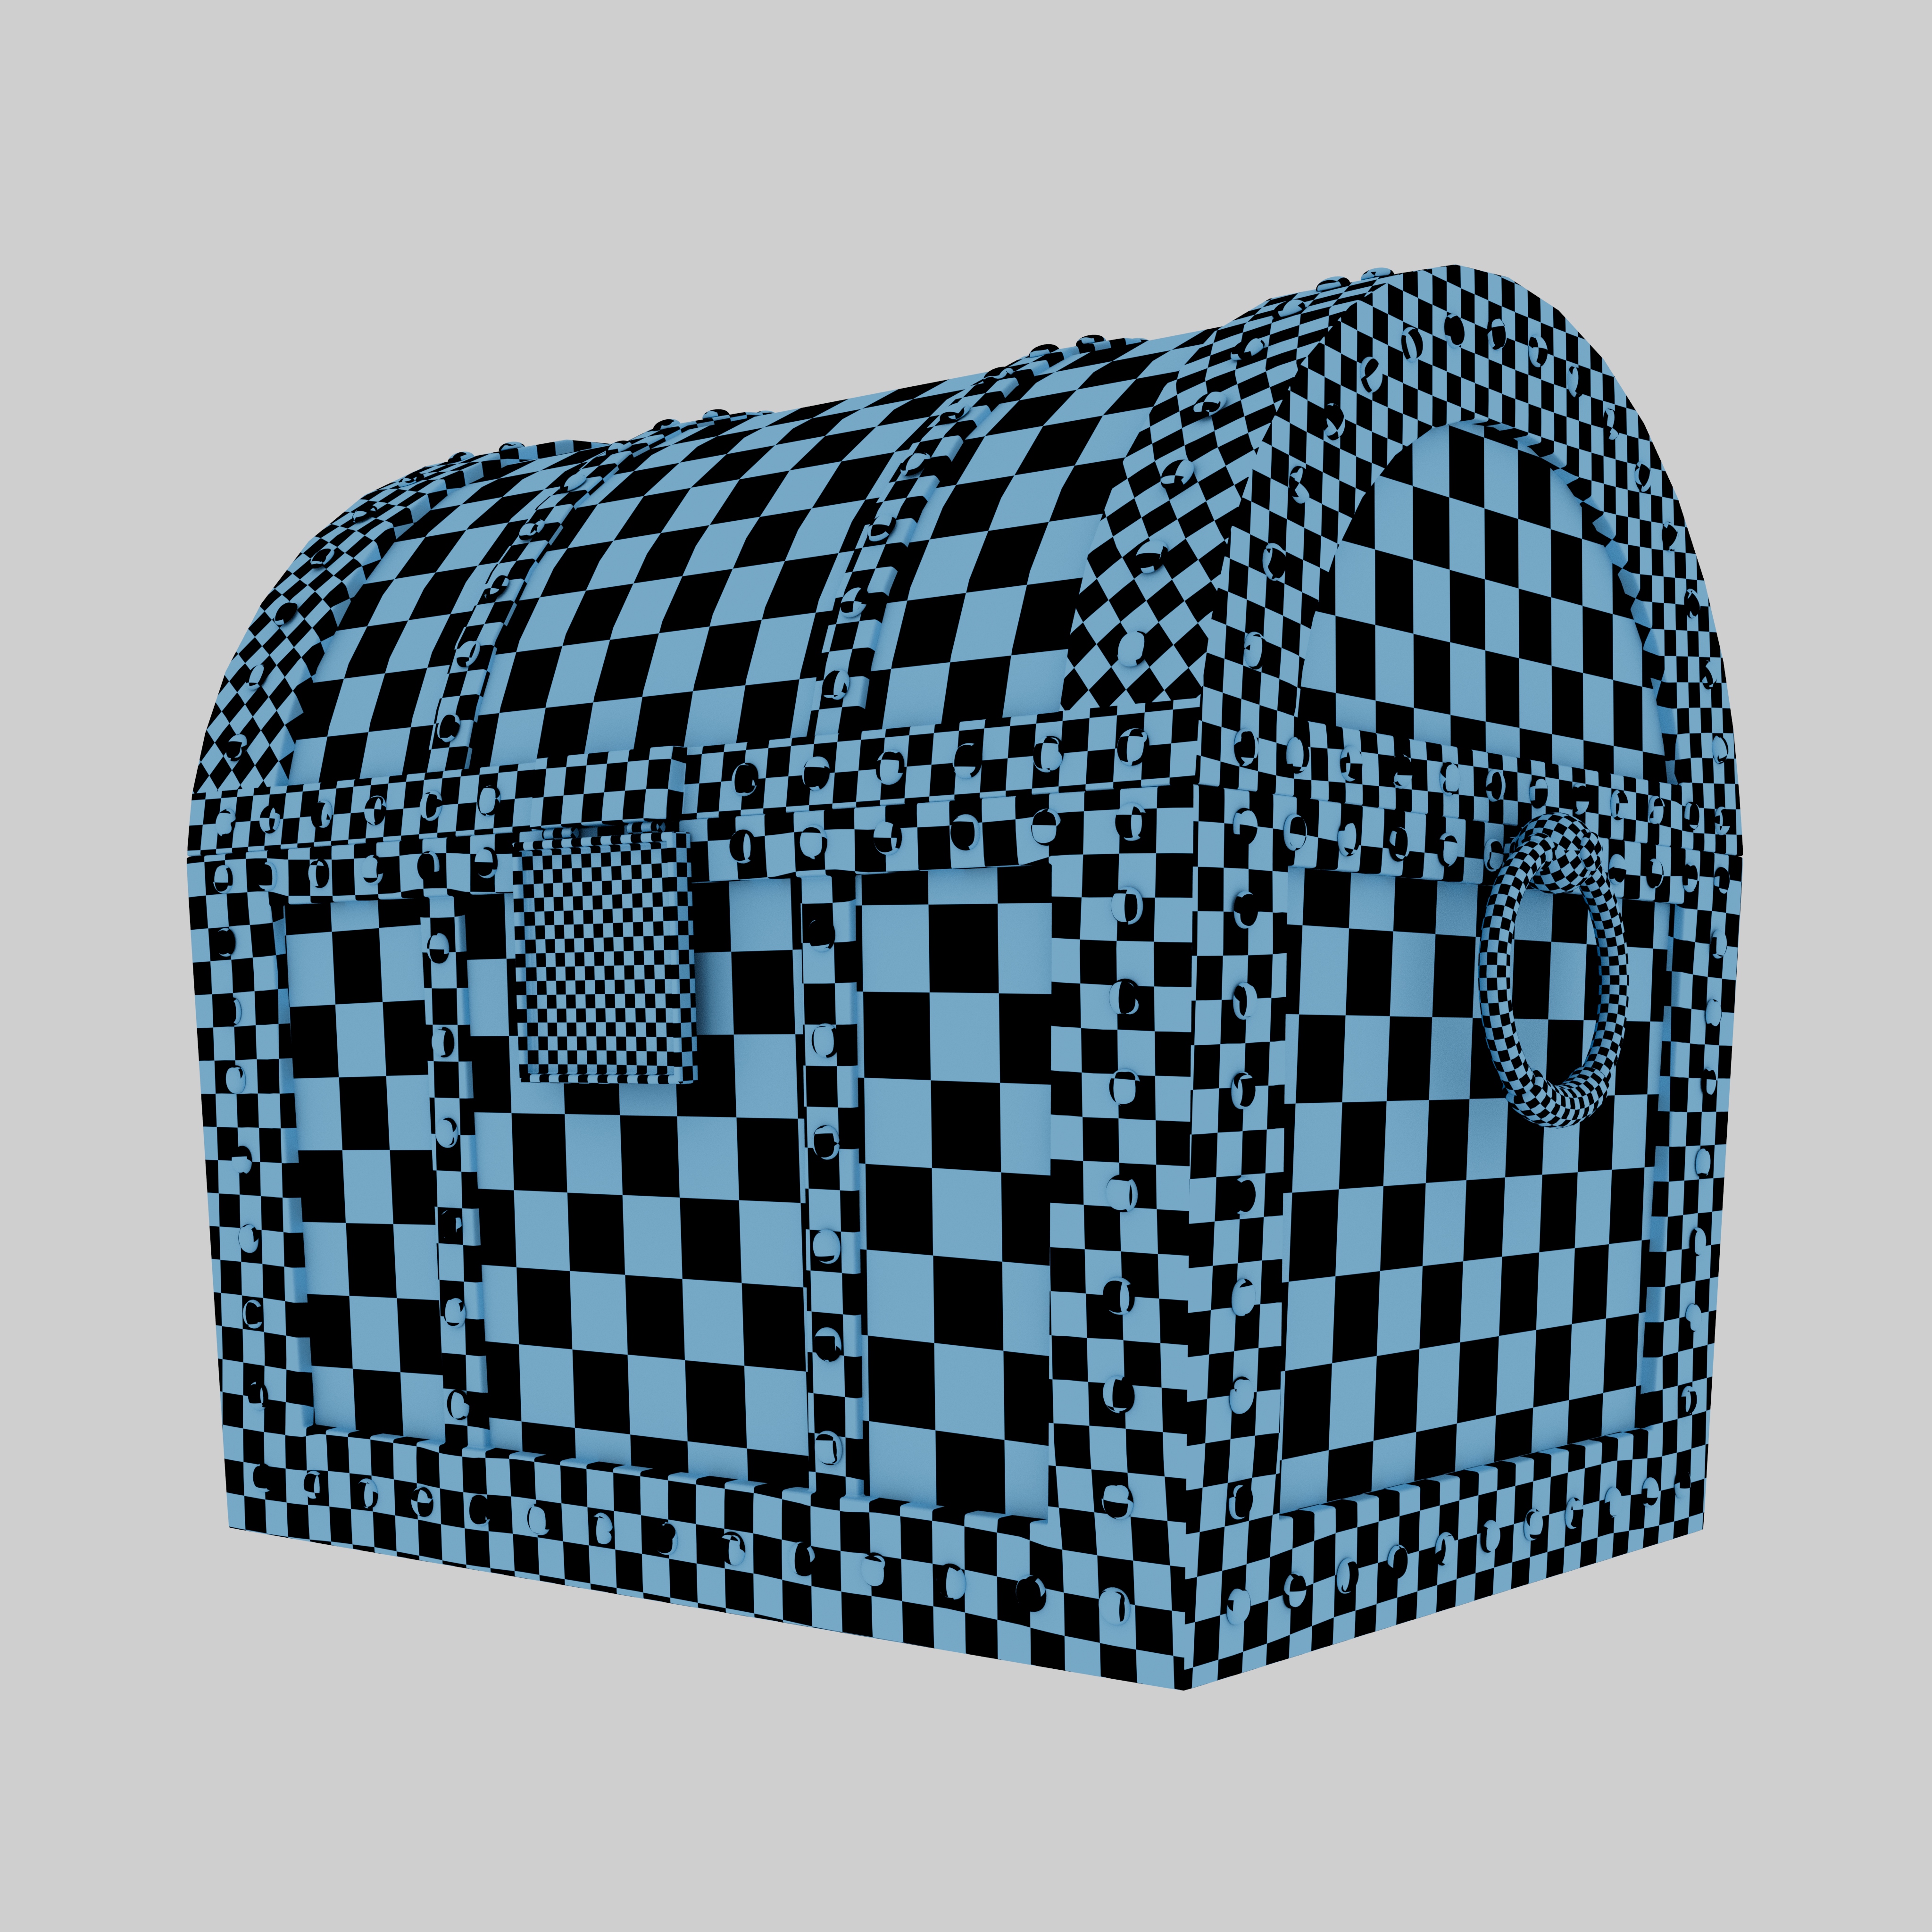
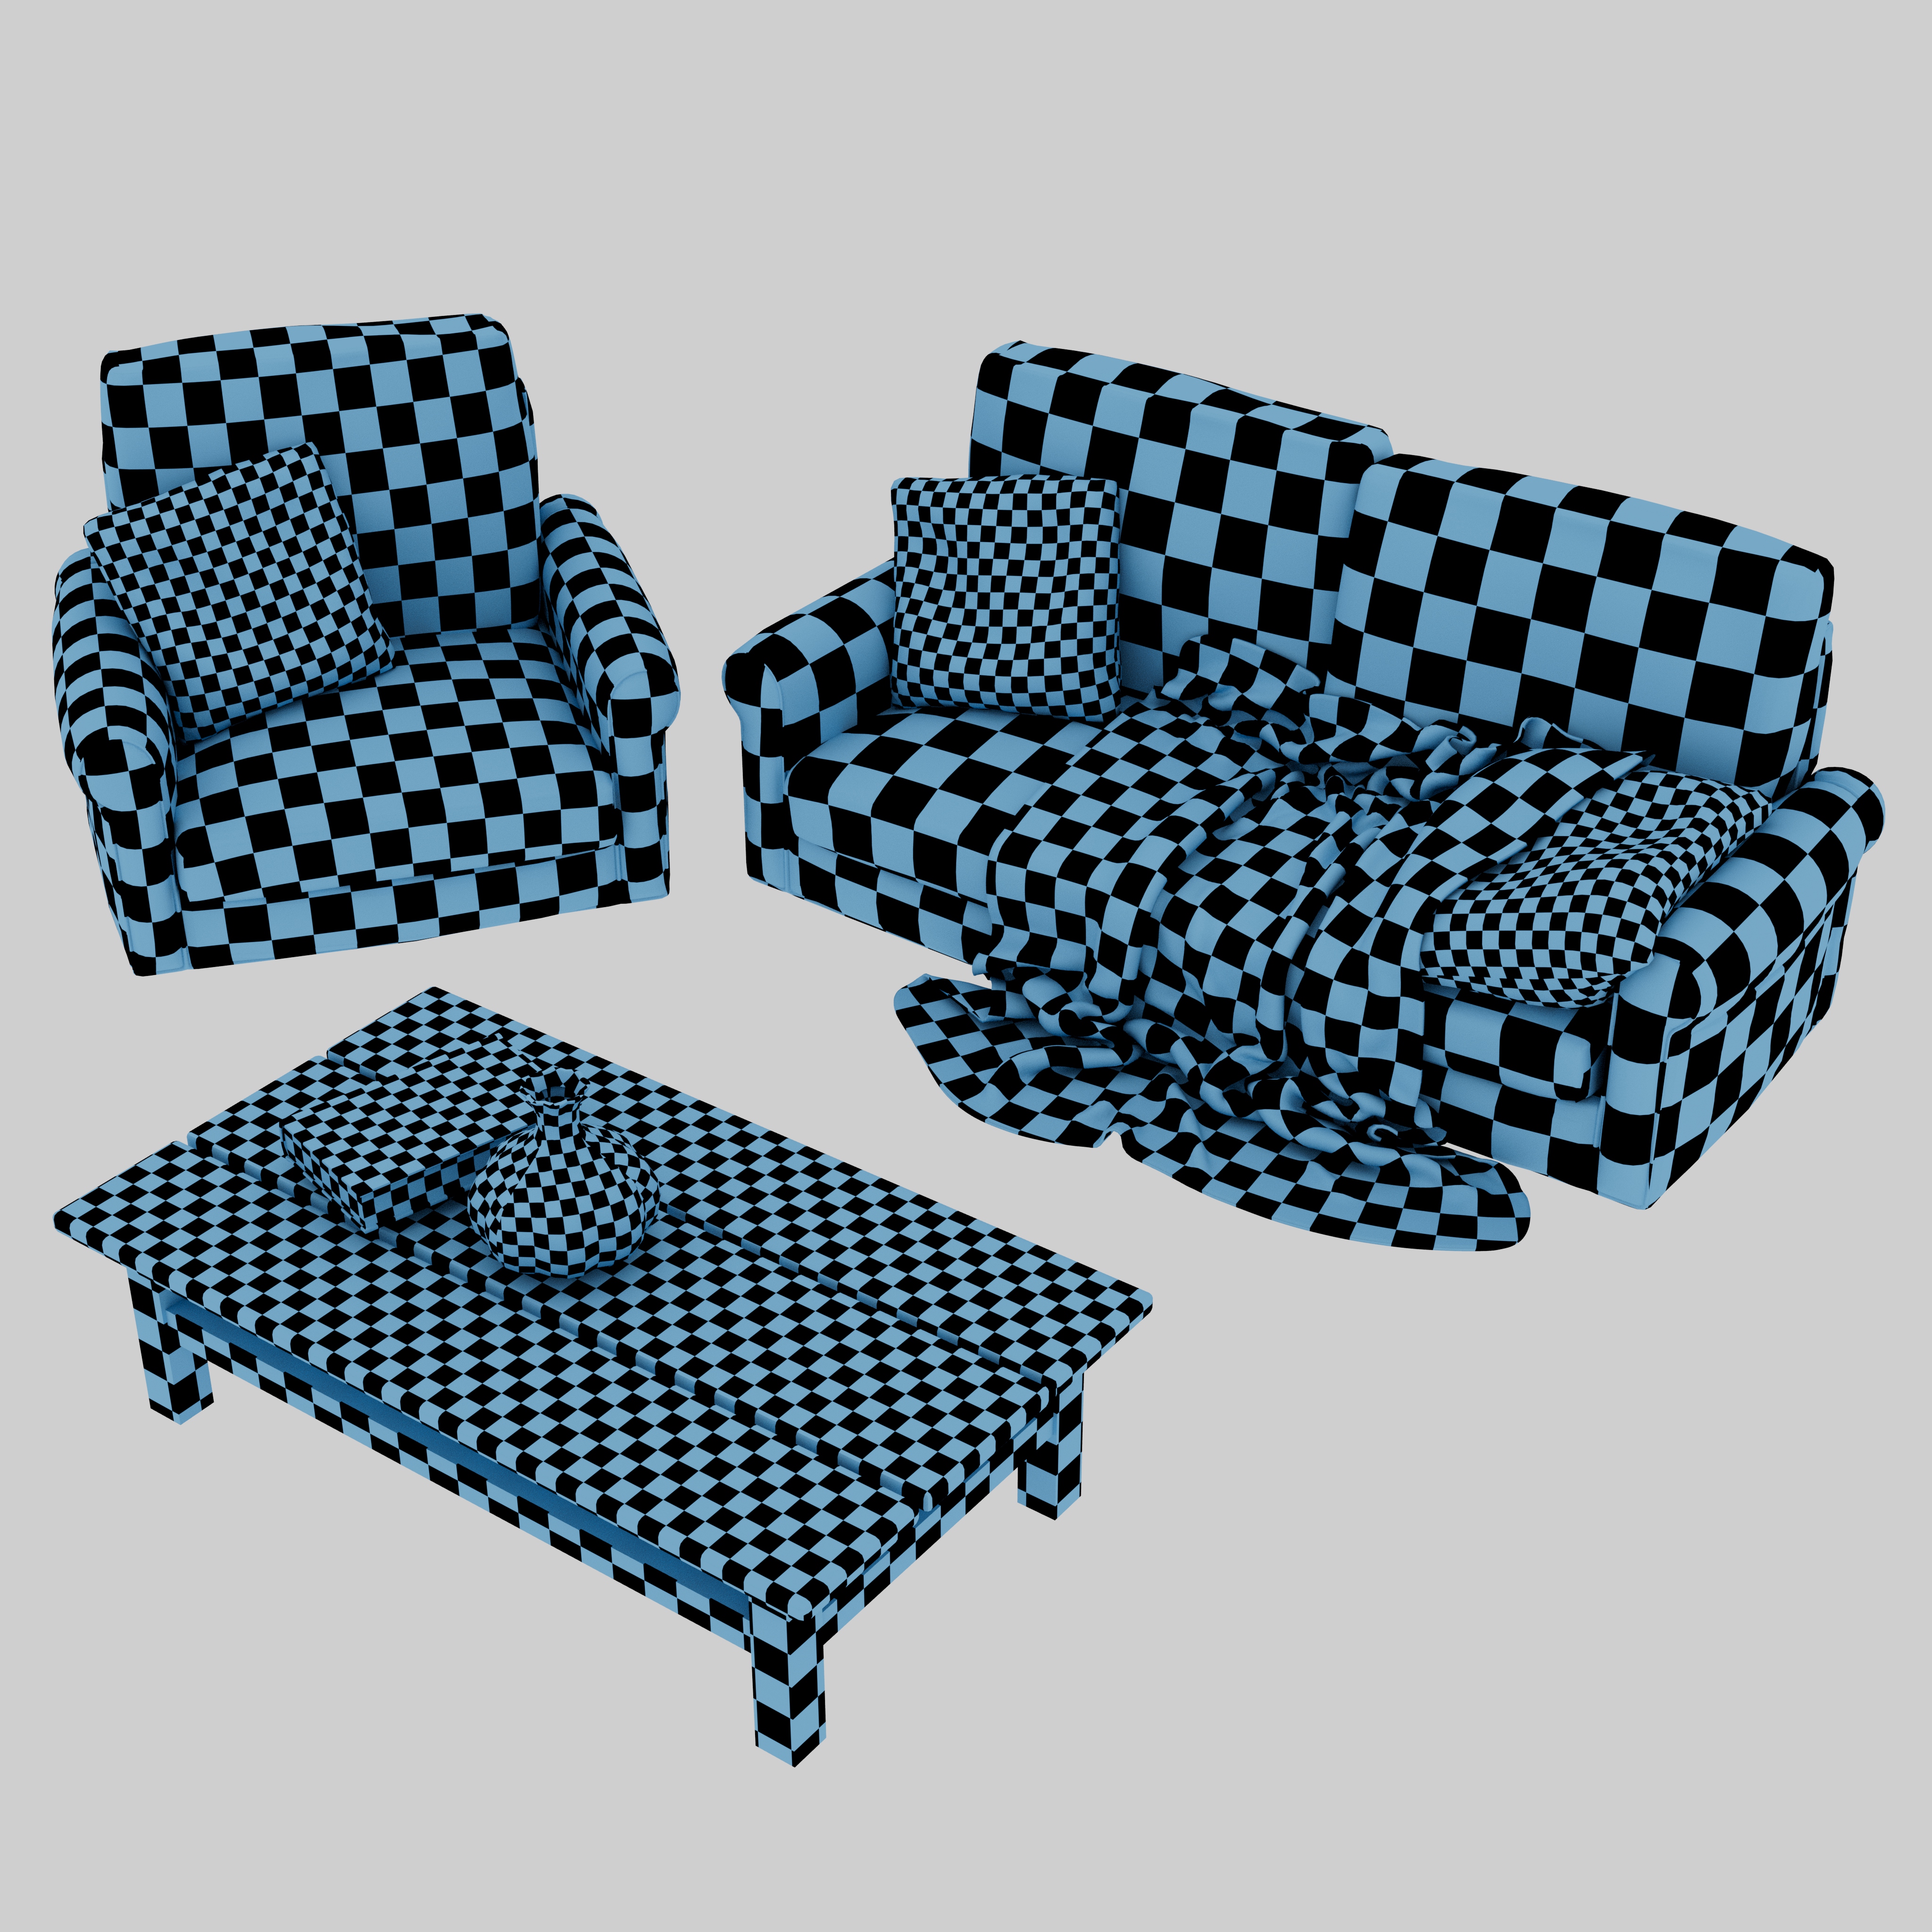
The UVs were manually created using Maya’s Bonus Tools and Auto Unwrap, aiming for an efficient and well-organized layout. Shell padding and arrangement are optimized to prevent artifacts during baking and texturing.

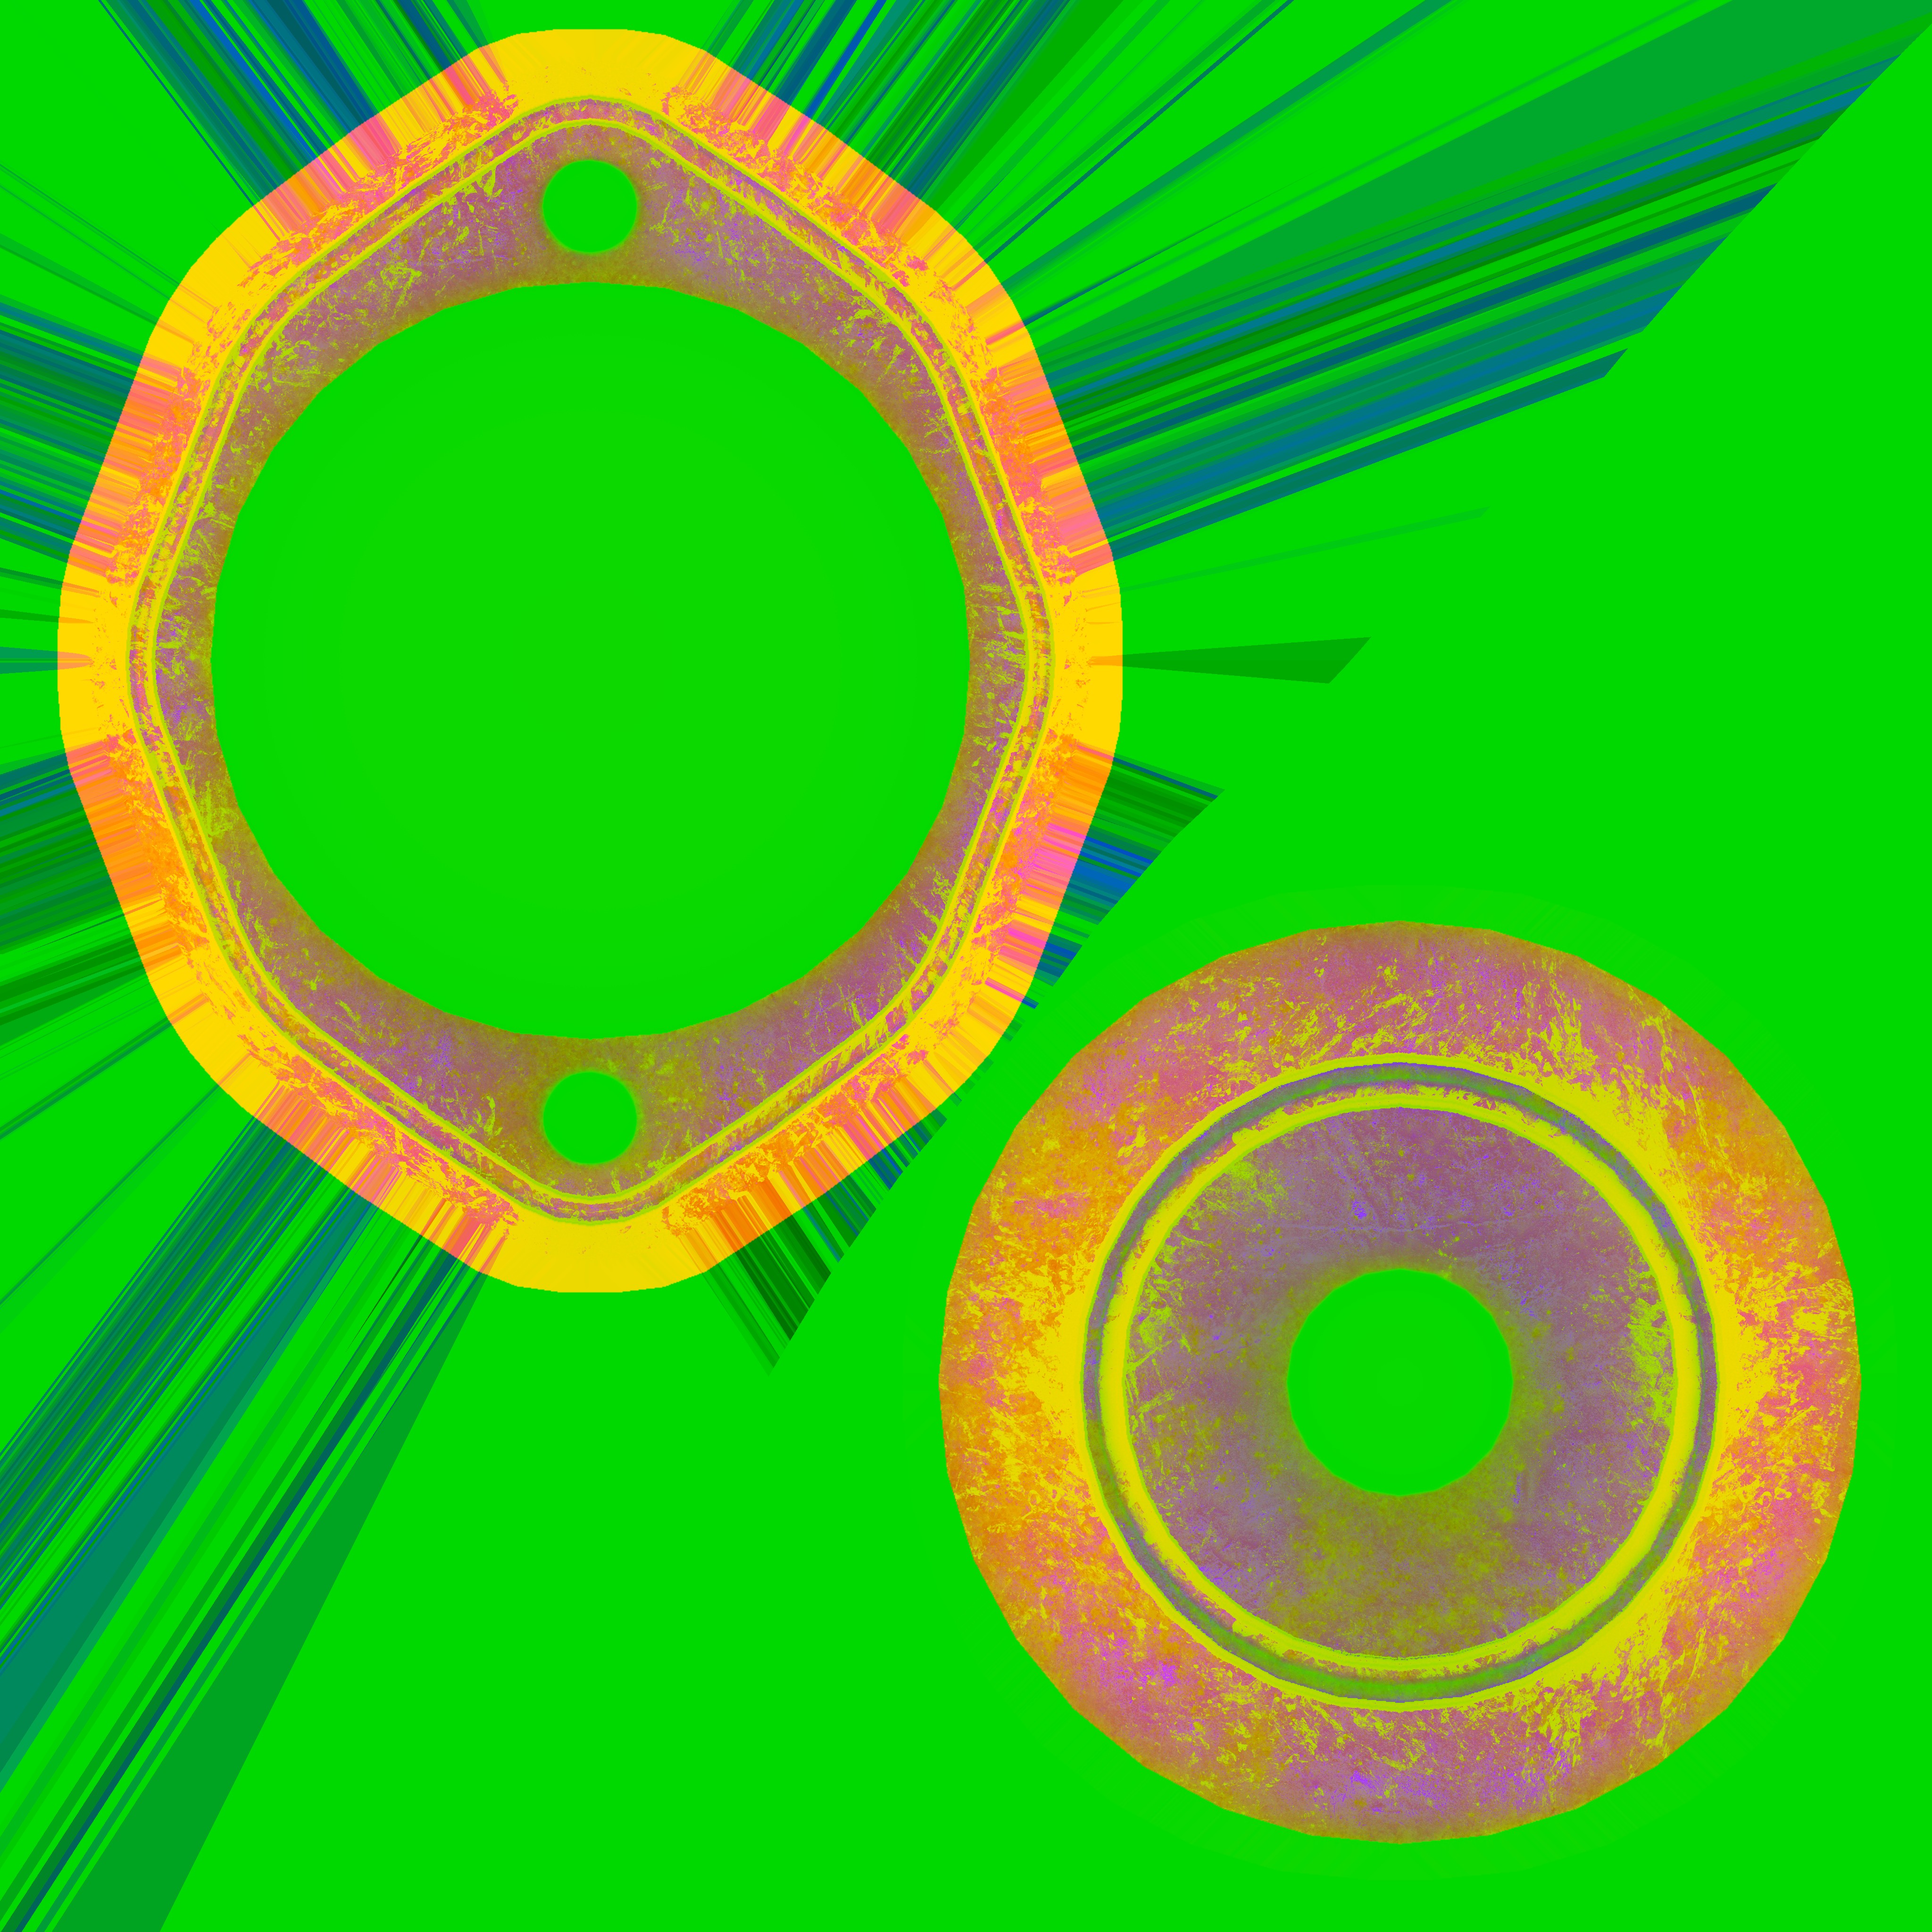
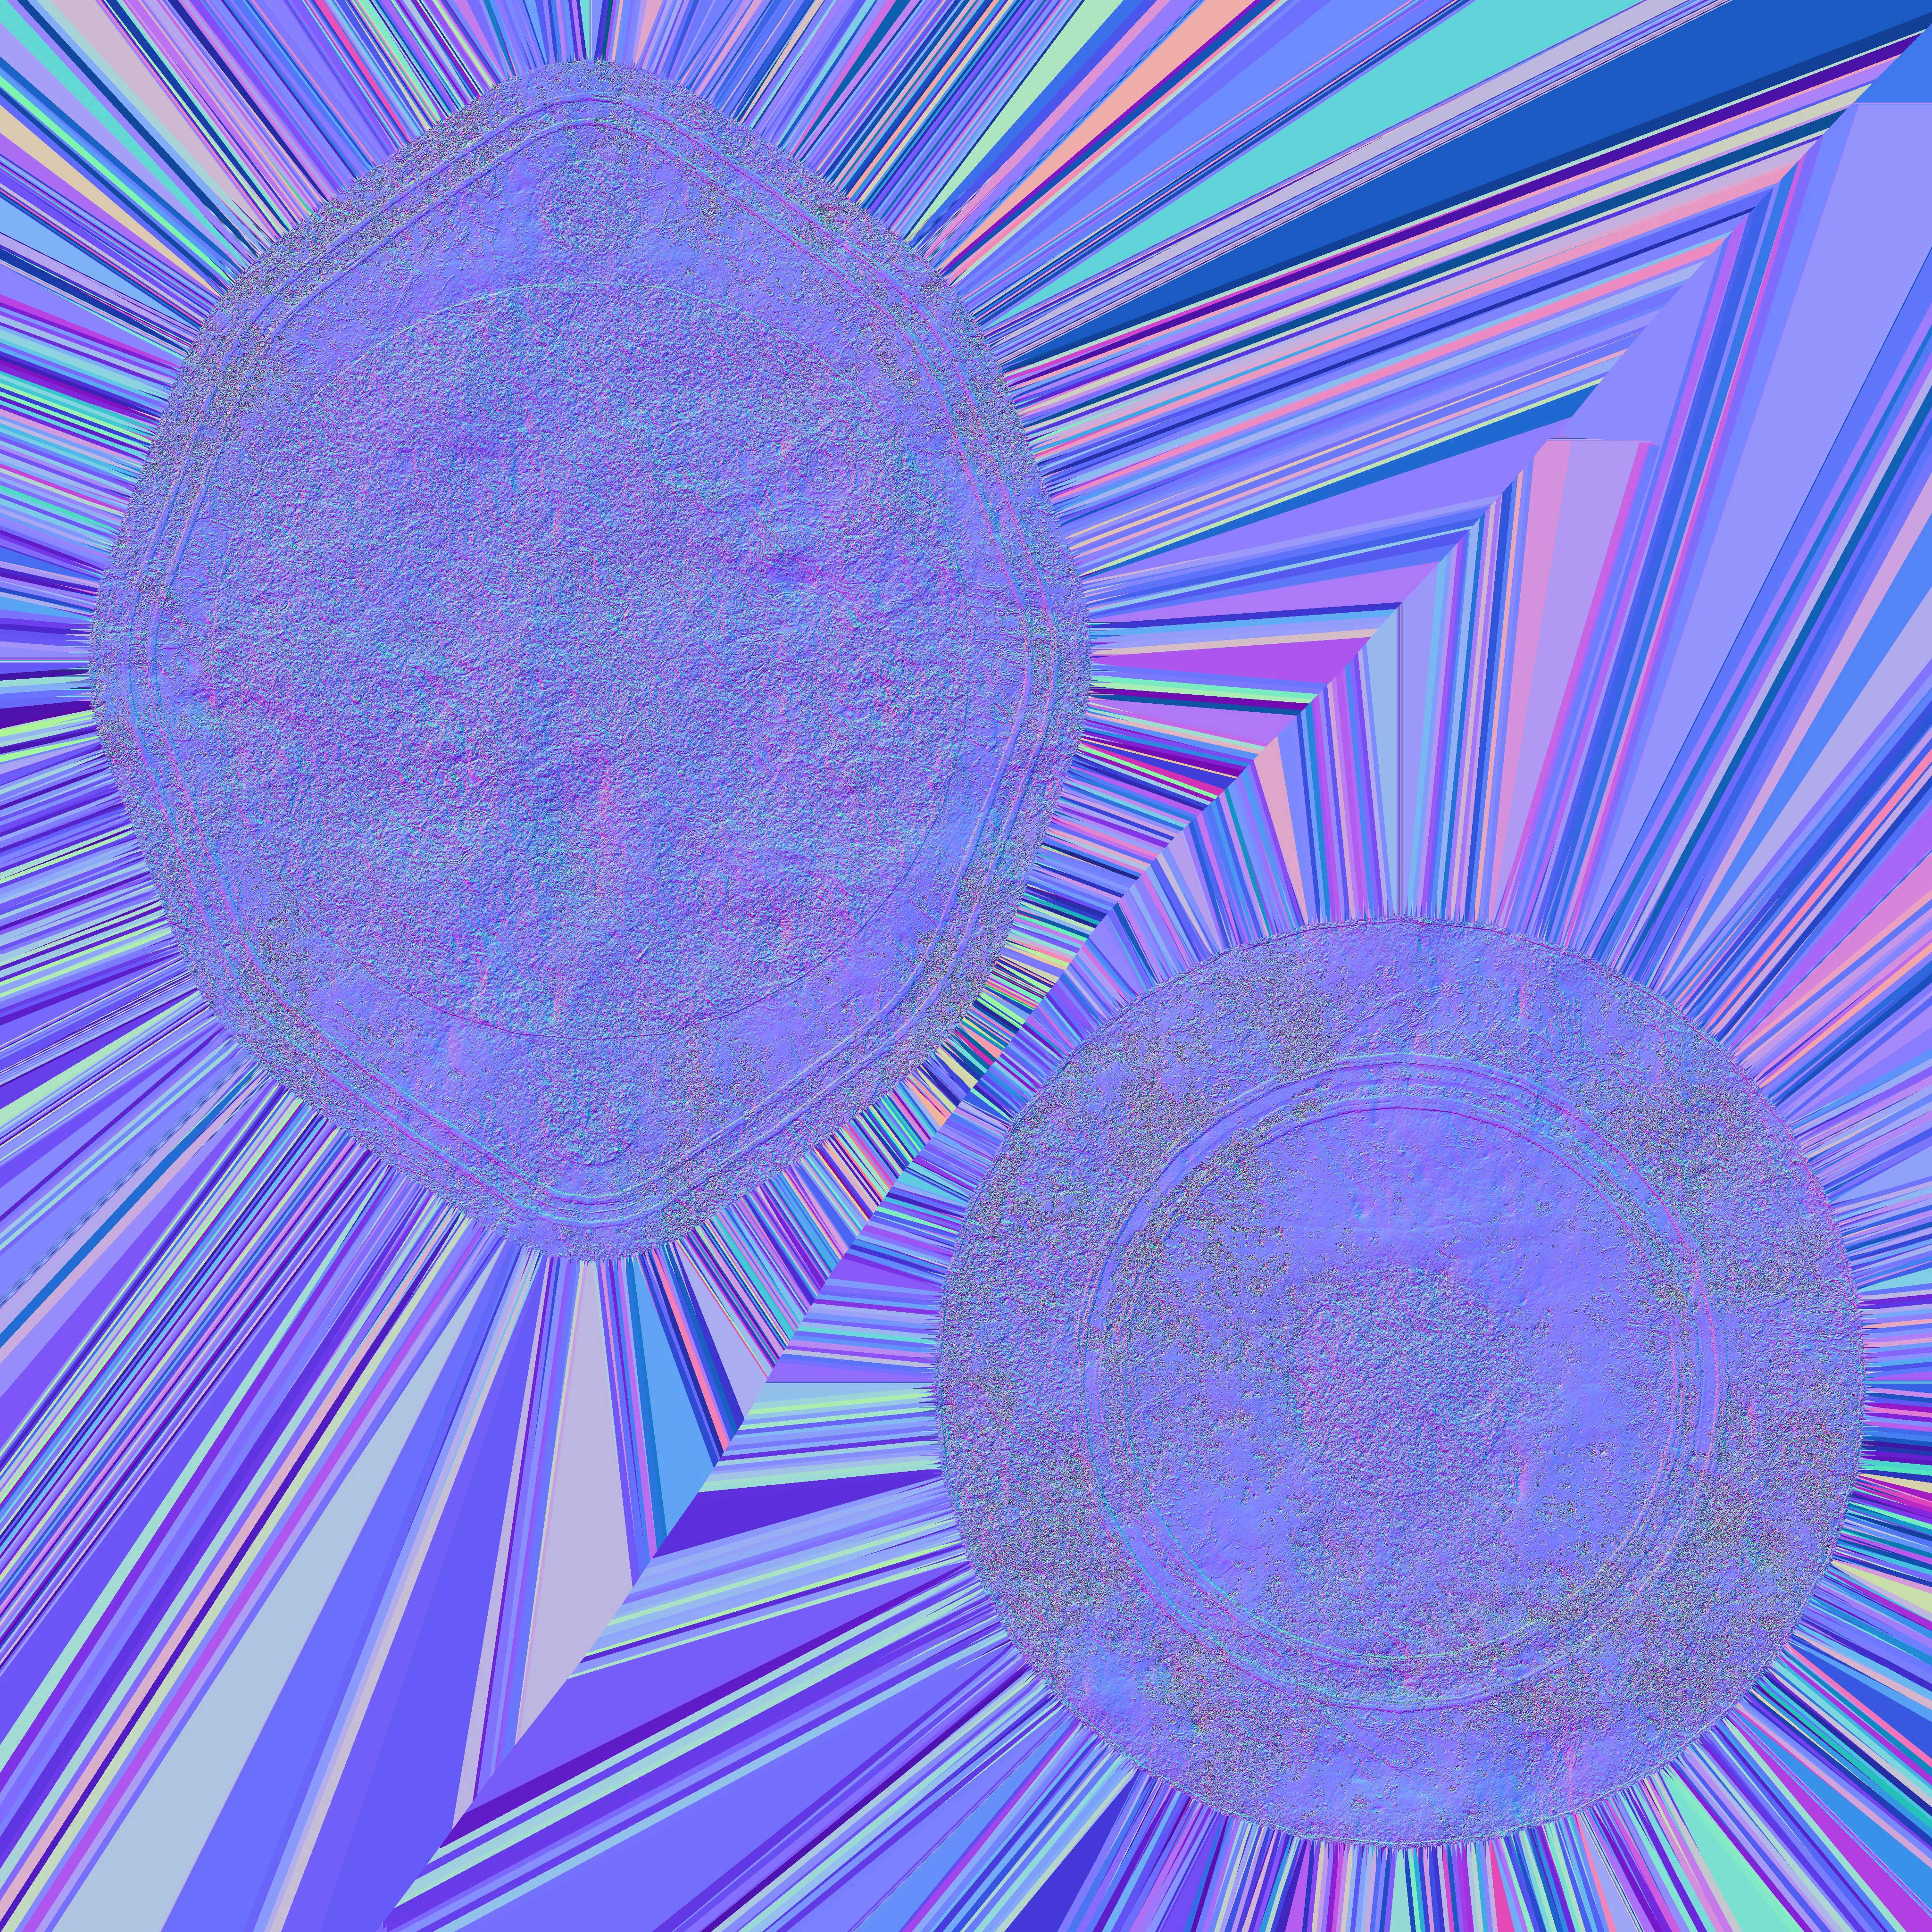
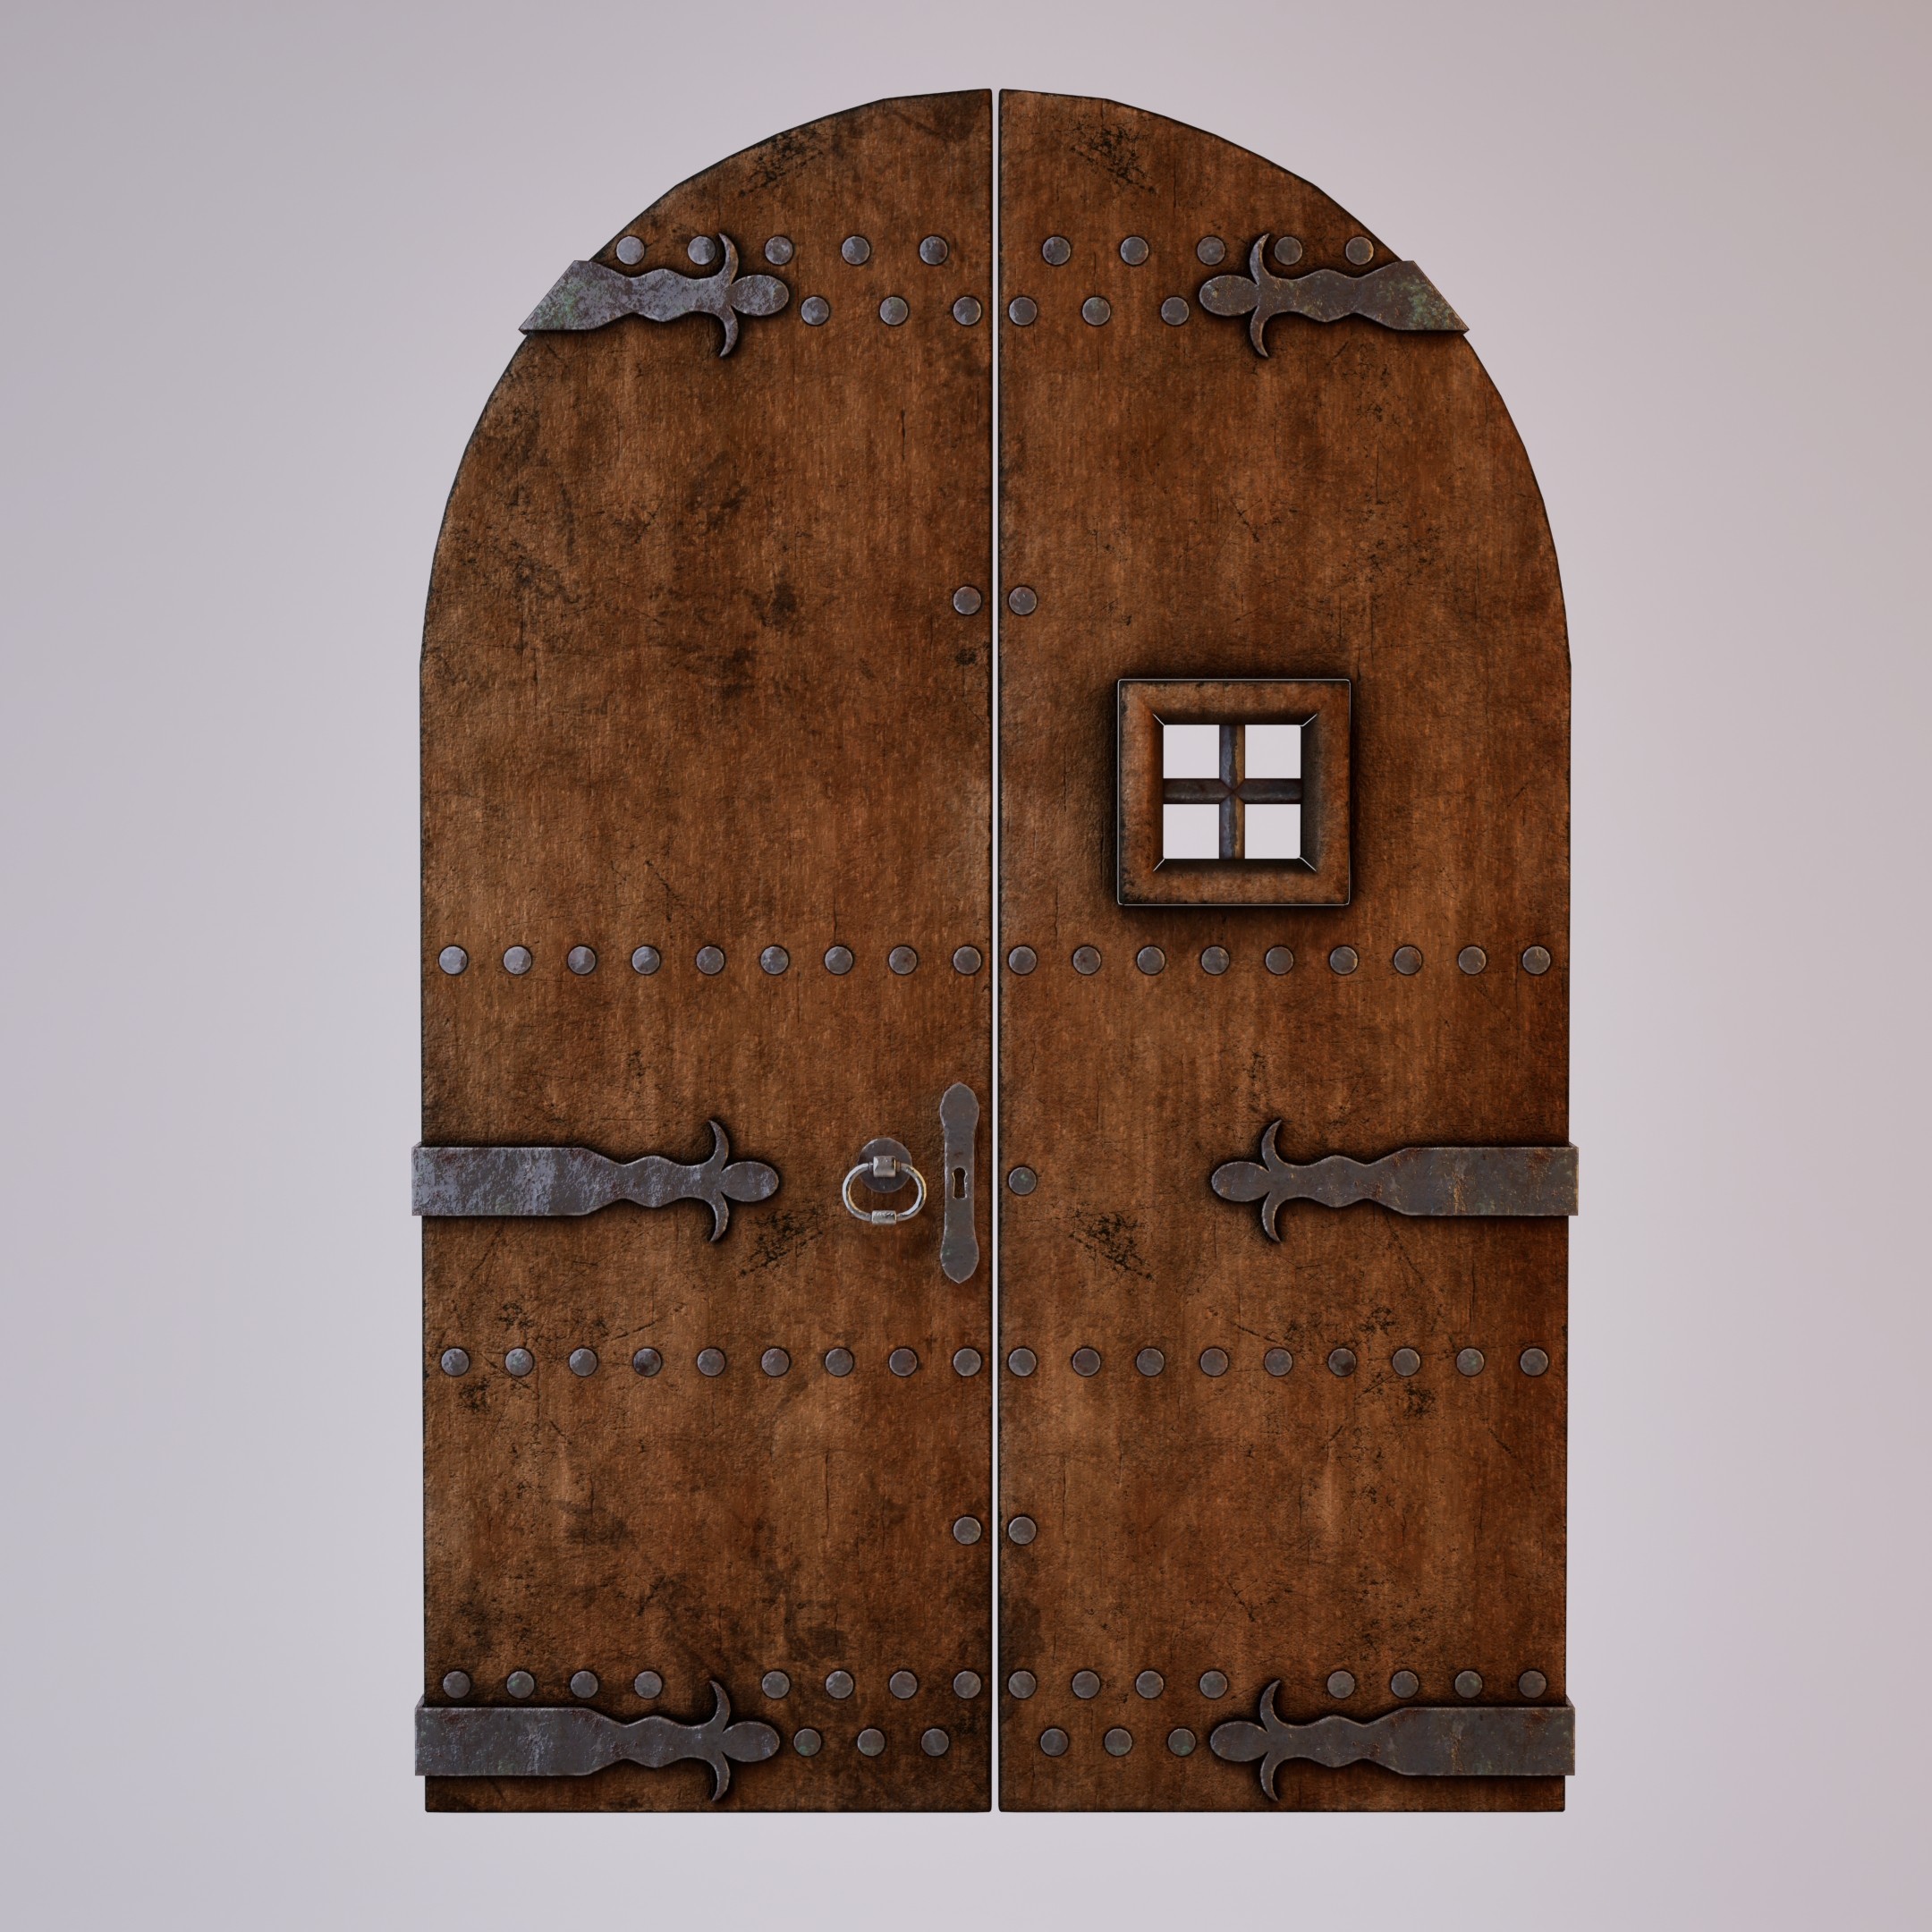
The textures were created by combining procedural masks with hand-painted adjustments. The materials simulate oxidized metal, chipped paint, and worn wood, consistent with the intended environment style. The export workflow for Unreal Engine includes three texture maps: Albedo, Normal Map, and ORD(Ambient Occlusion, Roughness, Metalness).
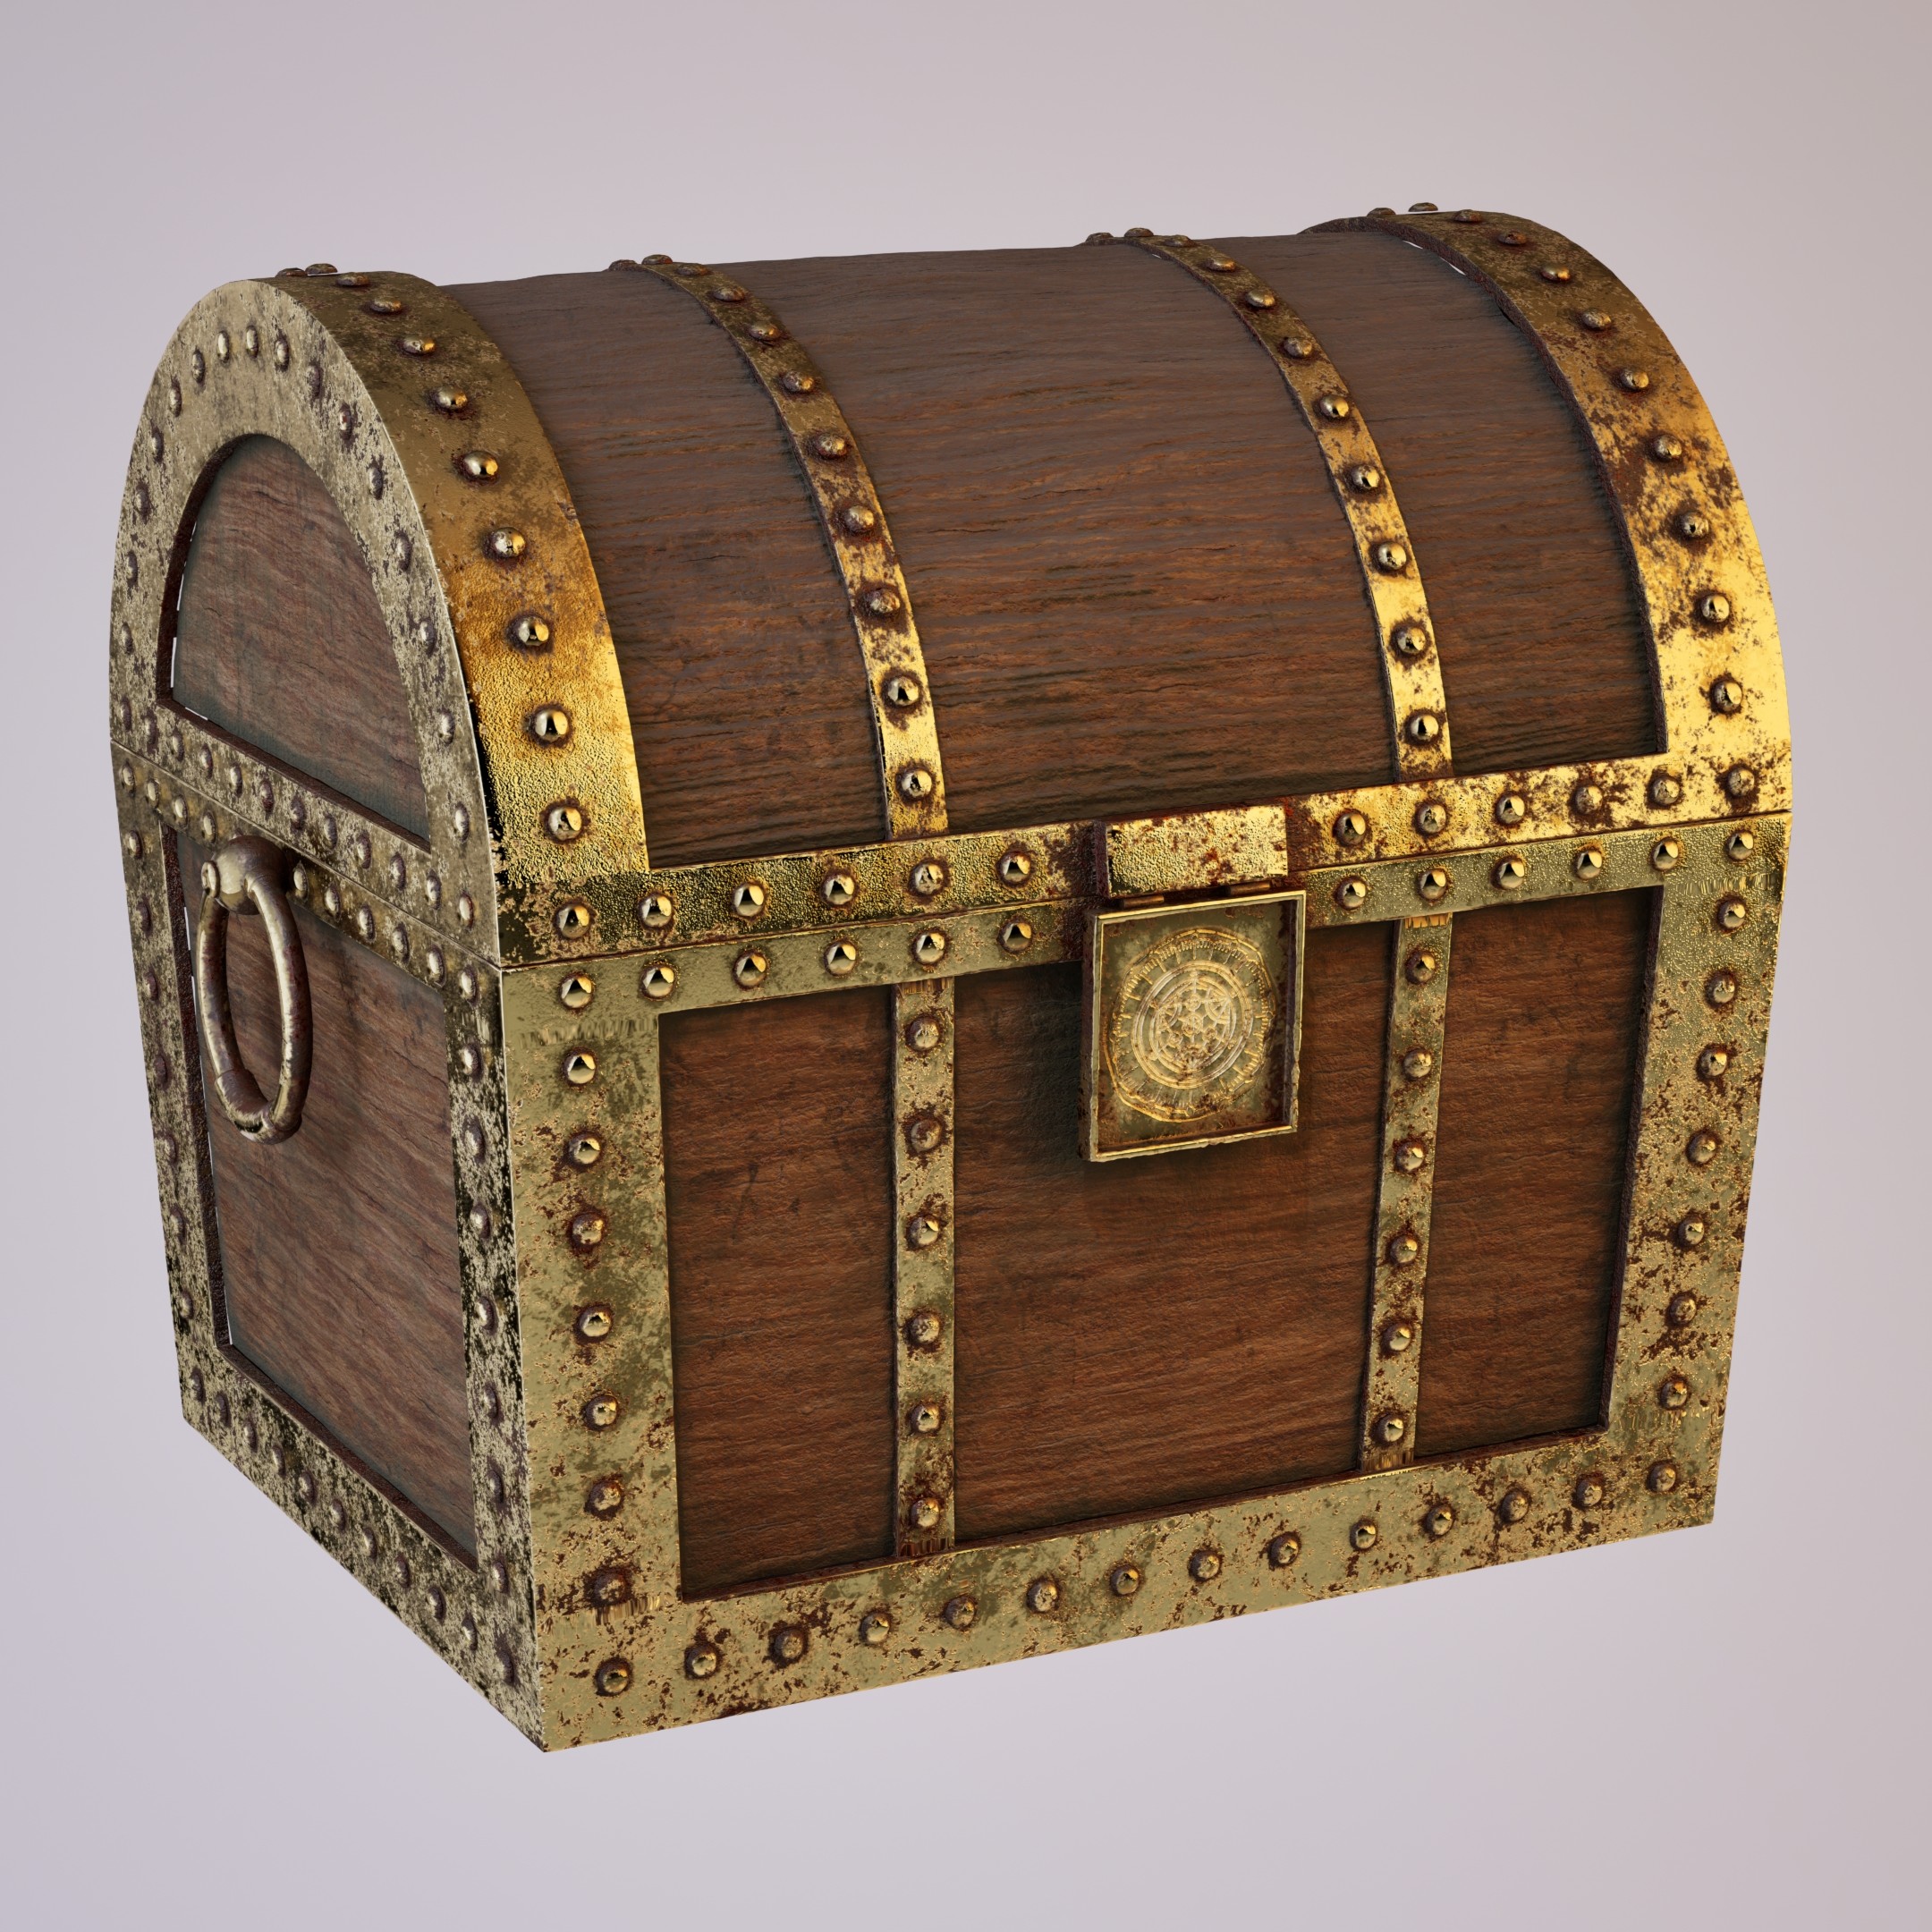
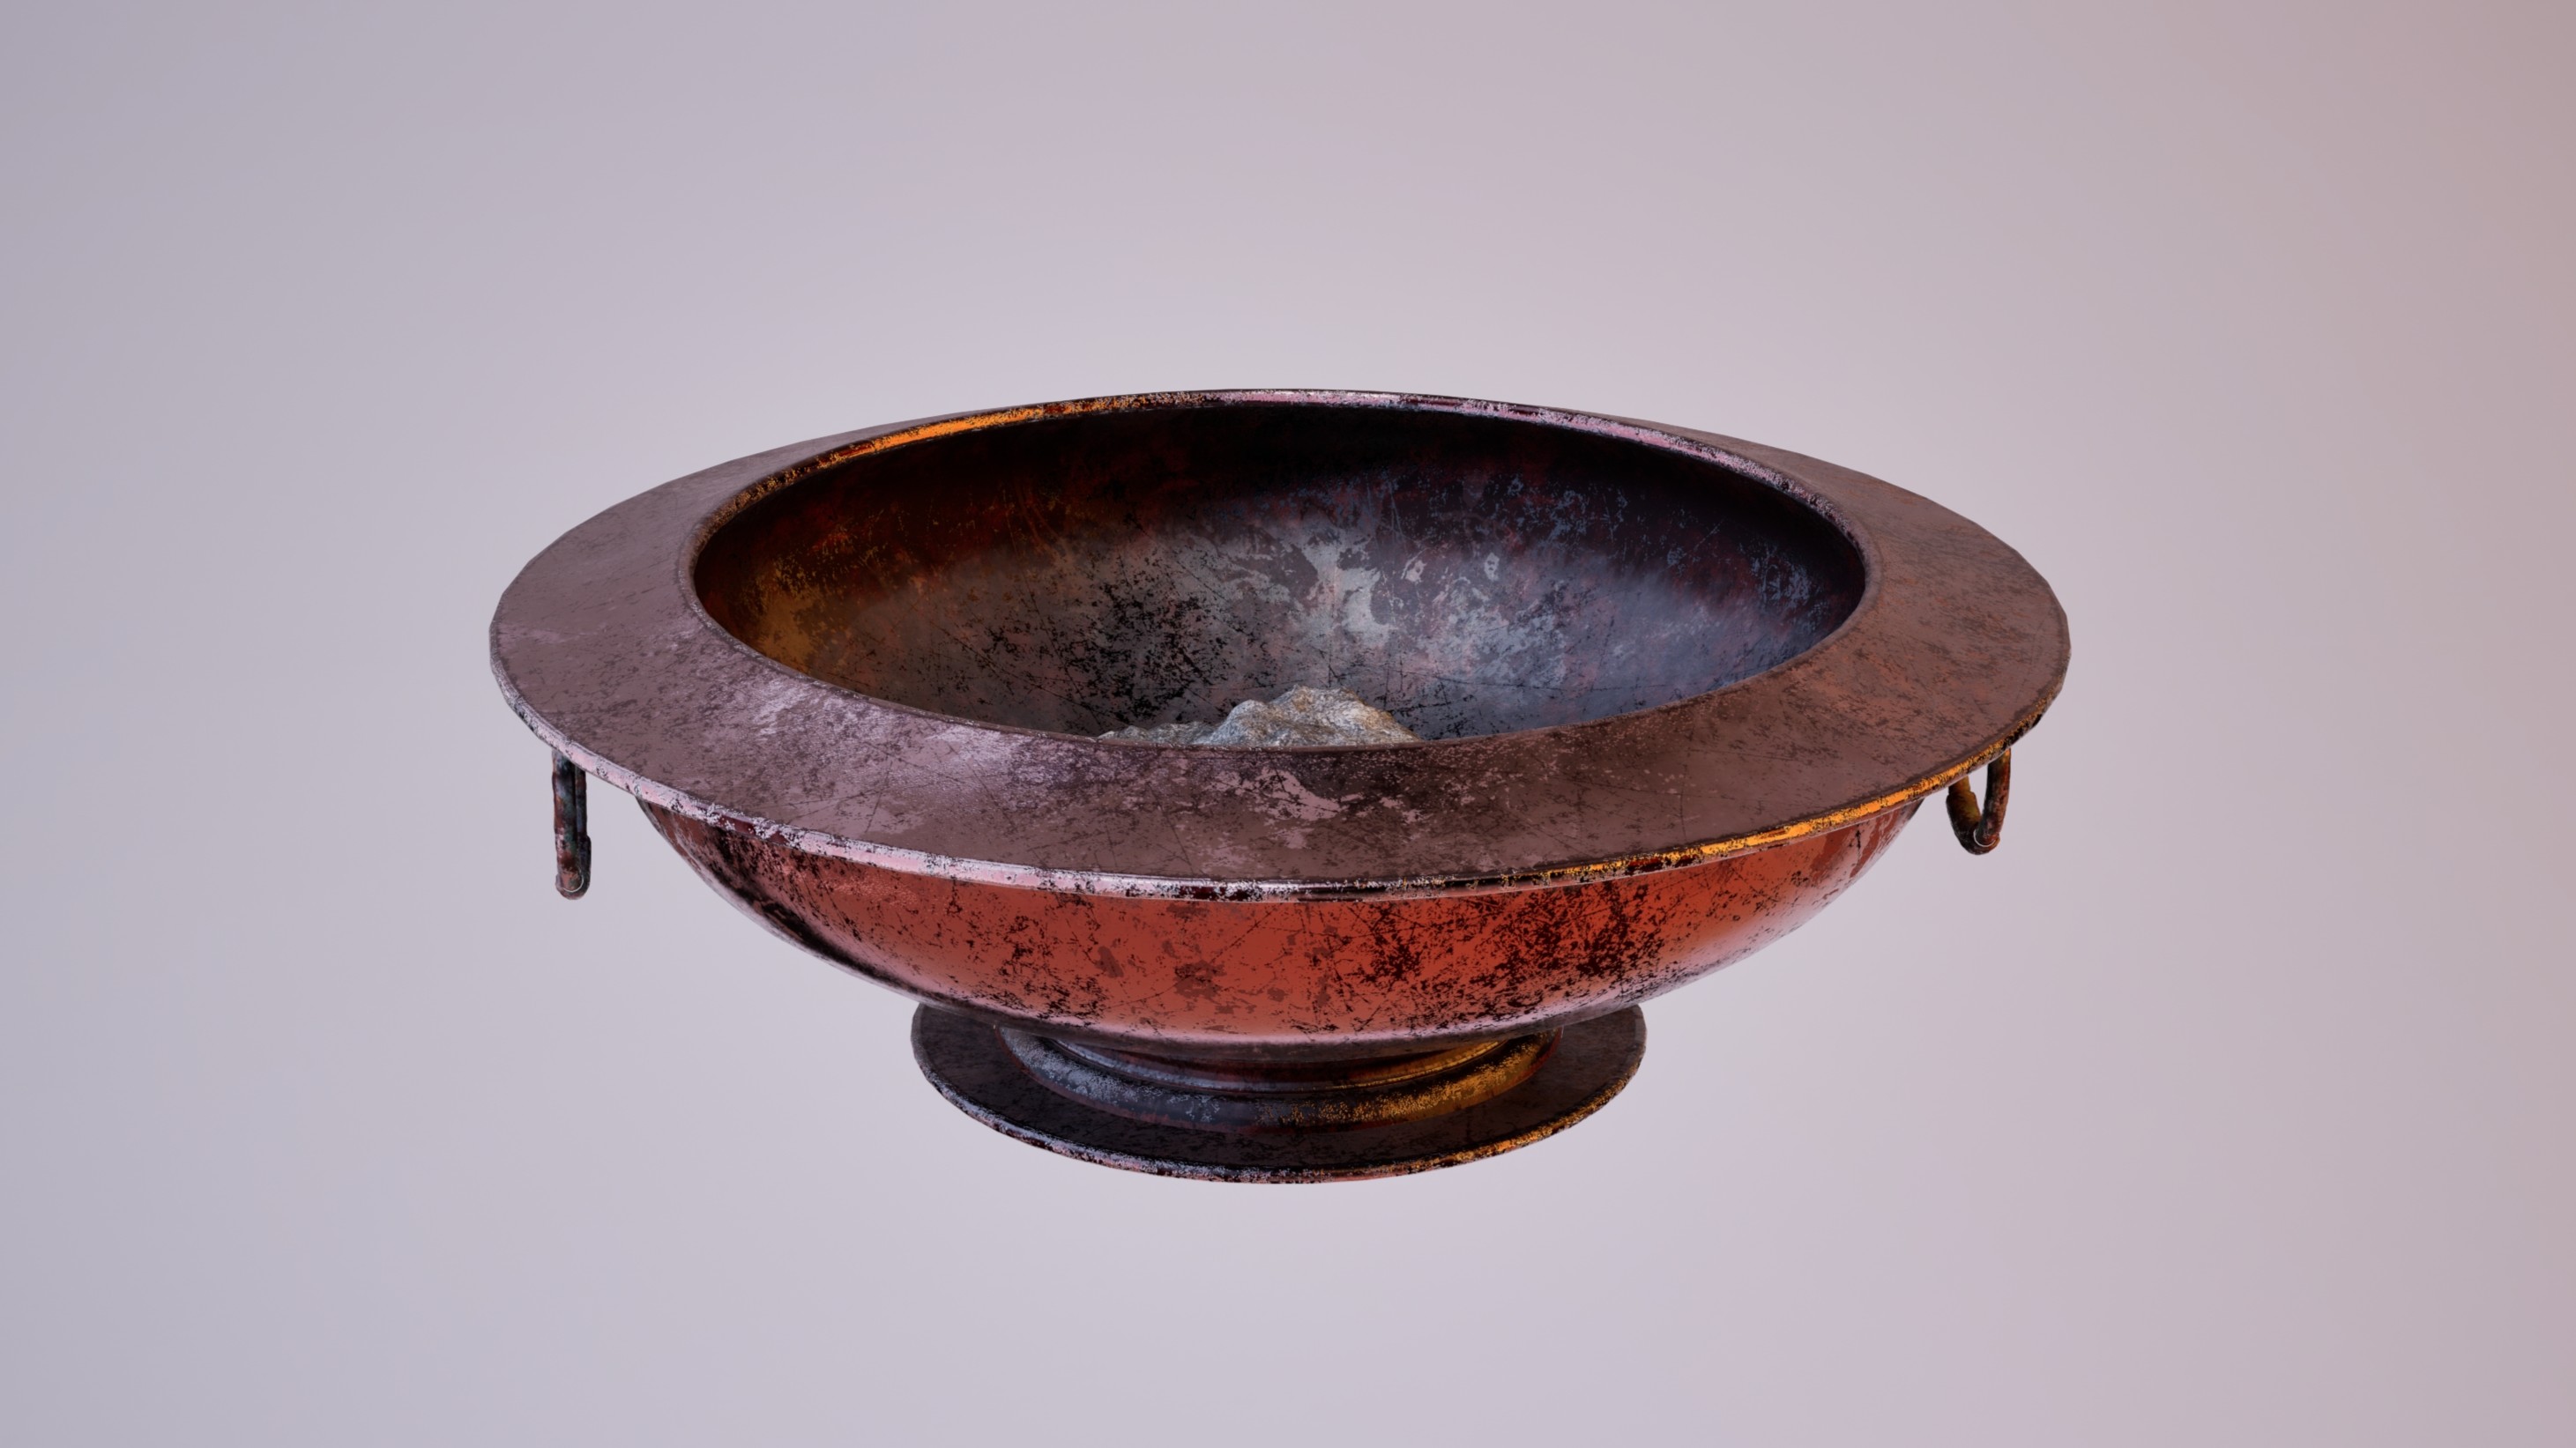
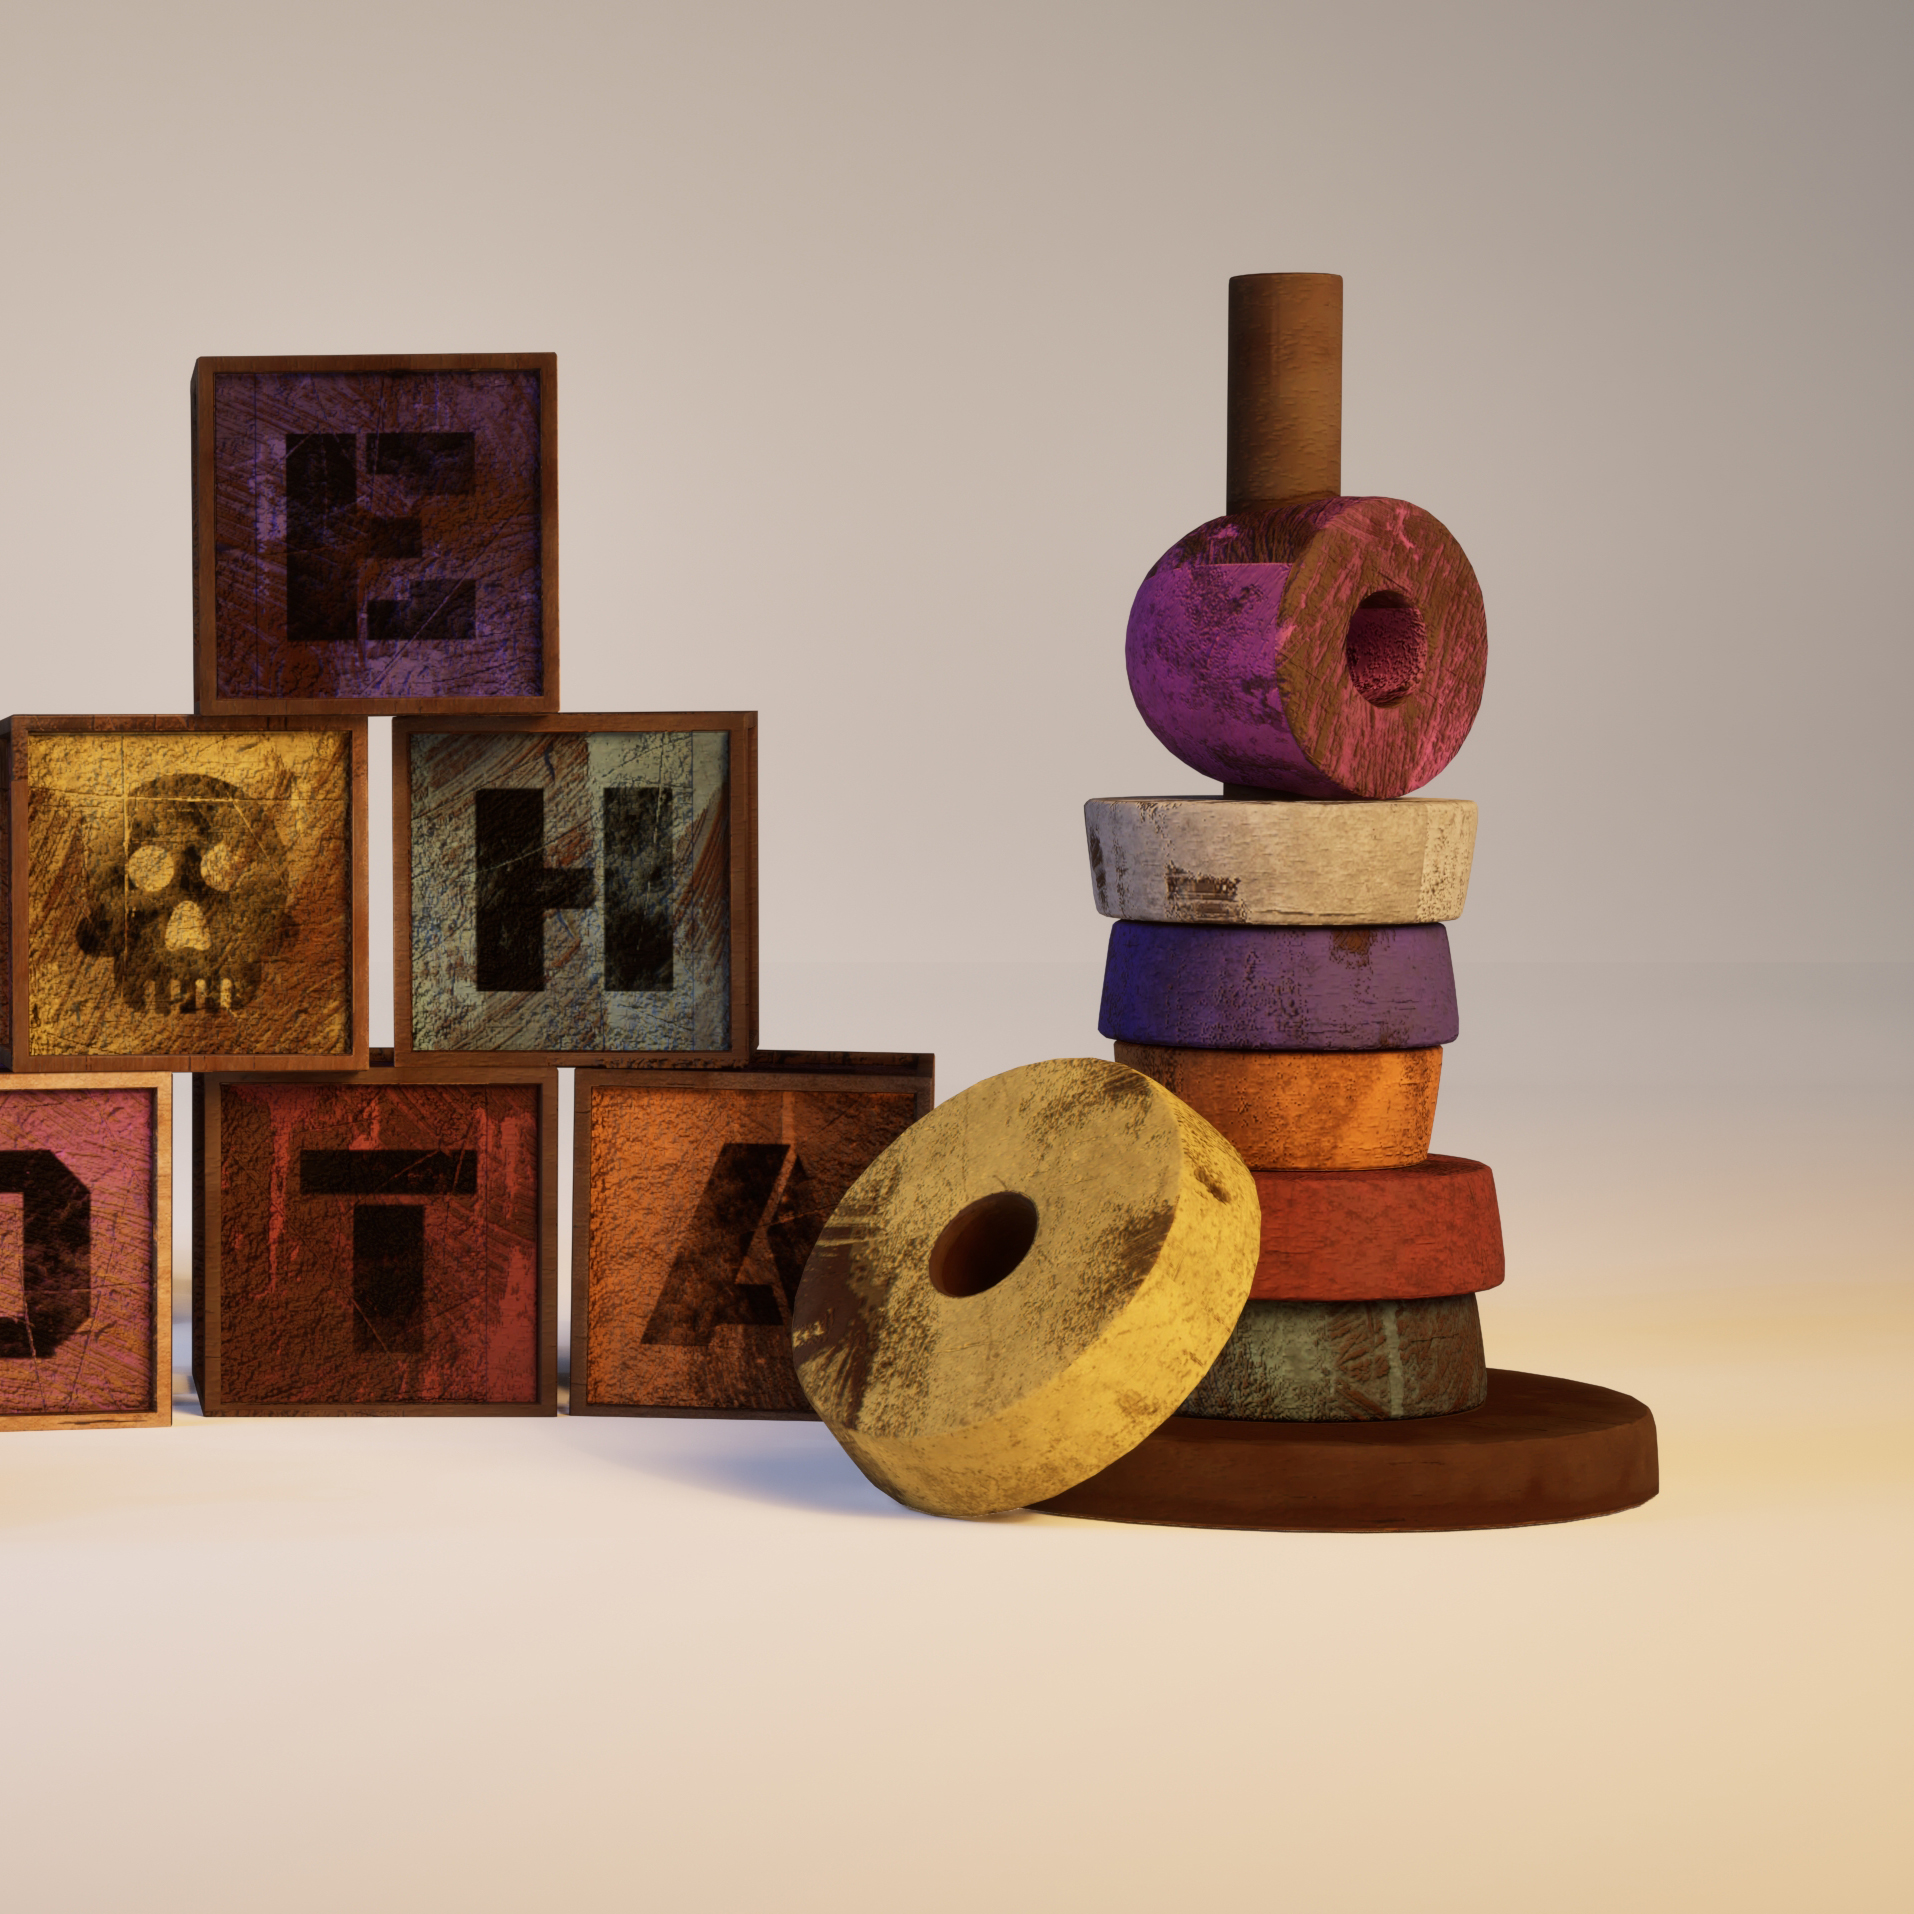
Render on a neutral background, created using Sequencer and Movie Render Queue(16×16 samples). The studio lighting setup is designed to enhance the metallic and wooden materials, highlighting wear, rust, and fine construction details.
Low-poly model with clean, optimized topology designed for real-time applications. The structure is built with well-distributed edge loops to ensure a solid silhouette while balancing polygon count and structural detail.
The UVs were manually created using Maya’s Bonus Tools and Auto Unwrap, aiming for an efficient and well-organized layout. Shell padding and arrangement are optimized to prevent artifacts during baking and texturing.
The textures were created by combining procedural masks with hand-painted adjustments. The materials simulate oxidized metal, chipped paint, and worn wood, consistent with the intended environment style. The export workflow for Unreal Engine includes three texture maps: Albedo, Normal Map, and ORD(Ambient Occlusion, Roughness, Metalness).
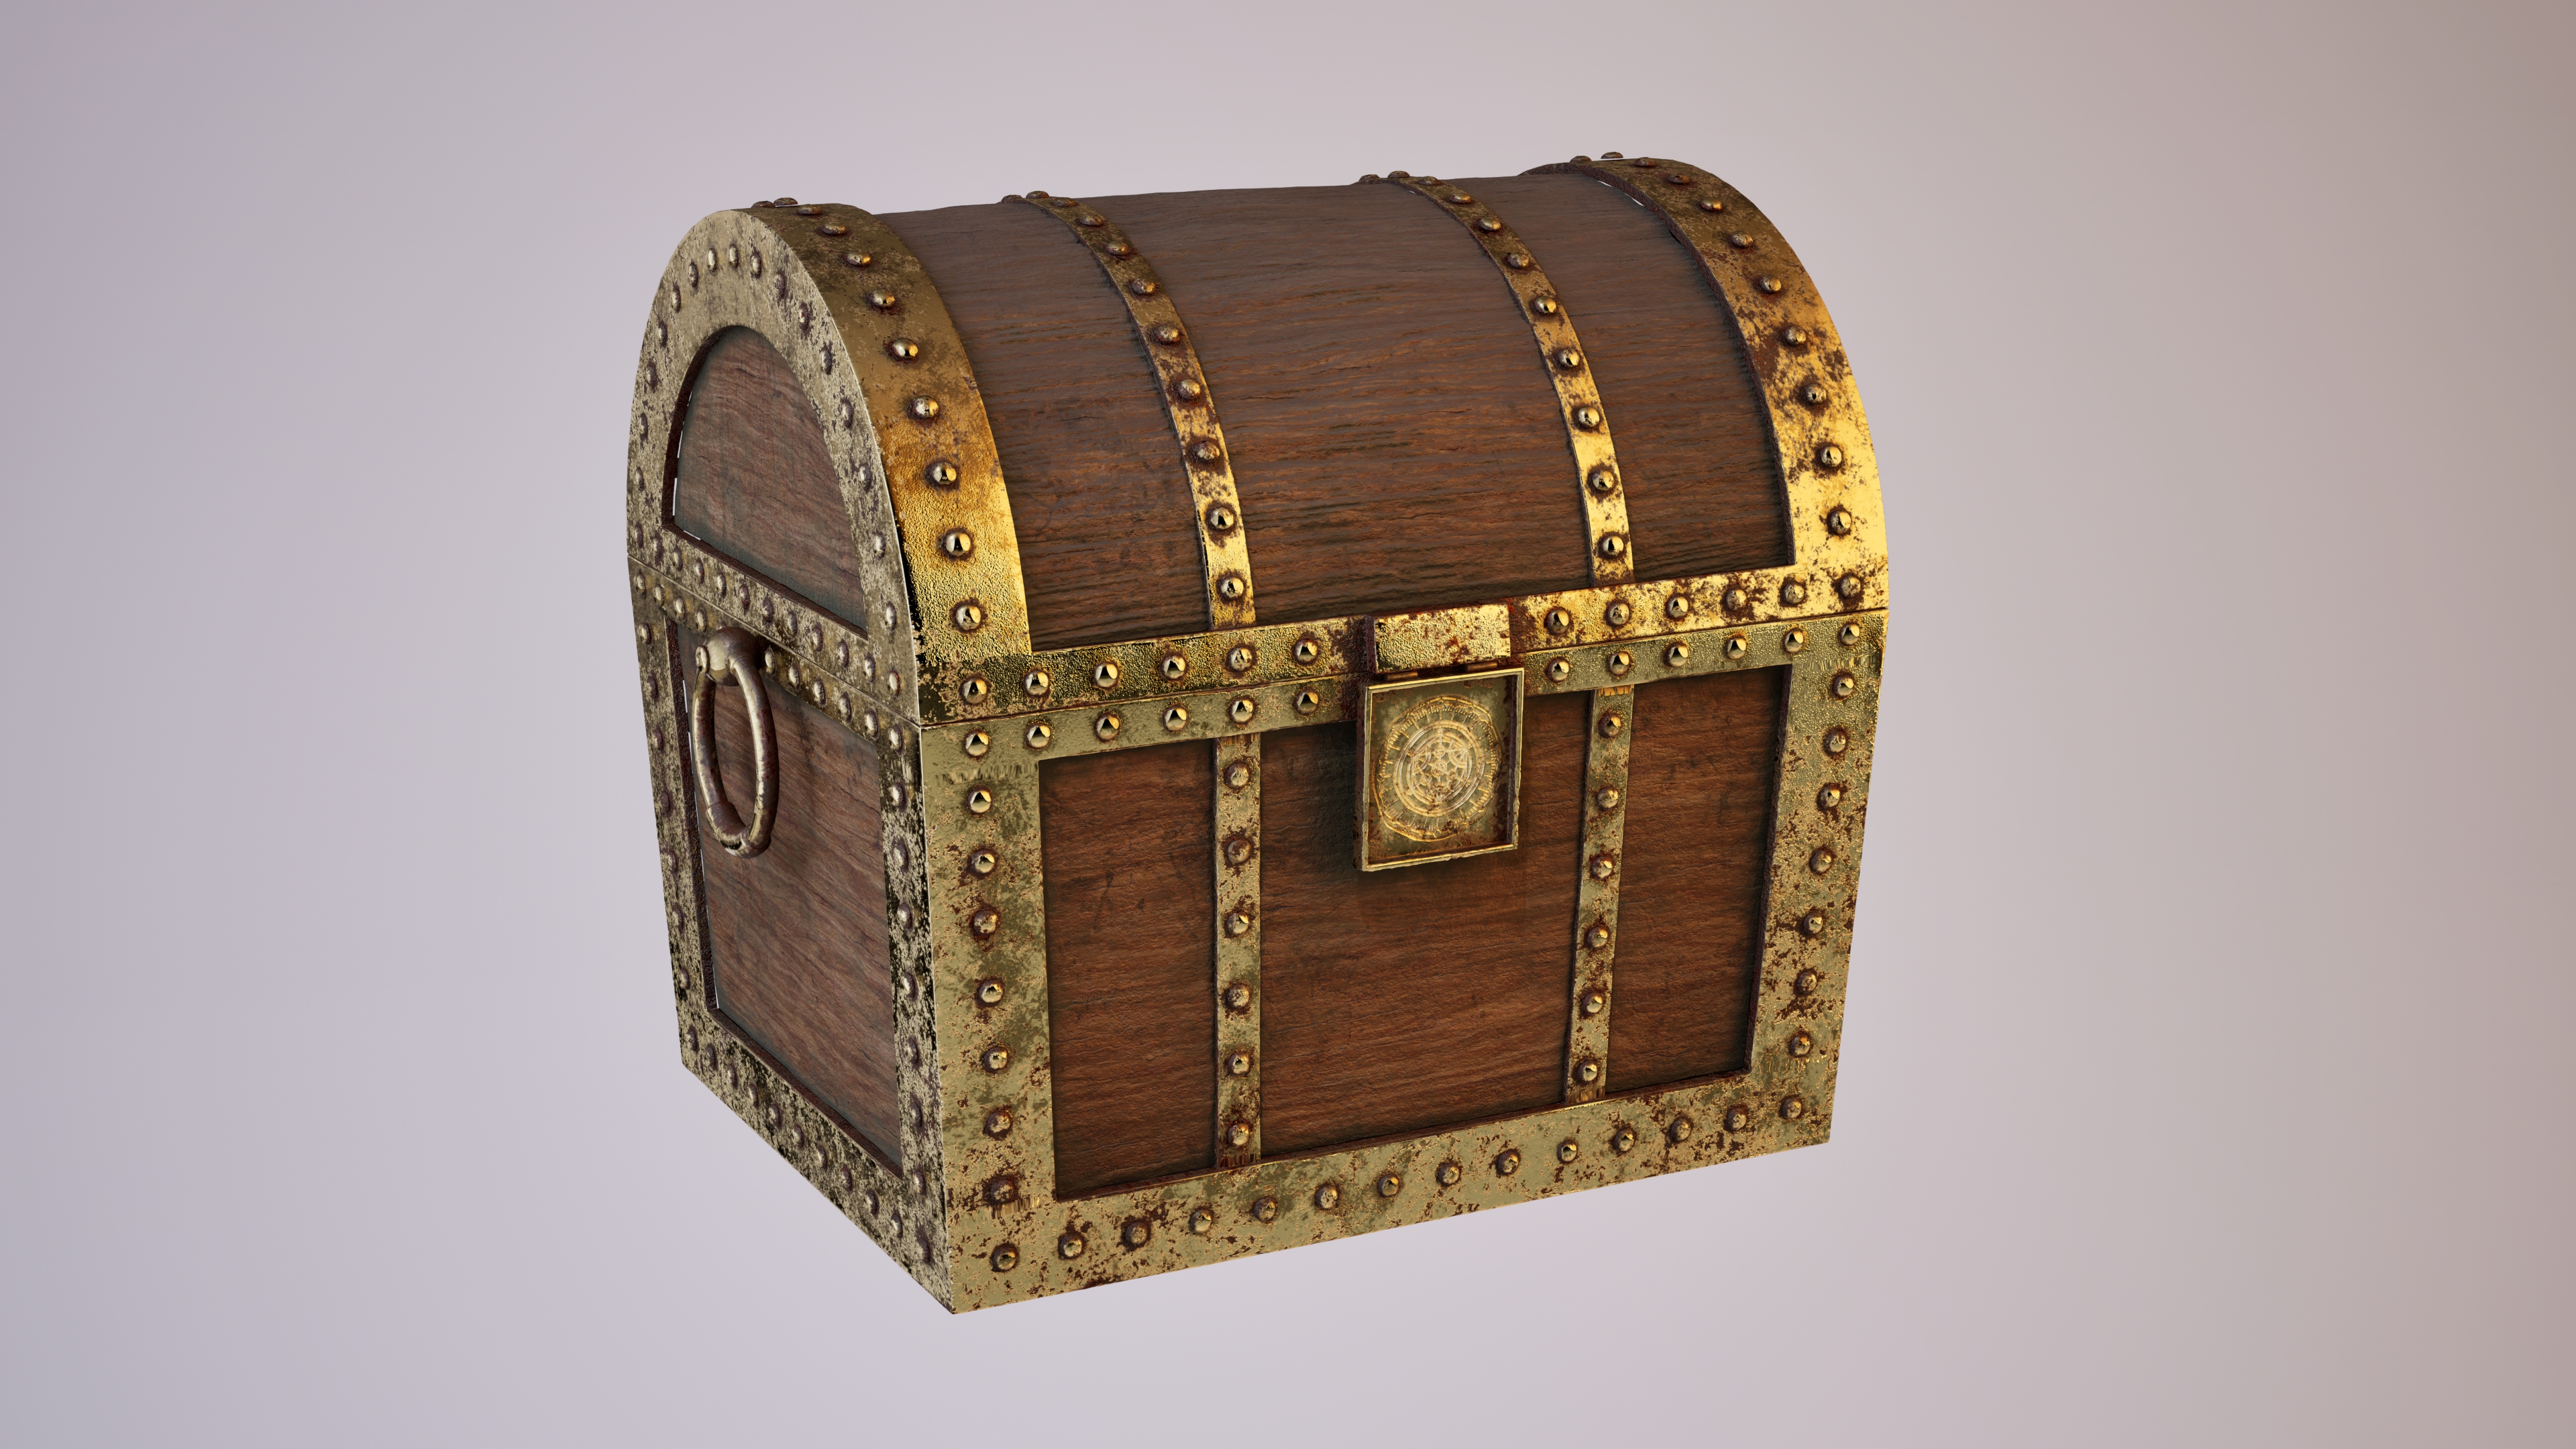
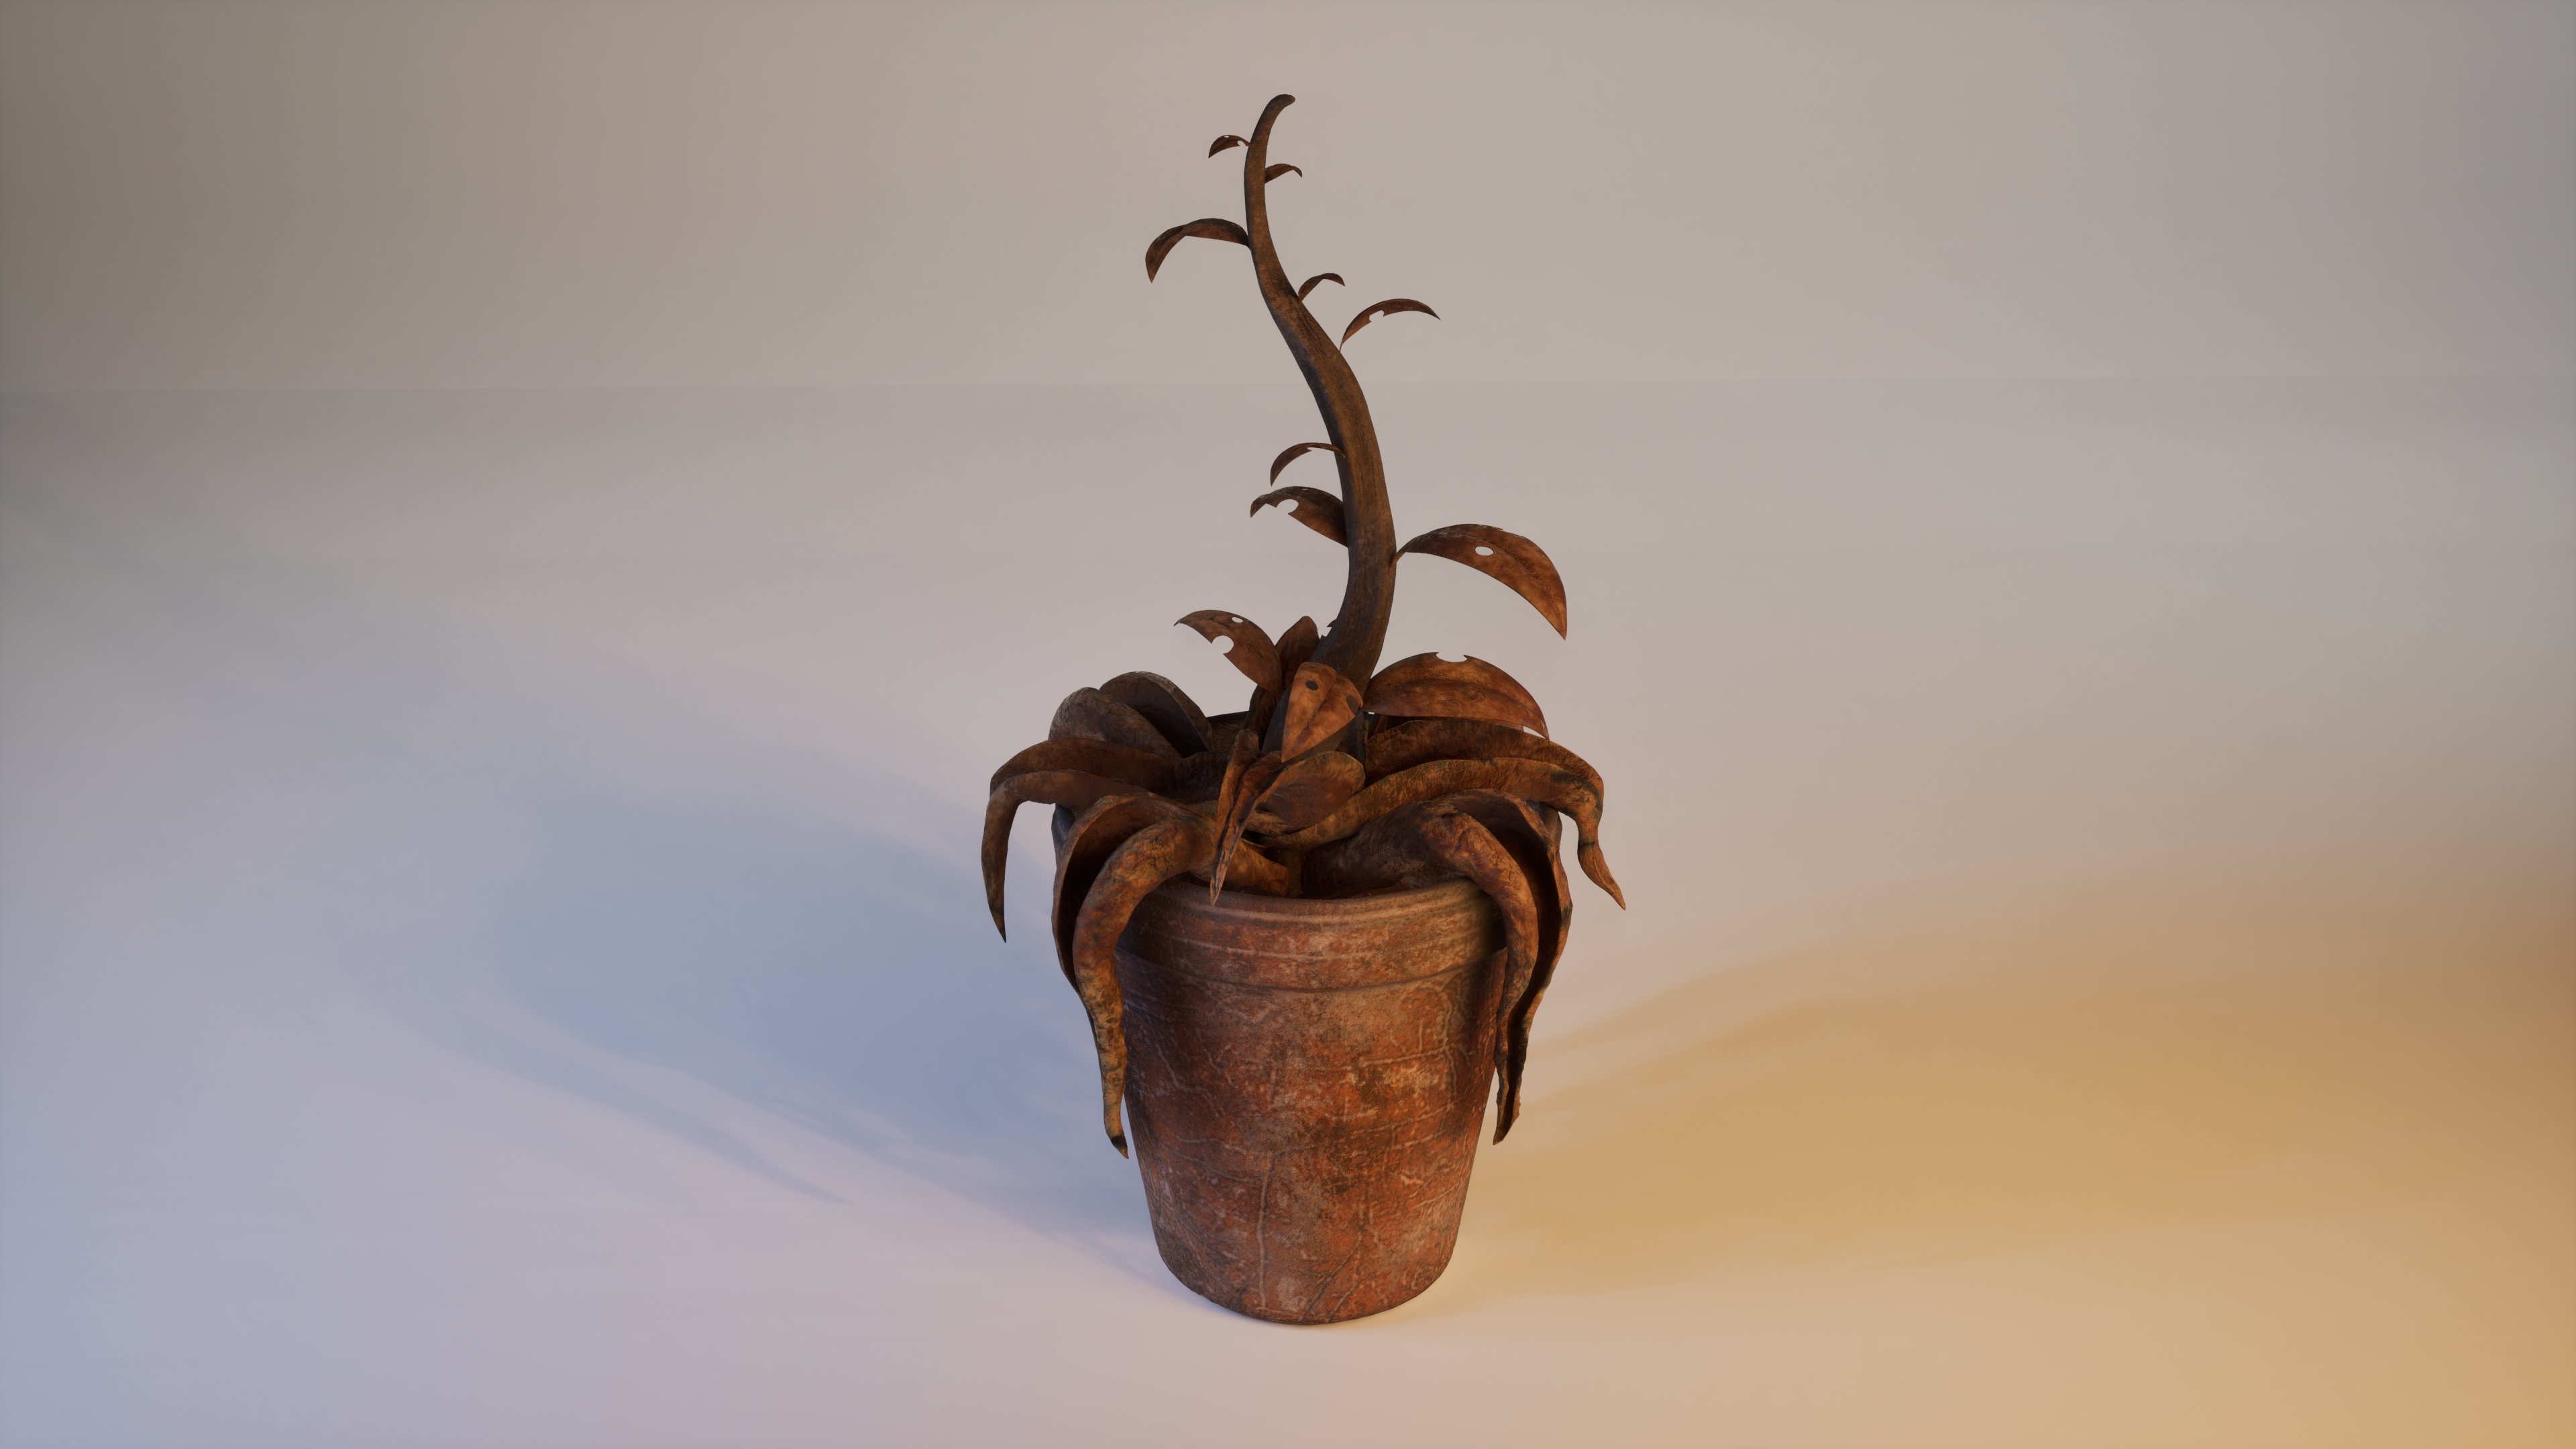
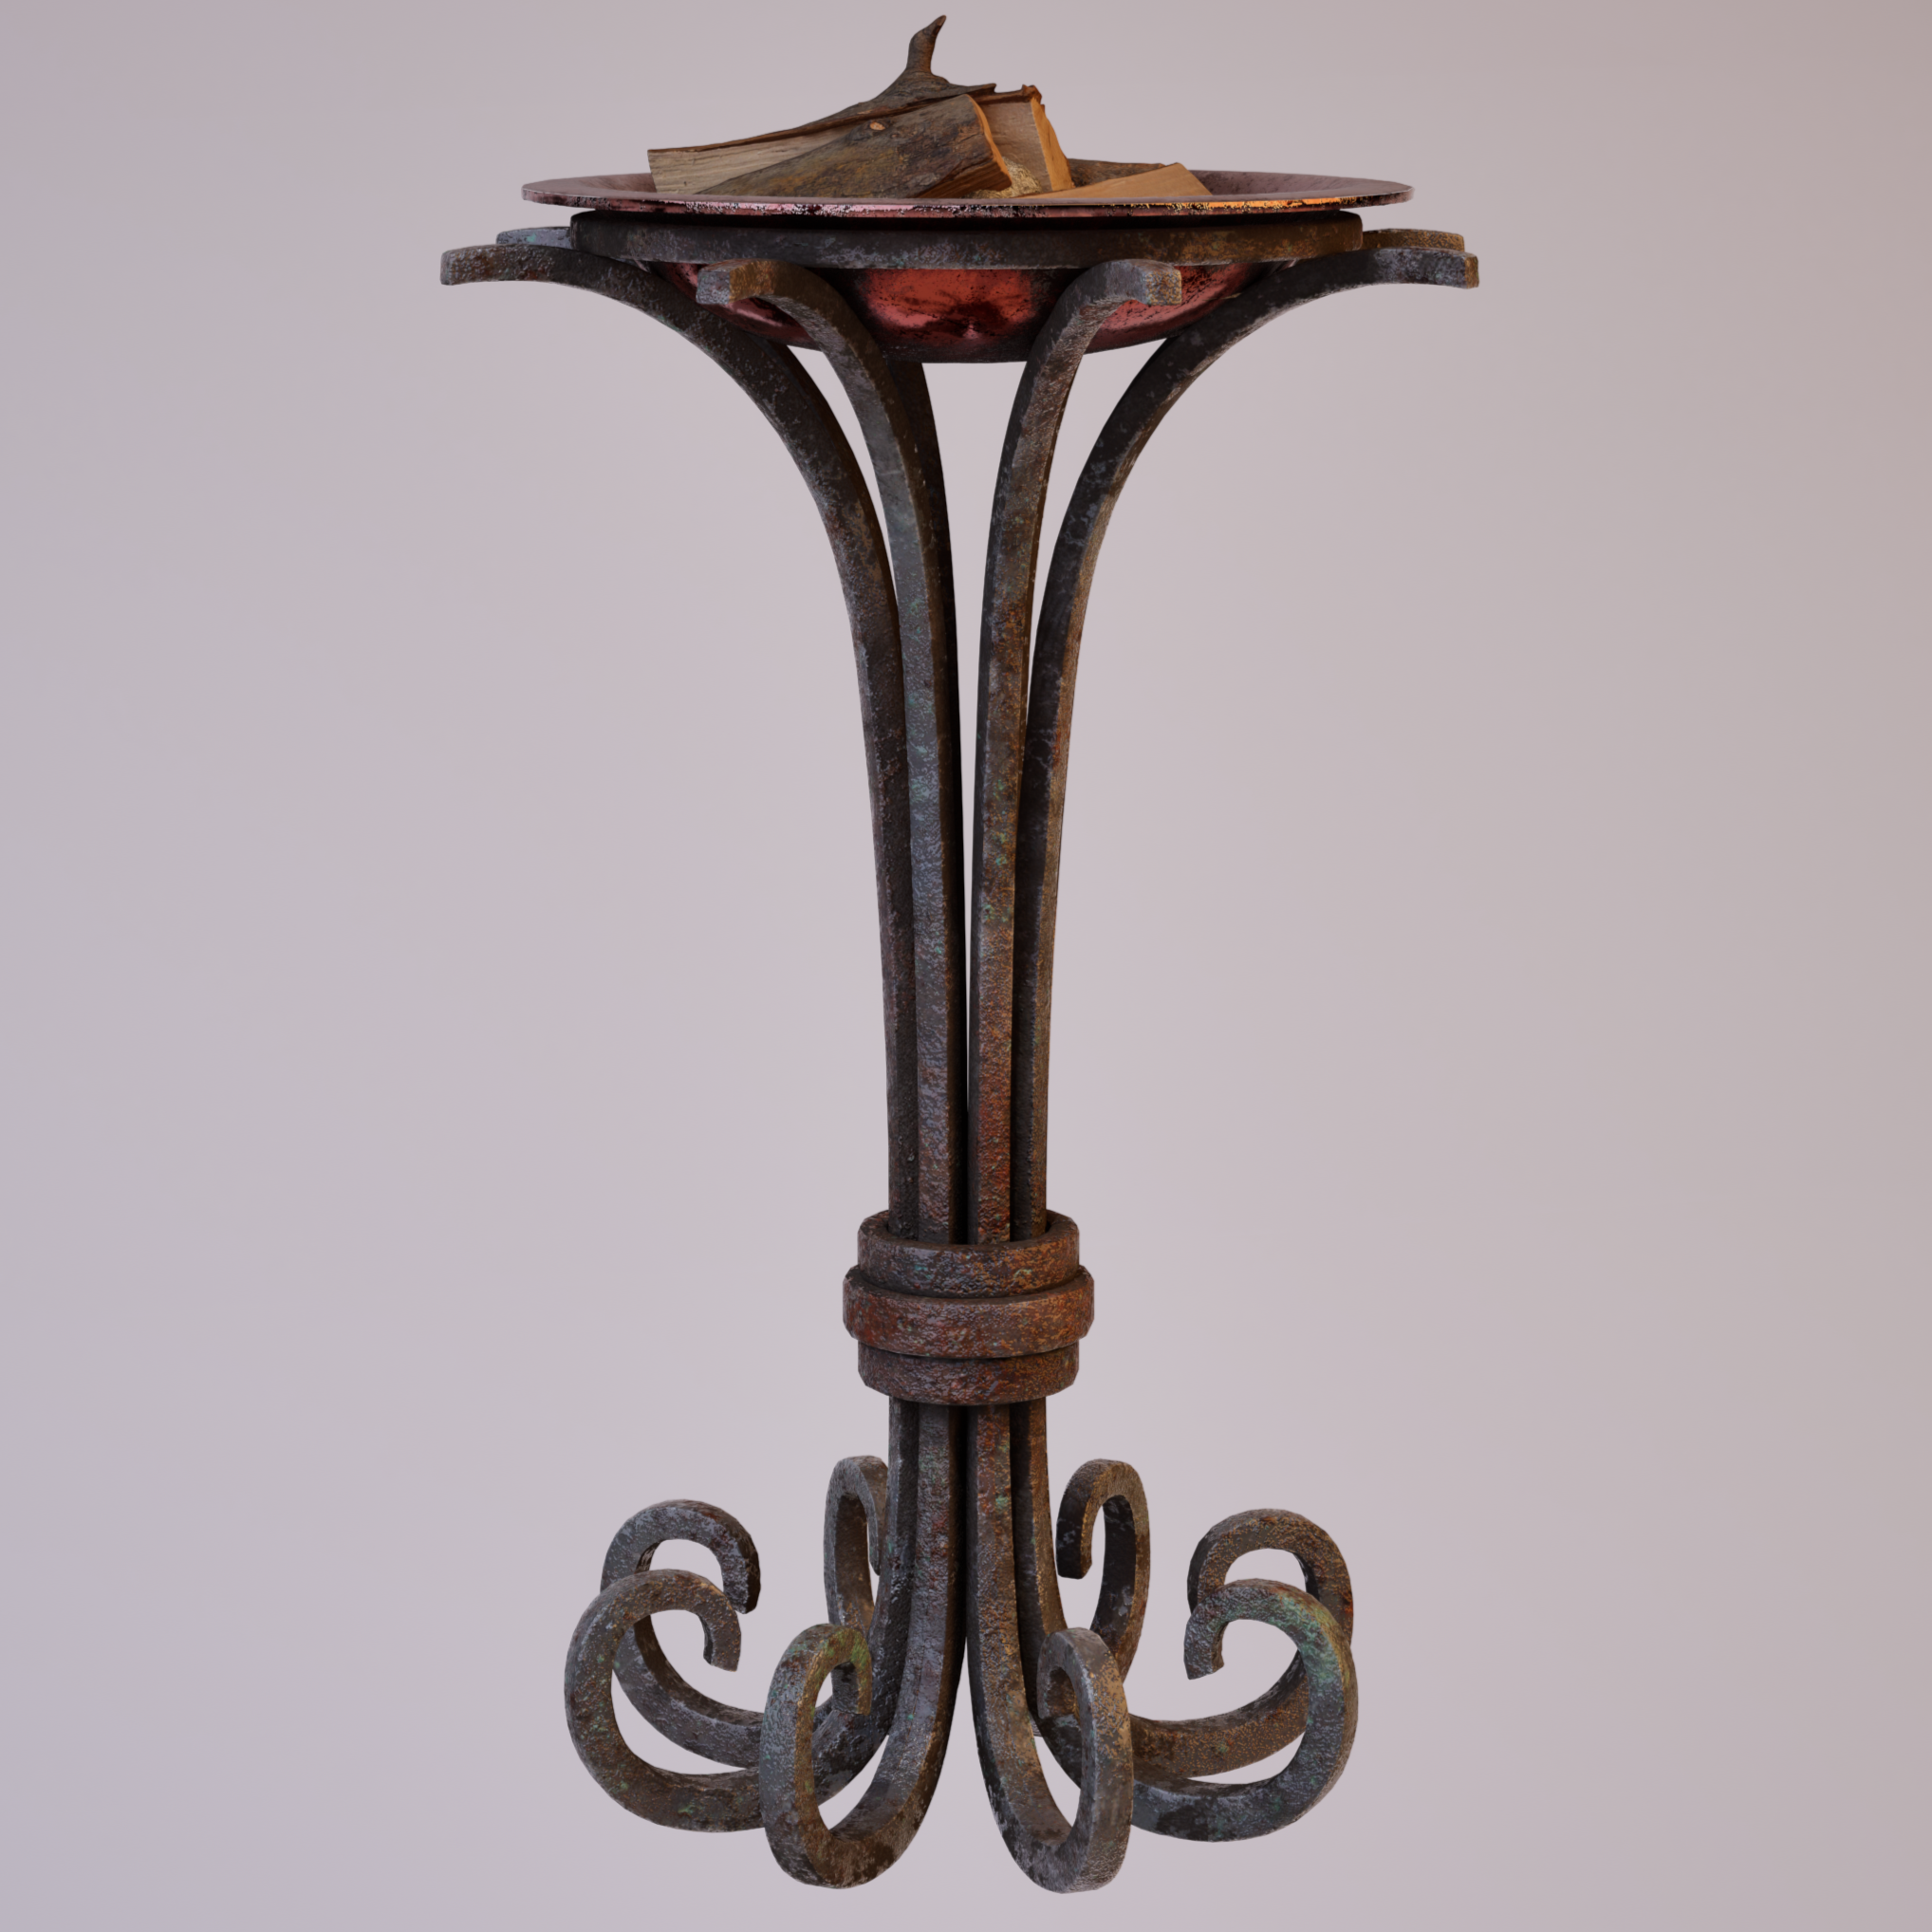


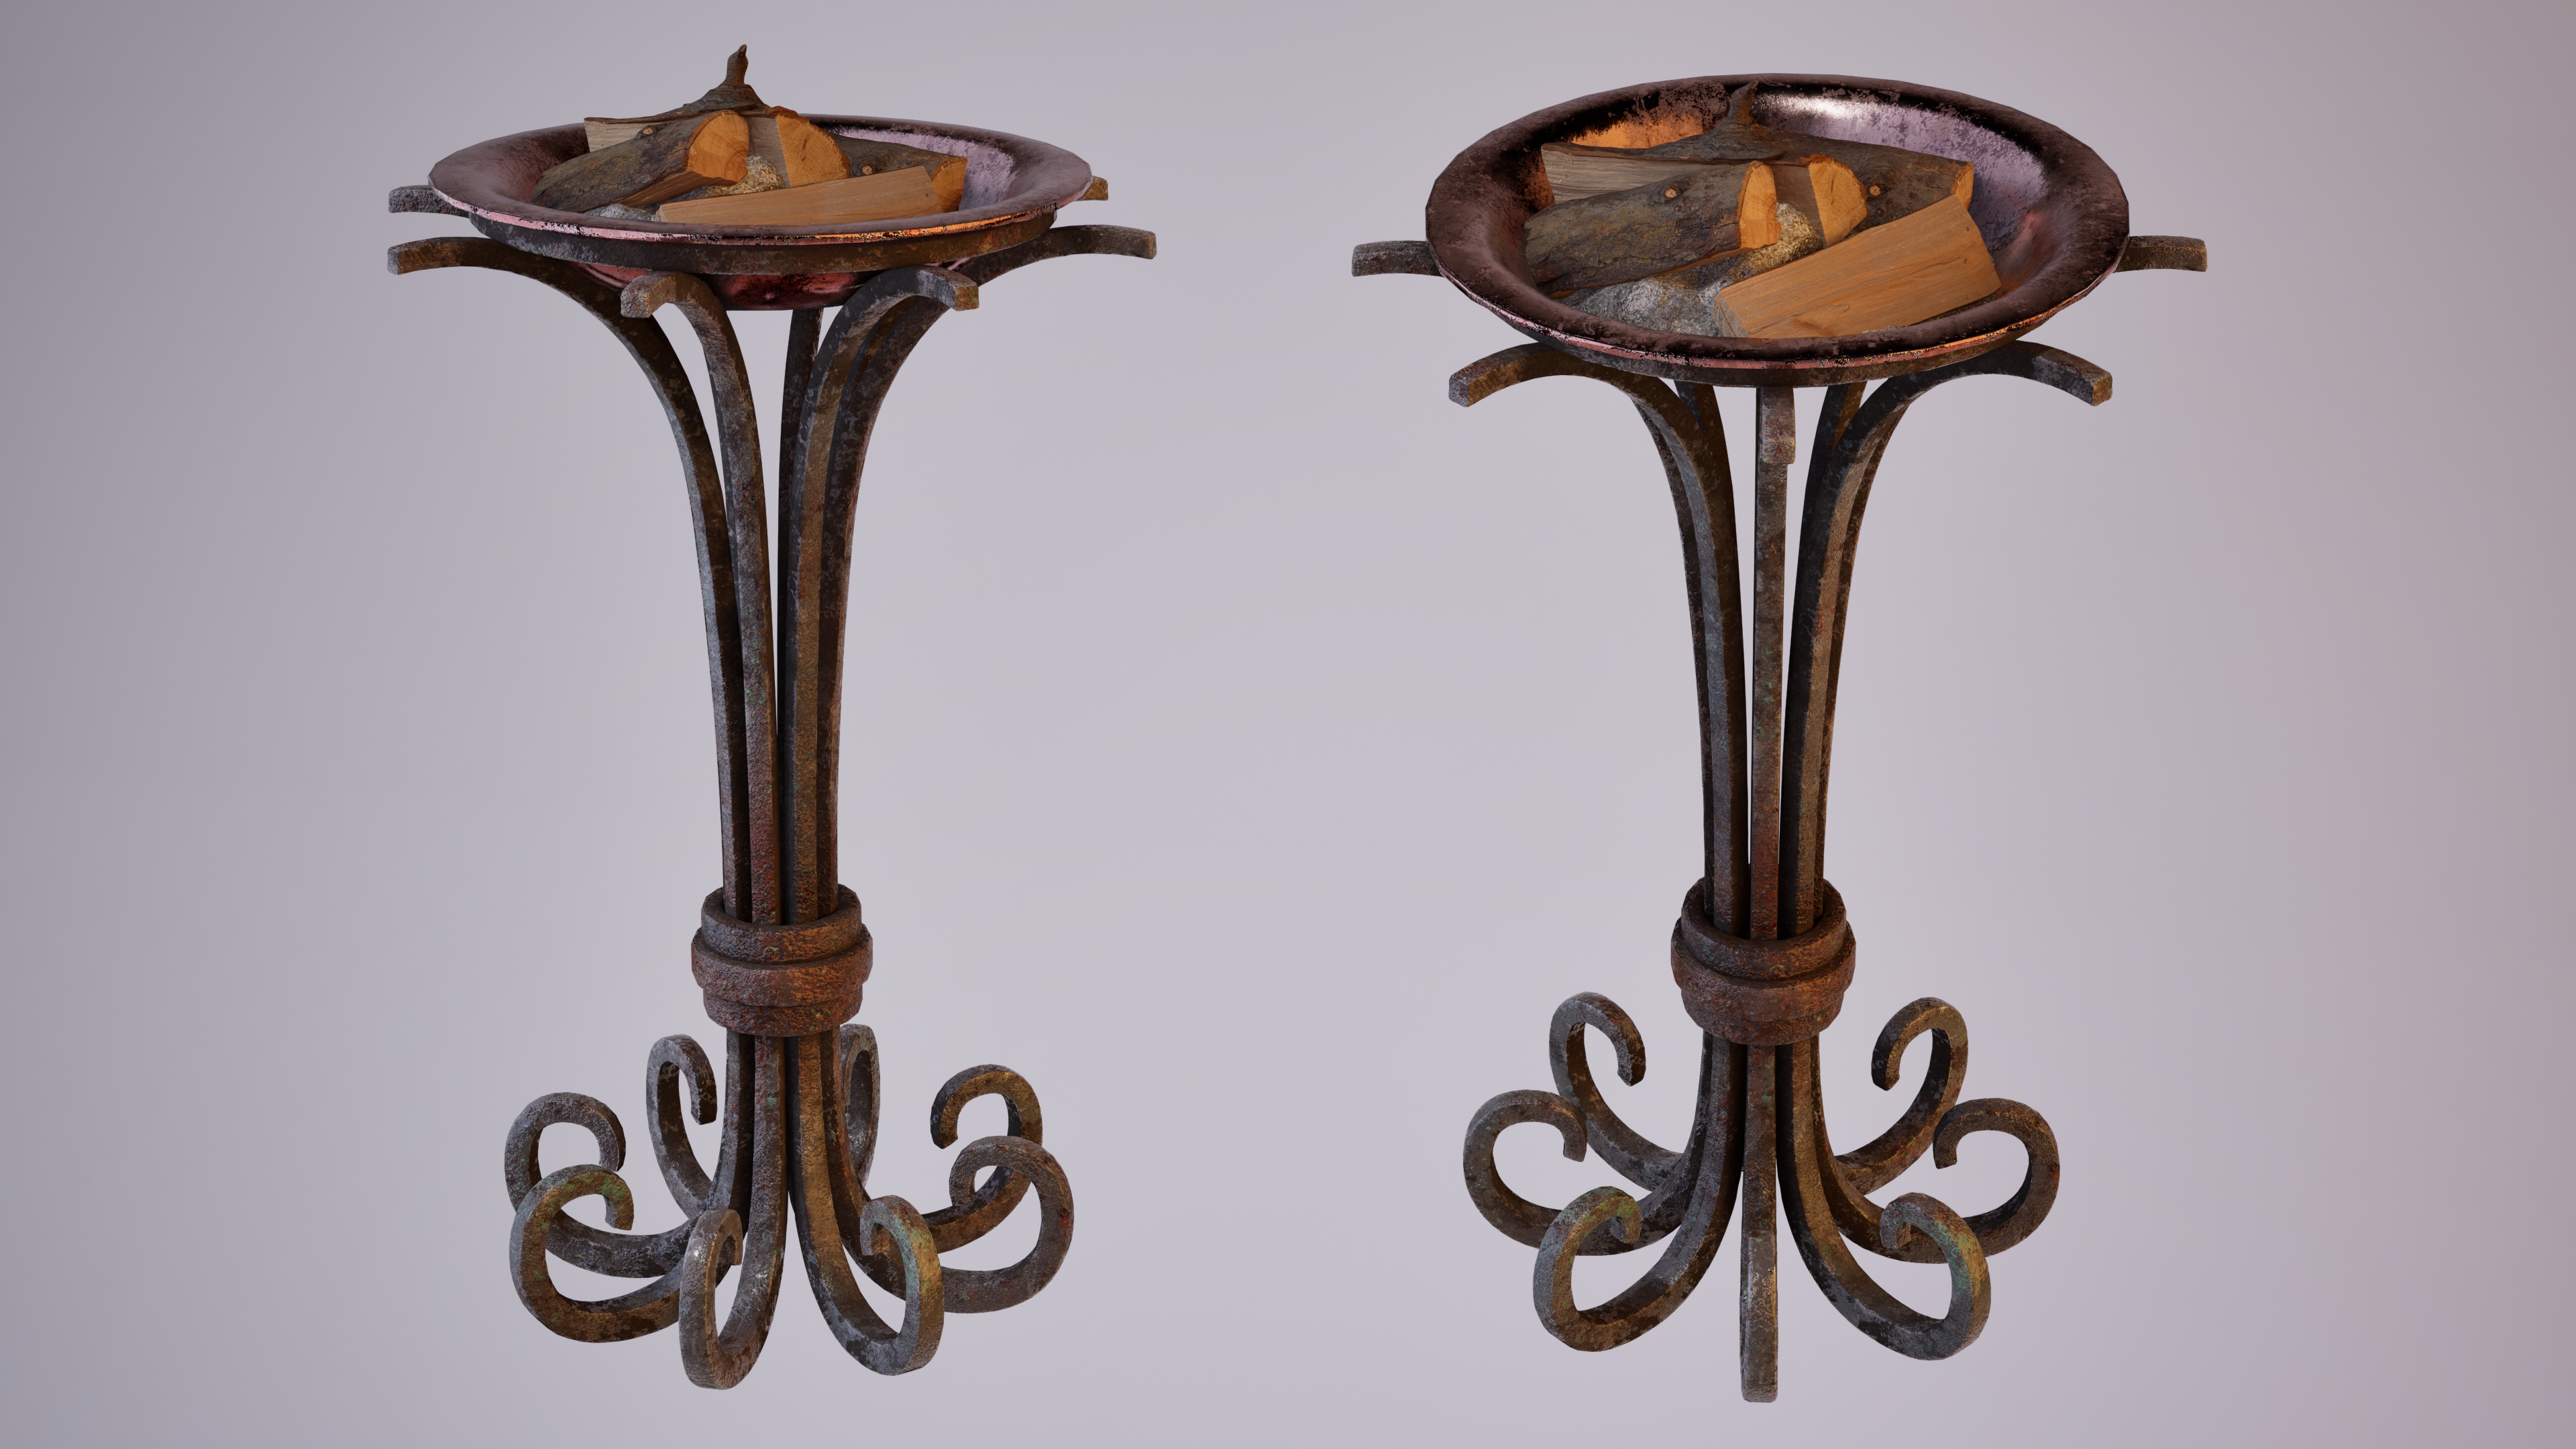
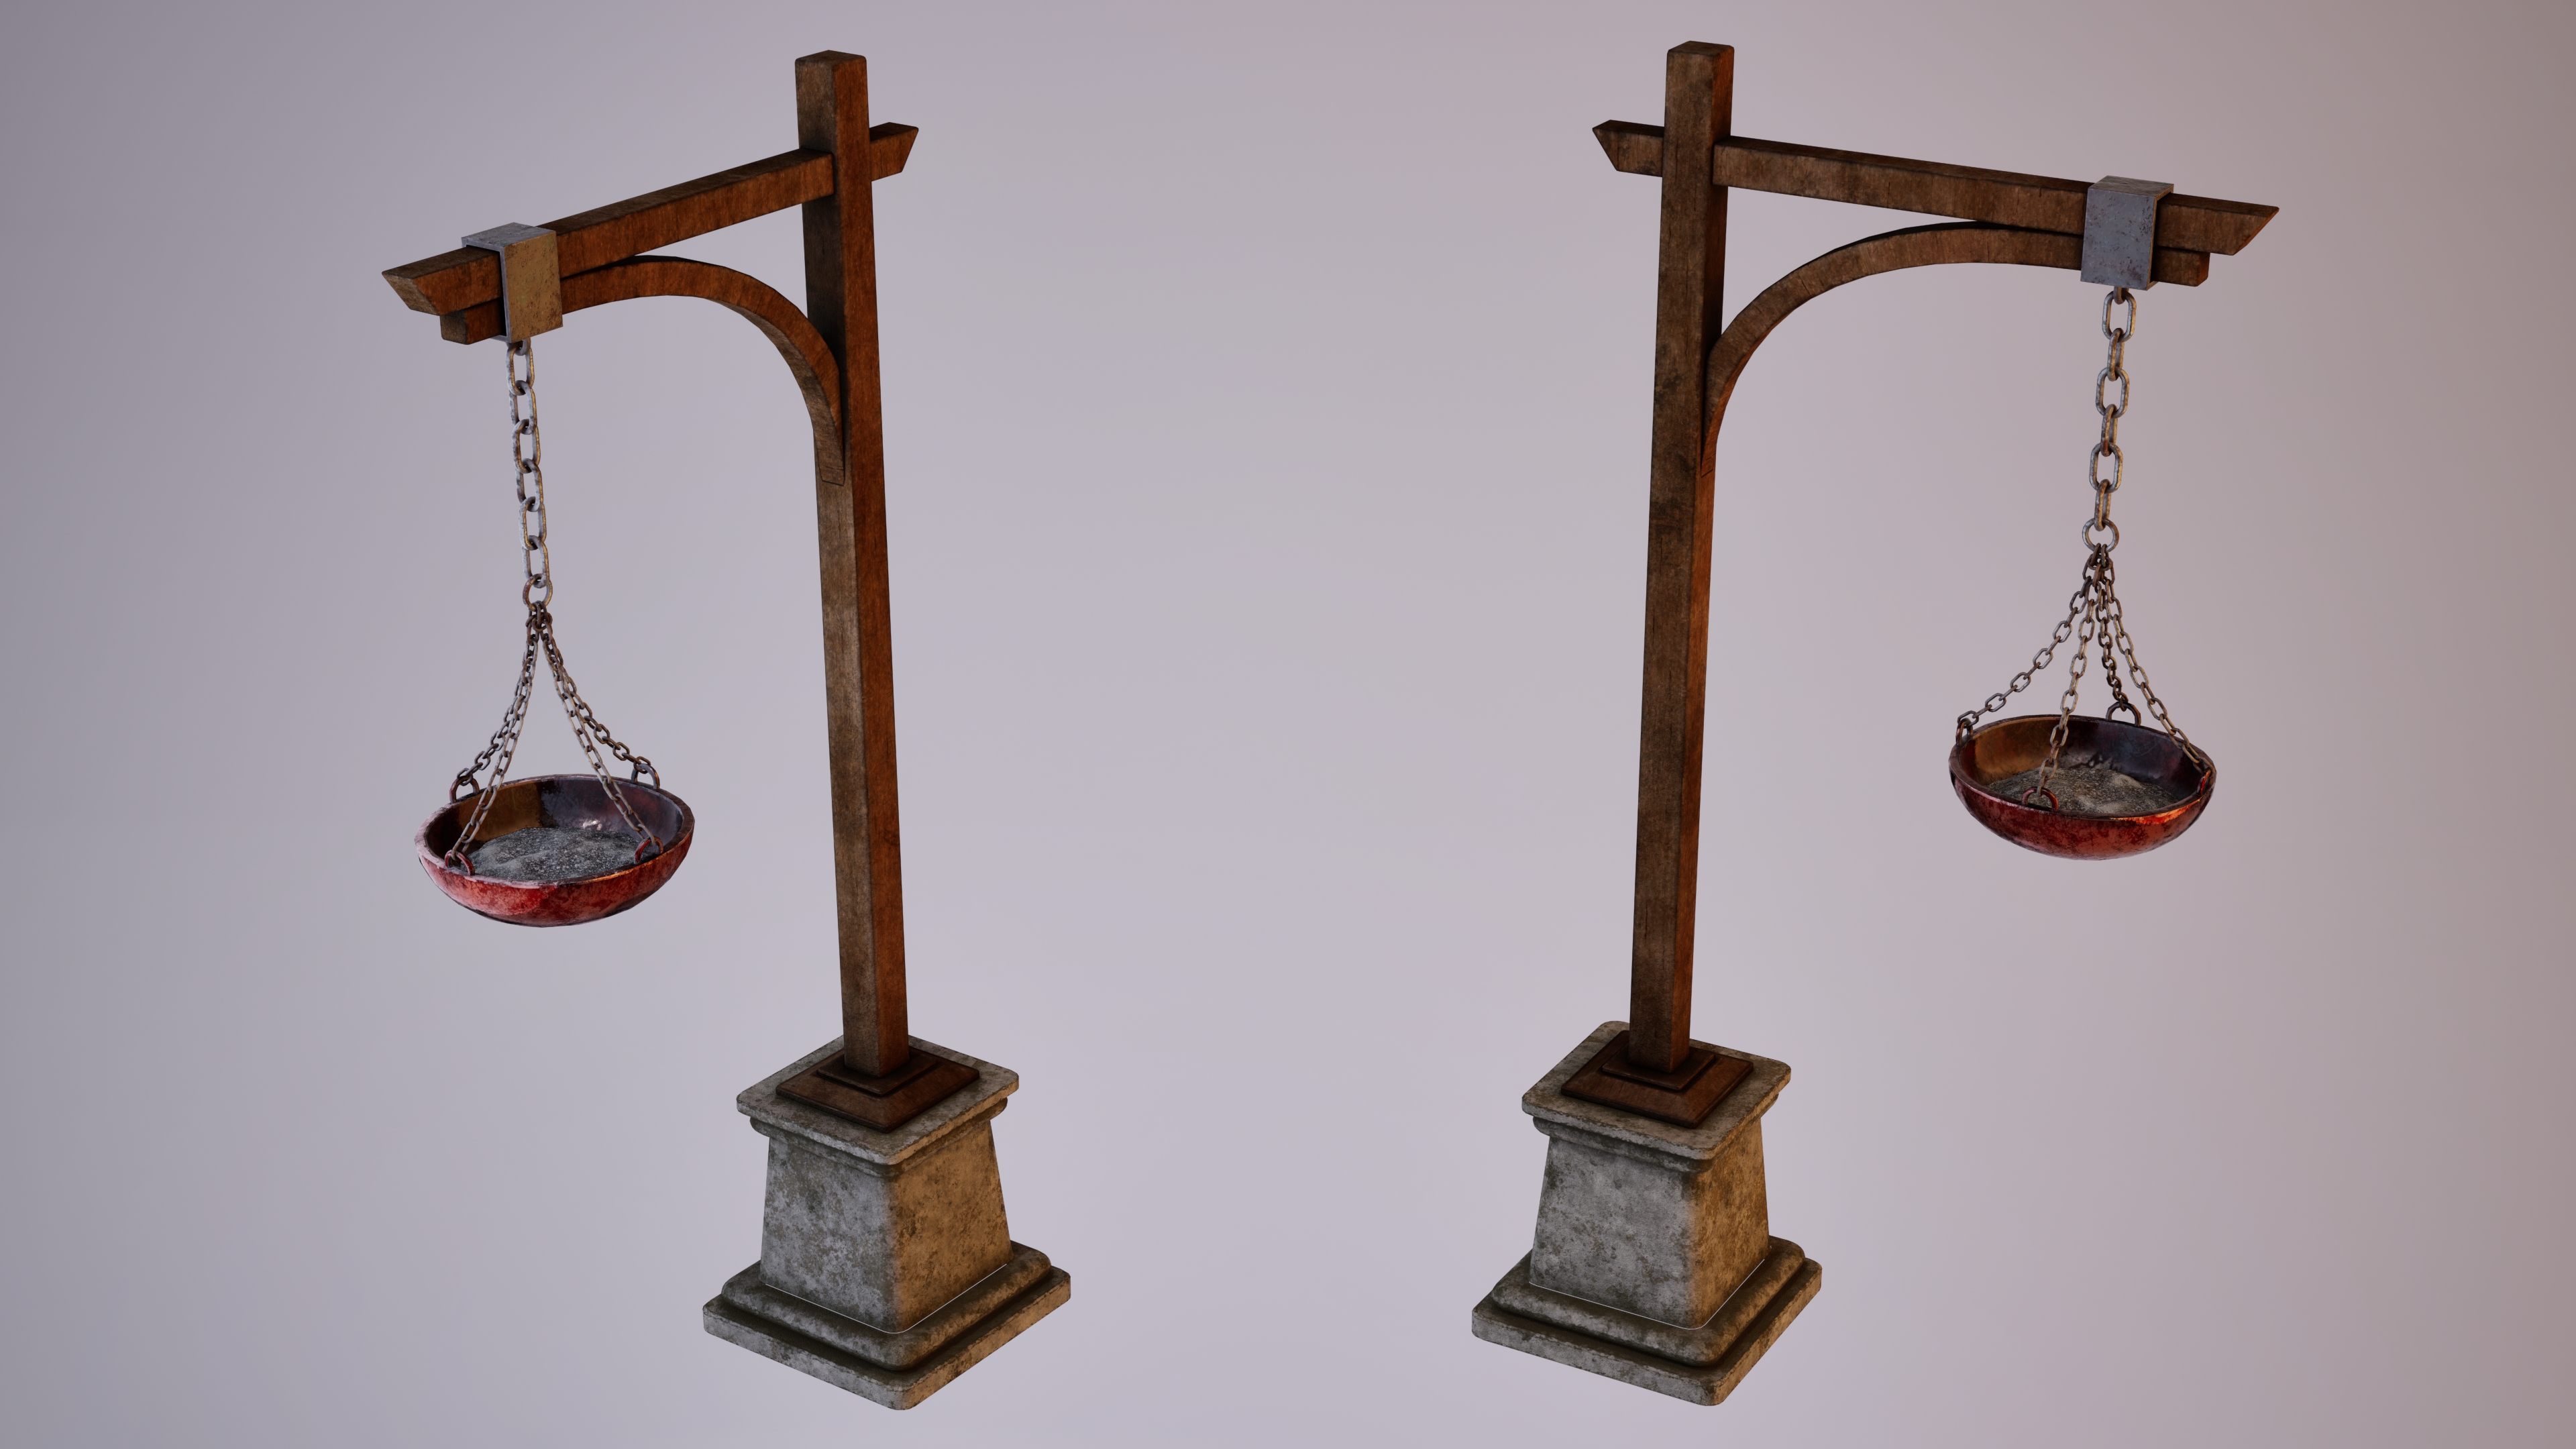
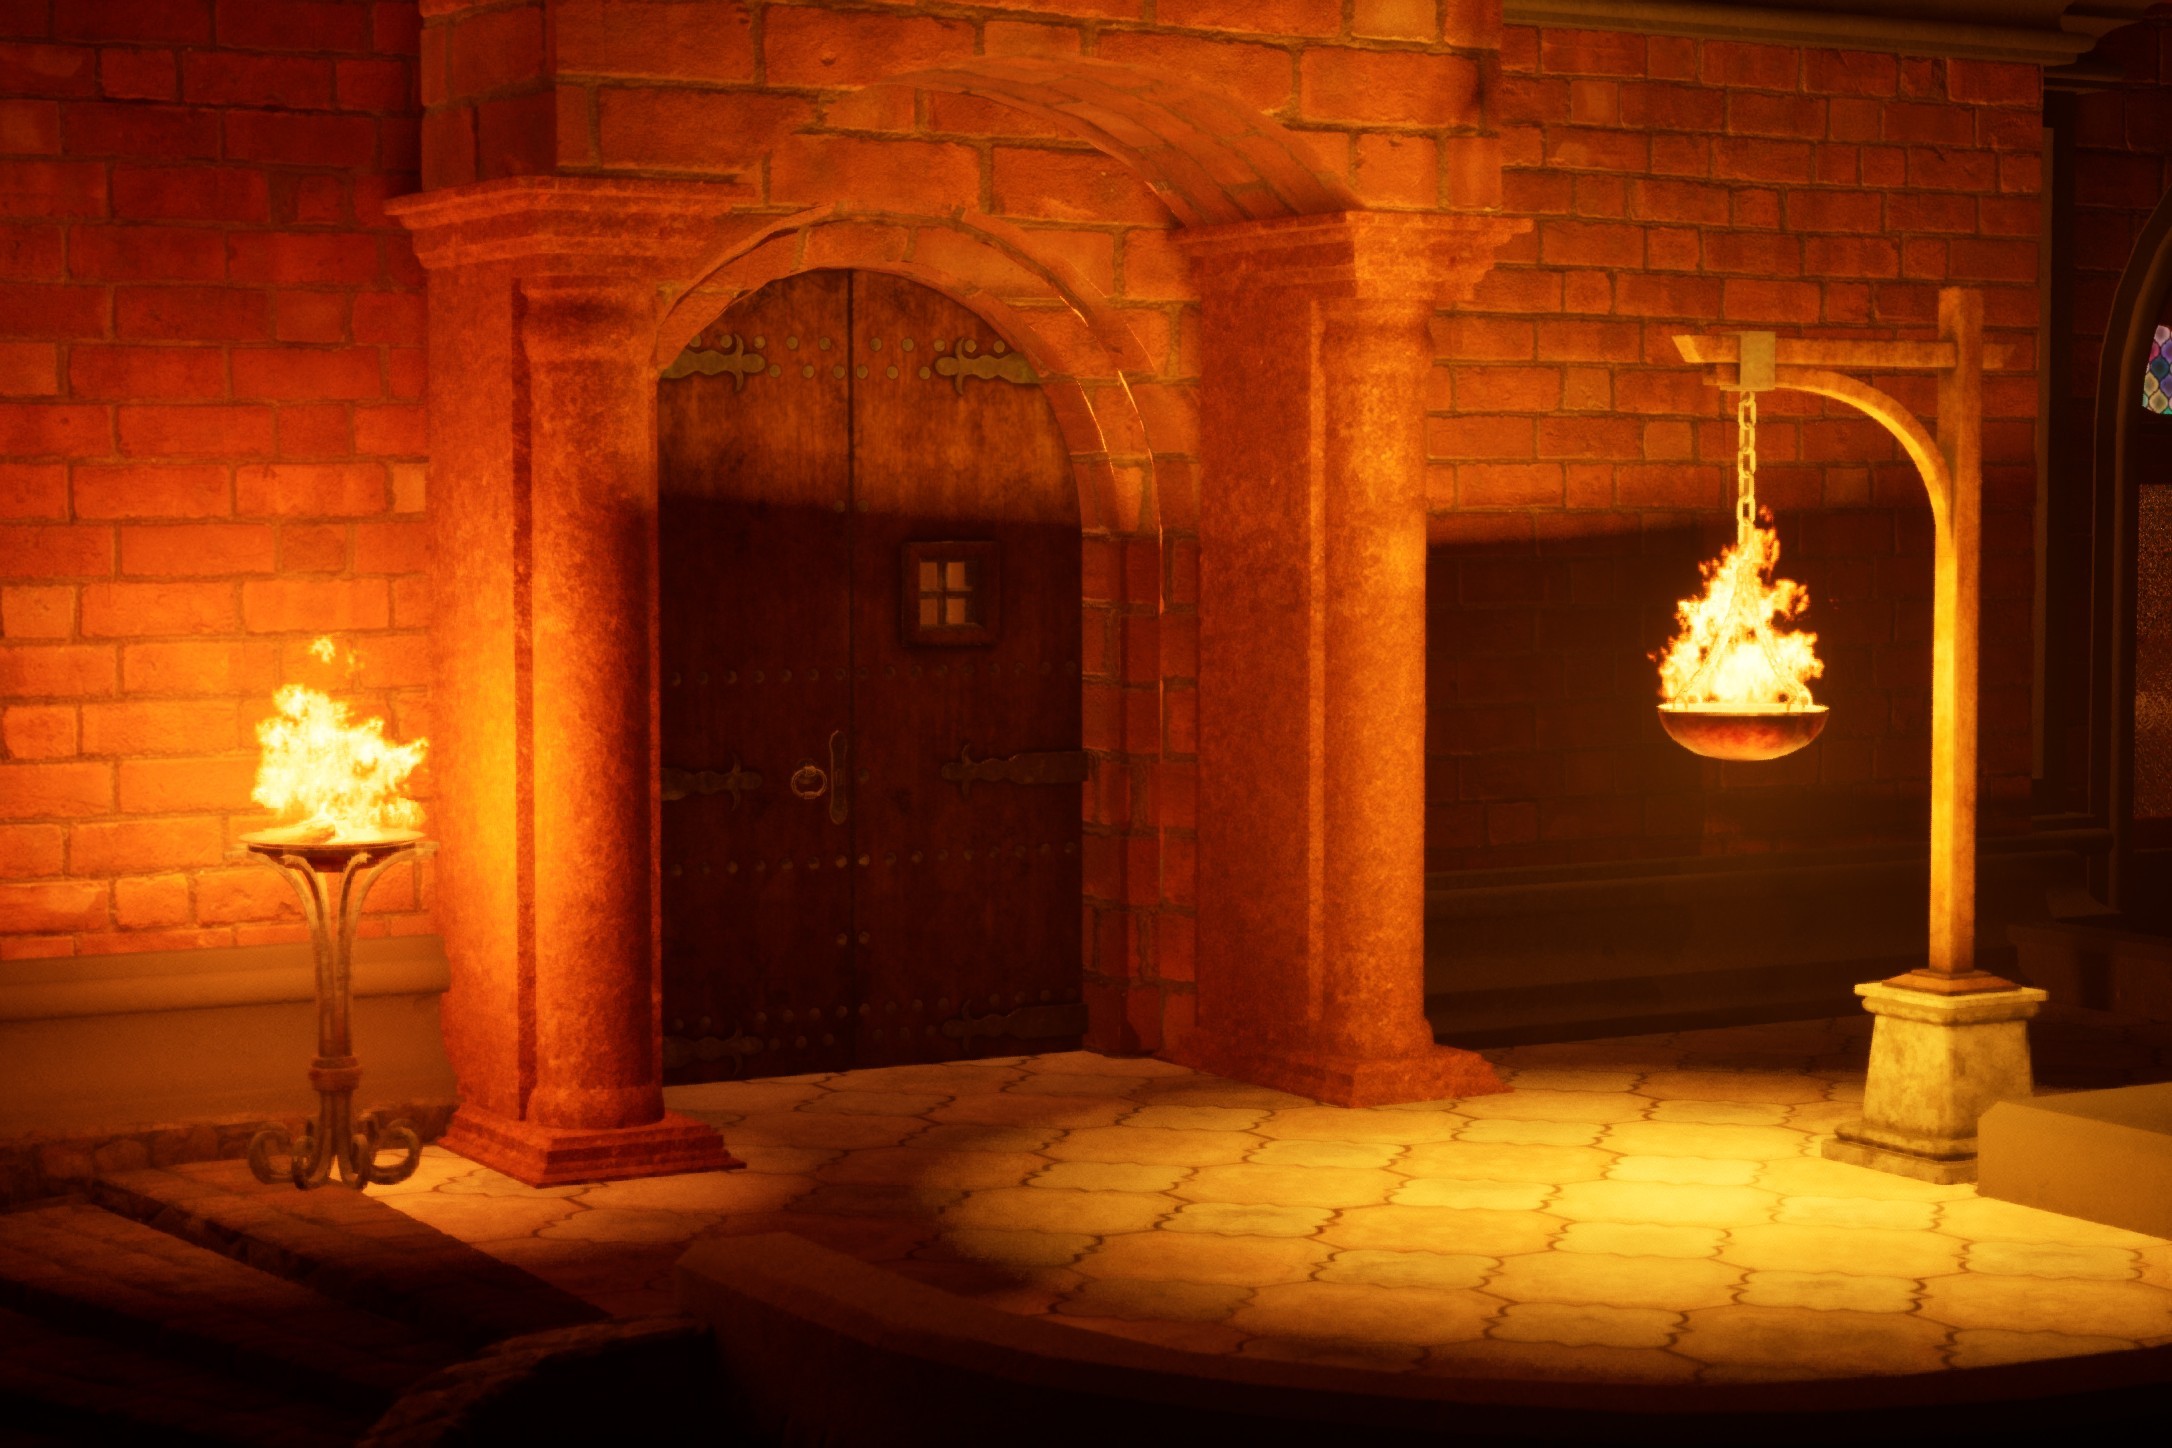

The assets were designed as modular and functional elements for an original fantasy-medieval environment, built in Unreal Engine 5.4. Each object was modeled and textured to maintain stylistic and narrative consistency, with particular attention to materials and natural wear. The dynamic lighting, combined with Niagara systems, simulates flame light and movement in real time. The integration demonstrates not only the visual quality of each prop but also their effectiveness within an immersive and optimized environment, following professional real-time game design pipelines and standards.
The assets were designed as modular and functional elements for an original fantasy-medieval environment, built in Unreal Engine 5.4. Each object was modeled and textured to maintain stylistic and narrative consistency, with particular attention to materials and natural wear. The dynamic lighting, combined with Niagara systems, simulates flame light and movement in real time. The integration demonstrates not only the visual quality of each prop but also their effectiveness within an immersive and optimized environment, following professional real-time game design pipelines and standards.

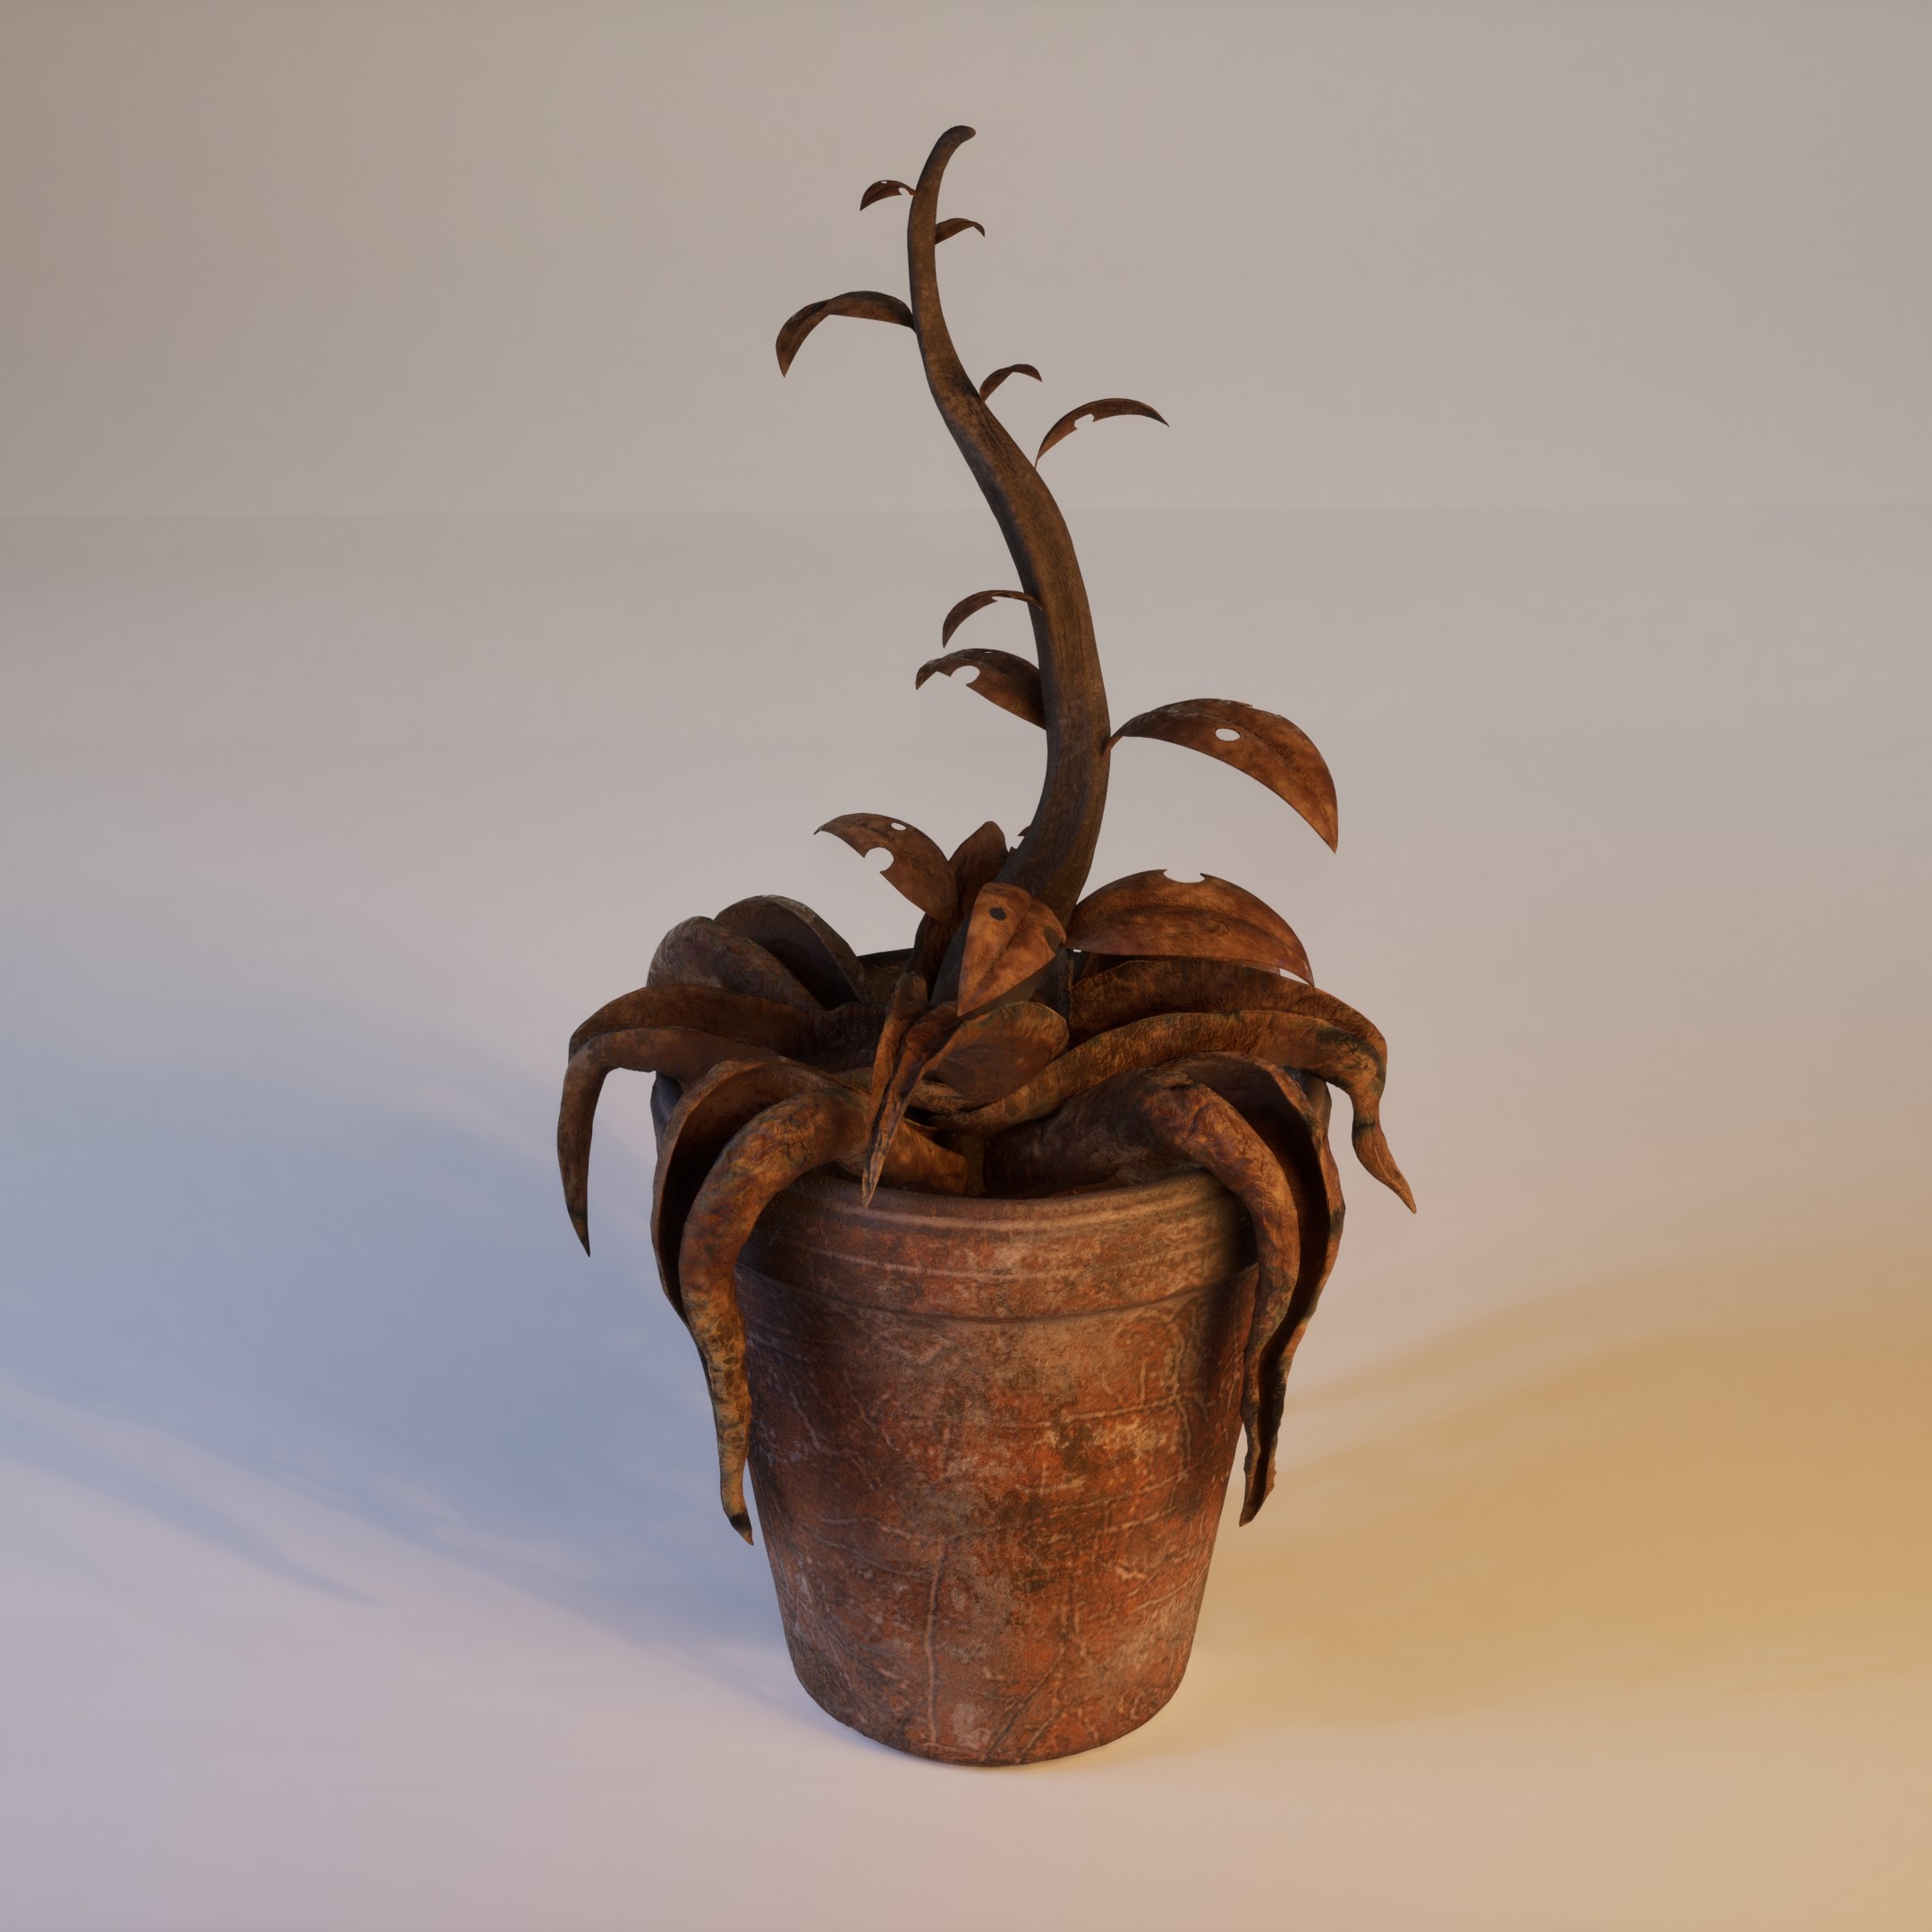
For the creation of assets such as leaves, the sofa, and the blanket, specific techniques were used to enhance realism and visual quality:
To enhance the quality of foreground assets, I created high-definition sculpts in ZBrush, integrating custom Alpha textures applied with DragRect brushes to sculpt realistic micro-details: cracks, engravings, and organic imperfections consistent with natural material wear. This process enhances the visual impact before texturing, improving light-surface interaction in the final render.
The normal map and other derived textures were generated through accurate high-to-low poly baking, optimizing in-game performance without compromising quality. When needed, I also performed baking from simplified geometries, fully leveraging the tools’ potential to achieve a visually rich and efficient result.
For the blanket’s fabric simulation, I used ZBrush’s Cloth Dynamics system, achieving a realistic drape adapted to the scene. I then manually refined folds and surface variations to ensure a believable result under dynamic lighting and in a real-time engine.

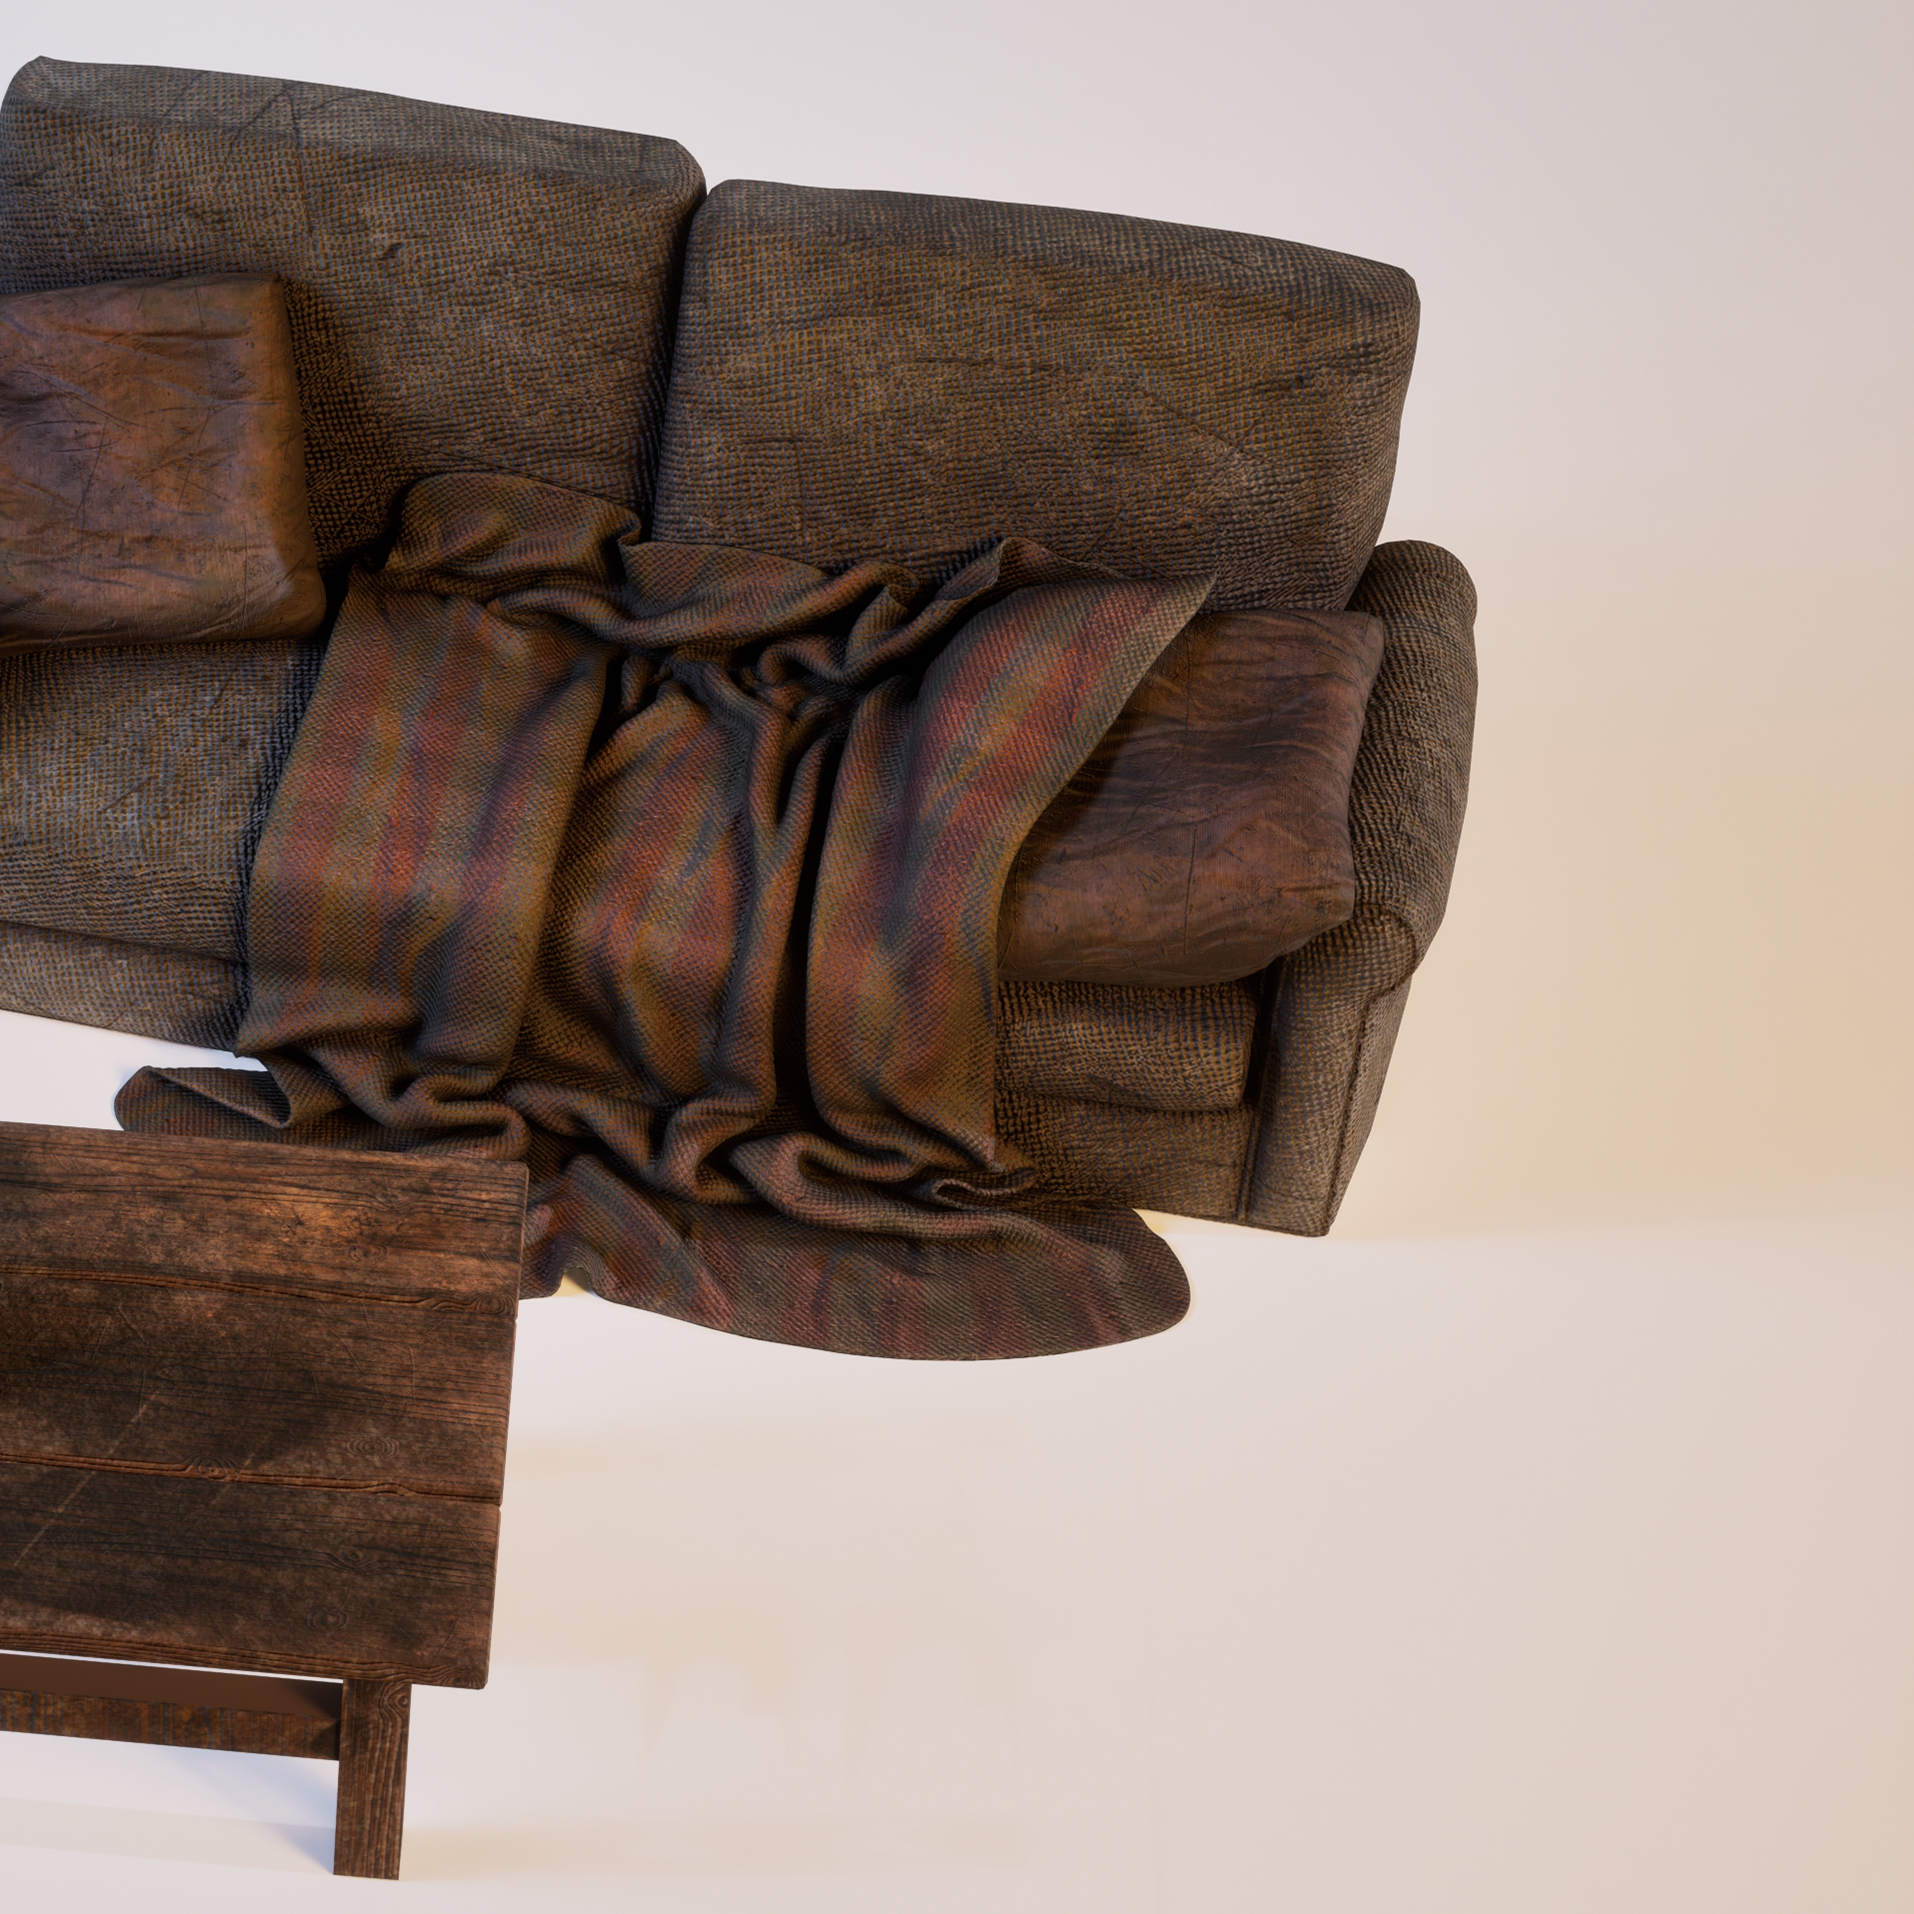

For the creation of assets such as leaves, the sofa, and the blanket, I applied advanced production techniques to enhance realism and visual fidelity:
To enhance the quality of foreground assets, I created high-definition sculpts in ZBrush, integrating custom Alpha textures applied with DragRect brushes to sculpt realistic micro-details: cracks, engravings, and organic imperfections consistent with natural material wear. This process enhances the visual impact before texturing, improving light-surface interaction in the final render.
The normal map and other derived textures were generated through accurate high-to-low poly baking, optimizing in-game performance without compromising quality. When needed, I also performed baking from simplified geometries, fully leveraging the tools’ potential to achieve a visually rich and efficient result.
For the blanket’s fabric simulation, I used ZBrush’s Cloth Dynamics system, achieving a realistic drape adapted to the scene. I then manually refined folds and surface variations to ensure a believable result under dynamic lighting and in a real-time engine.

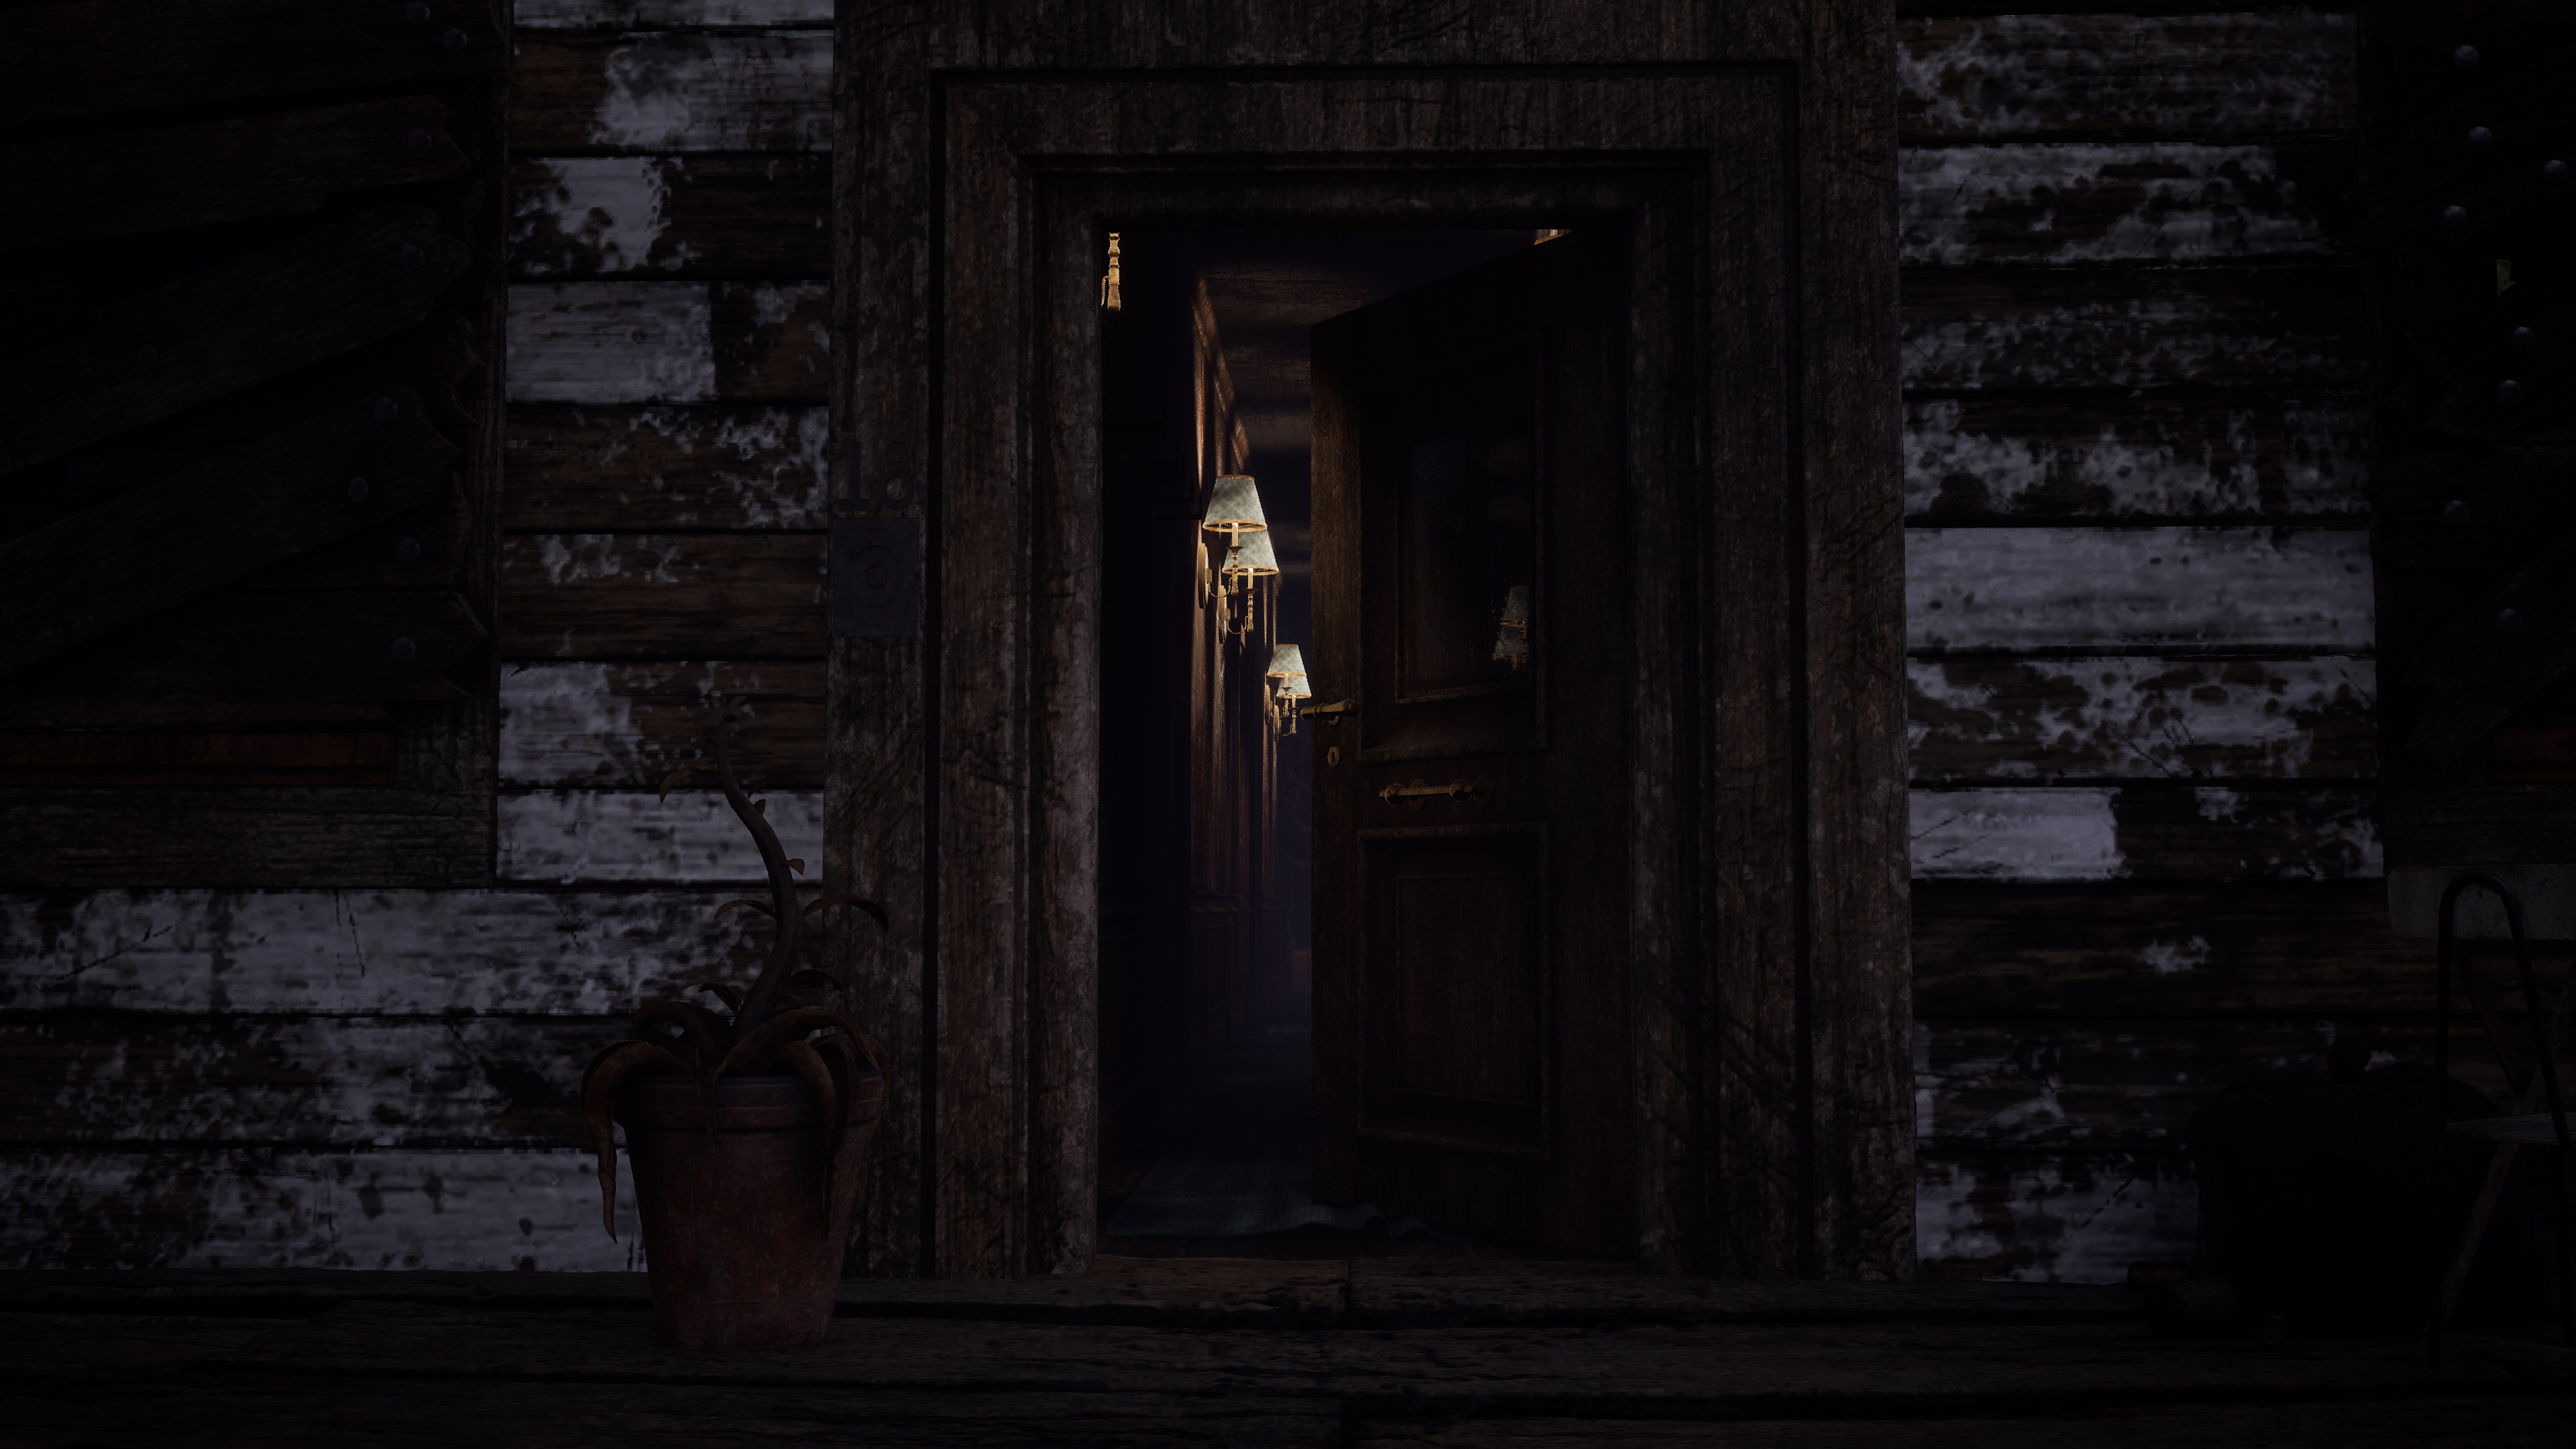
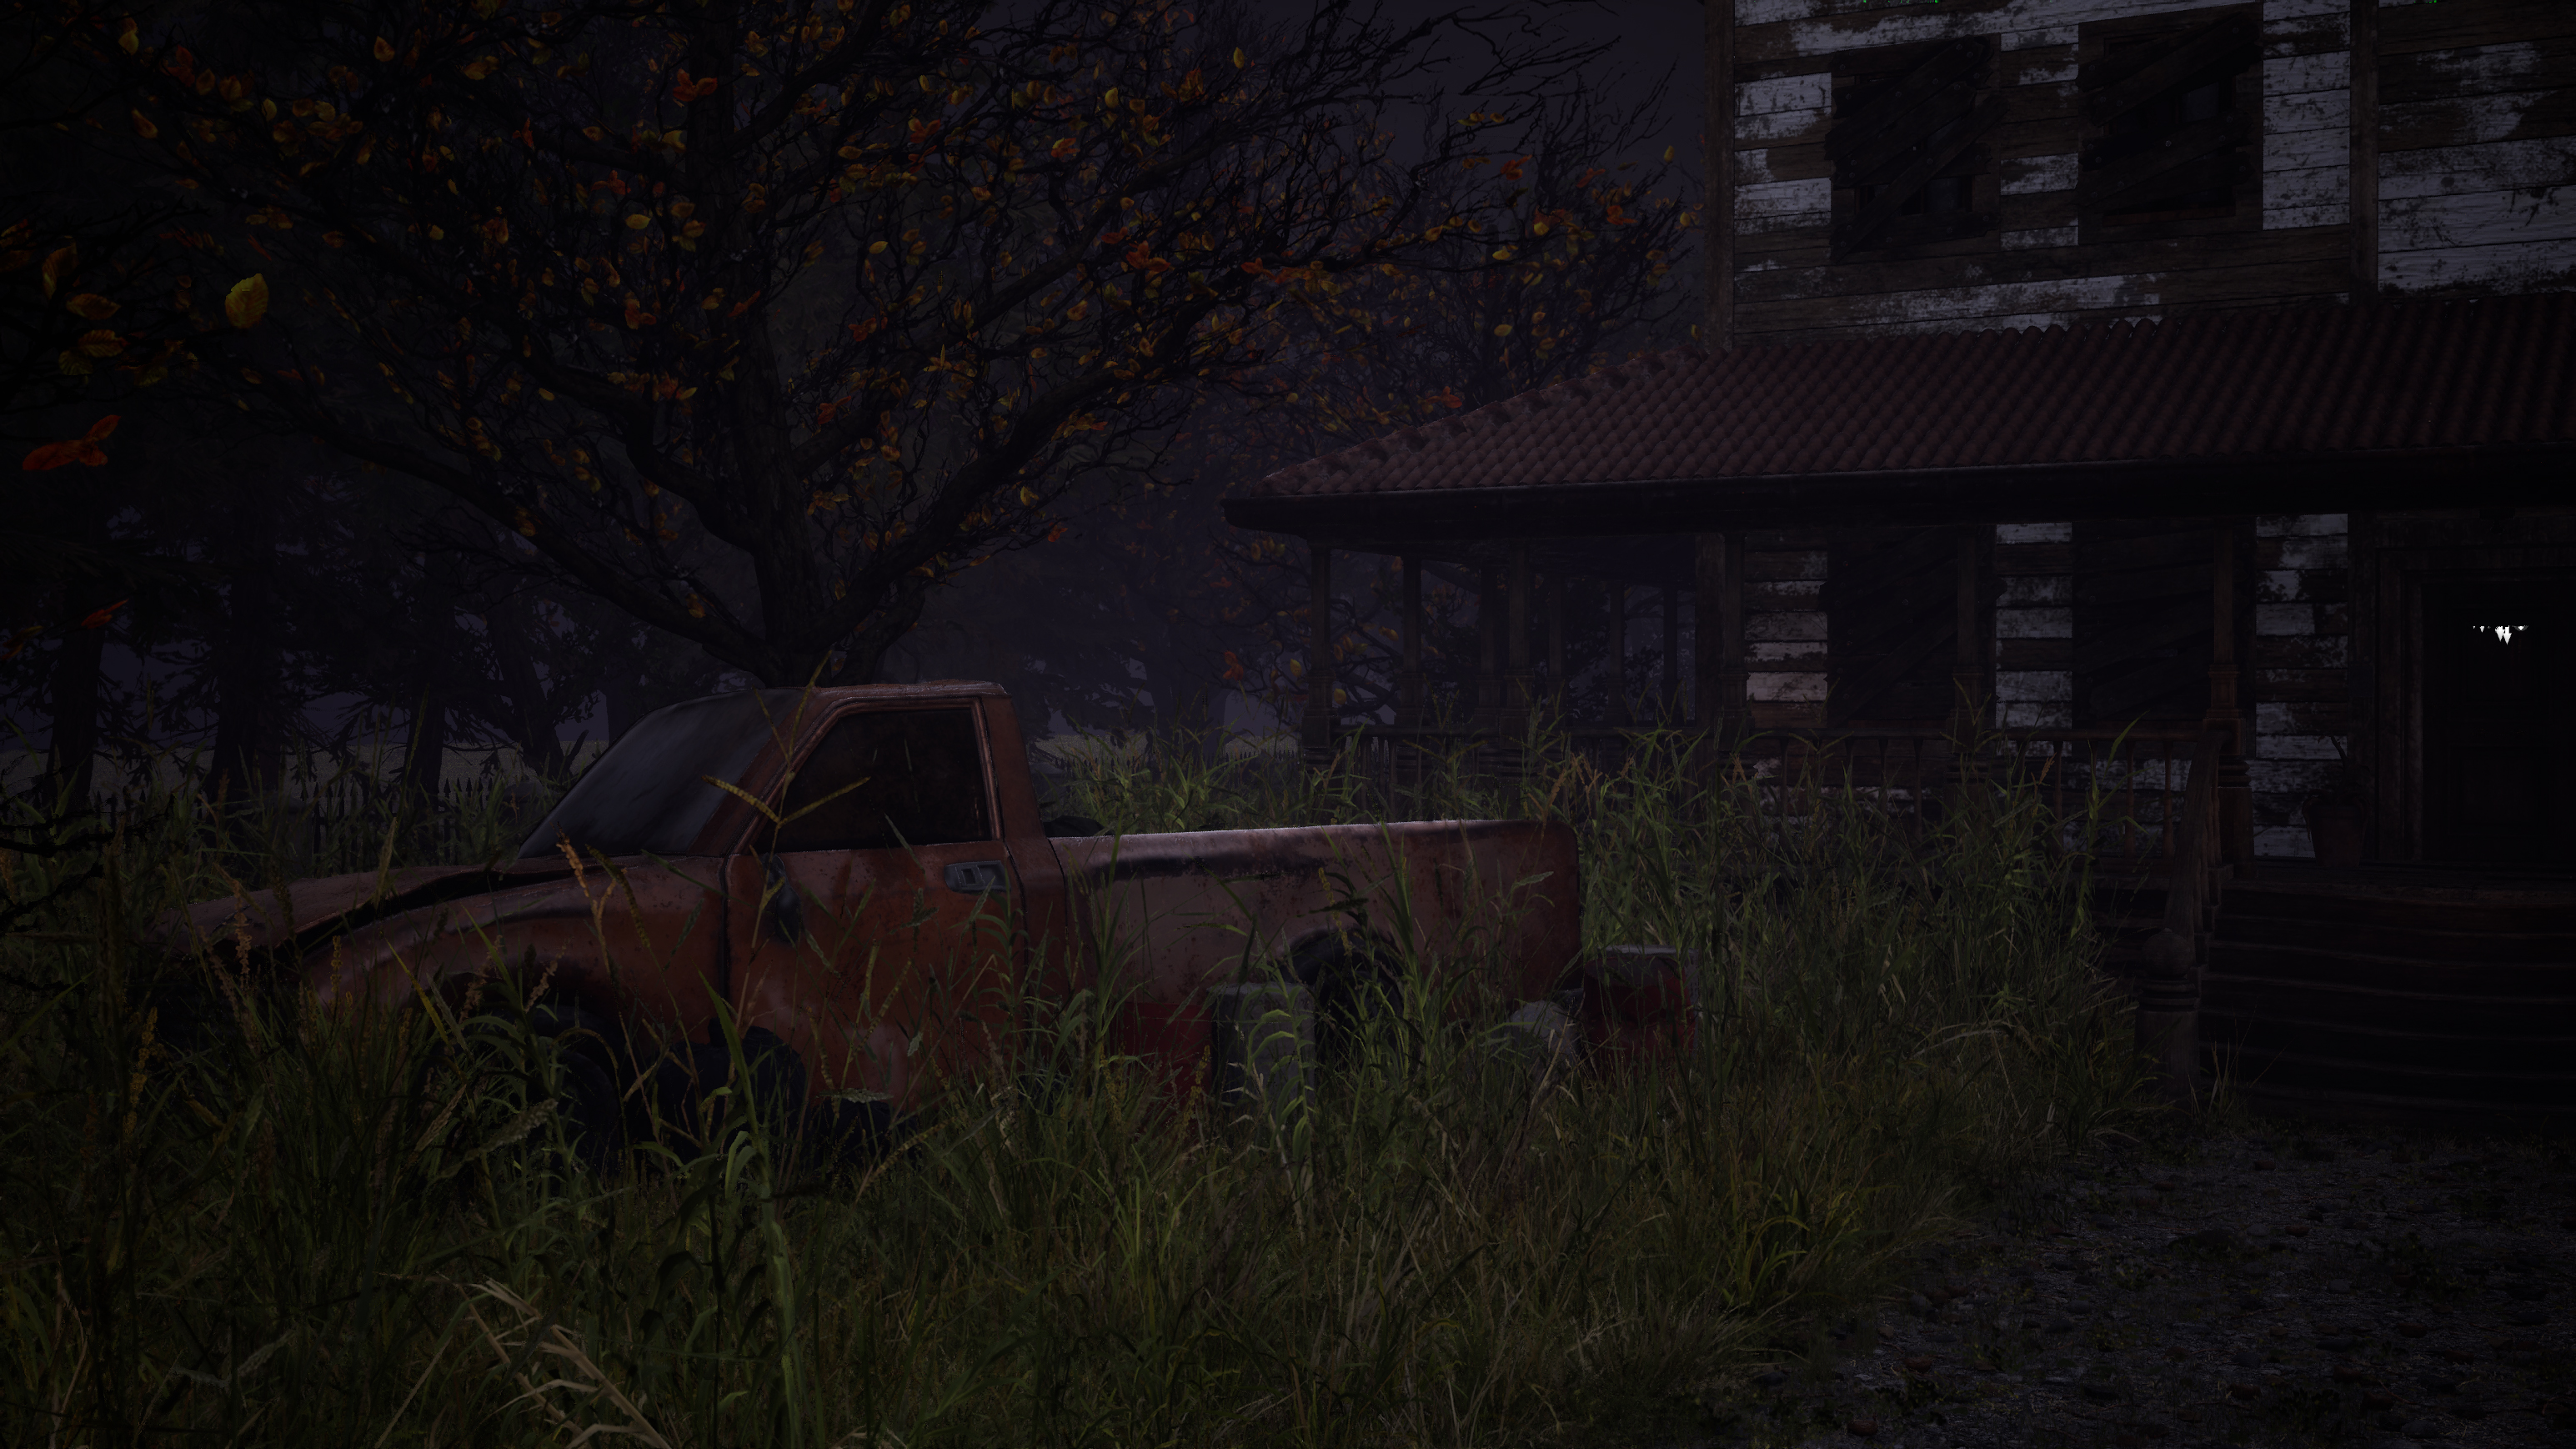
The assets were integrated and managed in real time within Unreal Engine 5.4 to build an immersive, narrative-driven environment. The images are taken from the horror short film The Quiet Boy, where I was responsible for modeling, texturing, fine detail rendering, scene composition, and lighting.The goal was to convey a decayed and unsettling atmosphere: each object reinforces the visual identity of an abandoned space, marked by time and neglect. For the vegetation, I used Unreal’s Foliage Tool to optimize the distribution of tall grass across the exterior environment.
The assets were integrated and managed in real time within Unreal Engine 5.4 to build an immersive, narrative-driven environment. The images are taken from the horror short film The Quiet Boy, where I was responsible for modeling, texturing, fine detail rendering, scene composition, and lighting. The goal was to convey a decayed and unsettling atmosphere: each object reinforces the visual identity of an abandoned space, marked by time and neglect. For the vegetation, I used Unreal’s Foliage Tool to optimize the distribution of tall grass across the exterior environment.
Description:
Procedural material developed in Substance Designer, inspired by the artistic stained glass of sacred architecture. The geometric pattern and visual style were initially created by following a training tutorial, then reworked and customized to meet the aesthetic and technical needs of my project. Applied to the castle windows, the material casts colorful light reflections onto the floor, enhancing the atmospheric mood of the environment.
Rendering & Visualization:
The material was visualized in Autodesk Maya using the dedicated Substance plugin, directly importing the .sbsar file. A cube-test render was performed to analyze light behavior, refraction, and transparency under controlled lighting conditions, ensuring proper integration before implementation in-engine.
Description:
Procedural material created in Substance Designer to simulate raw concrete surfaces used in columns, foundations, and architectural structures. The material was initially developed by following a tutorial and then customized to visually integrate with my project’s environment. The texture combines surface irregularities and micro-cracks, aiming to achieve a realistic, time-worn appearance for enhanced material authenticity.
Rendering & Visualization:
The material was visualized in Autodesk Maya using the dedicated Substance plugin, directly importing the .sbsar file. A cube-test render was performed to analyze light behavior, refraction, and transparency under controlled lighting conditions, ensuring proper integration before implementation in-engine.
Procedural Material
Architectural Texture
Realistic Surface FX


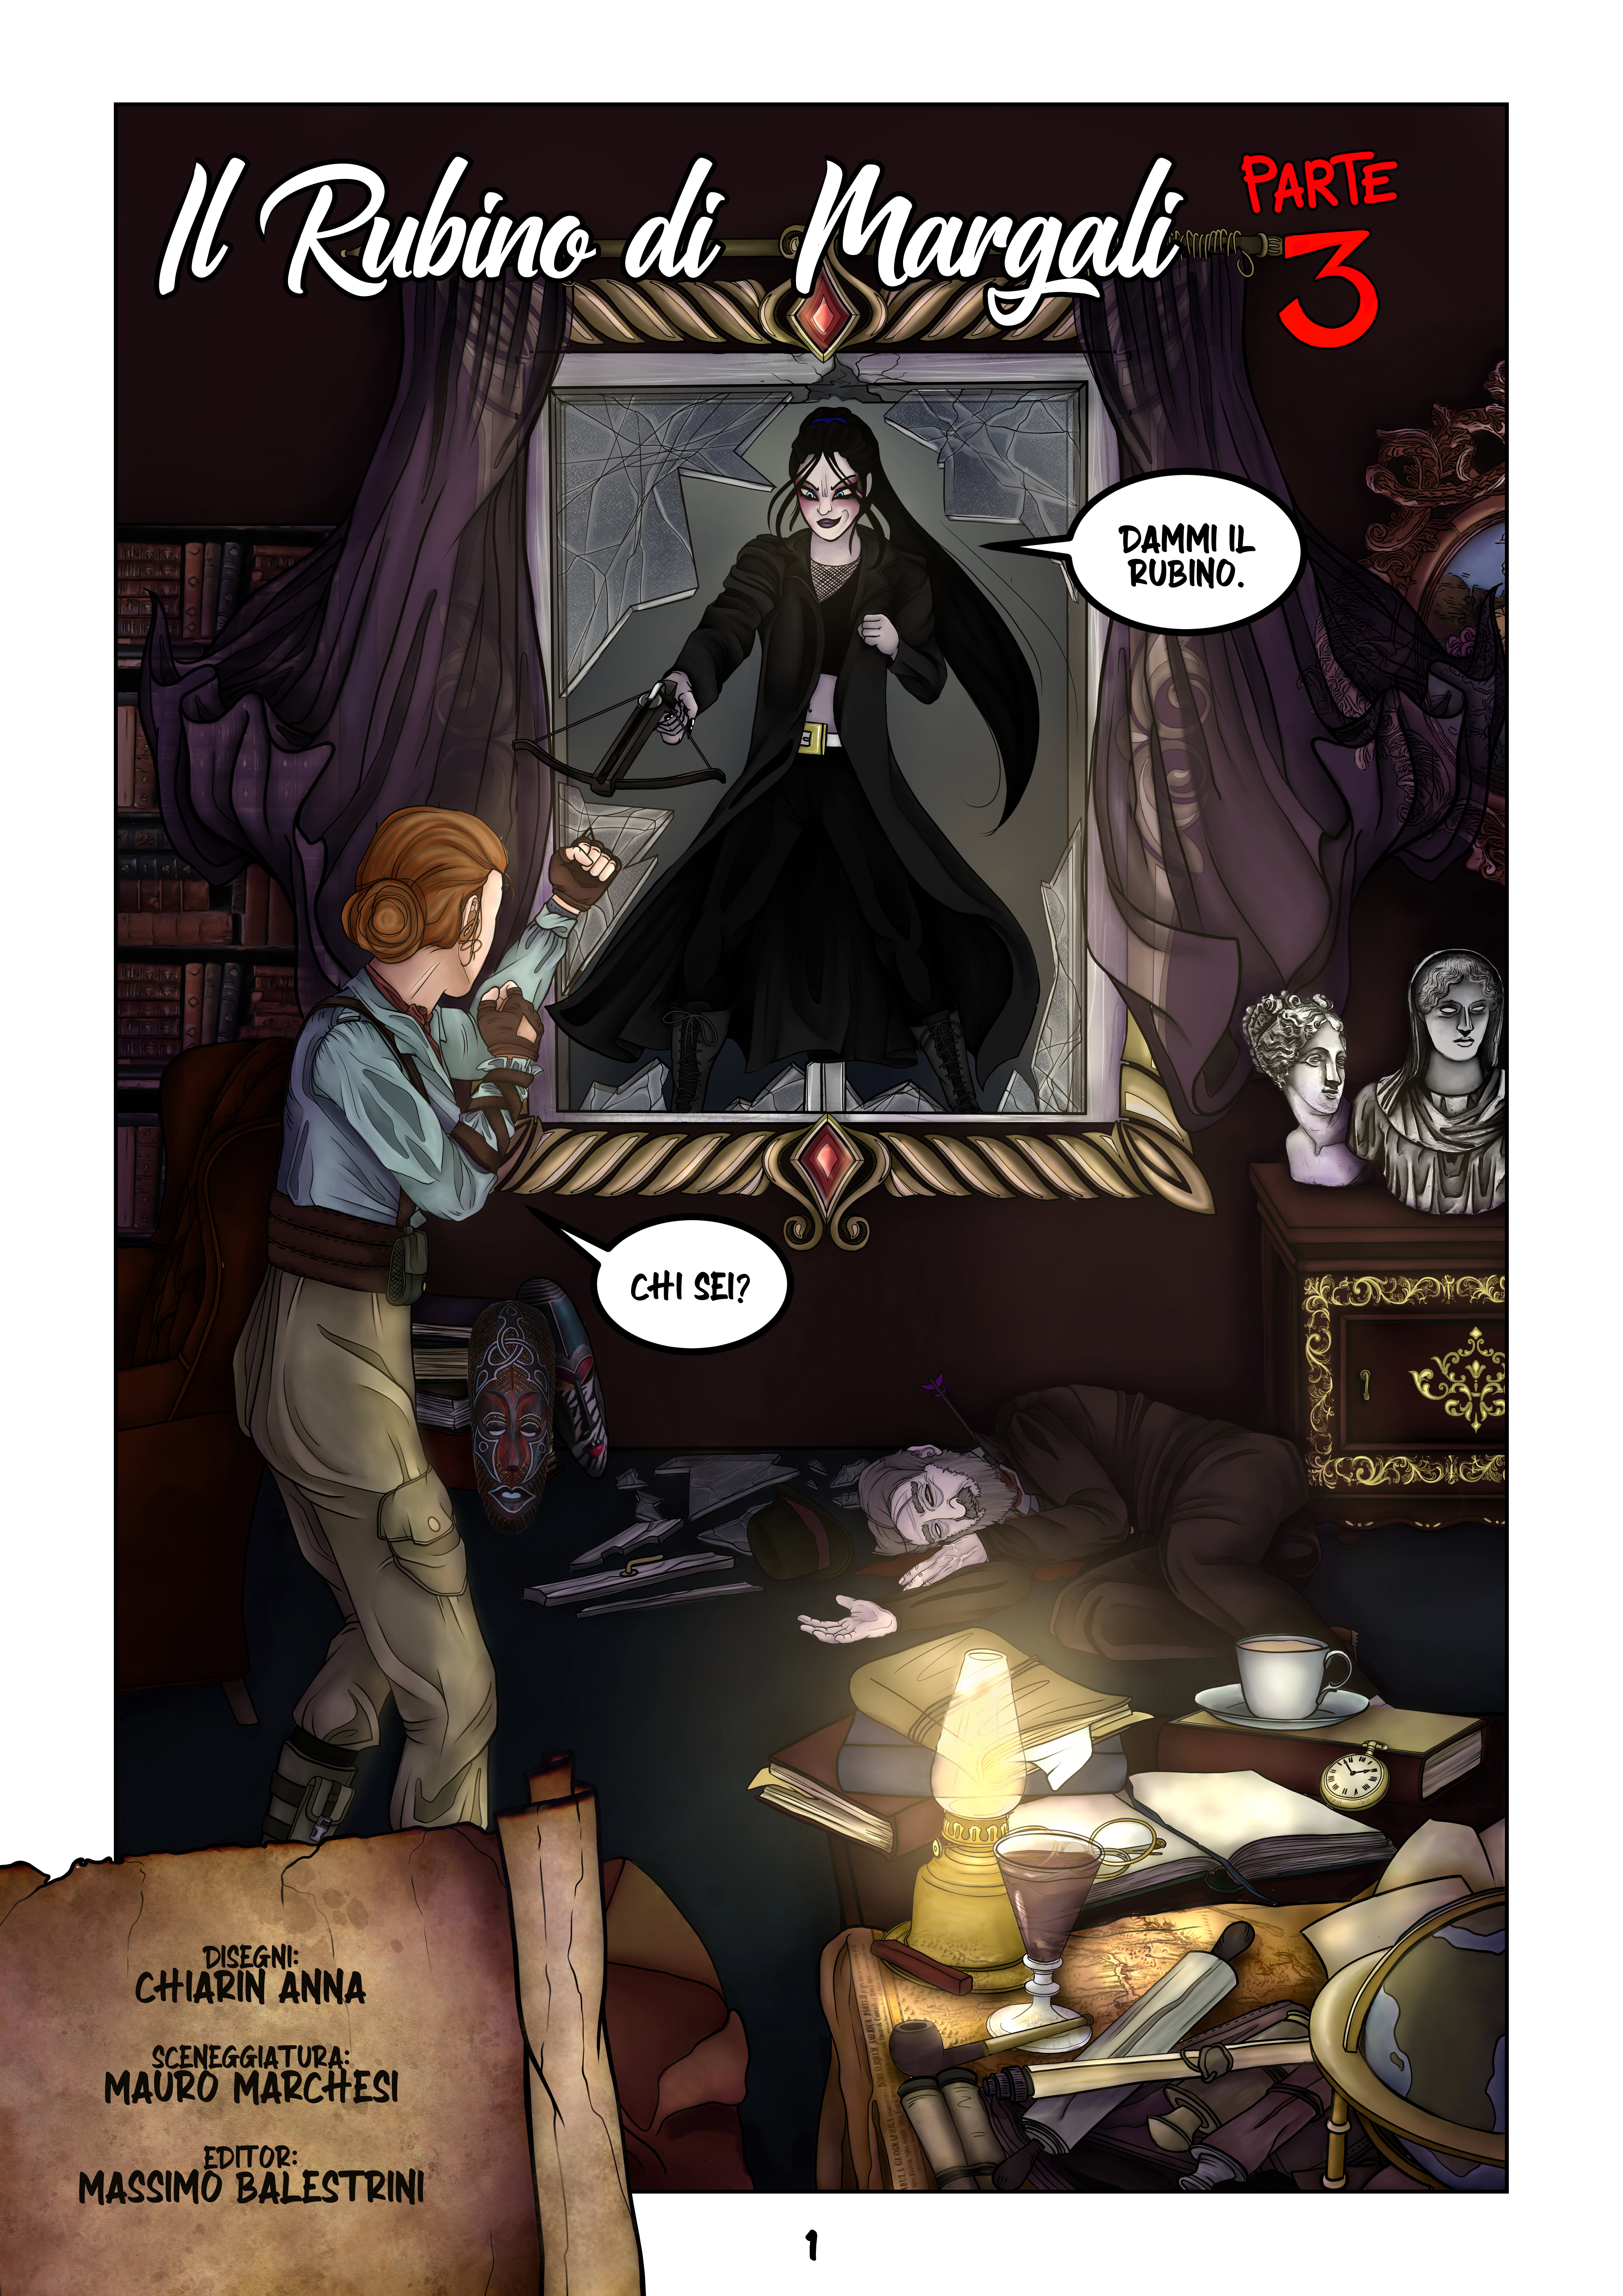
L'Antiquario
La Cacciatrice
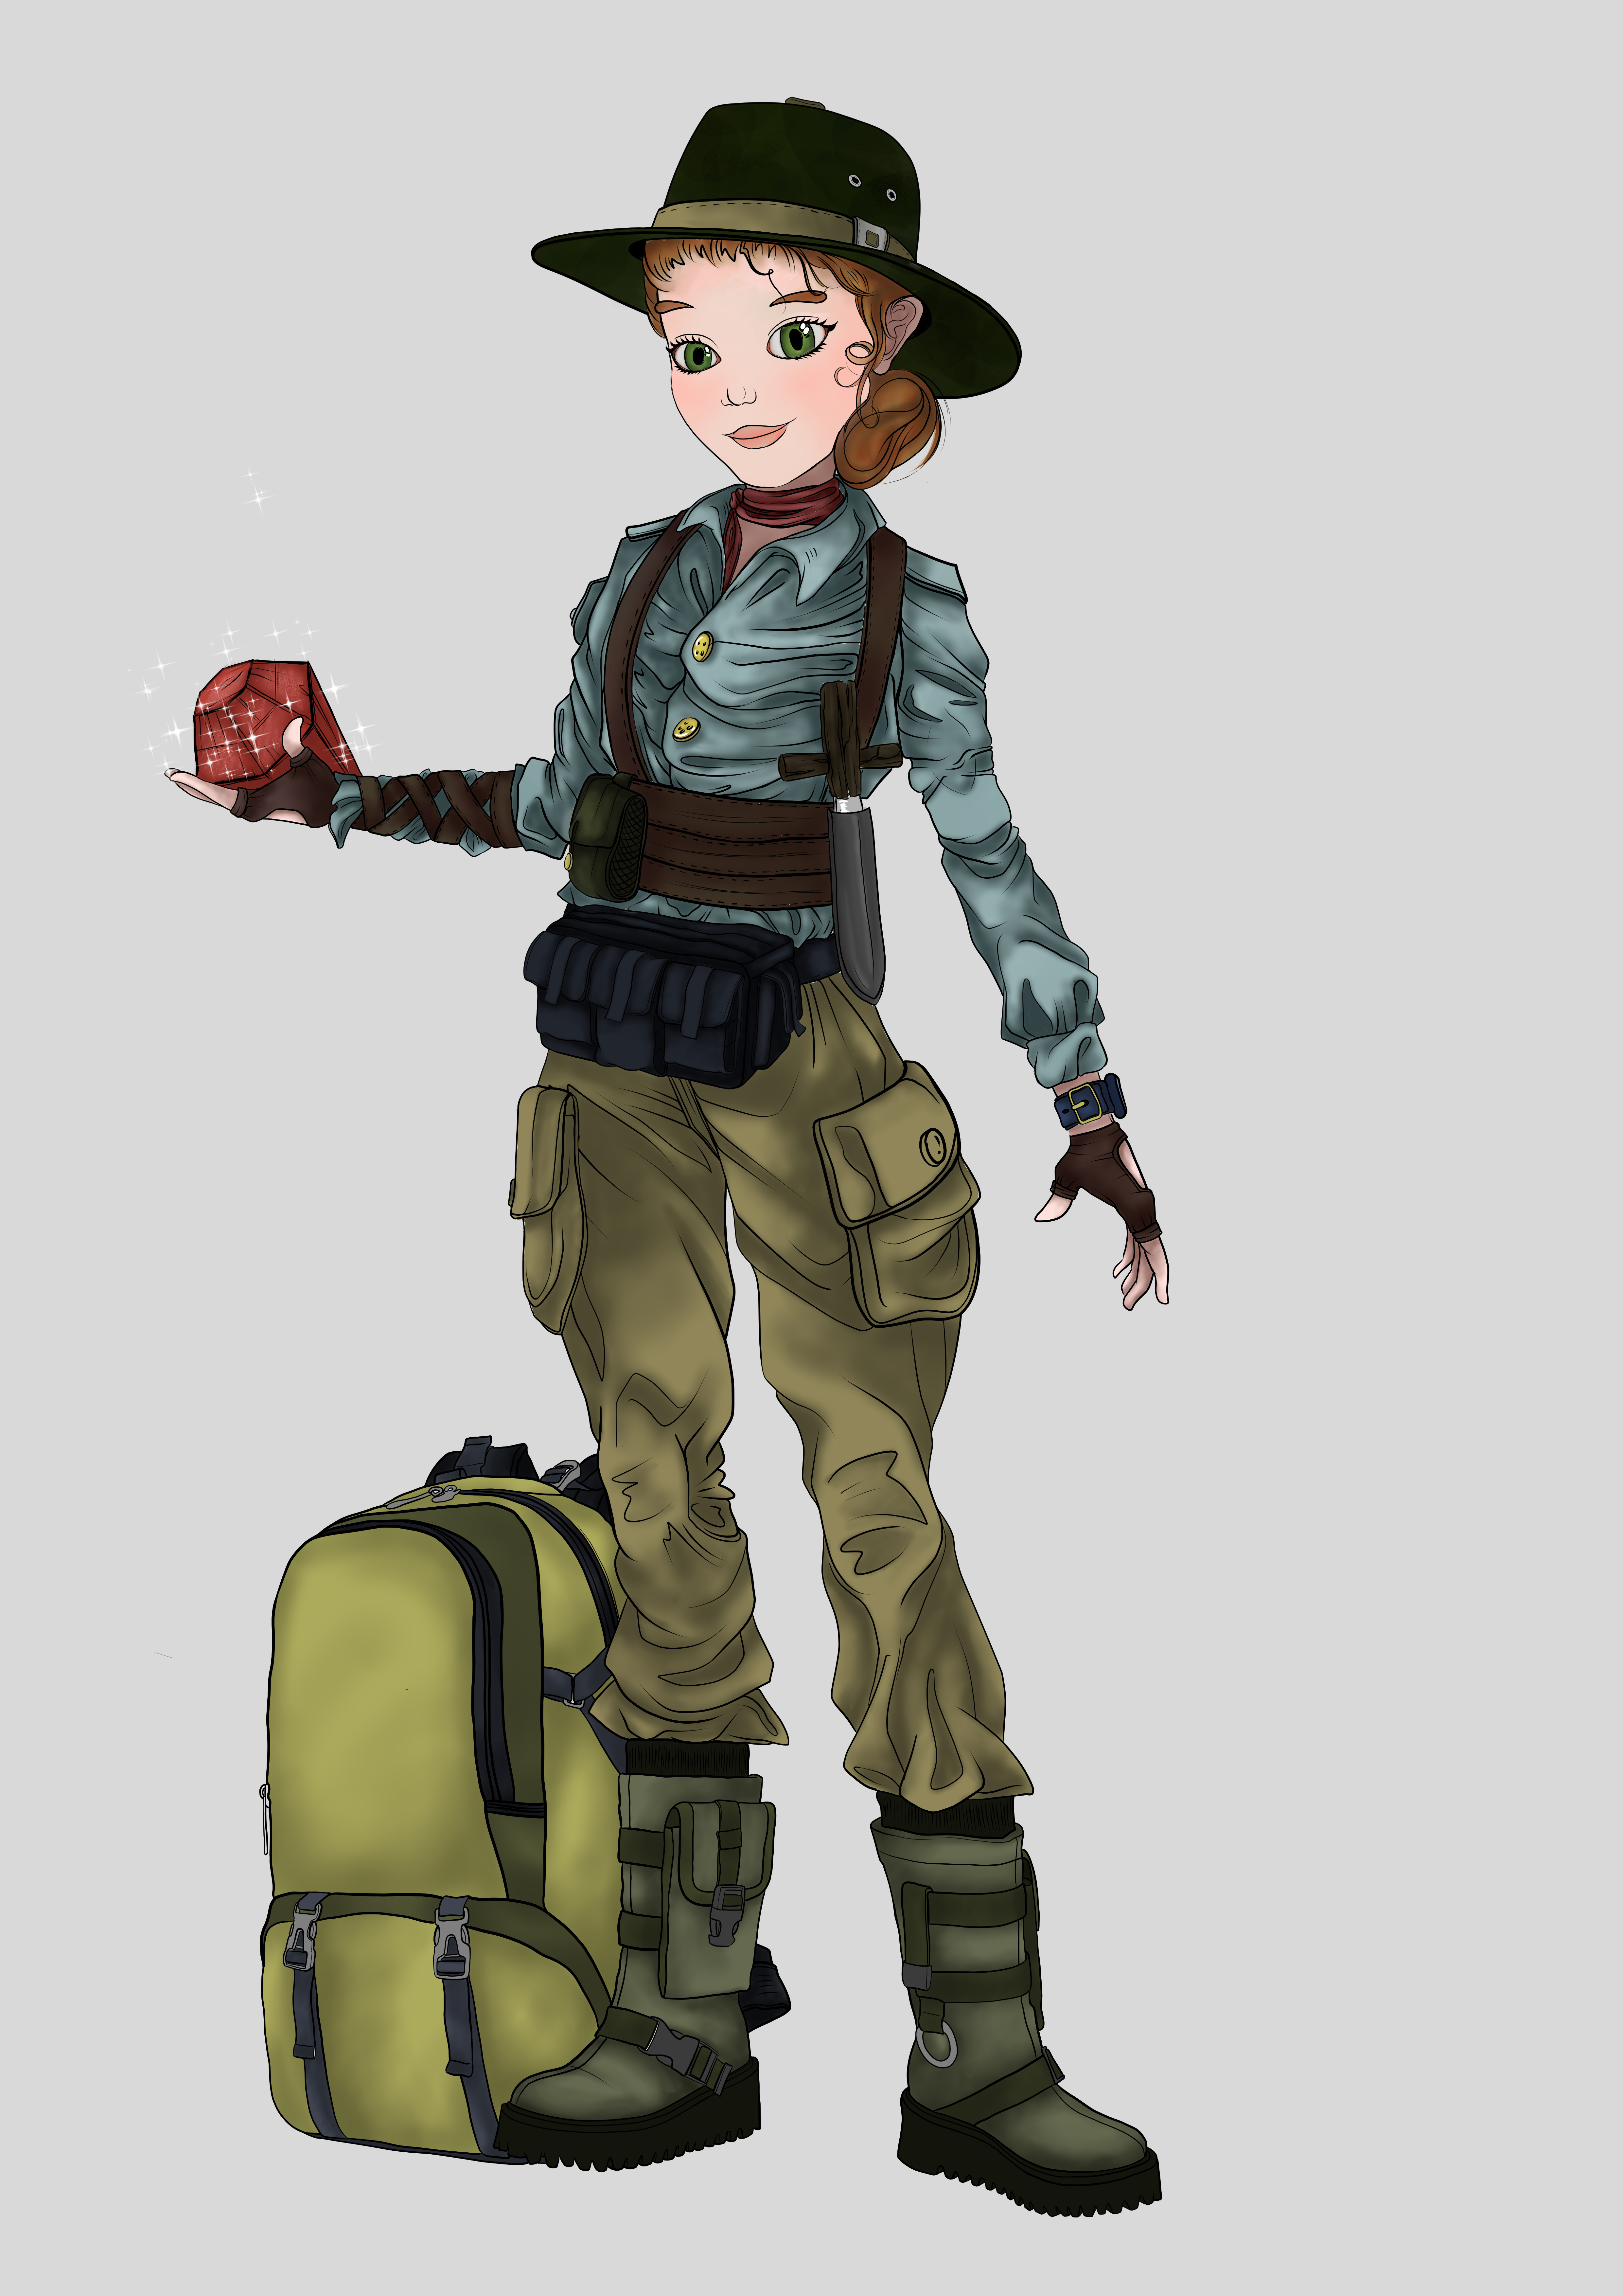
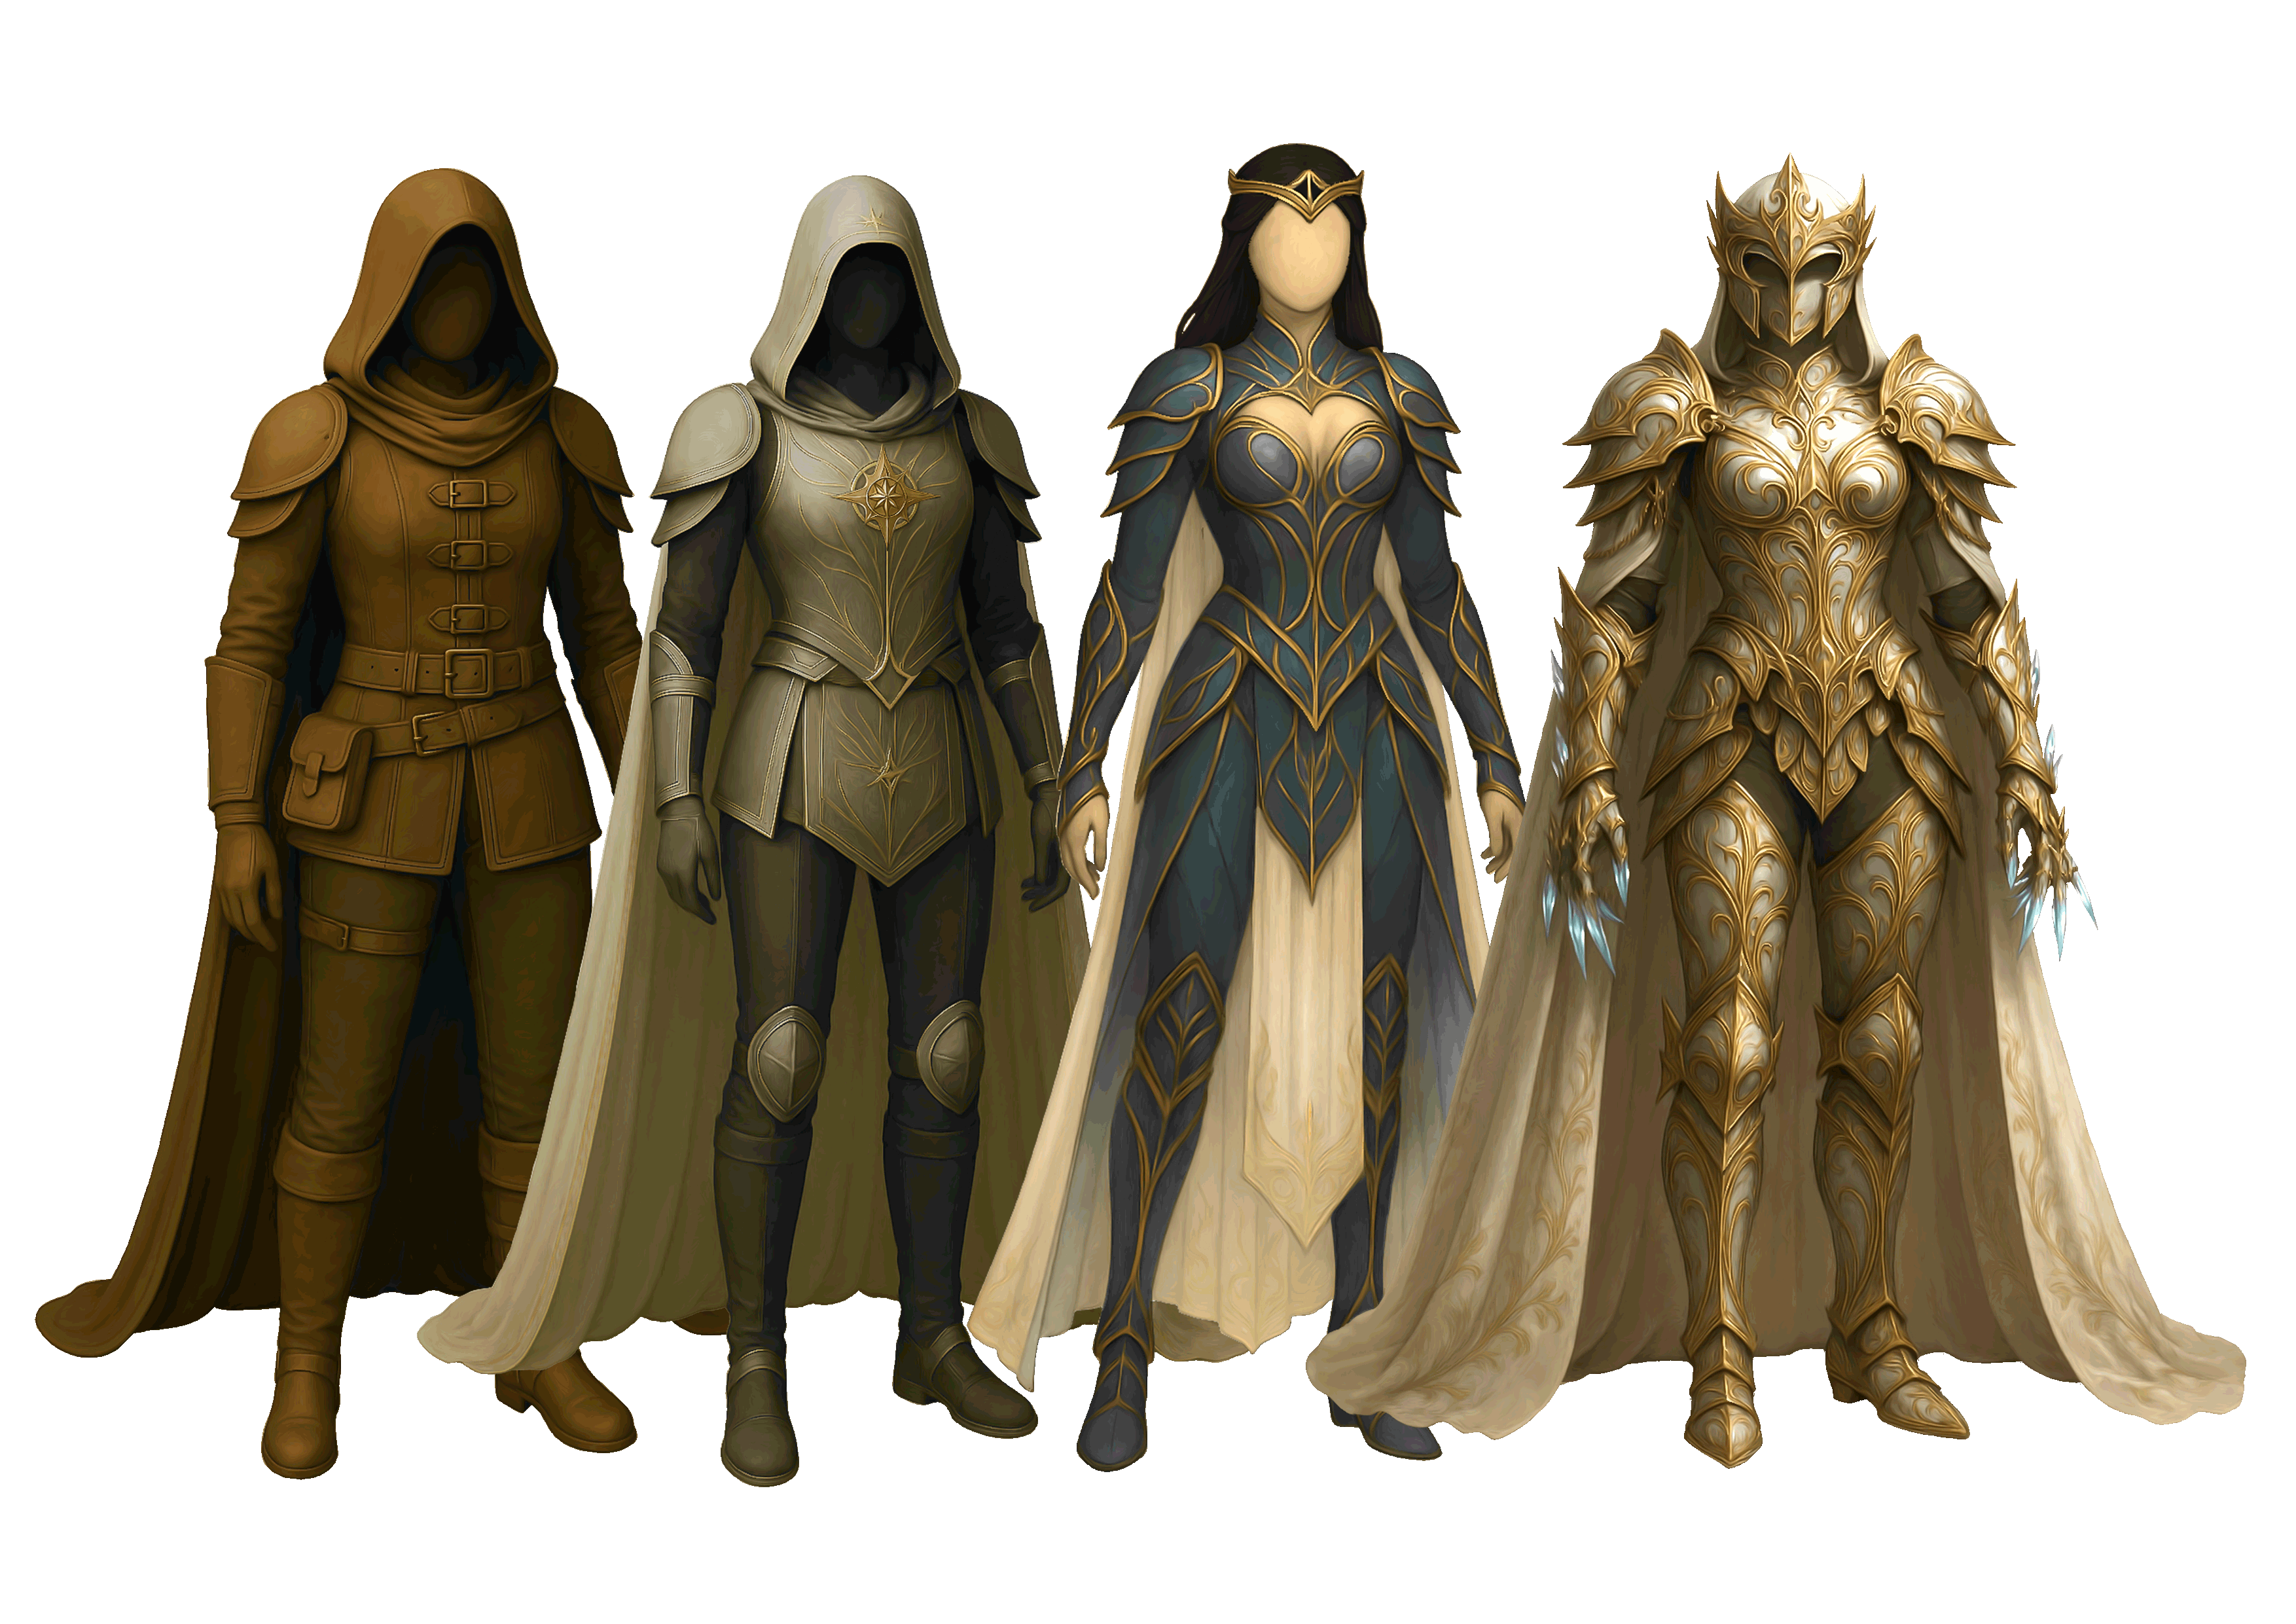
Vicky Ventura
The Antiquarian
La Cacciatrice
Vicky Ventura
Vicky Ventura
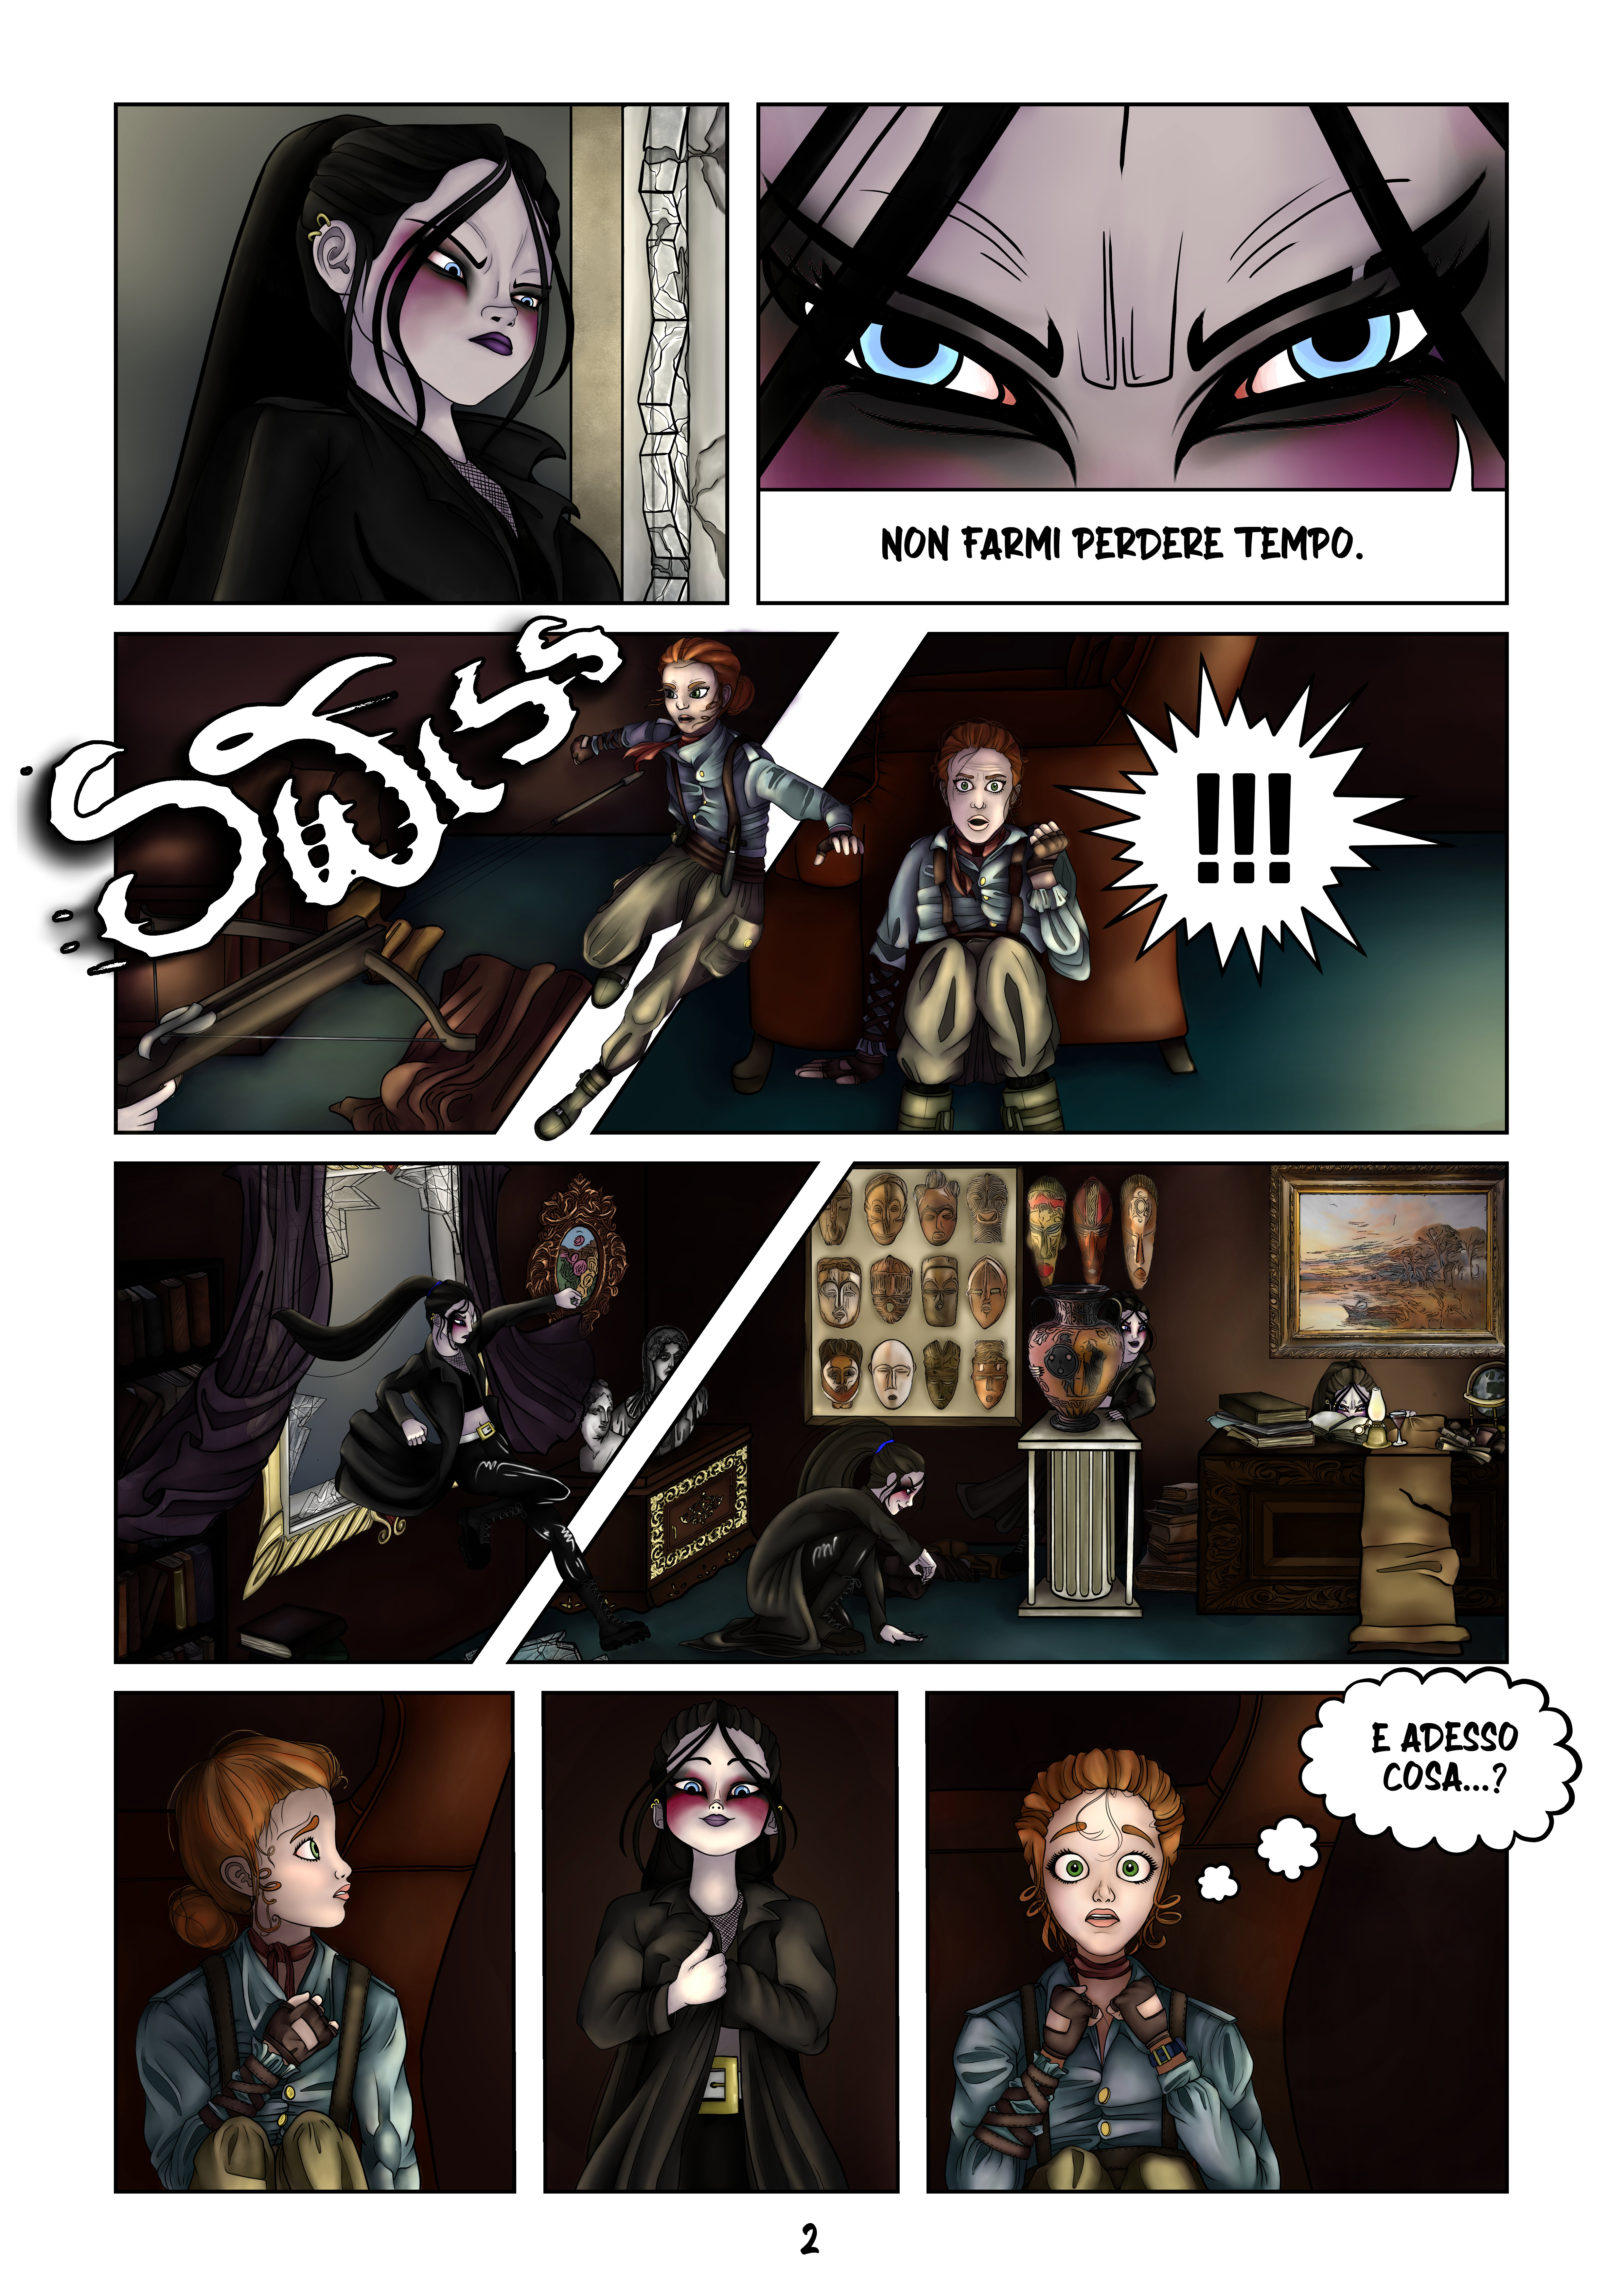
A dynamic and elegant woman in her late 20s, always ready for action. An adventurous archaeologist, she takes on missions to recover precious treasures for wealthy collectors.
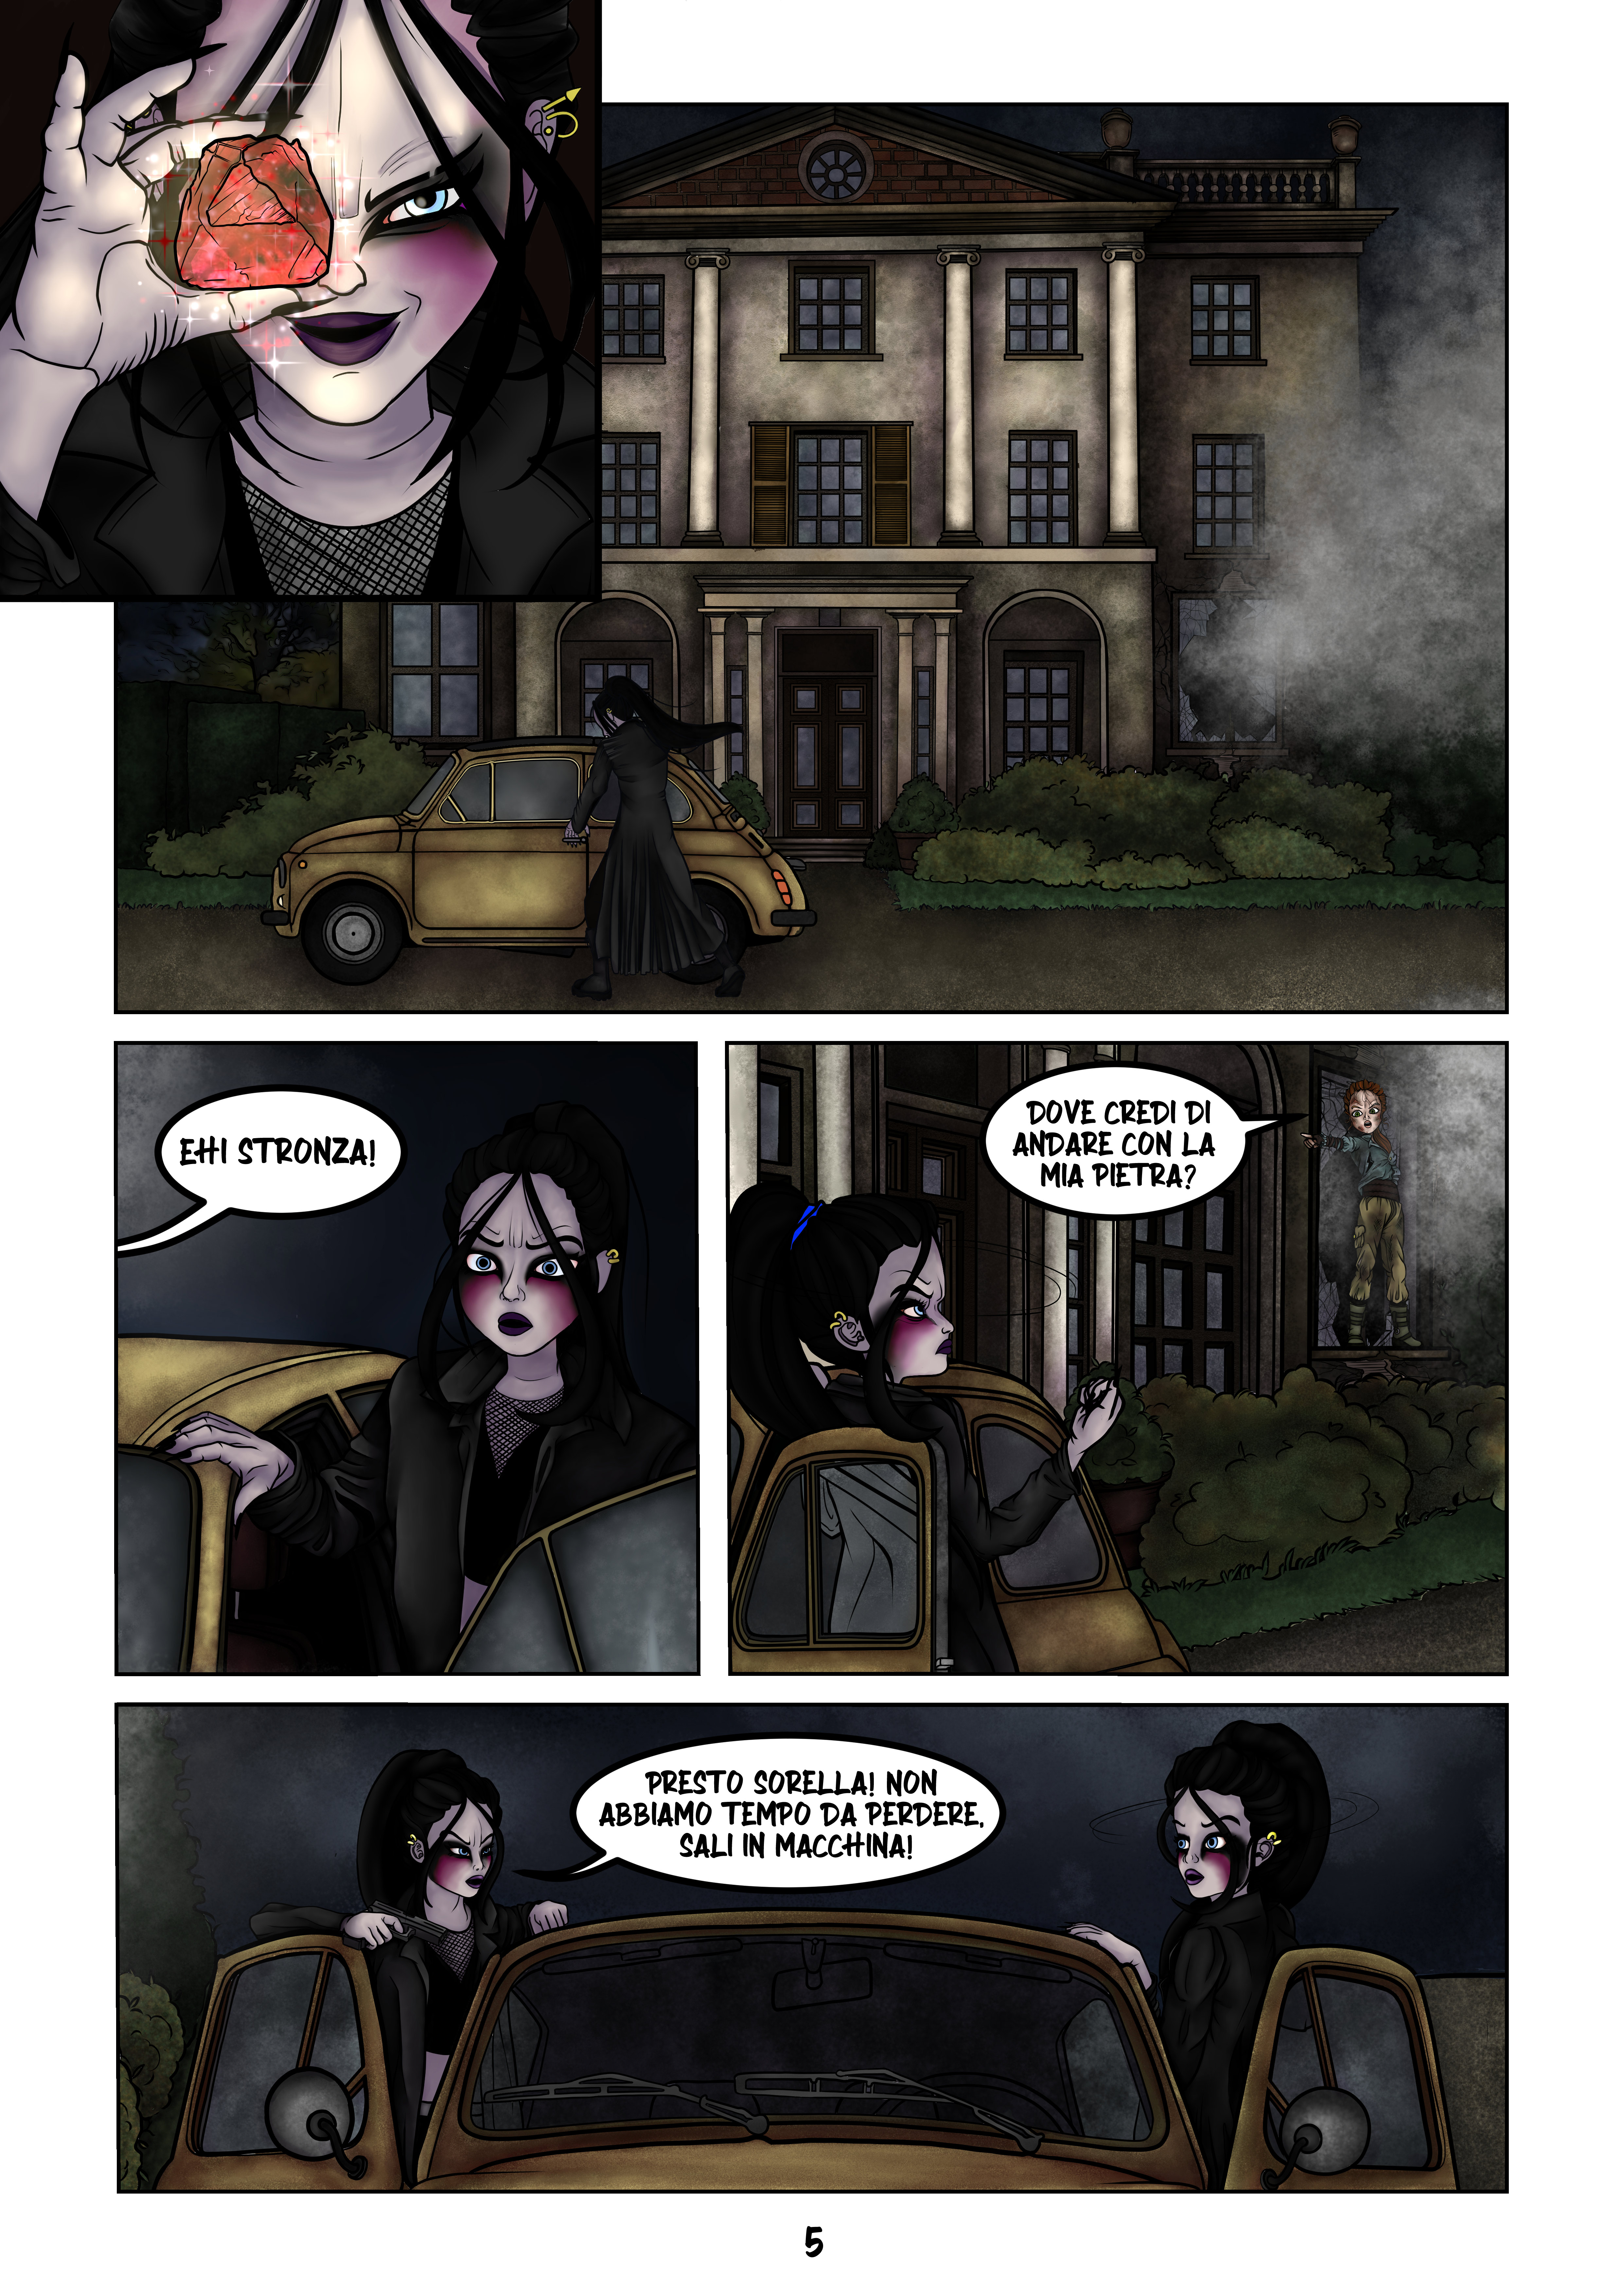
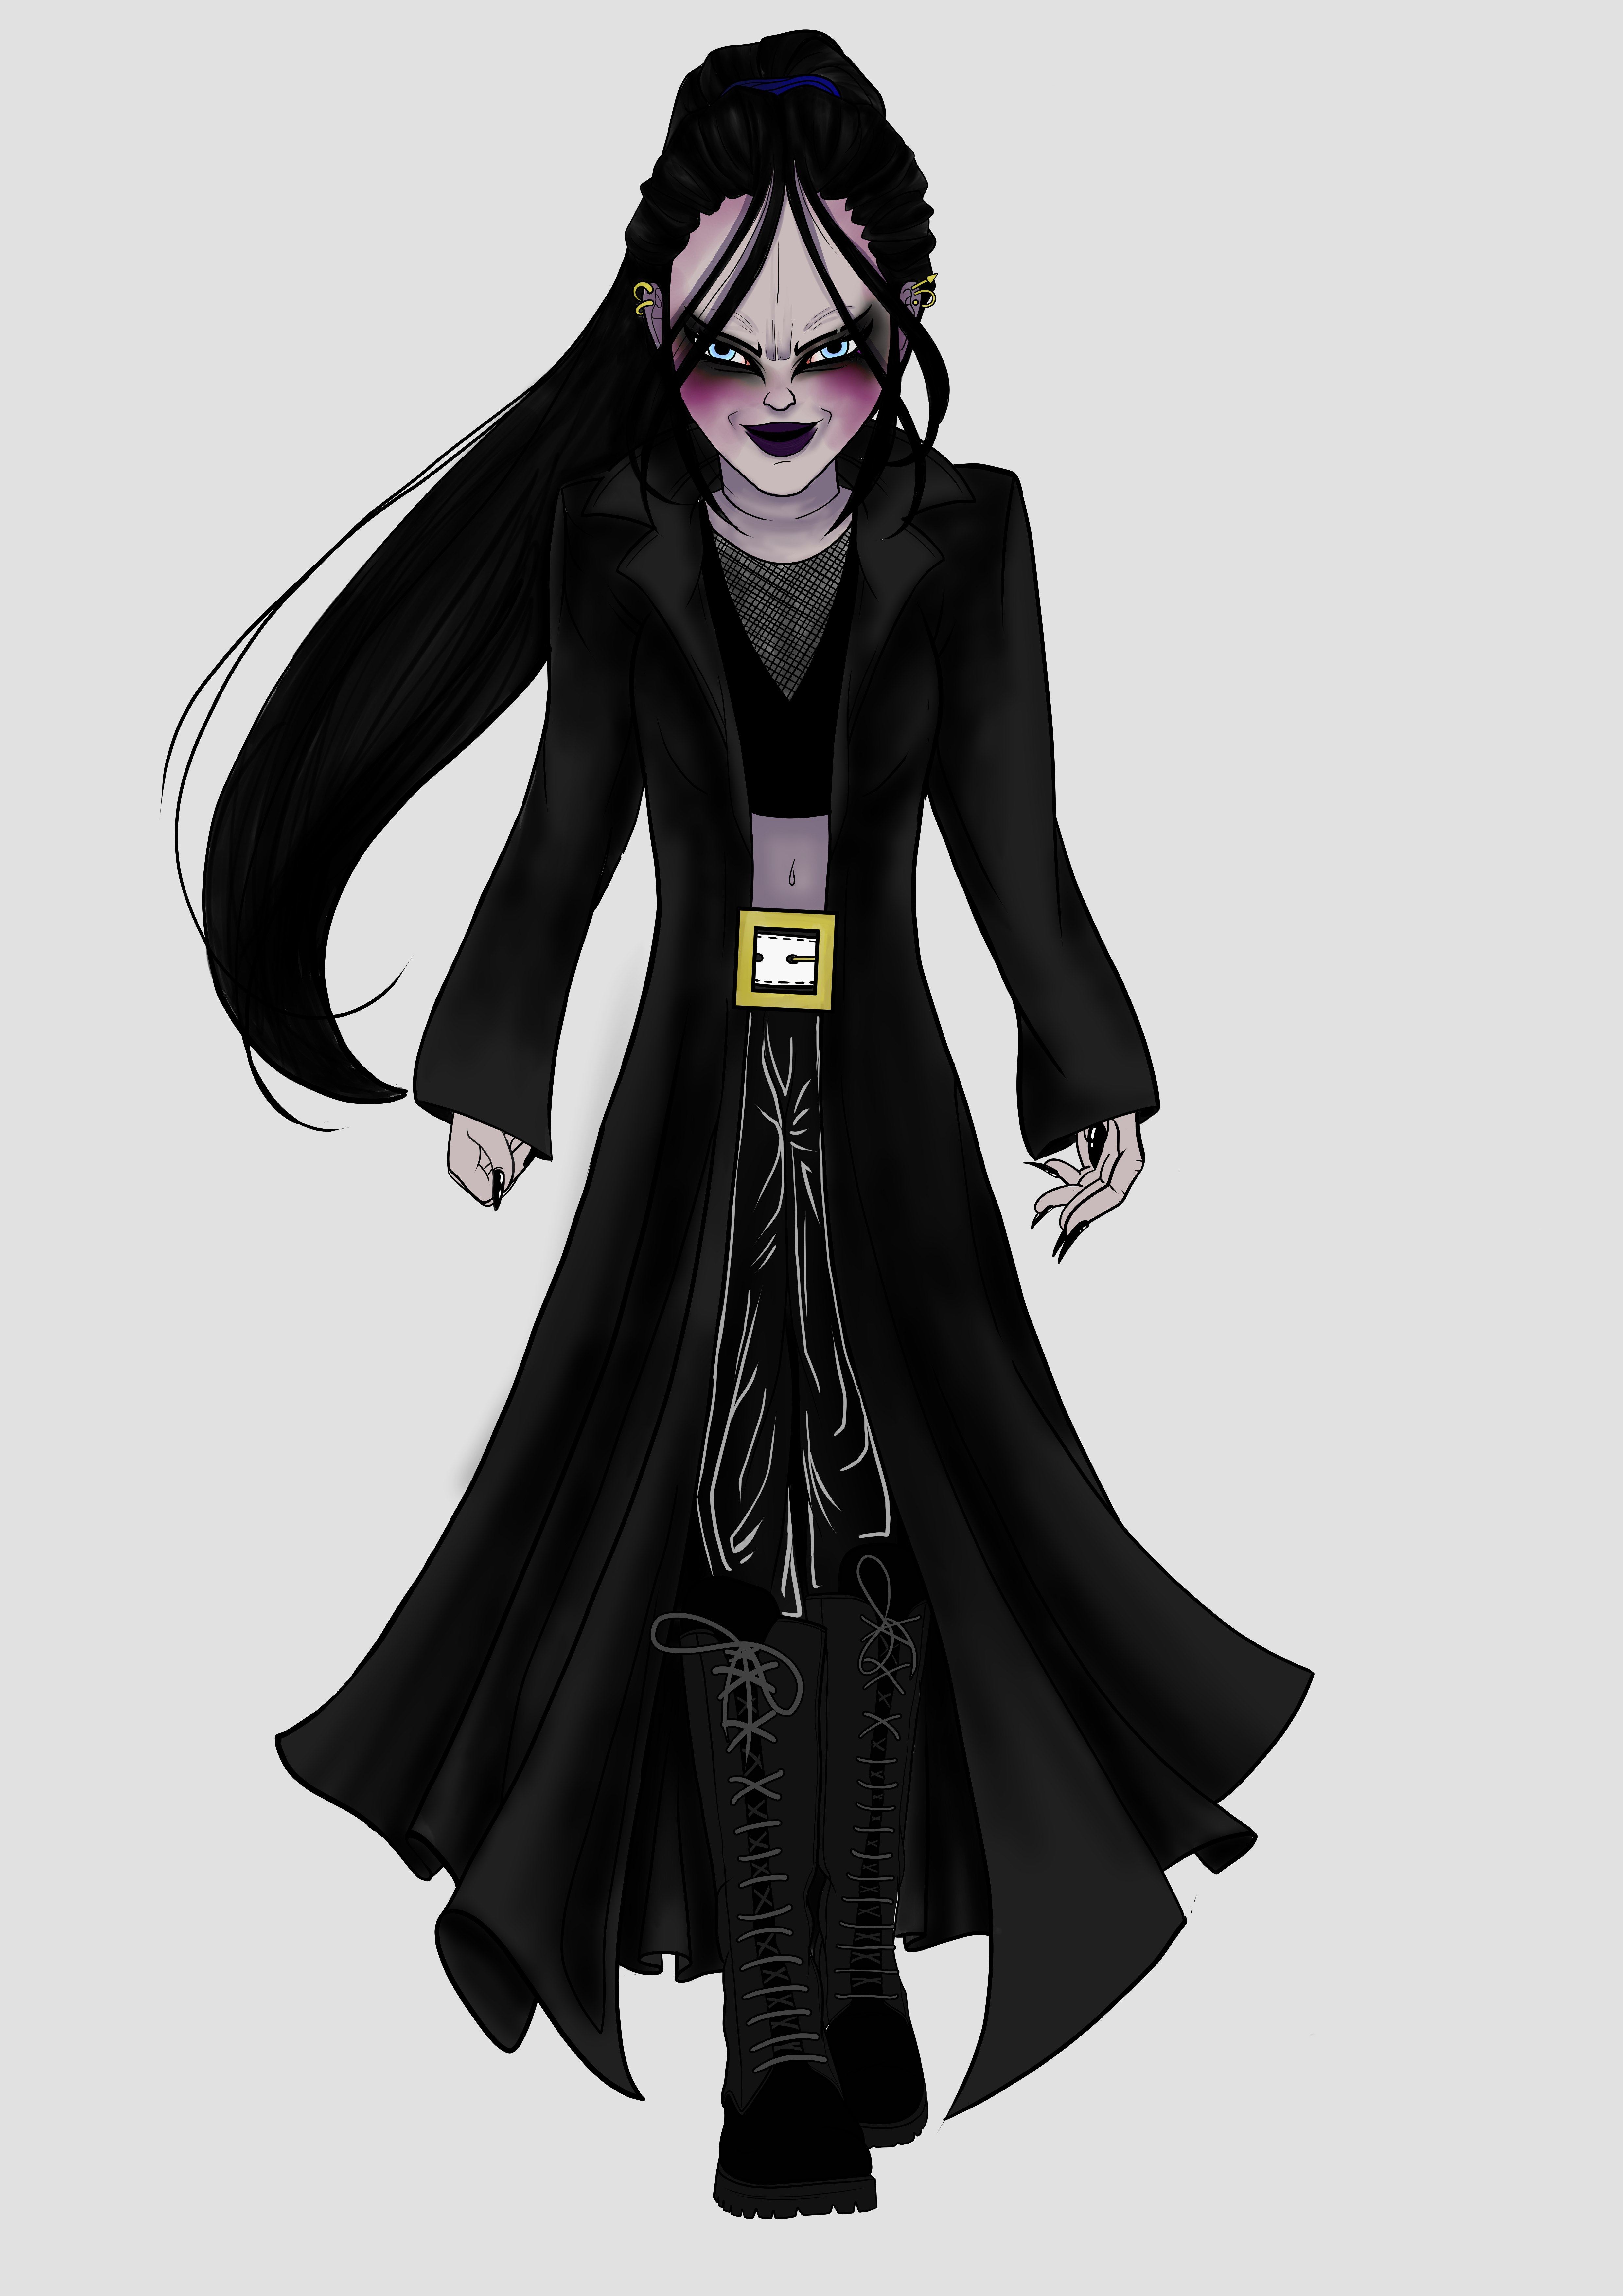
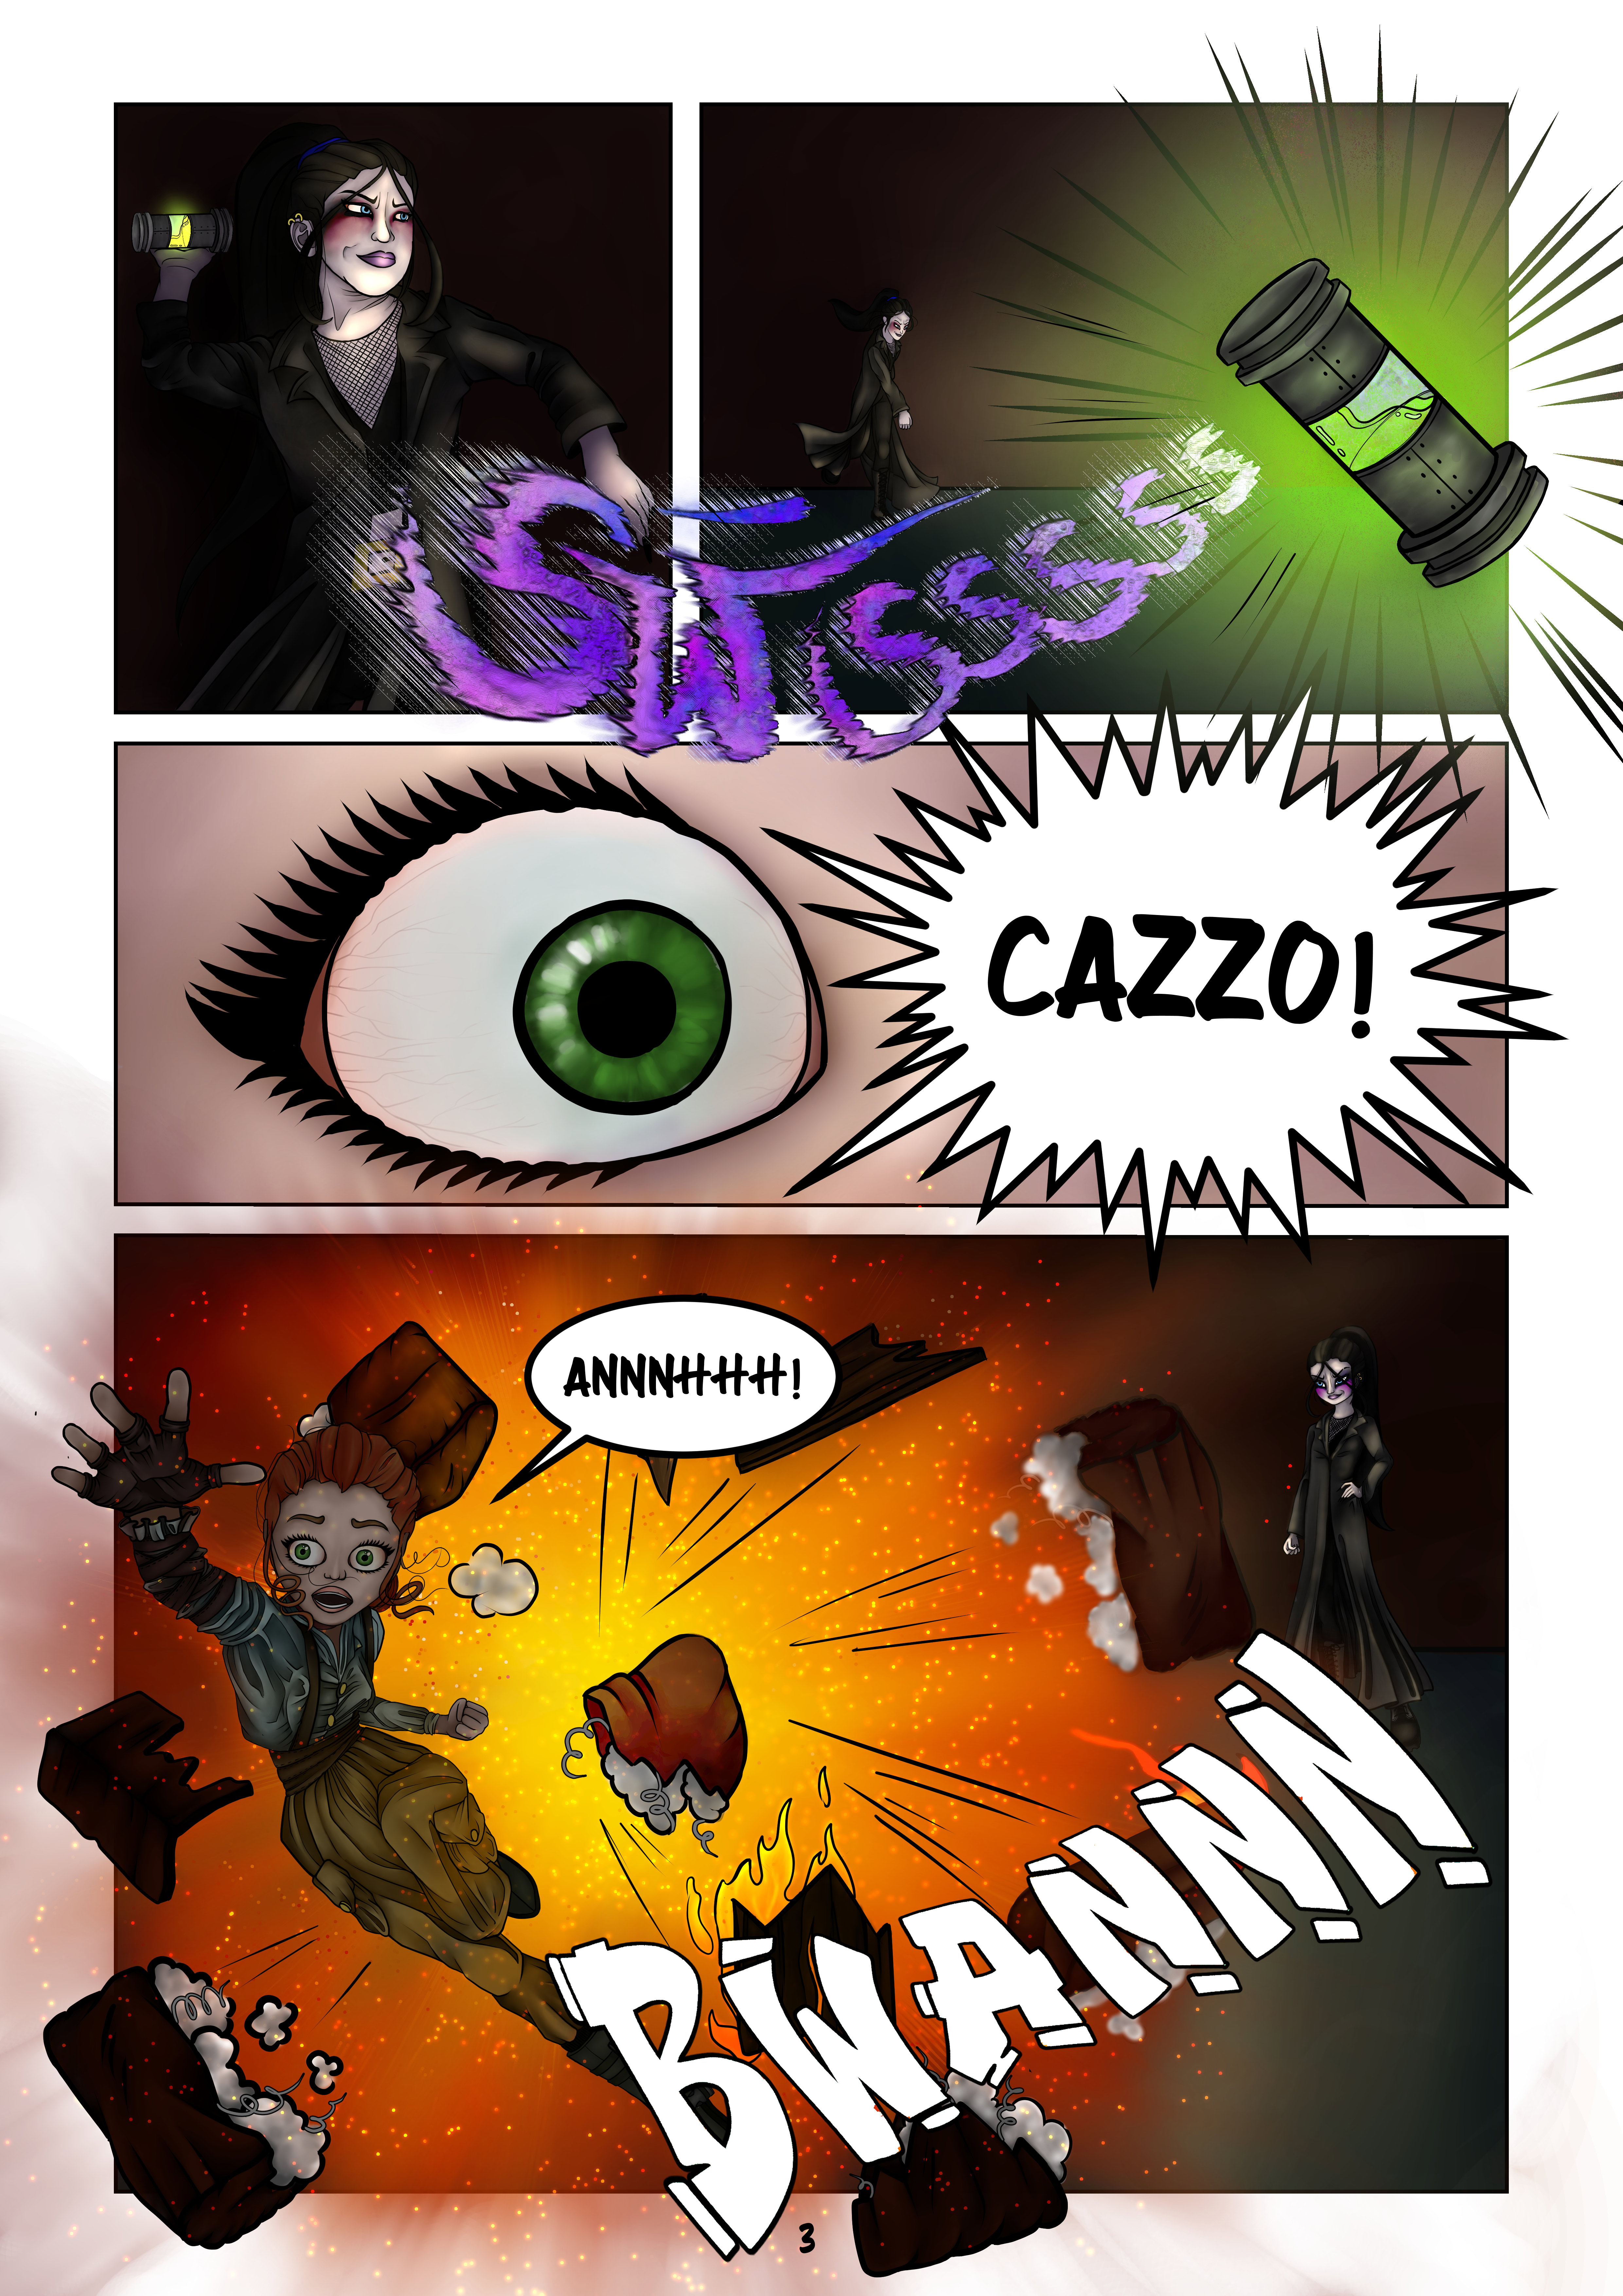
The Killer
A heavily made-up young woman with long black hair and a slightly gothic look. Dressed in a long black overcoat and combat boots, she exudes a dark, intimidating presence.
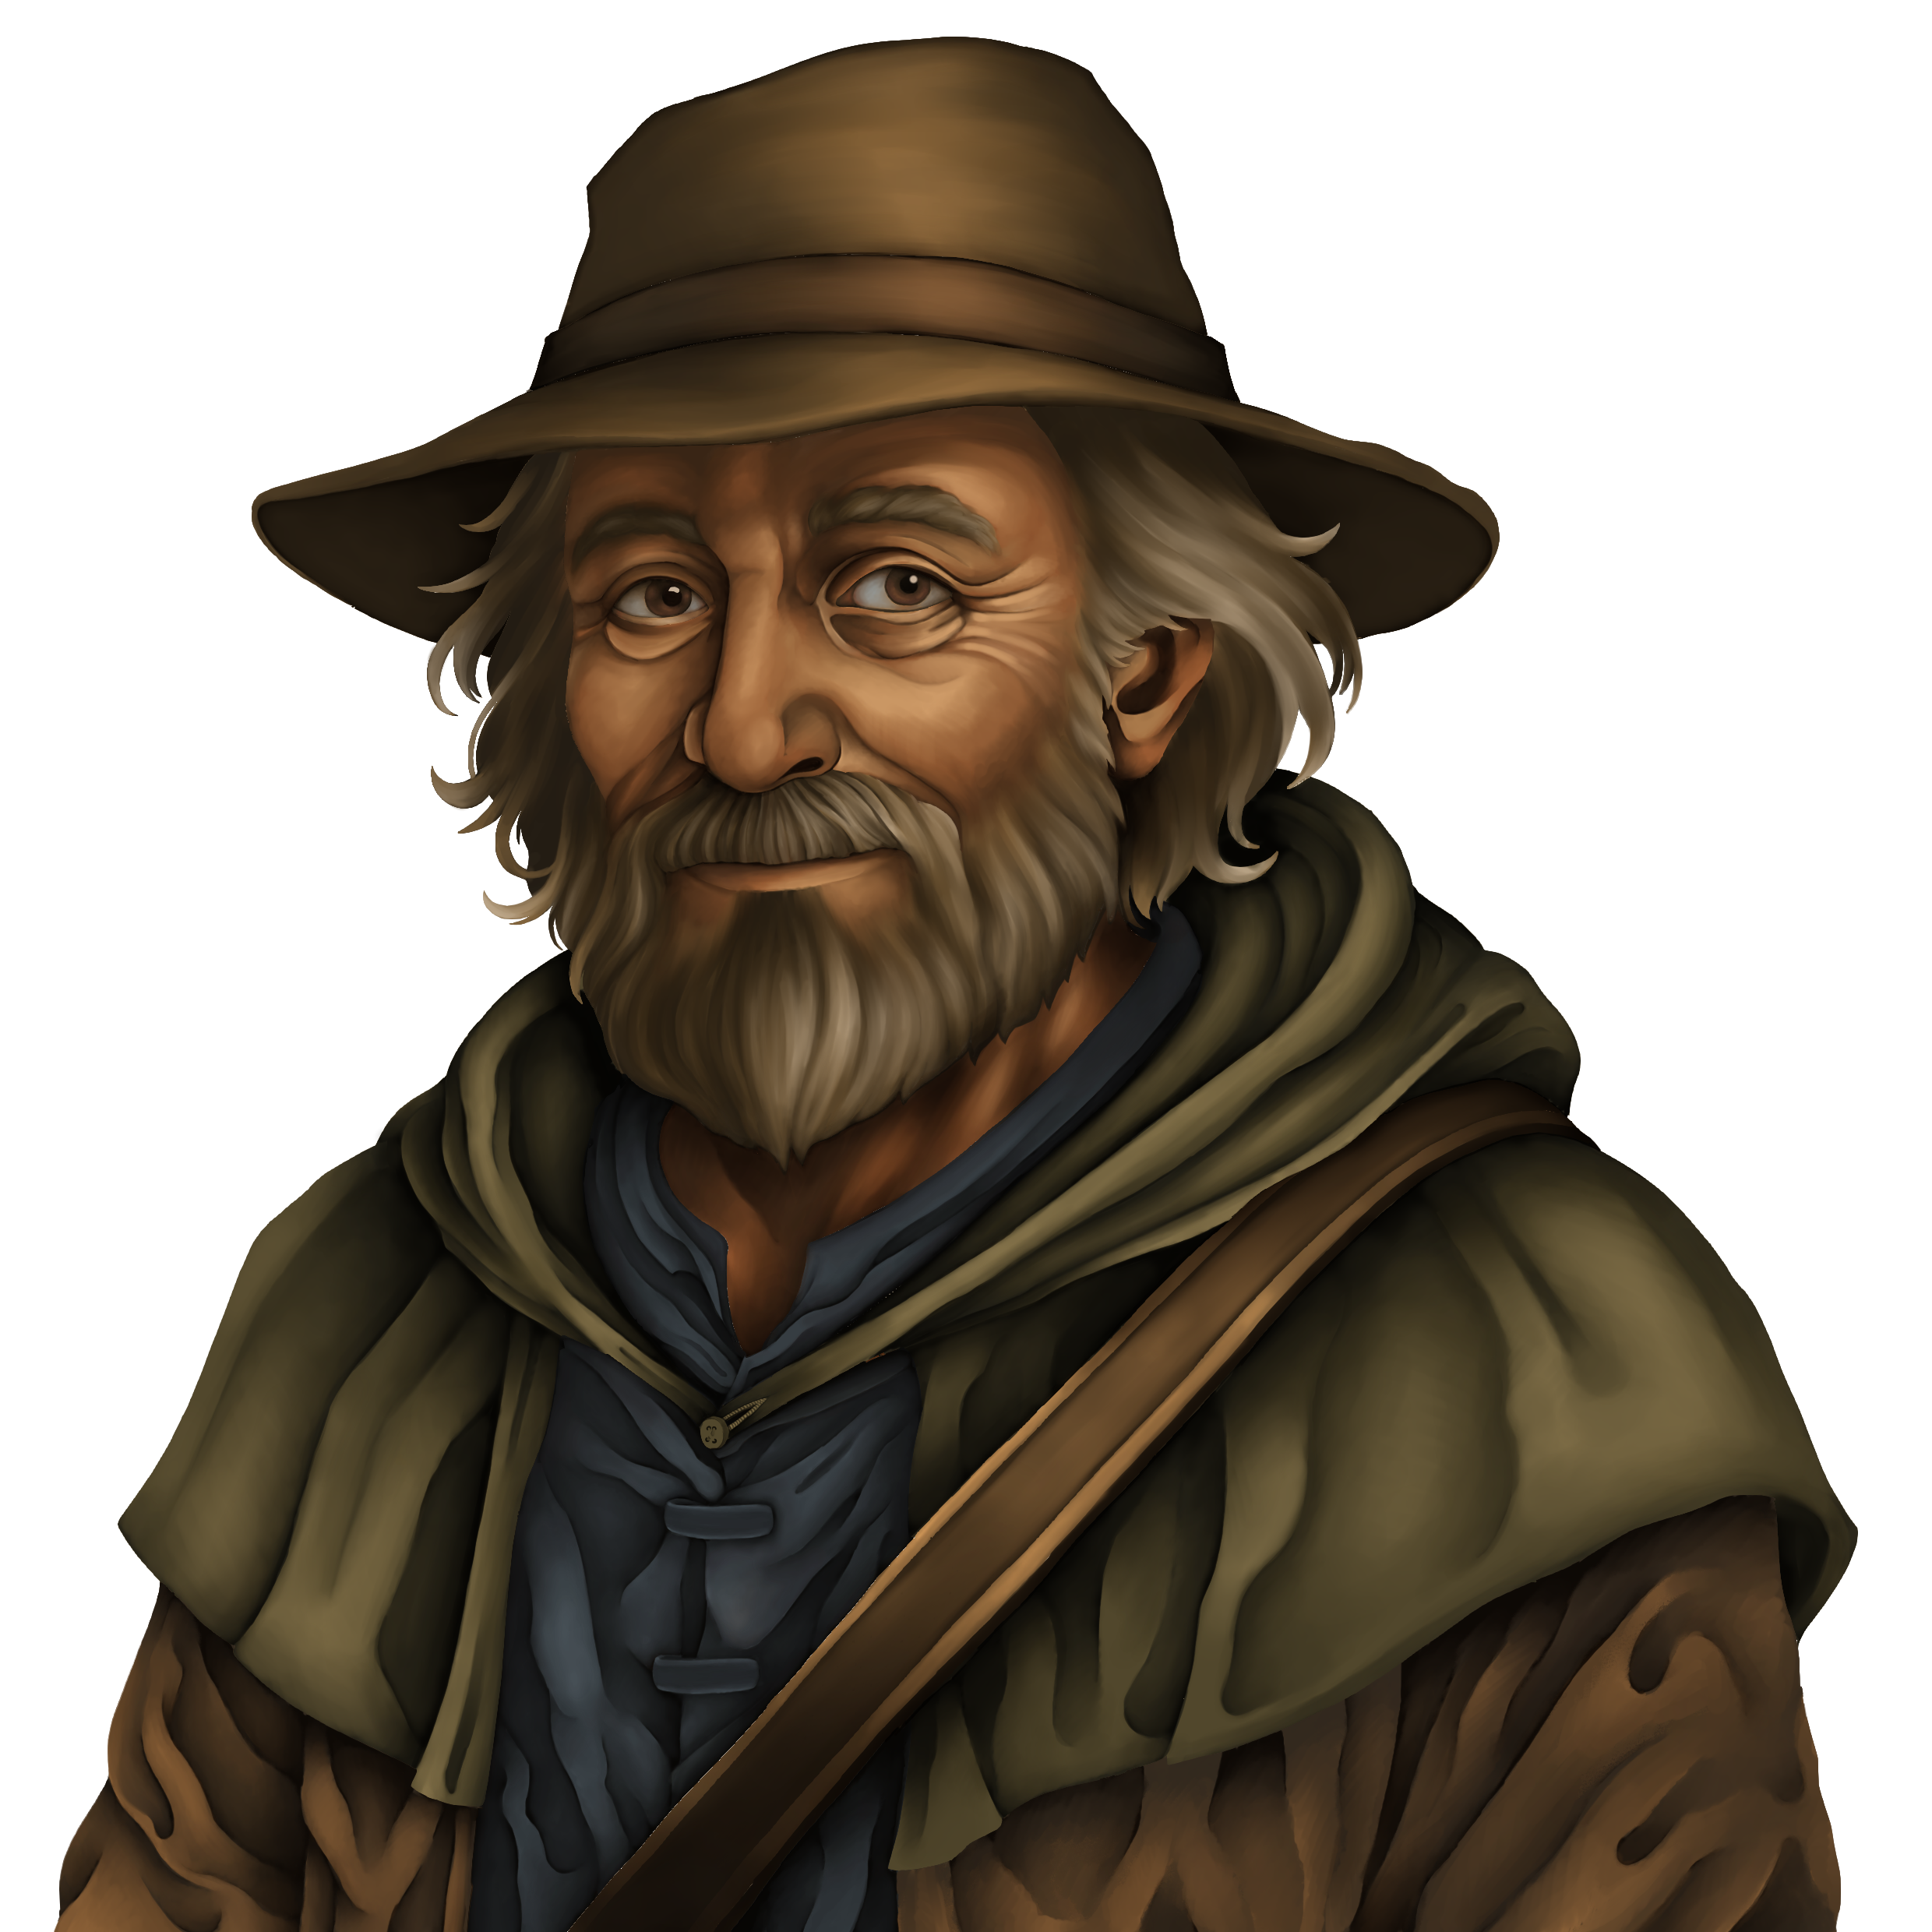
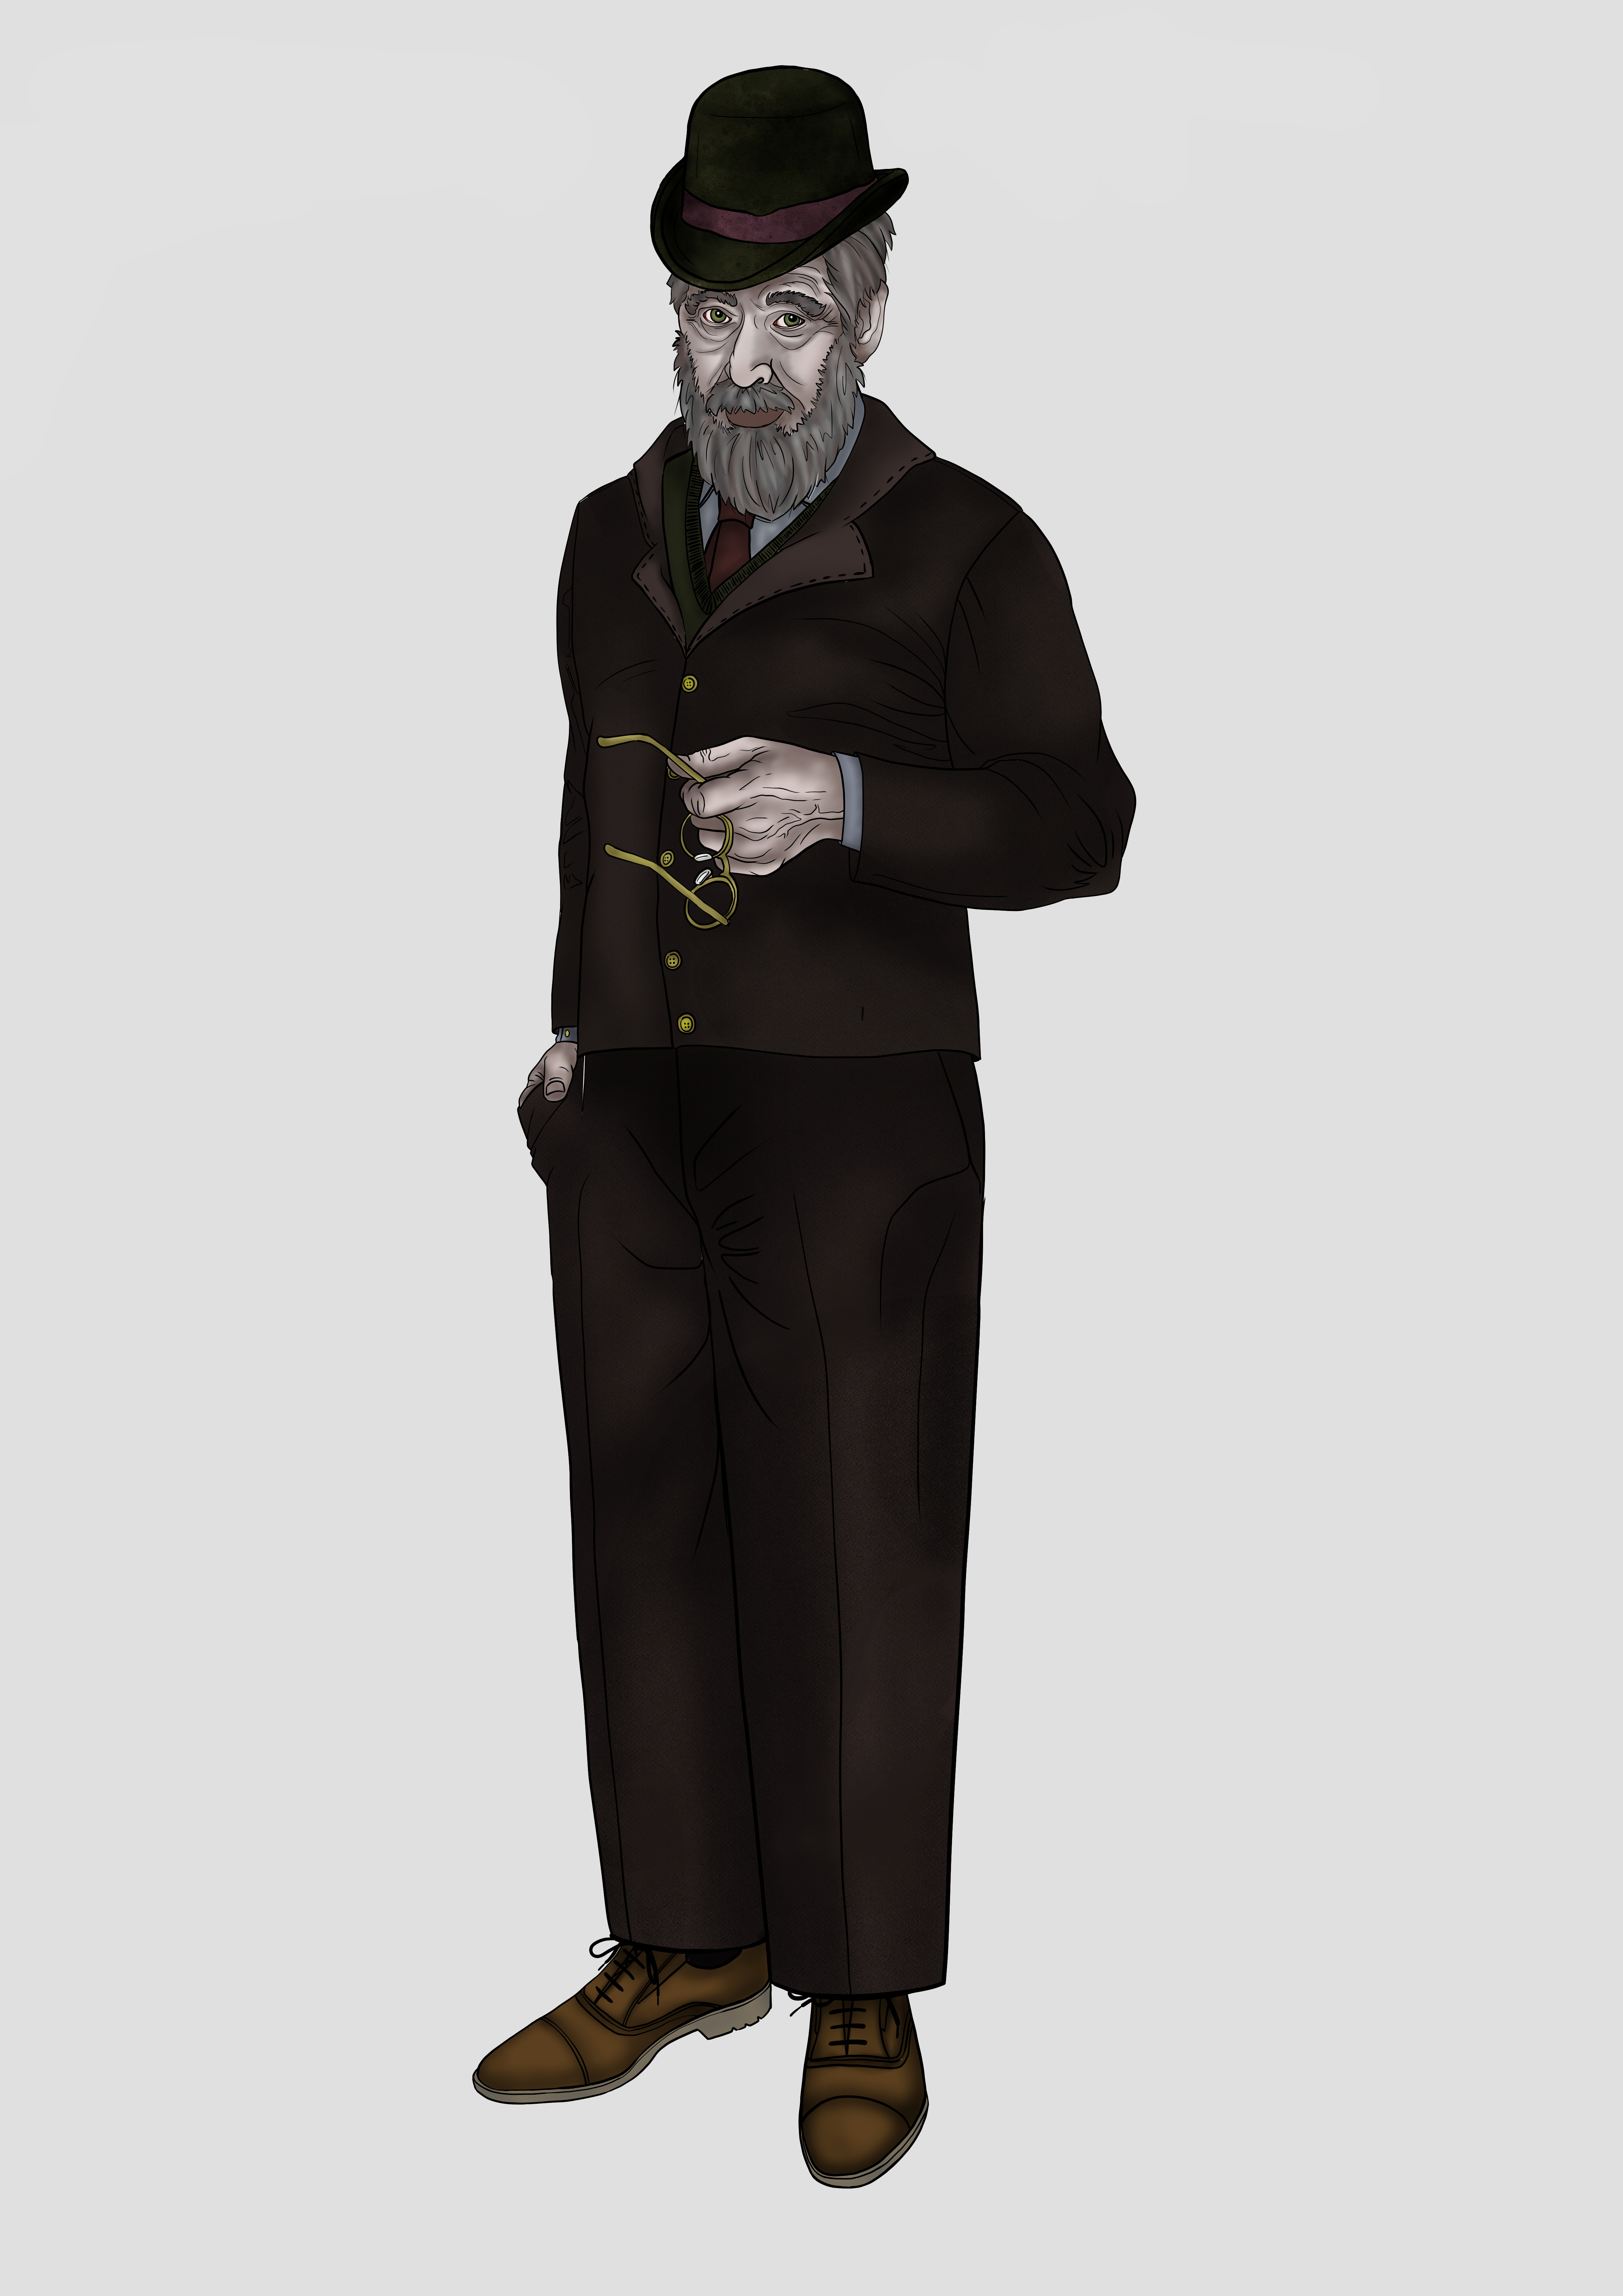
The Antiquarian
A distinguished man in his 60s, wearing glasses and a Sigmund Freud–style beard. Dressed in a classic English tweed jacket and tie, he is a passionate collector of rare and historical artifacts.
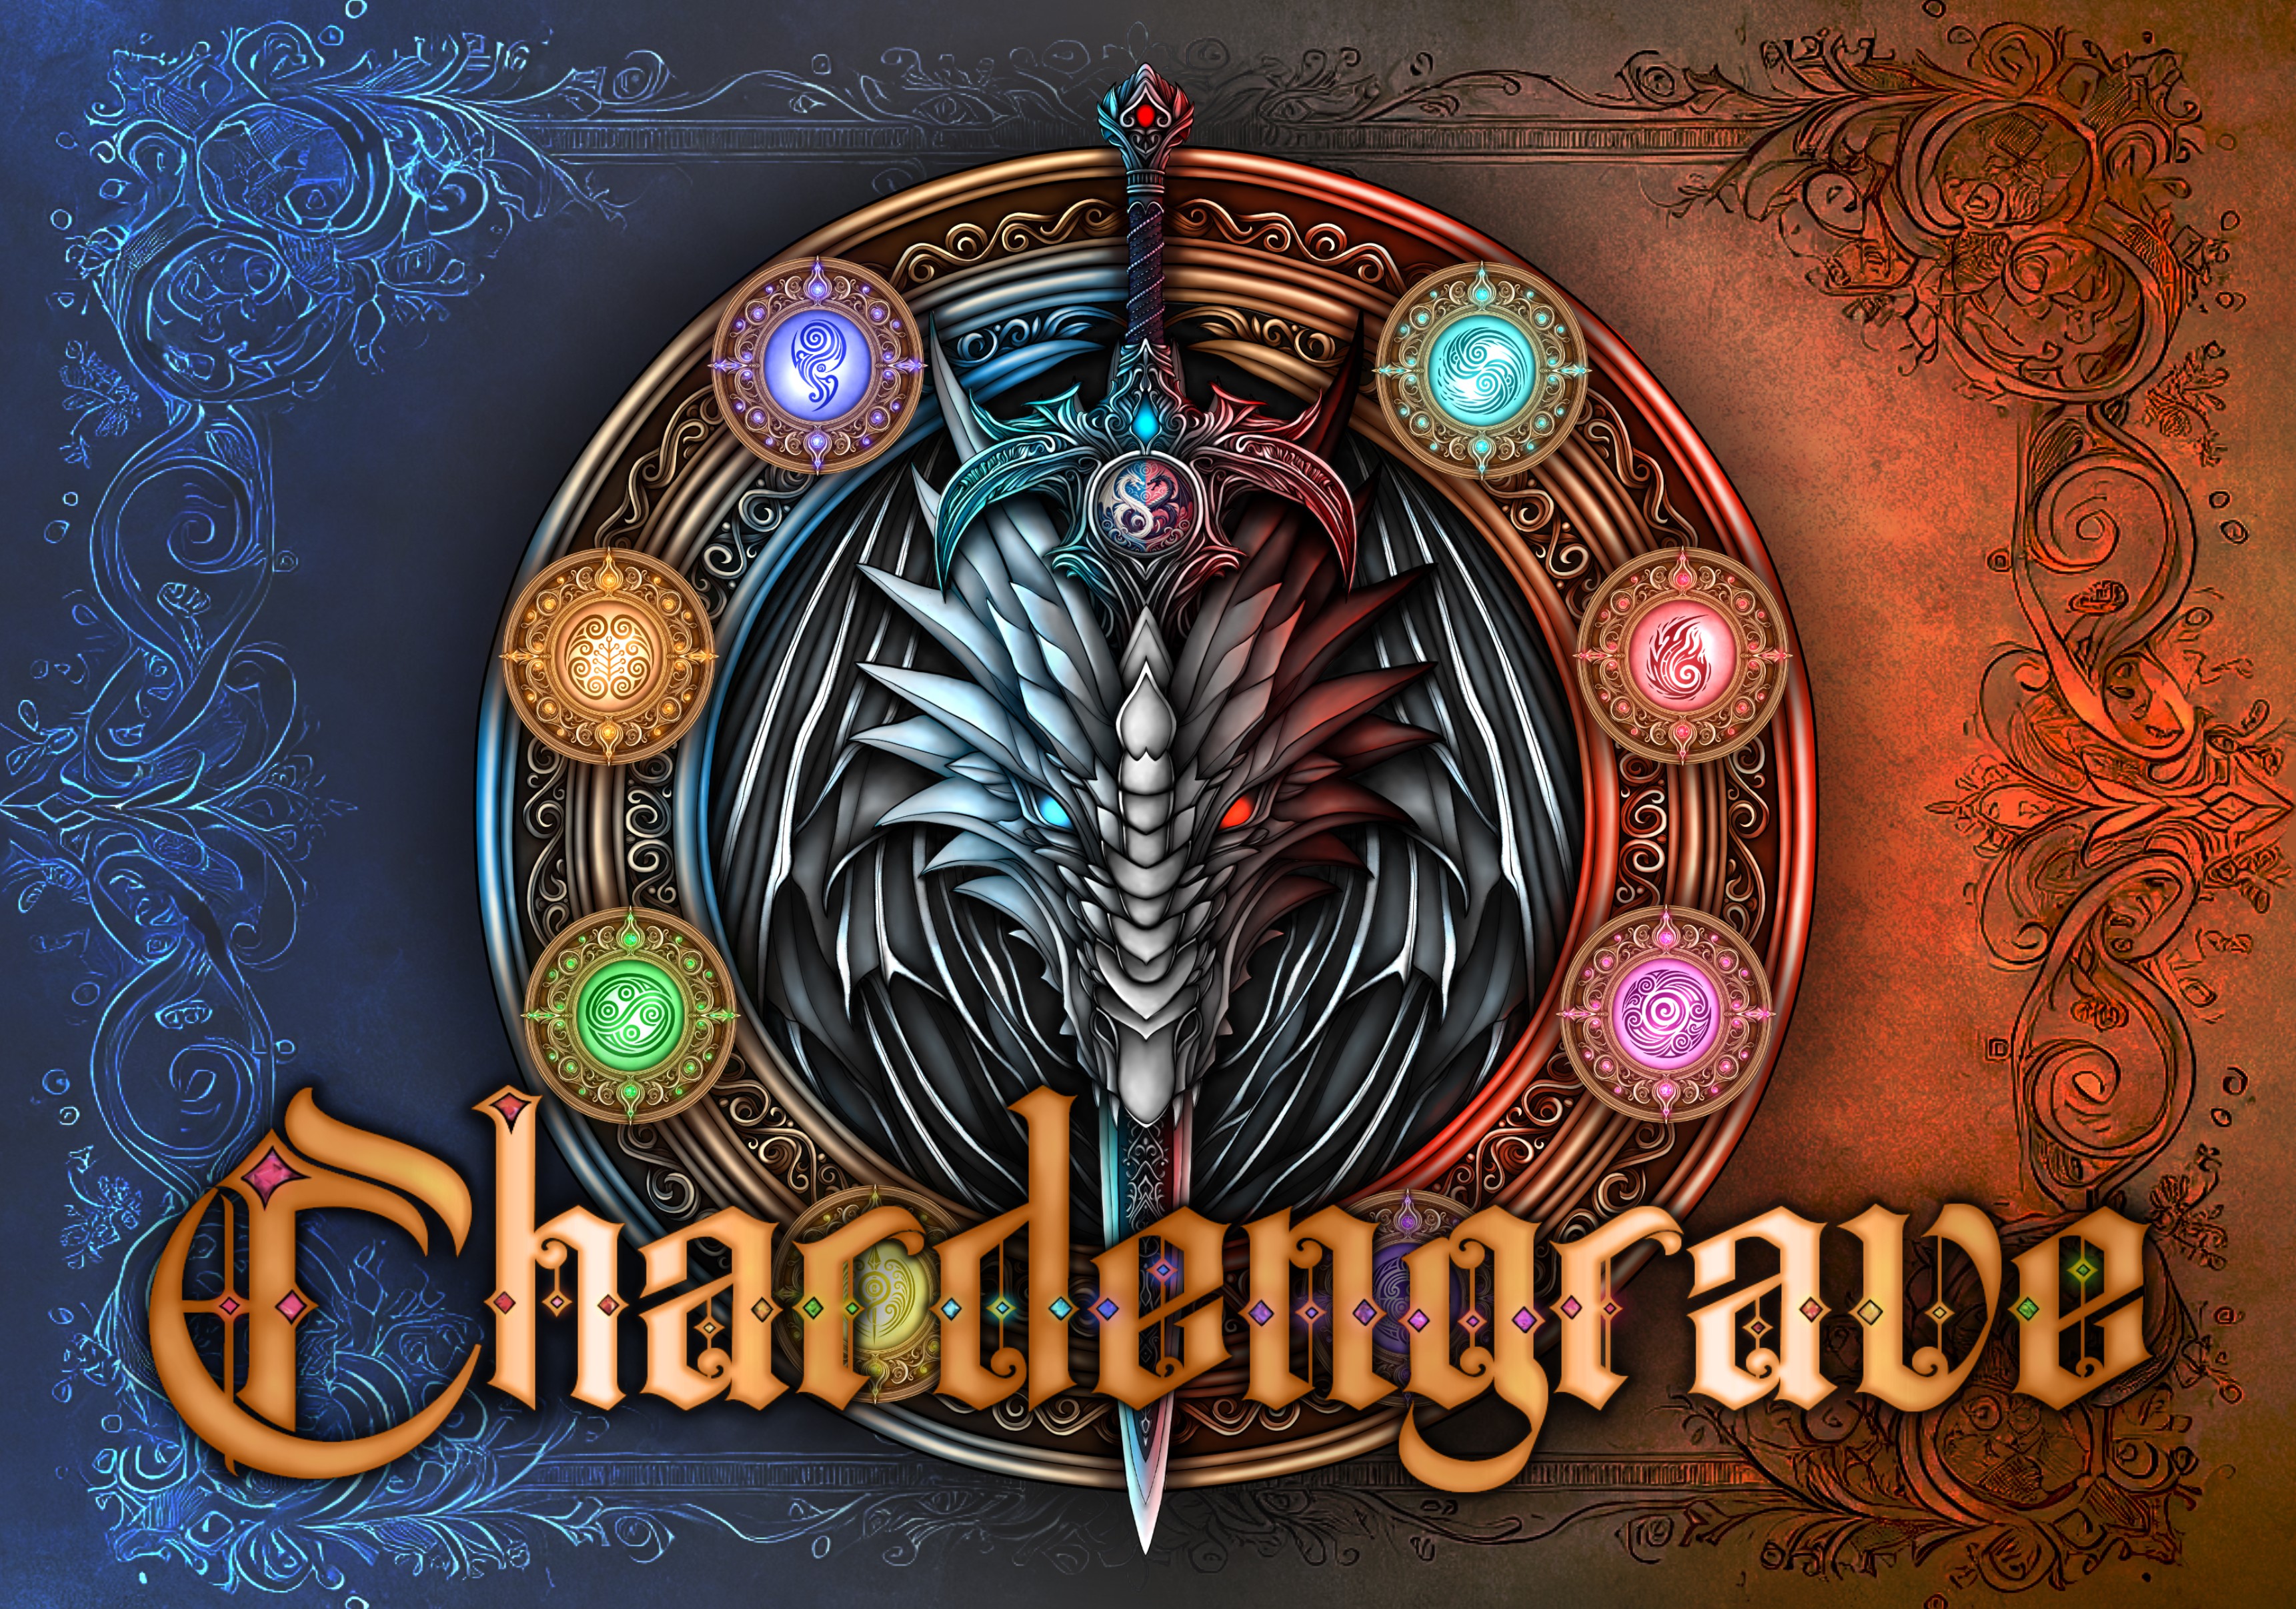

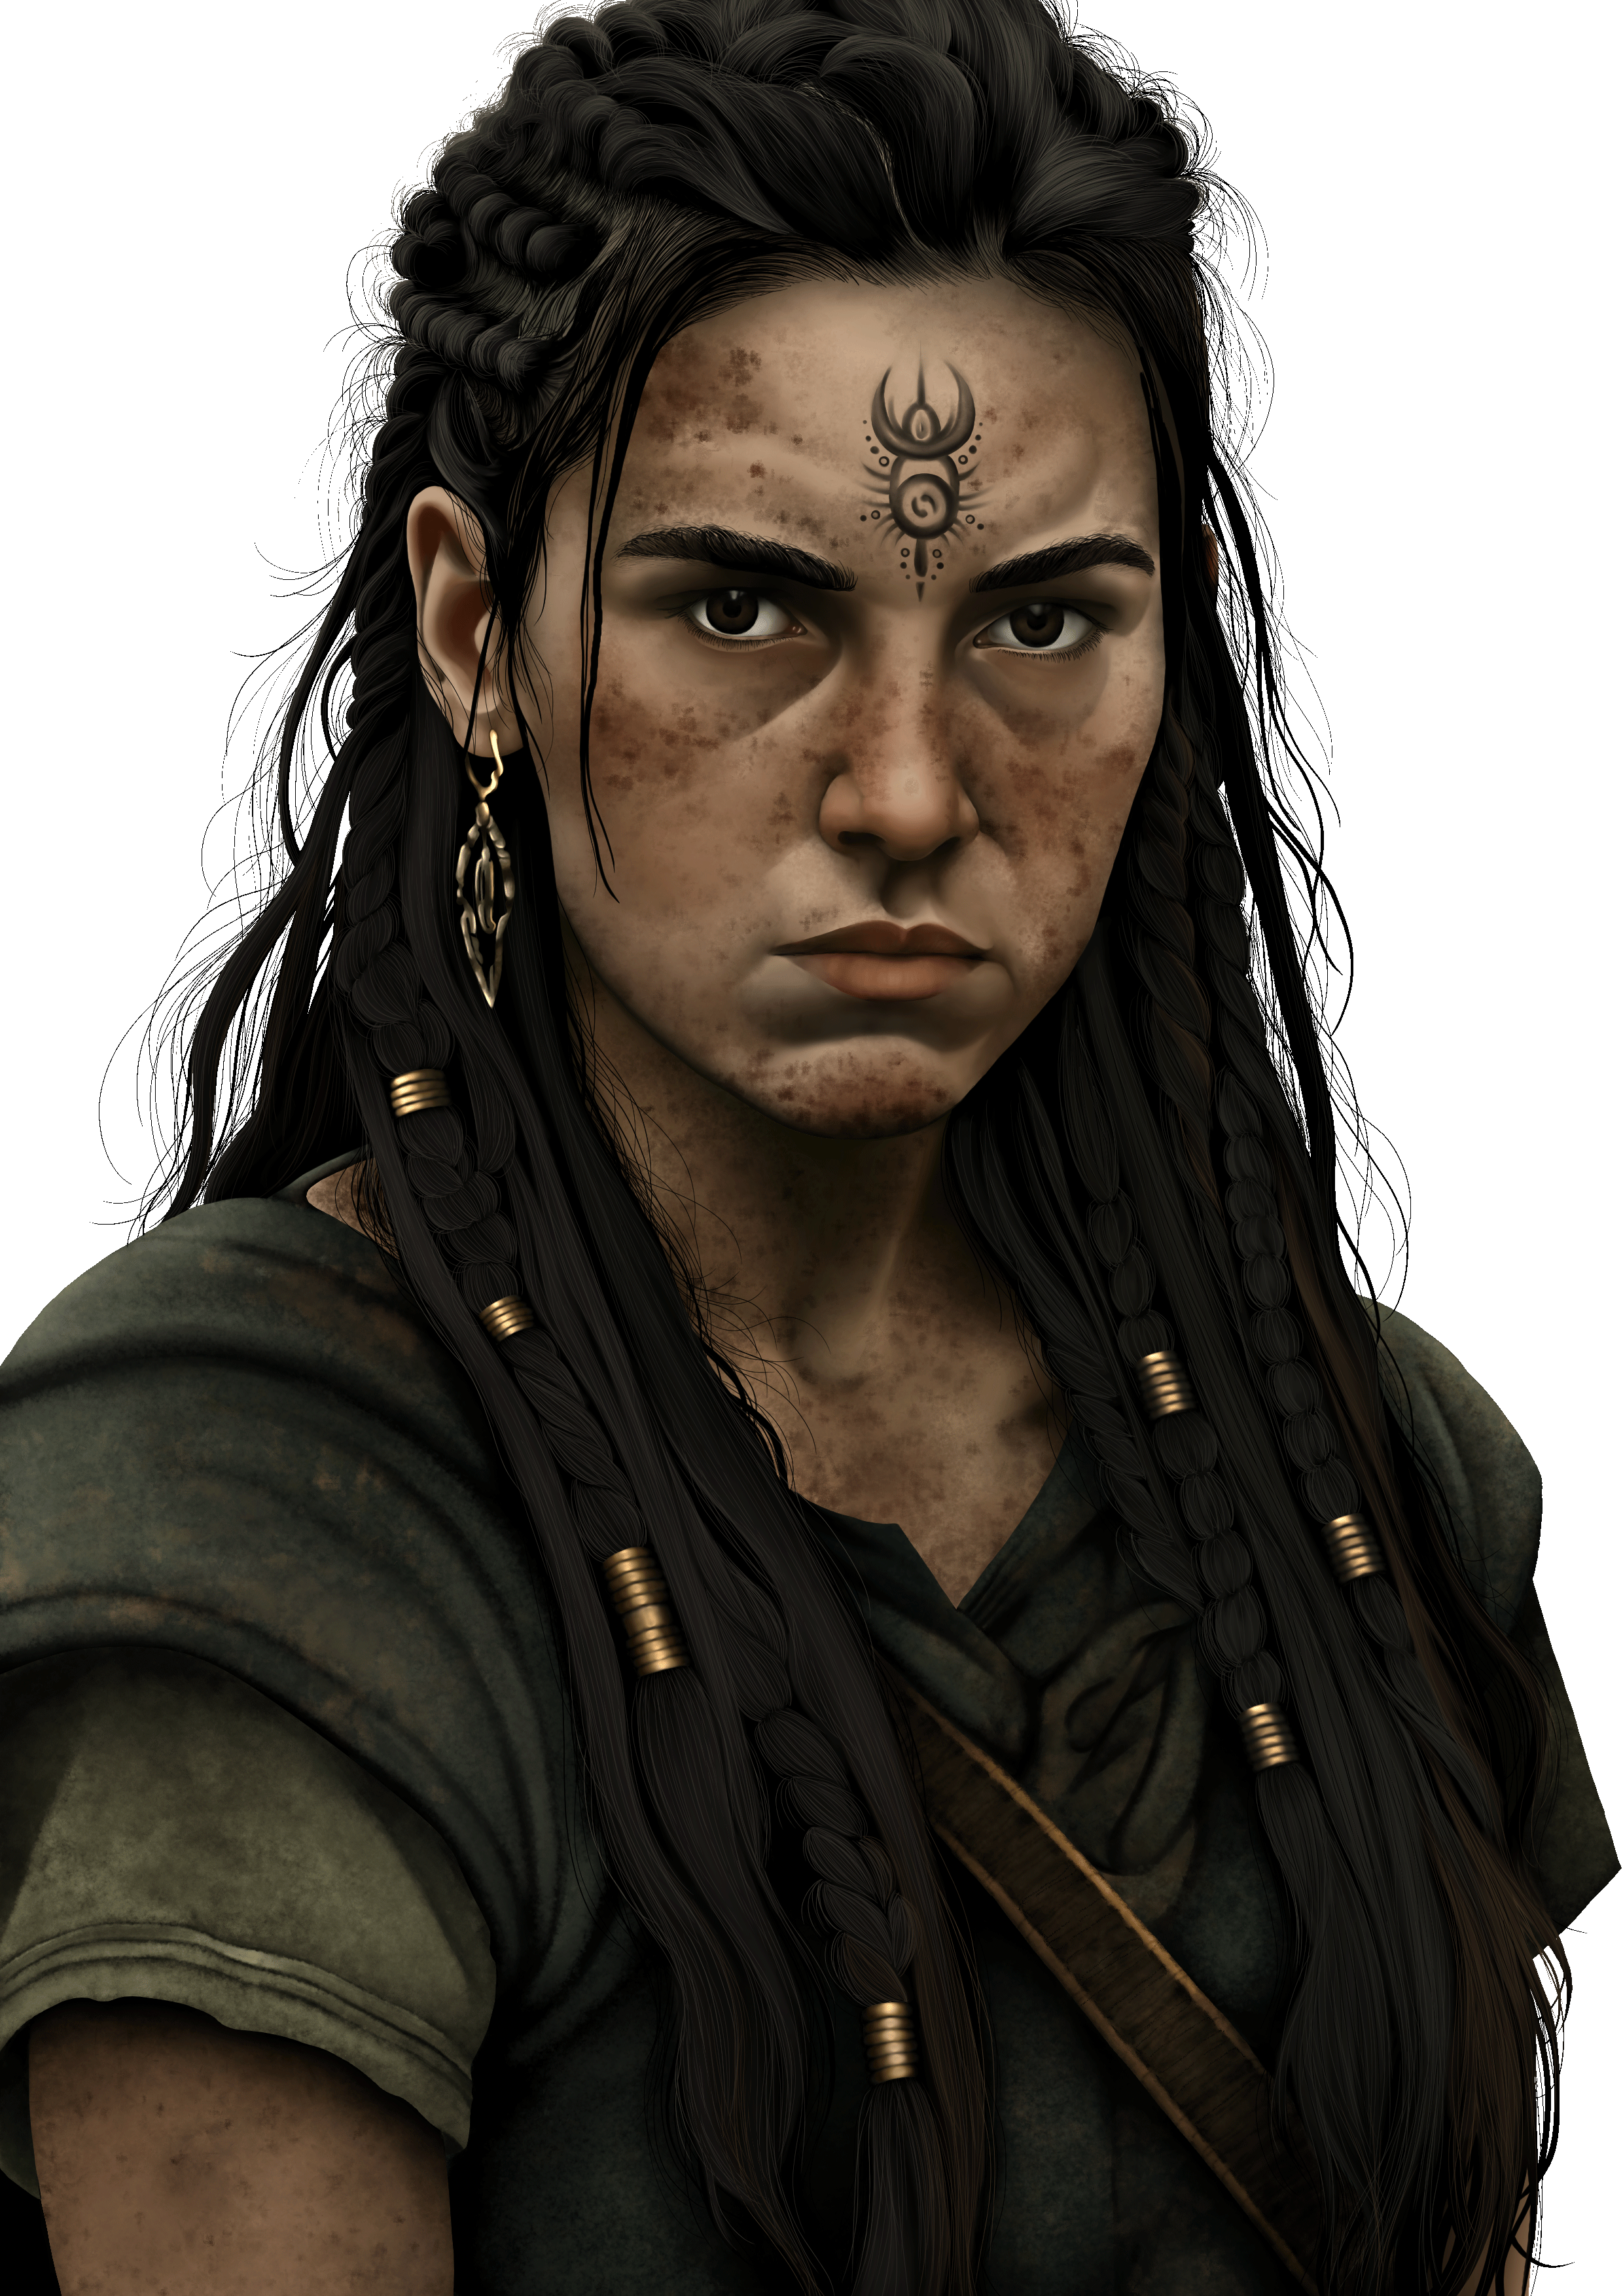
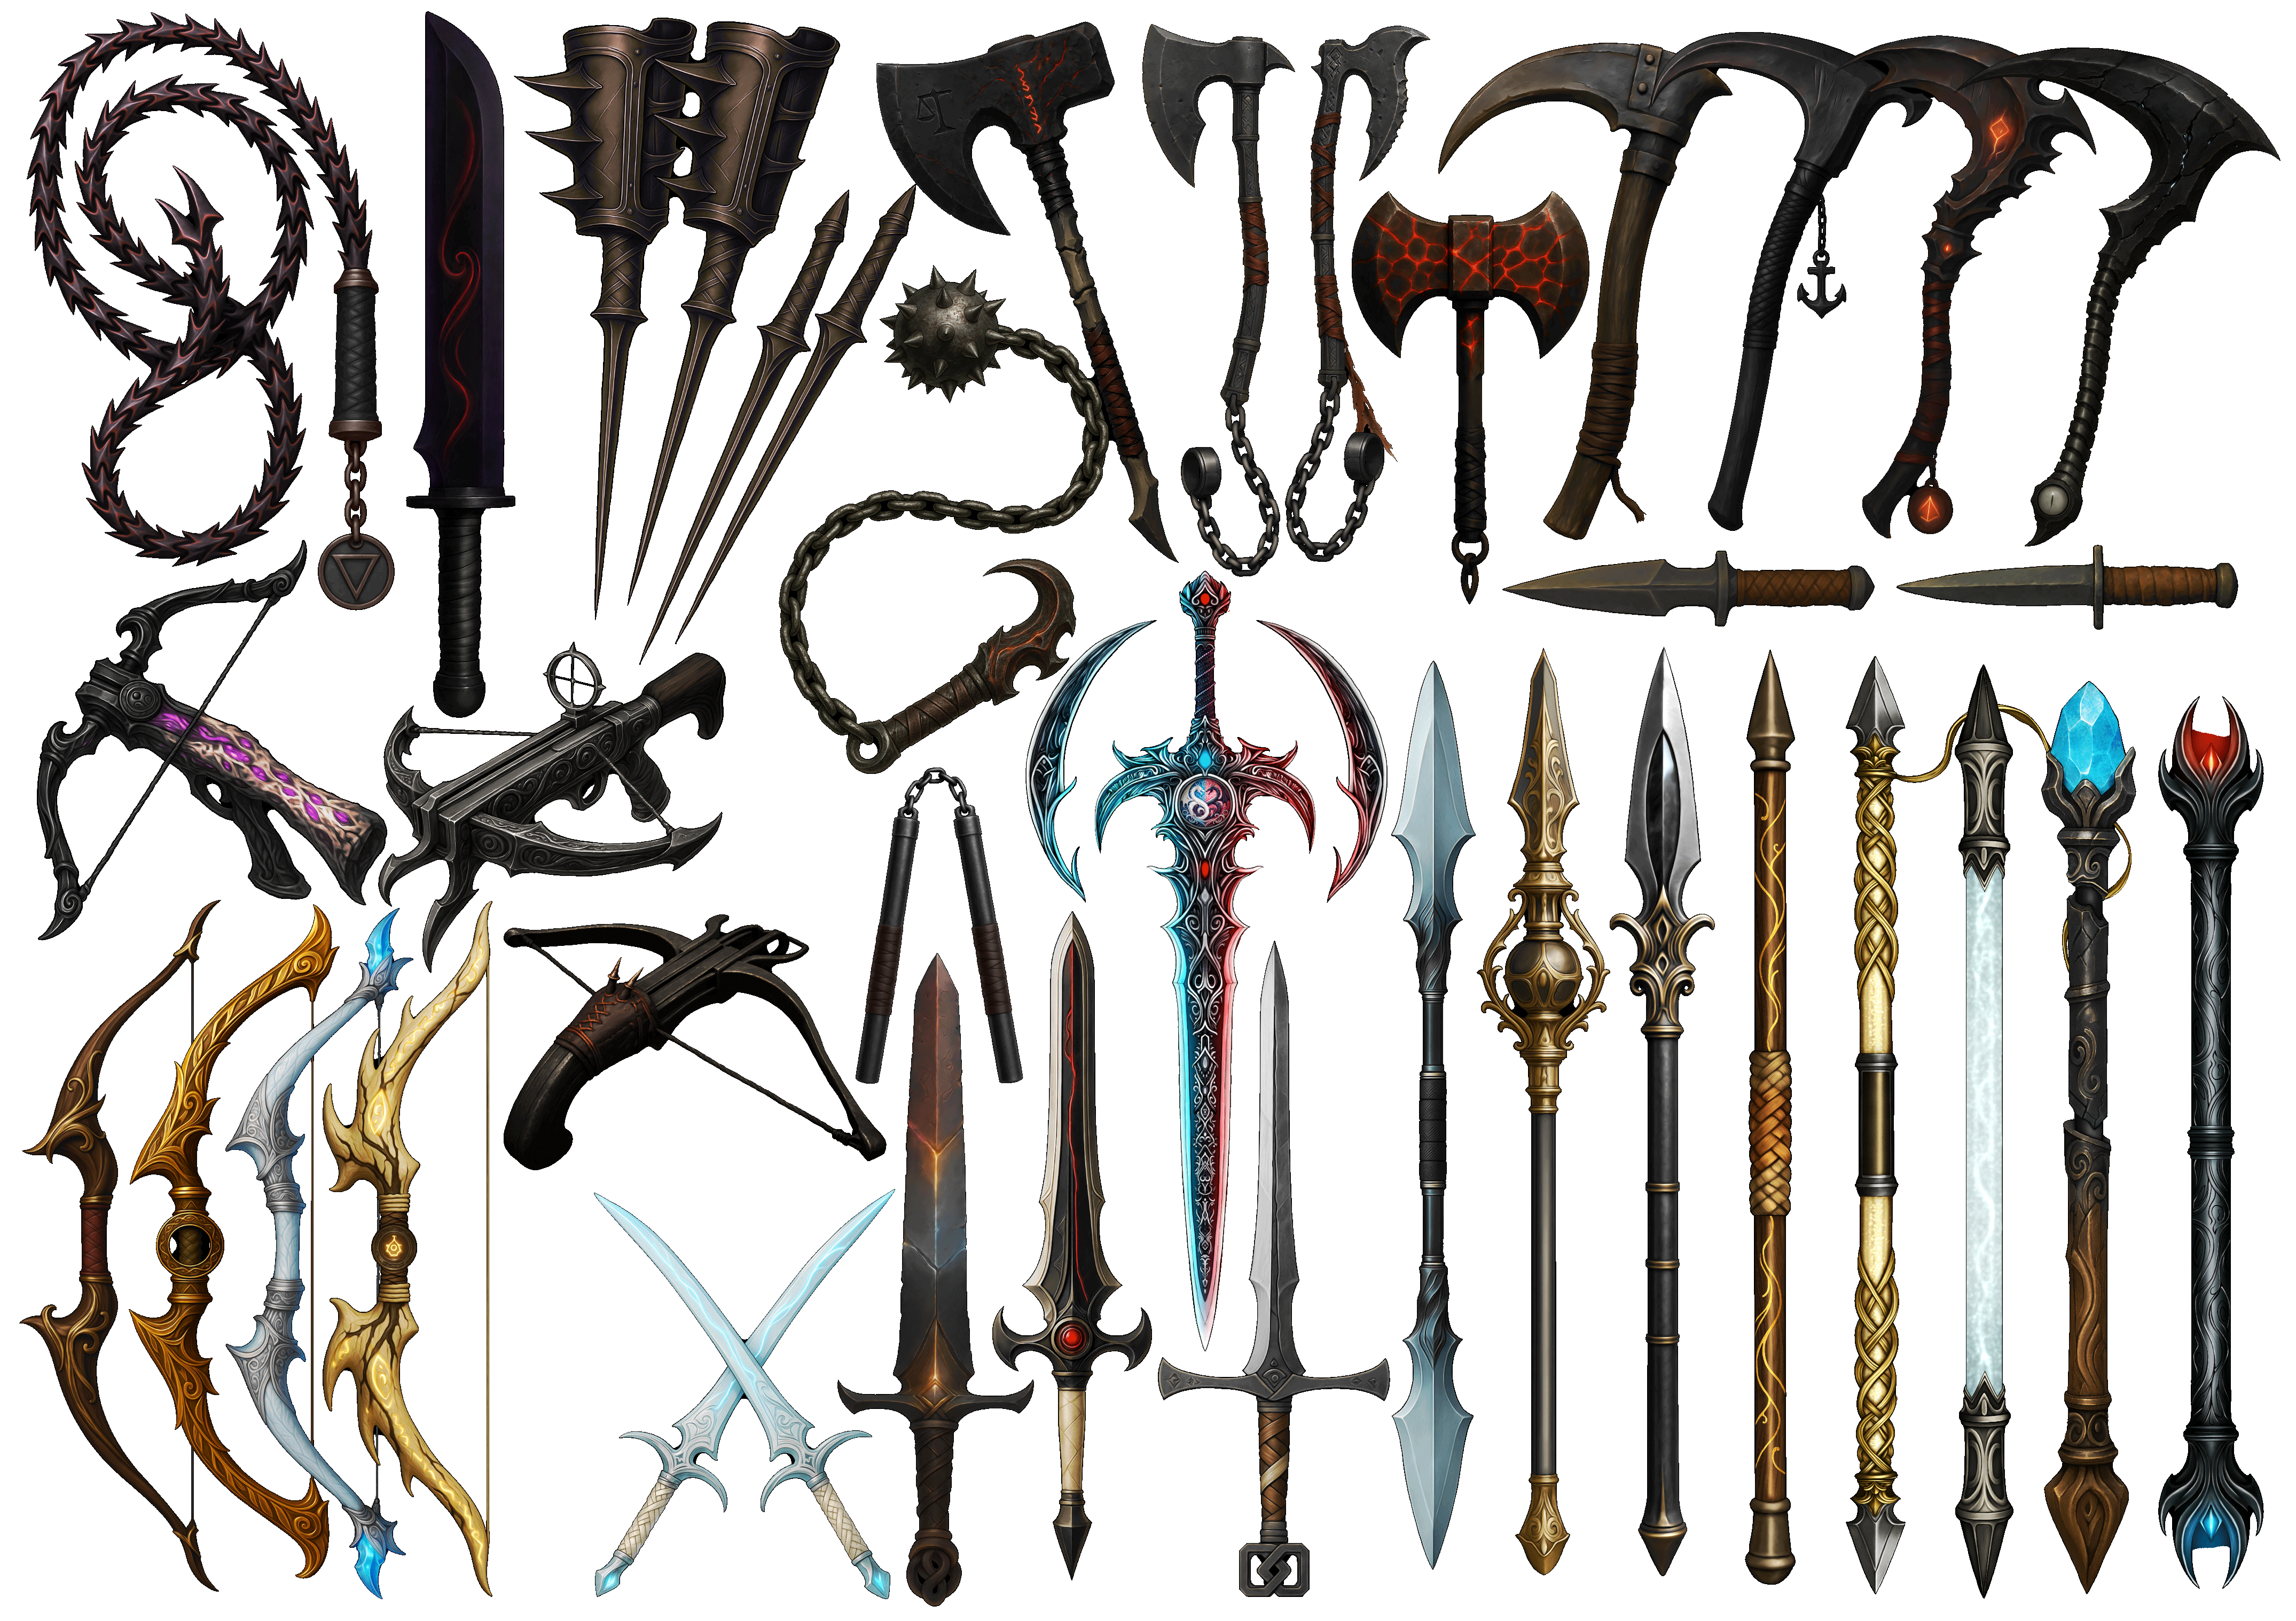
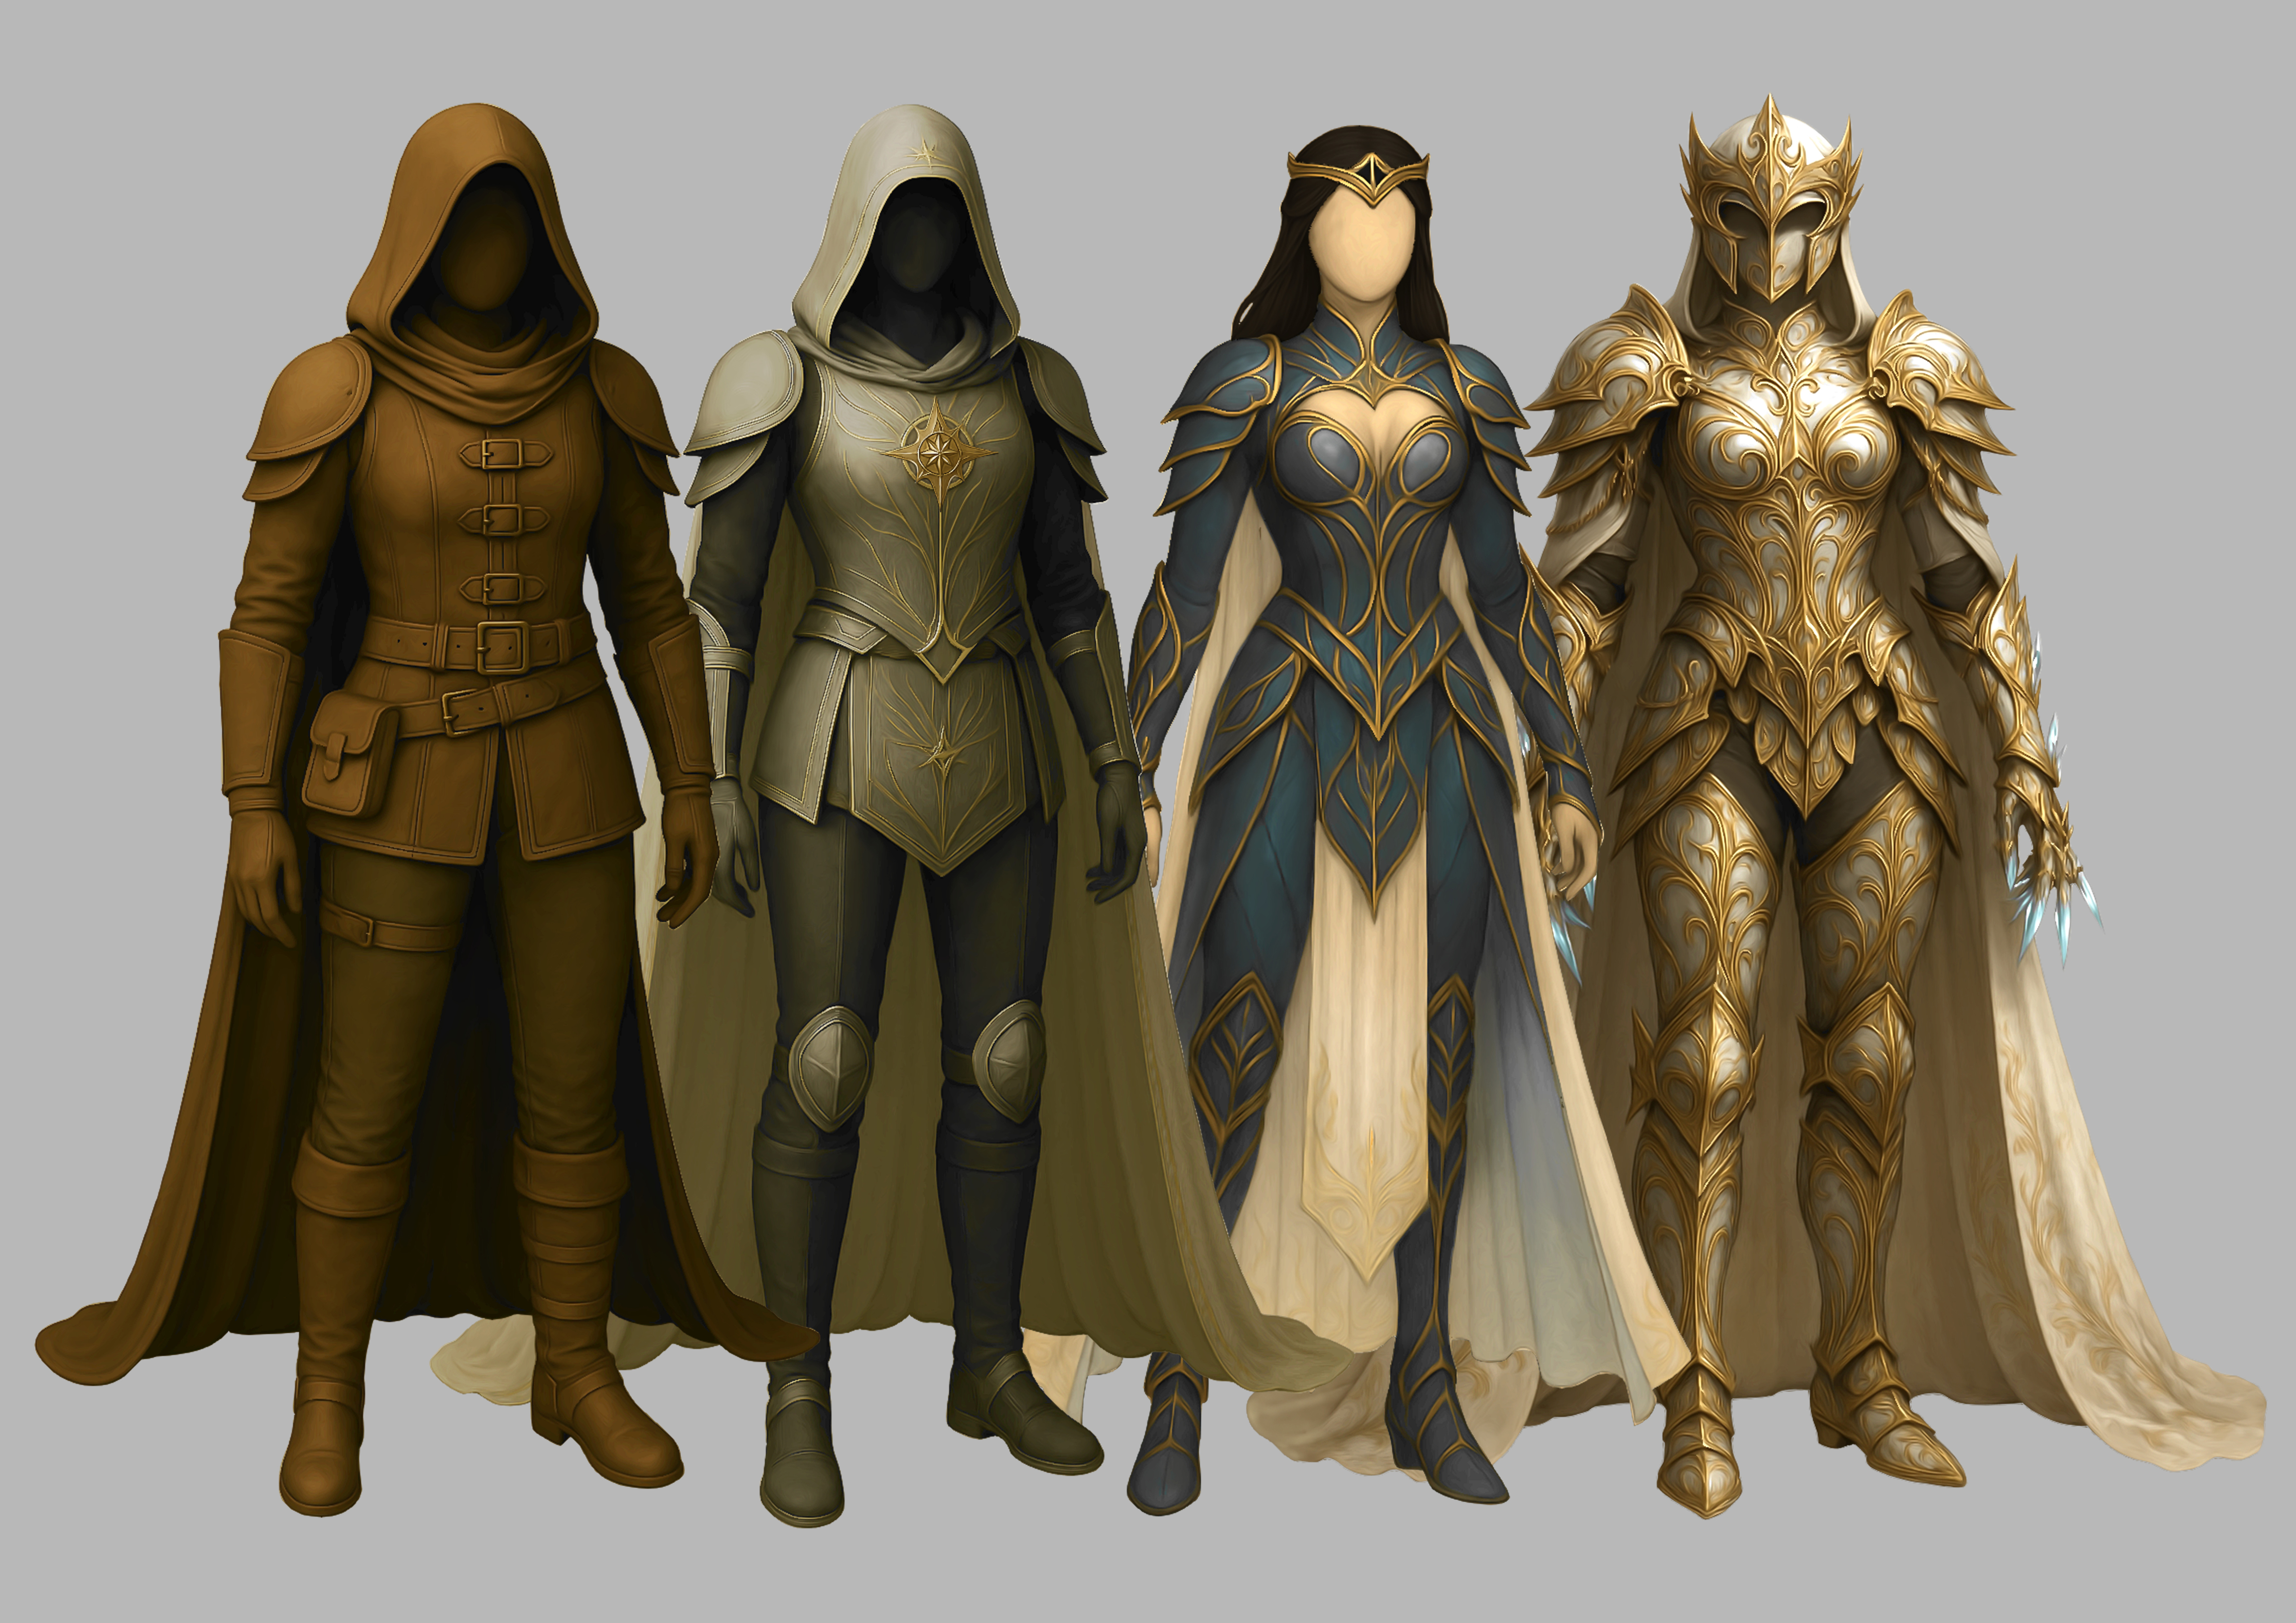
A personal Game Concept Document of an original dark fantasy video game, entirely conceived and written by me. A narrative adventure where emotions, moral choices, evocative environments, combat, and mystery intertwine in a world divided between light and darkness.
A personal Game Concept Document of an original dark fantasy video game, entirely conceived and written by me.
A narrative adventure where emotions, moral choices, evocative environments, combat, and mystery intertwine in a world divided between light and darkness.
It will be the player who determines their own fate:
will they follow the path of Purity or surrender to Corruption?
Two paths. Two journeys. Two completely different stories.
If your project needs a creative eye, an organized mind, and a genuine passion for the digital world… I’m ready to collaborate.
If your project needs a creative eye, an organized mind, and a genuine passion for the digital world… I’m ready to collaborate.
.png)


.png)